
How to Make a Sturdy Pool Ladder That Will Not Float

Thick plastic plumbing pipe works best. It never rots, rusts, or leaches chemicals into pool water like treated wood or metal can. To keep the light hollow tubing from bobbing to the top, fill the lower legs with clean pea gravel and drill small holes so air escapes. Smooth round caps keep the base from scraping the floor, giving everyone a steady, dependable way to climb in and out.
The exact build changes depending on your setup. A ladder attached to a deck uses top brackets, while a freestanding pool needs steps on both sides. Thin vinyl liners also require a thick rubber pad under the feet so the plastic never wears a hole in the bottom. Swimmer weight matters too, because larger adults need thicker pipe walls that will not flex. Taking a few basic measurements first will keep the whole frame steady and safe.
Choosing Safe Materials for an In-Pool Ladder
Every material you submerge in pool water faces constant contact with sanitizing chemicals like chlorine, bromine, or salt. These chemicals break down weak materials quickly, which can turn pool water cloudy, stain surfaces, or cause structural parts to fail when someone steps on them. Choosing the right material keeps your pool safe and prevents costly damage to your pool floor.
Schedule 40 PVC (thick white plastic plumbing pipe) is the best choice for a homemade submerged ladder. It does not rust, corrode, or rot, and pool chemicals do not break it down over time. It has a smooth surface that feels comfortable on bare feet and will not scratch skin. Thick PVC pipe holds up well under the weight of an adult when you support it with the right fittings.
Never submerge pressure-treated lumber in a swimming pool. The chemicals used to preserve exterior wood, including copper compounds and chemical biocides, leach directly into the water. These leached chemicals throw off your water chemistry, cause stubborn greenish-brown water discoloration, and can permanently discolor a pool liner. Submerged wood also softens, splinters, and rots within a couple of seasons.
You must also avoid metal pipes or standard steel fasteners below the waterline. Standard iron, steel, and cheap grades of stainless steel corrode rapidly in chlorinated water. When submerged hardware oxidizes, it leaves ugly brown streaks across your pool floor that are difficult to scrub away. If corroded hardware ever stains your pool surfaces, you will have to learn how to get rust out of a pool without draining it, which takes extra work and specialty chemicals that you can easily prevent by using plastic parts.
Measurements and Tools You Need Before Cutting
Before buying materials or making your first cut, measure the distance from the pool floor directly to the top edge of your pool deck. Measure straight down along the wall where the ladder will sit. Do not guess this height, because a ladder that is too tall will wobble, and one that is too short will pull loose from its deck mounts.
Pick the right pipe thickness for structural strength. Use 1.5-inch or 2-inch diameter Schedule 40 PVC. Never use thin-walled drain pipe (often labeled DWV or Schedule 20), because it bends under foot pressure and can snap when a swimmer climbs out. A 2-inch pipe offers the best rigidity for adult swimmers, while a 1.5-inch pipe works well for lighter pool users.
Gather these tools and materials before you begin your project:
- Schedule 40 PVC pipe in 1.5-inch or 2-inch diameter, measured to your pool height.
- PVC T-fittings (tees) for connecting each step rung to the vertical side rails.
- PVC 90-degree elbows for the top handrails and bottom base feet.
- PVC end caps or deck mounting flanges (flat mounting brackets screwed into deck boards).
- A handsaw or ratcheting PVC pipe cutter for straight, clean cuts.
- A power drill with a 1/4-inch drill bit to make water-fill and air-bleed holes.
- Coarse and fine sandpaper to smooth sharp edges.
- Purple PVC primer and solvent cement to bond all joints securely.
- Clean pea gravel (small, smooth decorative stones) to act as ballast (clean weight added inside pipes to sink the ladder).
- A tape measure and a permanent pencil or marker.
How to Build and Weight a PVC Pool Ladder Step by Step
Follow these steps in order to cut, weight, and assemble a solid ladder frame that sinks properly and supports swimmers safely.
- Measure and cut the vertical rails and step rungs to uniform lengths. Cut your horizontal rungs between 18 and 20 inches wide, and cut vertical rail segments so your steps sit 10 to 12 inches apart.
Reason: Matching cuts keep the ladder square and level, so foot weight distributes evenly across both side rails rather than twisting the frame. - Sand and deburr every single cut edge before assembling any joints. Rub medium-grit sandpaper over the inside and outside edges of every cut pipe until the plastic feels rounded and completely smooth.
Reason: Rough plastic burrs can slice vinyl liners or scratch bare feet when swimmers climb in and out. - Dry-fit the entire ladder frame together on your lawn or patio without glue. Push all cut pipes into their matching tees and elbows, then set the unglued ladder against your pool wall to confirm the height and step spacing.
Reason: PVC cement bonds permanently in seconds, so dry-fitting prevents costly cutting mistakes that cannot be undone later. - Drill 1/4-inch holes along the underside and back of each horizontal step rung. Drill three or four clean holes through the bottom wall of each step tube, keeping the holes facing away from swimmer foot contact.
Reason: Hollow sealed pipes trap air and float like buoys, but these holes allow trapped air to vent out and pool water to flood inside the pipes to pull the ladder down. - Fill the bottom vertical upright tubes with clean pea gravel. Pour washed pea gravel into the bottom two vertical pipe sections before you attach the lower fittings.
Reason: Pool water alone provides neutral buoyancy, but dense stone ballast (clean weight added inside pipes to sink the ladder) keeps the base pinned to the pool floor so the ladder does not bounce or drift. - Wipe every joint with purple PVC primer. Swab the inside socket of each fitting and the outside tip of each pipe end with primer until the glossy surface turns dull.
Reason: The primer chemically cleans and softens the hard plastic surface, creating the proper chemical base for the solvent cement to fuse. - Apply PVC cement and insert each pipe with a quarter-turn twist. Brush cement over the primed areas, shove the pipe firmly to the bottom of the fitting socket, and twist it a quarter turn while holding it tight for ten seconds.
Reason: Twisting spreads the glue evenly across the entire seam, fusing the parts into one solid plastic piece that will not pull apart under pressure. - Let the glued frame cure fully in open air for at least 24 hours. Set the assembled ladder in a dry, ventilated area and avoid moving or stressing the joints during the curing process.
Reason: Submerging uncured solvent into your pool weakens the joint bond and releases raw chemical fumes into your swimming water.
Securing the Ladder and Protecting Your Pool Liner
Once your ladder is assembled and cured, you must secure the top deck mounts and protect the bottom floor. A ladder that shifts around under swimmer weight creates friction, and friction is the main cause of worn vinyl liners. Even a small plastic burr or a shifting ladder foot can rub a thin spot into a vinyl liner over a single swimming season.
Always place a ladder pad (a thick vinyl mat placed under ladder feet) on your pool floor right where the ladder rests. The mat acts as a tough shock absorber between hard plastic and your thin pool floor. It distributes the downward weight of swimmers across a wider surface area, preventing divots in the sand base beneath your pool. Make sure the mat sits flat with no trapped air bubbles before resting the ladder feet on top.
Fasten the top handrails firmly to your deck using deck flanges. Screw these brackets securely into solid structural deck boards using stainless steel wood screws. If your pool deck has weathered boards or split wood near the mounting location, make structural repairs before installing the ladder. Taking time to inspect and learn how to fix a cracked pool deck yourself ensures your mounting screws bite into firm, solid material that will not pull loose when a swimmer pulls on the handrails.
Keep water circulation moving around and behind the ladder. Because homemade ladders sit close to pool walls, circulation from return jets can slow down behind the rungs, allowing algae and water film to collect. If you notice slippery residue building up along the frame or on the steps, learning how to clean pool stairs and remove tough stains will keep the steps slip-free and stop algae blooms from spreading across your pool.
DIY PVC Ladders Versus Factory-Built Resin Steps
Building your own ladder gives you an affordable option tailored to your deck height, but manufactured pool steps offer key structural advantages. Weighing these two options helps you decide whether a homemade build fits your family's swimming habits.
A homemade PVC ladder works well for standard budget needs and simple pool access. The materials are easy to find at any local hardware store, and the total build cost remains low. However, PVC ladders feature narrow, rounded pipe rungs that can feel uncomfortable on sensitive feet during long climbs. They also lack standardized weight certifications, meaning they are best suited for light or moderate weight loads around 200 to 250 pounds when built with 2-inch pipe.
Factory-built resin steps offer wide, textured treads that make entering and exiting the pool far more comfortable. These drop-in steps feature wide platforms, built-in handrails, and non-skid surfaces that help children, elderly swimmers, and pets move in and out of the water safely. Manufactured units are also engineered to hold 300 to 400 pounds or more, providing dependable stability without flexing.
Local building codes and insurance rules are another important factor. Many local municipalities require pool ladders to feature specific step widths, slip-resistant treads, and self-closing gates for pools without surrounding decks. A homemade ladder might not satisfy these code requirements. Check your local township rules before building to ensure your ladder meets safety expectations.
When to Choose Manufactured Steps and Mats
If you have swimmers with limited mobility, or if you prefer certified weight capacities, factory-made pool steps provide a safer, longer-lasting solution. Manufactured drop-in steps feature wide, gradual inclines that feel more like home stairs than vertical climbing ladders. This makes entering the water effortless for swimmers of all ages.
When shopping for manufactured pool steps, verify the height compatibility with your pool deck. Many models are designed specifically for deck heights between 48 and 56 inches, while others offer adjustable side rails to match taller decks. Check that the steps have perforated side panels to allow pool water to circulate freely, which prevents algae from blooming inside hollow step cavities.
Always pair any ladder or drop-in step unit with a protective floor pad. Even factory-molded resin steps shift slightly when people step on them. A dedicated, non-slip mat shields your pool floor from continuous scuff marks, keeps the step base from sliding, and protects your pool investment for years to come.

- VC Score9.2
BCP Score is a ranking system developed by bestcleanerproducts.com. BCP Score has no relationship or impact from any manufacturers or sales agent websites. Learn more
- BrandSwimline

- VC Score9.2
BCP Score is a ranking system developed by bestcleanerproducts.com. BCP Score has no relationship or impact from any manufacturers or sales agent websites. Learn more
- BrandConfer Plastics

- VC Score9.0
BCP Score is a ranking system developed by bestcleanerproducts.com. BCP Score has no relationship or impact from any manufacturers or sales agent websites. Learn more
- BrandConfer Plastics

- VC Score8.8
BCP Score is a ranking system developed by bestcleanerproducts.com. BCP Score has no relationship or impact from any manufacturers or sales agent websites. Learn more
- BrandConfer Plastics

- VC Score8.8
BCP Score is a ranking system developed by bestcleanerproducts.com. BCP Score has no relationship or impact from any manufacturers or sales agent websites. Learn more
- BrandRESILIA

- VC Score8.8
BCP Score is a ranking system developed by bestcleanerproducts.com. BCP Score has no relationship or impact from any manufacturers or sales agent websites. Learn more
- BrandGoovilla
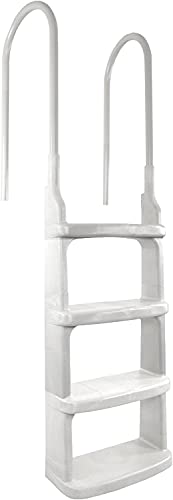
- VC Score8.6
BCP Score is a ranking system developed by bestcleanerproducts.com. BCP Score has no relationship or impact from any manufacturers or sales agent websites. Learn more
- BrandMain Access
Last update on 2026-10-08 / Affiliate links / Images, Product Titles, and Product Highlights from Amazon Product Advertising API
FAQs
Can I use play sand instead of pea gravel inside the pipes?
Do not use sand to weight down a pool ladder. Sand grains are small enough to wash out through the drilled water holes, which dumps gritty sediment across your pool floor and can clog your skimmer or pump. Smooth pea gravel is heavy, cheap, and large enough to stay locked inside the pipe segments permanently.
How many air bleed holes should I drill into the ladder?
Drill three to four 1/4-inch holes on the underside of each horizontal step rung and two holes near the top of the lower vertical posts. These holes allow water to flood the interior quickly while letting trapped air escape as you submerge the frame. Drilling them on the underside prevents swimmers from feeling the holes under their bare feet.
How wide should a homemade pool ladder be?
The best width for a pool ladder is between 18 and 20 inches from rail to rail. This width gives plenty of foot room for adult swimmers while keeping the horizontal rungs short enough to prevent bowing. Wider rungs can flex or bow downward in the center when an adult steps onto them.
Will regular PVC cement hold up underwater in chlorinated pool water?
Standard PVC primer and solvent cement hold up very well in chlorinated water once they cure completely. Solvent cement does not simply glue parts together; it chemically welds the plastic pieces into a single unit. As long as you let the assembled frame cure in open air for at least 24 hours before submerging it, the chemical bonds will stay watertight and strong.


How to Refinish a Fiberglass Pool

How Do You Keep Raccoons Out of Your Pool?

How to Fix Cyanuric Acid in Your Pool

How to Shape a Pool Cue Tip to Stop Miscues

12 Best Automatic Vacuum For Intex Above Ground Pool of 2026 To Keep Vinyl Floors Spotless

10 Best Automatic Pool Vacuum For Above Ground Pool of 2026 To End Manual Scrubbing

How Much Pool Clarifier Should You Use for Your Pool Size?

How Much Does a Pebble Tec Pool Cost to Build or Resurface?


