
How to Resurface a Concrete Pool Step by Step

Resurfacing a concrete pool involves draining the bowl, chipping off hollow spots, repairing cracks, and applying a fresh waterproof coating across the entire floor and walls. That job changes completely depending on whether the project calls for heavy replastering or a roll-on pool paint. Spreading new plaster sets in quickly and requires a fast, multi-person crew, while pool paint serves as the primary solo alternative.
The right approach depends on the depth of the shell damage, the finish you choose, and the water table under your yard. Fine surface flaking only needs a thorough wash and a rough bond coat, but structural cracks demand heavy hydraulic cement. Emptying the pool also carries real risks if underground water pressure is high. Here is how the whole resurfacing sequence unfolds, what you can handle yourself, and when to call in a crew.
The Short Version
- Resurfacing a concrete pool means pumping out the water, cutting away damaged plaster, fixing structural cracks, applying a rough bond coat, and troweling on a fresh waterproof surface layer.
- Applying plaster or pebble aggregate is almost always a job for a trained crew of four to six people because the material dries and hardens within hours under the sun.
- Painting the concrete shell with dedicated pool paint is the primary route for a solo homeowner, but it requires thorough chemical washing and only lasts a fraction of the time that plaster does.
- You must always open the drain valve at the bottom of the deep end as soon as the water drains out to keep underground water from floating the empty pool out of the yard.
The Complete Pool Resurfacing Process
Resurfacing restores the waterproof barrier that keeps water from soaking into the raw concrete shell of your pool. When that surface wears down, the exposed concrete turns rough on your feet, grows algae in deep pores, and eventually begins to leak. The entire project follows six main stages from the moment you drop a pump into the deep end to the moment you turn the garden hose back on.
- Drain the pool and relieve ground pressure. Rent or buy a submersible pump to remove the water. Run the discharge hose to an approved cleanout drain on your property rather than into the street or a storm sewer. As soon as the water clears the main drain in the deep end, unthread the hydrostatic plug (a small pressure-release valve at the bottom of the drain sump). Taking this plug out lets underground water flow into the empty pool instead of building pressure beneath the floor.
- Sound the shell and remove loose material. Walk the entire interior with a small ball-peen hammer or a solid piece of pipe. Tap the walls and floor lightly every few inches. A solid wall gives a sharp, high click, while a hollow pocket produces a dull, hollow thud. Use a hammer and chisel or a light demolition hammer to chip away every hollow spot down to the rough gunite shell. If the old surface suffers from spalling (flaking or peeling concrete layers), you must grind or chip those loose sheets off so the new layer has something firm to grip.
- Strip oils, mineral scale, and wash with acid. Scrape away old buildup around the waterline tile and fittings. Scrub the entire bare shell with a mixture of water and a heavy-duty cleaner to lift suntan oils, body greases, and dirt. Rinse thoroughly, then wash the surface with a diluted muriatic acid mixture using a plastic watering can and a stiff broom. Acid washing dissolves the slick outer layer of old cement and opens the pores of the concrete so it feels like rough sandpaper.
- Roll or spray a bond coat. New cement does not naturally stick to old, cured cement. A bond coat (a rough glue layer made of liquid polymers and fine sand) bridges the gap between the two. Roll or spray this mixture evenly across every square inch of the floor, walls, and steps. Let it dry until it feels like coarse 40-grit sandpaper. If you skip this layer or let dirt blow onto it before plastering, your new finish can separate and pop loose within its first season.
- Trowel on the new finish. This is the physical peak of the job. Mix the finish material in a large mortar mixer and wheelbarrow it directly into the pool. Workers spread the material across the walls and floor using rounded steel pool trowels. The crew trowels the surface multiple times as the material hardens to push out air pockets, smooth down rough trowel marks, and create a dense, waterproof crust.
- Refill immediately and balance the water. New plaster needs water pressure and moisture to cure evenly without shrinking or cracking in the open air. As soon as the plaster is firm enough that a shoe leaves no print, place a garden hose in the deep end. Wrap a clean shop rag or sock around the nozzle so the metal end does not gouge the soft plaster. Keep the water running continuously until it reaches the middle of the skimmer opening. Shutting off the hose midway leaves a permanent ring in the plaster where the water line sat.
DIY Pool Painting Versus Professional Replastering
Many pool owners wonder if they can grab a few buckets of material over a long weekend and replaster their pool alone. Plaster is a smooth waterproof cement layer that begins setting within an hour of hitting the wall. A standard backyard pool requires thousands of pounds of wet cement to be mixed, carried, spread, and troweled flat within a tight three-hour window. A single person working alone simply cannot move fast enough to finish the walls before the cement sets into rock-hard ridges.
For this reason, full replastering is a project best left to a specialized crew with high-volume spray rigs and multiple experienced finishers. A professional crew moves in unison: two people mix and haul, one person sprays the mixture against the gunite, and three people hand-trowel the steps, walls, and floor simultaneously.
If you want to complete the resurfacing project yourself to save on labor, pool paint is the realistic DIY alternative. Epoxy pool paint rolls on like thick house paint and creates a slick, colorful membrane over bare concrete or old, sound plaster. The physical demand of rolling paint is manageable for one or two people over several days.
The trade-off comes down to lifespan and chemical sensitivity. Traditional plaster lasts 10 to 15 years, while a high-grade pebble finish can last more than 20 years. Pool paint usually lasts between 3 and 7 years before it chalks, blisters, or peels. You will spend far less money up front with paint, but you will find yourself draining and repainting the pool much sooner.
Choosing Your Finish: Plaster, Pebble, or Paint
The interior finish sets the color of your water, how the floor feels on bare feet, and how often you will need to refinish the pool over the next two decades.
Traditional White Plaster: This classic blend of white Portland cement and crushed marble dust remains the most common choice. It creates a bright, baby-blue water hue and feels smooth underfoot. White plaster is the most affordable cement finish, but it is vulnerable to poor water balance. If your pool water turns acidic, it pulls calcium straight out of the plaster, creating rough, pitted spots across the floor.
Aggregate Pebble Finishes: An aggregate finish blends small, rounded river pebbles or glass beads into the waterproof cement. Once the crew trowels the wall, they spray it with water or wash it with mild acid to reveal the pebble texture. This finish resists water chemistry swings far better than plain plaster and hides minor stains naturally. It feels slightly bumpy, like walking on a wet riverbed, and costs significantly more than standard white plaster.
Epoxy Pool Paint: Epoxy forms a hard, resinous skin over the pool shell. It offers a smooth, glossy finish that makes brushing away dirt easy. However, epoxy requires bone-dry concrete during application. Any moisture trapped inside the pool wall turns into steam in the summer sun, blowing bubbles in the paint that eventually pop and peel.
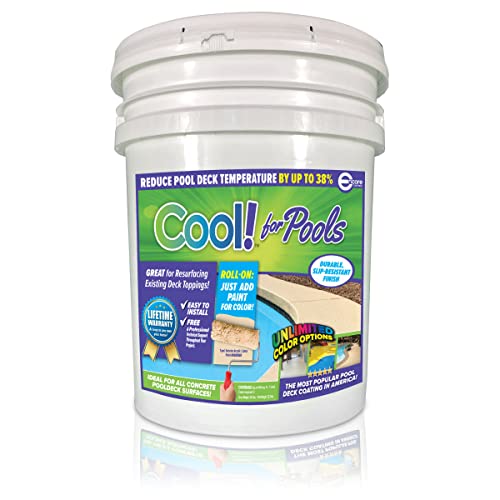
Be careful not to confuse pool deck resurfacing products with underwater finishes. Products designed to seal pool walking decks, steps, and patios are made to handle foot traffic in open air. They are not formulated to survive continuous underwater submersion under high hydrostatic pressure.
Critical Prep Rules to Prevent Peeling and Blisters
New finishes do not fail because of the material; they fail because the surface beneath them was dirty, loose, or damp. Follow these prep rules before you roll a drop of primer or spread an inch of cement.
- Cut back all loose edges: Never feather wet patch material over loose, crumbling edges. When you chip away a hollow spot, cut the edges straight down with an angle grinder or chisel so the patch fills a deep pocket with crisp borders.
- Scrub all algae and surface grease: Organic stains and plant matter break the bond between the pool shell and the new plaster. You can learn how to clean algae from pool walls safely before etching the surface to make sure no spores stay hidden inside the pores.
- Clear scale line buildup: Mineral crusts on the tile line will shed new coatings quickly. Take time to check how you get calcium off pool tile without scratching it so your border is clean before applying finishes near the coping.
- Rinse away all acid residue: After etching concrete with muriatic acid, neutralize the shell with baking soda and water, then rinse with fresh water several times. Acid left in low spots weakens fresh cement immediately.
- Verify concrete dryness for paint: If you choose epoxy paint, tape a two-foot square piece of clear plastic sheeting to the floor in the deep end. Leave it in direct sunlight for 24 hours. If moisture droplets form under the plastic, the pool shell still holds water and paint will bubble.
Groundwater and Structural Safety Checks
Emptying an in-ground concrete pool carries one major structural risk: pool popping. Concrete swimming pools act like heavy concrete boats. When full, thousands of gallons of water push down and anchor the shell in place. If the ground around your home is saturated from heavy rains, underground water pushes up against the empty bowl. If that upward pressure exceeds the weight of the empty concrete, the entire pool shell can pop out of the ground, snapping plumbing lines and cracking pool decks permanently.
Always inspect the hydrostatic plug in the main drain sump before draining your pool. If ground water begins bubbling up through the plug hole after you pull the plug, that is good news. It proves the relief valve is doing its job by letting groundwater fill the bottom of the pool instead of lifting the entire shell.
You also need to inspect the difference between surface crazing and structural cracks. Crazing looks like fine, shallow spiderwebs across the old plaster. These are harmless surface shrinkage marks that vanish once you strip the old layer. In contrast, structural cracks run all the way through the plaster into the gunite shell beneath. They often follow the floor contour or run vertically down the wall, staying wet long after the rest of the pool dries out. If you see cracks wider than an eighth of an inch, or cracks where one side sits higher than the other, stop immediately. A pool structural specialist must install heavy-duty carbon fiber staples or inject structural epoxy before any resurfacing layer goes over the top.
Prep Supplies and Maintenance Tools to Have Ready
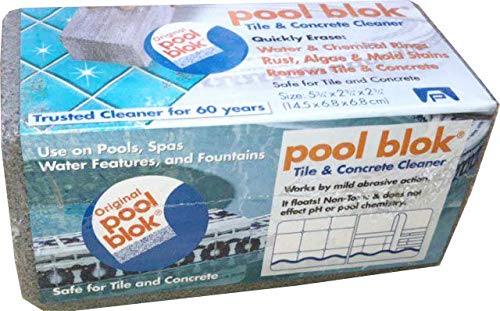
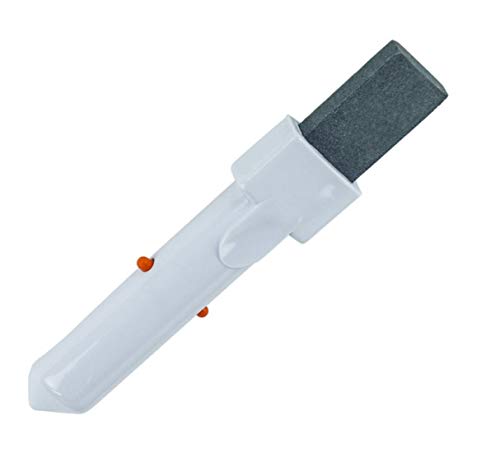
Getting your pool ready for new plaster or paint involves specialized surface-cleaning supplies and patching compounds. Before any wide-scale coating begins, homeowners need ready-to-use concrete patches to repair small spalls, along with flexible polyurethane sealants to seal expansion joints and gaps where the pool shell meets concrete steps or coping stones. For hard mineral deposits and waterline crust, heavy-duty pumice blocks help scour away stubborn lime, rust, and scale spots without using harsh liquid chemicals on delicate fixtures.
Once your pool is resurfaced, filled, and balanced, protecting that fresh surface becomes the main priority. During the first thirty days, new plaster sheds a cloud of fine plaster dust as the cement cures. A manual wall brush attached to a telescopic pole is necessary during this curing phase, as you will need to brush the walls and floor twice daily to prevent that dust from calcifying into rough sandpaper streaks.
After that first month passes and the plaster fully hardens, an automatic pool cleaner takes over the heavy lifting. Look for a unit that matches your surface texture. If you chose a smooth plaster or painted finish, a robotic cleaner with soft rubber tracks and textured climbing rings will climb the walls without slipping. If you chose a rough pebble aggregate finish, durable suction-side cleaners or robotic units with heavy-duty drive treads work best, as rough stone surfaces wear down soft scrubbing rings more quickly. Always verify that your cleaner features a wide collection canister or fine filter basket so it lifts debris without dragging coarse particles across your brand-new pool floor.

- VC Score8.8
BCP Score is a ranking system developed by bestcleanerproducts.com. BCP Score has no relationship or impact from any manufacturers or sales agent websites. Learn more
- BrandSIKA

- VC Score8.8
BCP Score is a ranking system developed by bestcleanerproducts.com. BCP Score has no relationship or impact from any manufacturers or sales agent websites. Learn more
- BrandSIKA

- VC Score8.6
BCP Score is a ranking system developed by bestcleanerproducts.com. BCP Score has no relationship or impact from any manufacturers or sales agent websites. Learn more
- BrandRobelle
- VC Score8.2
BCP Score is a ranking system developed by bestcleanerproducts.com. BCP Score has no relationship or impact from any manufacturers or sales agent websites. Learn more
- BrandEncore Coatings
- VC Score8.2
BCP Score is a ranking system developed by bestcleanerproducts.com. BCP Score has no relationship or impact from any manufacturers or sales agent websites. Learn more
- BrandPool Blok

- VC Score8.2
BCP Score is a ranking system developed by bestcleanerproducts.com. BCP Score has no relationship or impact from any manufacturers or sales agent websites. Learn more
- BrandIn The Swim

- VC Score8.2
BCP Score is a ranking system developed by bestcleanerproducts.com. BCP Score has no relationship or impact from any manufacturers or sales agent websites. Learn more
- BrandKILZ
- VC Score8.0
BCP Score is a ranking system developed by bestcleanerproducts.com. BCP Score has no relationship or impact from any manufacturers or sales agent websites. Learn more
- BrandPool Supply Town

- VC Score7.8
BCP Score is a ranking system developed by bestcleanerproducts.com. BCP Score has no relationship or impact from any manufacturers or sales agent websites. Learn more
- BrandKILZ

- VC Score7.6
BCP Score is a ranking system developed by bestcleanerproducts.com. BCP Score has no relationship or impact from any manufacturers or sales agent websites. Learn more
- BrandBILLY BUCKSKIN HOME & BEAUTY
Last update on 2026-10-08 / Affiliate links / Images, Product Titles, and Product Highlights from Amazon Product Advertising API
FAQs
Can I put a new layer of plaster directly over my old plaster?
You can apply a new layer directly over old plaster only if the original surface is solidly bonded to the concrete shell underneath. You must tap the entire pool to verify there are no hollow spots, strip away all loose flakes, and roll on an approved bond coat first. If more than twenty percent of the old plaster is hollow or peeling, chip the entire shell down to bare gunite before replastering.
How long do I have to wait before swimming after resurfacing?
If you resurface with traditional plaster or pebble aggregate, you must wait until the pool is completely full and the water chemistry balances, which usually takes about three to five days. For epoxy or rubber pool paint, you must let the paint cure in the open air for five to seven sunny days before even beginning to fill the pool. Once filled and chemically balanced, the water is safe for swimming.
Why does new plaster develop dark streaks or rough spots?
Dark streaks usually happen when the plaster cures unevenly due to hot sun, direct wind, or hard troweling after the cement has begun to dry. Rough spots, on the other hand, often occur when pool owners fail to brush the pool twice daily during the first month. As new cement hydrates underwater, it releases calcium dust that settles on the floor and hardens into rough grit if left unbrushed.
Can I drain my pool for resurfacing during the rainy season?
You should never drain an in-ground concrete pool during heavy rain or when the water table is high. Saturated soil creates immense underground water pressure that can float the pool shell or crack the floor. Plan your resurfacing project for a dry, moderate time of year, and always pull the hydrostatic relief plug at the bottom of the main drain the moment the pool empties.


How to Refinish a Fiberglass Pool

How Do You Keep Raccoons Out of Your Pool?

How to Fix Cyanuric Acid in Your Pool

How to Shape a Pool Cue Tip to Stop Miscues

12 Best Automatic Vacuum For Intex Above Ground Pool of 2026 To Keep Vinyl Floors Spotless

10 Best Automatic Pool Vacuum For Above Ground Pool of 2026 To End Manual Scrubbing

How Much Pool Clarifier Should You Use for Your Pool Size?

How Much Does a Pebble Tec Pool Cost to Build or Resurface?


