
How to Epoxy Paint a Pool So It Does Not Peel

Most folks assume resurfacing a pool with epoxy is just a standard weekend rolling project. In reality, thorough surface cleaning and bone-dry concrete are what actually make the job succeed. Epoxy creates a tough, watertight seal, but even a tiny pocket of trapped moisture or leftover body oil will force the new finish to blister and peel away from the walls.
Your specific process depends on what is already on the pool floor and walls. An old rubber-base coating requires a special bonding coat before epoxy can grip, while bare plaster needs an acid wash to roughen up smooth spots. Steady outdoor temperatures between 50 and 90 degrees and zero rain are also essential so the thick shell dries out all the way through. Here is how to handle the prep, roll the paint cleanly, and let it cure properly.
Identify Your Pool Surface and Old Paint Chemistry
Before you purchase any paint, you must know exactly what material coats your pool shell. Epoxy pool paint creates a hard, durable chemical bond, but it only sticks to bare concrete, rough plaster, gunite, fiberglass, or an existing coat of cured epoxy. If your pool has an old layer of chlorinated rubber paint or water-based acrylic paint, rolling epoxy straight over it will cause the new paint to soften, lift, and peel away in large sheets within months.
If you have a vinyl liner pool rather than concrete or gunite, epoxy paint will not work because the resin cannot bond to flexible vinyl. In that case, look into how to pick the right pool liner rather than painting. For solid concrete shells, you can identify old coatings with a simple solvent swab on a small paint chip:
- Test with denatured alcohol: Rub a clean rag dipped in denatured alcohol against an old paint flake for thirty seconds. If the paint softens or rubs off onto the cloth, the surface is water-based acrylic.
- Test with xylene: If alcohol does nothing, rub a fresh chip with xylene solvent. If the paint gets sticky, dissolves, or turns gummy, the coating is chlorinated or synthetic rubber.
- Test for epoxy: If xylene does not affect the paint chip at all, the old finish is an epoxy coating.
Chlorinated rubber pool paint has an expected lifespan of 2 to 3 years, while a solid epoxy base finish lasts 7 to 8 years. If your shell currently has rubber paint, you have two practical choices. You can either sandblast the concrete down to bare plaster, or apply a conversion coating (a special primer that lets epoxy stick over old rubber paint). Putting epoxy directly over rubber paint without a conversion coat is the most common reason pool paint projects fail.
Clean, Degrease, and Acid-Wash the Concrete Shell
Epoxy needs an open, rough concrete texture to grip properly. Grease, body oils, algae residue, and suntan lotions soak into porous pool plaster over years of swimming. Acid cannot cut through oil, so you must wash and degrease the entire pool interior before applying any acid.
- Drain the pool safely: Pump all water out through your main drain or a submersible pump. If your local water table is high after heavy storms, make sure your hydrostatic relief valve (a small pressure plug in the main drain that stops groundwater from pushing the shell upward) is open so the empty pool does not shift.
- Scrub with a heavy-duty degreaser: Mix trisodium phosphate (TSP) or a specialized pool surface cleaner with warm water. Scrub the floor and walls from the shallow end to the deep end using a stiff-bristle push broom. Rinse the shell thoroughly with fresh water and pump the dirty wash water out completely.
- Perform an acid wash: Acid washing (scrubbing concrete with a mild acid mix so paint can grip) opens the tight pores of the plaster. Mix one part muriatic acid with three parts fresh water in a clean plastic watering can. Always pour the acid into the water, never the water into the acid, to prevent chemical splashing. Wear safety goggles, heavy rubber gloves, rubber boots, and an organic vapor respirator.
- Scrub and rinse: Work in small sections, wetting the concrete first, then pouring the diluted acid down the walls. Let it foam for two to three minutes while scrubbing with a stiff broom. Rinse each section with fresh water before the acid dries on the wall.
- Neutralize the acid: Dissolve one pound of baking soda or TSP in five gallons of water and wash the concrete to stop the acid reaction. Flush the pool with clean water, pump out the rinse water, and let the shell drain.
Once dry, touch the surface with your bare hand. The concrete should feel like coarse 80-grit sandpaper. If any spots still feel slick or smooth like polished stone, repeat the acid wash on those areas so the epoxy has physical teeth to lock onto.
Confirm Deep Shell Dryness with a Moisture Test
Trapped moisture is the primary cause of bubbling and blistering in epoxy pool coatings. A concrete pool acts like a rigid, thick sponge. The surface might look light gray and bone-dry after two days in the sun, but several gallons of water often remain locked an inch deep inside the plaster. When the sun heats up the painted pool, that trapped moisture turns into vapor, pushes upward, and forces the paint away from the plaster.
Never rely on a quick visual check. Use this taped plastic test across different zones of the pool before opening any cans of primer or paint:
- Cut test patches: Cut three or four square sheets of clear plastic wrap or heavy plastic sheeting, measuring roughly two feet by two feet.
- Seal all edges: Tape one plastic sheet to the deep-end floor, one to a shaded side wall, and one to the shallow-end floor. Use heavy-duty duct tape and press it down hard along all four edges so outside air cannot get under the plastic.
- Wait 24 hours: Leave the sealed plastic sheets in place through a full day of direct sun.
- Check for condensation: Pull the tape up and inspect the underside of the plastic and the concrete directly underneath it. If you see water droplets on the plastic, or if the concrete under the sheet looks darker than the concrete around it, the shell is still holding water.
If moisture appears, you must wait another two to four sunny days and run the test again. Concrete pools typically take five to seven days of dry, warm weather to dry completely after an acid wash. Do not rush this step, because rolling epoxy over hidden moisture ruins the entire job.
Patch Surface Cracks and Roll Your Epoxy Primer
Once the shell passes the moisture test, inspect the plaster for cracks, spalls, and gouges. Epoxy pool paint creates a smooth, hard finish that can help seal small hairline cracks in the pool surface, but larger structural fissures need repair before you apply coatings. If you notice wide gaps or shifting joints, read up on repairing cracks in a concrete pool to address the underlying movement.
For standard cosmetic divots, chip away any loose, crumbly plaster around the crack with a hammer and chisel. Clean out the dust with a dry brush. Pack the void tightly with a waterproof epoxy patching compound or hydraulic pool cement, smoothing it flat with a putty knife. Allow the patch to cure completely, then sand it level with 80-grit sandpaper so it blends into the surrounding plaster.
Next, apply a dedicated epoxy primer. Bare concrete, rough plaster, new gunite, or fiberglass surfaces need a two-part epoxy primer to seal the porous substrate. Unsealed plaster will absorb the liquid resin out of your topcoat, leaving dull dry patches and pinholes. An epoxy primer seals those pores and creates an adhesive bridge that locks the paint to the shell.
Pour the mixed epoxy primer into a paint tray and cut in around the tile line, light niches, and drain fittings using a solvent-resistant brush. Use a 3/8-inch nap roller attached to a sturdy extension pole to roll the primer across the walls and floor. Let the primer dry according to the manufacturer instructions on the can before you begin rolling the finish paint.
Mix and Roll Two-Part Epoxy Paint Within Its Pot Life Window
Two-part epoxy swimming pool paint consists of a base resin and a separate catalyst hardener. When you blend the two components, a chemical curing reaction begins immediately. You must understand pot life (the limited time you have to roll epoxy before it hardens in the bucket). In mild temperatures around 70 degrees Fahrenheit, your pot life is usually between 60 and 90 minutes. In hot weather above 85 degrees, that working time drops significantly, and the epoxy can harden inside the bucket in less than 45 minutes.
- Check the weather forecast: Choose a week with steady daily temperatures between 50 and 90 degrees Fahrenheit. Avoid painting during the hottest midday hours under intense sun, which can cause solvent boil (bubbles created when the paint surface skins over before the solvent evaporates). Early morning, once dew evaporates, is the best time to paint.
- Mix mechanically: Pour the catalyst into the paint resin. Use an electric drill with a paint paddle mixer and blend for five to seven minutes at moderate speed. Stirring by hand with a wooden stick is not enough to activate the chemical components evenly. Let the mixture sit for fifteen minutes if the instructions call for an induction period (a short resting time that lets the chemical bonding start).
- Cut in perimeter edges: Use a brush to paint around pool lights, returns, main drains, and the waterline (the tile border where water meets the pool wall).
- Roll the pool walls: Start at the deep end. Work around the perimeter walls toward the shallow end. Use a solvent-resistant roller with a 3/8-inch nap. Roll in overlapping vertical passes, then cross-roll horizontally to distribute the paint evenly without leaving thick ridges.
- Roll the pool floor: Paint the floor starting at the deep-end drain, walking backward toward the shallow-end steps so you do not paint yourself into a corner. Keep your roller wet and maintain a wet edge to avoid visible lap marks.
- Apply non-slip sand to steps: Wet epoxy creates an extremely slick, glass-like surface underwater. To keep steps and shallow benches safe, broadcast clean, fine silica sand across the wet first coat on all stair treads. When you apply the second coat, roll directly over the sand to lock the grit in place.
- Apply the second coat: Most epoxy systems require two full coats for lasting water protection. Apply the second coat within the recoat window stated on your paint can, which is typically between 24 and 48 hours. If you wait too long between coats, the first layer cures completely hard and the second coat cannot chemically fuse to it without sanding the entire pool again.
Allow Full Curing Time Before Refilling Your Pool
Drying is not the same as curing (the chemical hardening process required before adding pool water). Epoxy paint drys to the touch within 6 to 8 hours, but the resin takes several days to finish cross-linking into a dense, non-porous barrier. Filling the pool too early softens the paint, clouds the finish, and leads to water blisters underneath the coating.
Outdoor pools require at least five to seven full days of dry, warm weather to cure properly. If temperatures stay on the cooler side, between 50 and 60 degrees, leave the pool empty for eight to ten days. Indoor pools need longer curing windows, often ten to fourteen days, along with active ventilation fans to blow heavy solvent fumes out of the room.
Keep a close eye on rain during this curing period. If rain falls on fresh epoxy during the first 48 to 72 hours, it causes a milky, chalky film called a surface blush. If an unexpected storm leaves puddles in the deep end, pump the standing water out immediately with a small utility pump or wet vacuum. Use a sponge to dry the plaster so standing water does not sit against the uncured paint.
When the cure window is complete, place your garden hose at the bottom of the deep end and fill the pool continuously until the water reaches the middle of the skimmer. Never turn the hose off halfway through filling, or you will leave a permanent dirt and chemical ring around the new paint. Once filled, run your filter pump for 24 hours and balance your water chemistry before swimming.
Choose the Right Pool Paint Supplies for Long-Term Durability
Resurfacing a pool shell requires dedicated swimming pool products engineered specifically for total, continuous underwater submersion. Standard exterior masonry paint or topside marine enamels designed only for surfaces above the waterline cannot handle water pressure or heavy chlorination, and they will break down in weeks.
Before purchasing your supplies, confirm whether your shell requires an epoxy gunite primer for rough, porous plaster or a conversion coating to transition over old rubber-base paint. Look for commercial two-part epoxy pool paint with high solids content to provide a hard, abrasion-resistant, non-porous shell that resists chemical stains and algae attachment. Pair your paint with solvent-safe roller frames, lint-free phenolic-core roller covers, and mechanical drill mixers to ensure a uniform blend and clean finish that lasts for years.
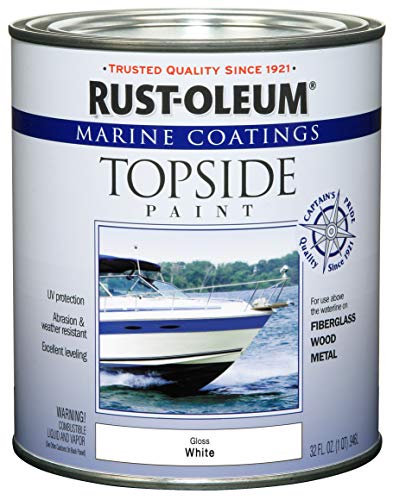
- VC Score9.2
BCP Score is a ranking system developed by bestcleanerproducts.com. BCP Score has no relationship or impact from any manufacturers or sales agent websites. Learn more
- BrandRust-Oleum

- VC Score9.2
BCP Score is a ranking system developed by bestcleanerproducts.com. BCP Score has no relationship or impact from any manufacturers or sales agent websites. Learn more
- BrandIn The Swim

- VC Score8.8
BCP Score is a ranking system developed by bestcleanerproducts.com. BCP Score has no relationship or impact from any manufacturers or sales agent websites. Learn more
- BrandIn The Swim

- VC Score8.8
BCP Score is a ranking system developed by bestcleanerproducts.com. BCP Score has no relationship or impact from any manufacturers or sales agent websites. Learn more
- BrandIn The Swim
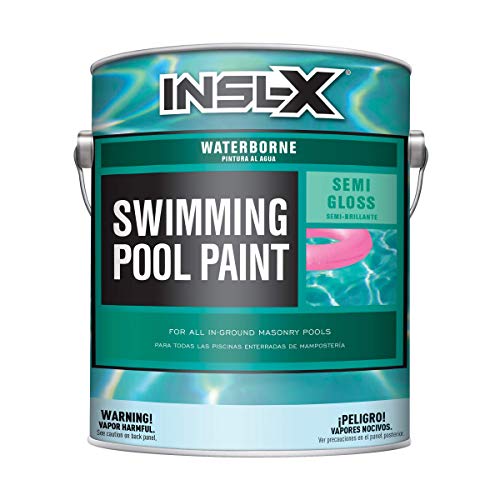
- VC Score8.4
BCP Score is a ranking system developed by bestcleanerproducts.com. BCP Score has no relationship or impact from any manufacturers or sales agent websites. Learn more
- BrandINSL-X

- VC Score8.0
BCP Score is a ranking system developed by bestcleanerproducts.com. BCP Score has no relationship or impact from any manufacturers or sales agent websites. Learn more
- BrandIn The Swim
Last update on 2026-10-08 / Affiliate links / Images, Product Titles, and Product Highlights from Amazon Product Advertising API
FAQs
Can I paint over old pool paint without knowing what type it is?
No, you should never roll epoxy over unknown pool paint without testing it first. Epoxy will chemically lift and blister if applied over old chlorinated rubber or water-based acrylic paint. Take a small paint chip from the pool wall and test it with denatured alcohol and xylene solvent to confirm the coating chemistry before you begin.
Do I really need to acid-wash my pool concrete before epoxy painting?
Yes, acid washing is mandatory on bare concrete, gunite, and old plaster surfaces. Epoxy paint cannot form a durable mechanical bond with smooth or dirty concrete. The acid removes mineral glaze and opens the concrete pores so the surface feels like coarse sandpaper, giving the epoxy a rough profile to grip.
What happens if it rains right after I finish painting my pool?
Rain landing on wet or freshly rolled epoxy within the first three days can cause surface blushing, which appears as a cloudy, milky discoloration across the finish. Standing rain pools can also soften the uncured resin. Pump out any pooled water in the deep end immediately with a submersible pump and dry the puddle with clean towels.
Can I use regular exterior concrete paint inside my swimming pool?
No, standard outdoor patio or masonry paint will quickly fail underwater. Swimming pools experience constant hydrostatic pressure, harsh sanitizers, and fluctuating pH levels. Only specialized pool paints, such as two-part epoxy swimming pool coatings, are formulated to remain submerged in treated pool water without peeling or dissolving.


How to Refinish a Fiberglass Pool

How Do You Keep Raccoons Out of Your Pool?

How to Fix Cyanuric Acid in Your Pool

How to Shape a Pool Cue Tip to Stop Miscues

12 Best Automatic Vacuum For Intex Above Ground Pool of 2026 To Keep Vinyl Floors Spotless

10 Best Automatic Pool Vacuum For Above Ground Pool of 2026 To End Manual Scrubbing

How Much Pool Clarifier Should You Use for Your Pool Size?

How Much Does a Pebble Tec Pool Cost to Build or Resurface?


