
How to Clean a Pool Pump Impeller to Restore Flow

Clear the blockage with a stiff wire hook. After turning off power at the breaker and pulling the basket, you can usually reach through the intake to scoop trapped debris out of the impeller (the spinning plastic wheel that pushes water). Removing that gunk stops the motor from overheating and gets your water moving again.
How much effort you need depends on how tightly the mess is packed inside the narrow channels. Many pump styles give you room to hook debris through the front basket, but stubborn clogs might require separating the pump housing to reach the wheel directly. It also helps to verify that the plastic is simply jammed rather than warped from running dry. Here is how to find the clog, clear it safely, and get your pool running smoothly.
Low Pressure and Rattling Noises Signal a Clogged Impeller
When pool water stops moving with its usual strength, most pool owners assume their filter needs backwashing or cartridge cleaning. But checking your filter pressure gauge tells you the real story immediately. If your filter is packed with dirt, the pressure gauge climbs higher than normal because water struggles to push through the media. If the impeller (spinning plastic water wheel) is clogged with debris, the pressure gauge drops unusually low, often staying near zero to five pounds per square inch. The pump cannot pull enough water from the pool to build pressure in the tank.
You can also tell the spinning plastic water wheel is blocked by listening closely to the motor. A starved pump often makes a loud groaning or rattling noise that sounds like someone poured gravel into the basket housing. That noise is cavitation (boiling air bubbles caused by starved water flow). When the spinning blades cannot grab enough water, low pressure forces tiny vapor bubbles to form and collapse violently against the plastic walls. The pump basket lid will show little to no water, or you will see a turbulent swirl of churning white froth.
Debris reaches this internal wheel when small materials slip past the skimmer and pump baskets. Pine needles, palm fibers, small pebbles, and oak tassels easily slip through the narrow slots in plastic baskets. If your pump basket has a tiny crack or floats up when the motor turns off, larger leaves can slip underneath. This often happens after severe storms or during spring opening when you calculate how much to open a pool in 2026 and vacuum heavy winter sediment from the pool floor.
Leaving debris inside the wheel is dangerous for your equipment. Without a steady stream of pool water flowing past the spinning plastic water wheel, the mechanical shaft seal quickly overheats. That heat boils the standing water inside the housing, warps plastic parts, and causes water leaks that run straight into the motor bearings. If left running dry, the motor will overheat, trip the internal thermal switch, and eventually burn out its electrical windings.
Cut Power at the Breaker Before Touching Any Equipment
Working on a pool pump requires strict electrical and hydraulic safety before you loosen a single bolt or take off the lid. Follow this preparation checklist to protect your hands and prevent water damage to your equipment pad:
- Shut off the main circuit breaker: Never trust an on/off toggle switch or an automated digital timer. If you understand how to wire a pool pump timer, you know that automation schedules or mechanical clock pins can start the motor unexpectedly. Trip the dedicated circuit breaker inside your main electrical panel so the pump has zero power.
- Bleed trapped air pressure: Walk over to your filter tank and slowly turn the manual air relief valve counterclockwise. Wait until the pressure gauge needle falls to zero and the hissing sound stops completely.
- Close isolation valves on plumbing lines: If your equipment pad sits lower than the pool waterline, gravity will push pool water out of the open pump housing. Turn your suction valves (skimmers and main drain) and return valves to the closed position to avoid flooding the area.
- Gather simple tools: Keep a bright flashlight, a stiff wire coat hanger, a pair of needle-nose pliers, and a bucket of water right next to the pump.
Clear Trapped Debris Through the Basket Port Using Wire
You can clear most clogs without disconnecting pipes or unbolting the motor from the plumbing. This quick method reaches through the front suction port to pull leaves and pine needles out directly.
- Open the strainer pot: Turn the pump lid locking ring or knobs counterclockwise and pull the clear lid off. Inspect the rubber O-ring under the lid for tears, and set the lid on a clean towel so it does not pick up dirt or sand.
- Remove the strainer basket: Lift the basket out of the strainer pot (basket housing before the motor). Dump out any leaves or pine needles, and rinse it clean with a garden hose so you can see clearly into the housing.
- Feel the suction port opening: Reach your hand into the back of the strainer pot toward the motor. You will feel a circular hole that leads directly into the center of the spinning plastic water wheel. Check this opening with your fingers to feel for tangled clumps of leaves, seeds, or small stones.
- Shape a wire hook tool: Take a piece of stiff wire, like an unwound metal coat hanger. Use pliers to bend a sharp, narrow hook at the very tip, roughly one-quarter inch long. Make sure the hook is small enough to slip into the narrow slots between the plastic vanes.
- Hook and extract the trapped debris: Push the wire hook into the center hole of the spinning plastic water wheel. Guide the hook into one of the narrow curved channels, twist the wire slightly to snag debris, and pull it straight back toward you. Pine needles and palm fronds will come out in tight, wet bundles.
- Turn the wheel by hand: Reach into the center port and use your fingertips to rotate the spinning plastic water wheel a quarter turn. Insert the wire hook into the next channel and pull out any trapped matter. Continue turning the wheel a full 360 degrees until every internal channel feels clean and clear.
- Flush the housing: Pour a bucket of pool water directly into the suction port while turning the wheel with your fingers. This flushes loose grains of sand, dirt, and tiny twig fragments out of the channels.
Separate the Pump Housing When Debris Is Wedged Solid
If small gravel, hard acorn shells, or thick palm seeds get wedged tight inside the internal channels, a wire hook might bend without pulling them free. When that happens, splitting the pump housing gives you direct access without cutting any PVC pipes.
- Drain the pump wet end: Unscrew the threaded drain plugs at the bottom of the strainer pot and the main pump housing. Let the trapped water drain onto the pad so it does not spill onto the motor when you separate the parts.
- Remove the main housing bolts: Locate the ring of bolts or the large metal clamp band that holds the motor bracket to the strainer pot. Use an open-end wrench or socket set to loosen the bolts. Place the bolts, washers, and nuts into a small cup so none roll away.
- Slide the motor assembly backward: Support the motor with one hand and gently pull it straight back away from the plumbing. The front basket housing stays glued to the PVC pipes, so your plumbing stays completely untouched. Rest the motor on a flat block of wood so you do not strain the electrical conduit.
- Take off the diffuser shroud: Look at the front face of the detached motor. You will see the diffuser (protective shroud covering the wheel). Remove the two retaining screws holding it in place, or pull it straight forward if it attaches with a rubber friction seal.
- Clean the exposed wheel directly: With the shroud removed, all the channels of the spinning plastic water wheel are completely open. Use needle-nose pliers or a small flathead screwdriver to gently pry wedged stones, sticks, or packed pine needles out of the front slots and from behind the rear backplate.
- Check the shaft rotation: Grab the spinning plastic water wheel with your fingers and spin it. It should rotate smoothly with only light drag from the rubber mechanical seal. If you hear metal scraping or feel heavy binding, check behind the wheel for debris wrapped around the motor shaft.
Inspect the Wheel for Cracks Before Sealing the Housing
Before you bolt your pump back together, inspect the plastic carefully to confirm the clog did not cause permanent heat or friction damage. Use this quick checklist to make sure your pump seals properly and runs without air leaks:
- Inspect the vane edges and center eye: Look at the curved channels and the front circular collar of the spinning plastic water wheel. The plastic should be smooth and straight. If you notice melted edges, cracks, warped plastic, or chipped pieces, the wheel will wobble and fail to generate proper water pressure.
- Clean all rubber O-ring surfaces: Wipe down the large housing O-ring and the diffuser seal with a clean rag. Remove all pine needles, sand grains, and dried dirt from the sealing grooves, because a single grain of grit can cause a continuous suction air leak.
- Apply silicone pool lubricant: Coat the rubber O-rings lightly with a silicone-based pool lubricant. Never use petroleum jelly or automotive grease. Petroleum products break down pool-grade rubber, causing seals to swell, split, and leak.
- Reinstall the shroud correctly: Position the protective shroud back over the spinning wheel. Make sure the molded word "TOP" or the alignment notch points straight up so internal water channels match the housing ports. Tighten the mounting screws snugly by hand.
- Bolt the housing evenly: Slide the motor assembly back into the strainer pot. Thread all bolts in by hand before tightening any of them with a wrench. Tighten opposing bolts in a crisscross pattern, turning each bolt a few turns at a time so the two halves pull together straight and seal evenly.
- Reinstall plugs and prime the system: Thread the bottom drain plugs back into the housing using fresh thread seal tape. Fill the strainer pot completely to the top with water from a garden hose, lubricate the lid O-ring, and lock the lid down tight.
- Restore power and bleed air: Open all suction and return valves. Turn the circuit breaker back on and start the pump. Open the air relief valve on top of the filter tank until a steady stream of water shoots out, then close it. Check the pressure gauge to confirm normal operating pressure is restored.
Replace Damaged Impellers to Protect Your Pump Motor
Cleaning out packed pine needles and pebbles usually restores your water circulation immediately. But if running dry or sucking in sharp gravel warped, melted, or cracked the spinning plastic water wheel, cleaning alone will not fix your pool's weak water flow. A damaged wheel creates turbulence inside the housing, puts uneven physical stress on the motor shaft, and reduces suction power so much that your pool cleaner stops moving.
When shopping for a replacement wheel, match the part strictly to your equipment rather than buying a generic fit. Check the exact pump model series on your pump housing label and confirm the motor horsepower rating. A one-horsepower motor requires an internal wheel designed specifically for one horsepower. Installing an oversized wheel will overload the motor and trip the breaker, while an undersized wheel will never pull enough water to clear your pool floor.
Also confirm whether your motor shaft uses a threaded connection or a keyed slip-fit design before ordering. Whenever you install a replacement wheel, install a fresh mechanical shaft seal and new housing O-rings at the same time. Putting a fresh wheel on an old, heat-stressed shaft seal often leads to motor leaks within weeks, so replacing both parts together protects your pump motor for the long haul.

- VC Score9.2
BCP Score is a ranking system developed by bestcleanerproducts.com. BCP Score has no relationship or impact from any manufacturers or sales agent websites. Learn more
- BrandPentair

- VC Score9.2
BCP Score is a ranking system developed by bestcleanerproducts.com. BCP Score has no relationship or impact from any manufacturers or sales agent websites. Learn more
- BrandHayward

- VC Score9.2
BCP Score is a ranking system developed by bestcleanerproducts.com. BCP Score has no relationship or impact from any manufacturers or sales agent websites. Learn more
- BrandPentair

- VC Score9.2
BCP Score is a ranking system developed by bestcleanerproducts.com. BCP Score has no relationship or impact from any manufacturers or sales agent websites. Learn more
- BrandPentair

- VC Score9.2
BCP Score is a ranking system developed by bestcleanerproducts.com. BCP Score has no relationship or impact from any manufacturers or sales agent websites. Learn more
- BrandPentair

- VC Score8.8
BCP Score is a ranking system developed by bestcleanerproducts.com. BCP Score has no relationship or impact from any manufacturers or sales agent websites. Learn more
- BrandPentair

- VC Score8.6
BCP Score is a ranking system developed by bestcleanerproducts.com. BCP Score has no relationship or impact from any manufacturers or sales agent websites. Learn more
- BrandSummer Waves

- VC Score8.2
BCP Score is a ranking system developed by bestcleanerproducts.com. BCP Score has no relationship or impact from any manufacturers or sales agent websites. Learn more
- BrandSummer Waves
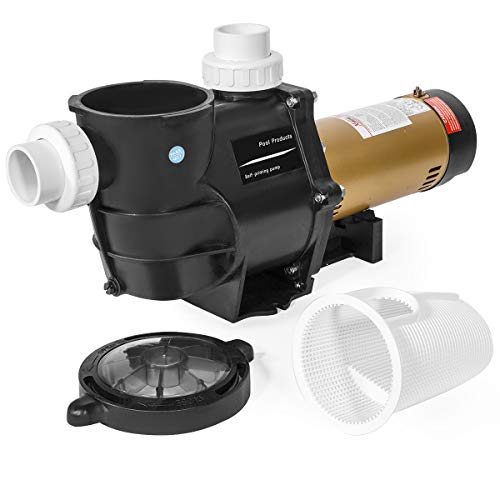
- VC Score7.8
BCP Score is a ranking system developed by bestcleanerproducts.com. BCP Score has no relationship or impact from any manufacturers or sales agent websites. Learn more
- BrandXtremepowerUS
Last update on 2026-10-08 / Affiliate links / Images, Product Titles, and Product Highlights from Amazon Product Advertising API


How to Refinish a Fiberglass Pool

How Do You Keep Raccoons Out of Your Pool?

How to Fix Cyanuric Acid in Your Pool

How to Shape a Pool Cue Tip to Stop Miscues

12 Best Automatic Vacuum For Intex Above Ground Pool of 2026 To Keep Vinyl Floors Spotless

10 Best Automatic Pool Vacuum For Above Ground Pool of 2026 To End Manual Scrubbing

How Much Pool Clarifier Should You Use for Your Pool Size?

How Much Does a Pebble Tec Pool Cost to Build or Resurface?


