
How to Use Pool Salt Without Damaging Your Pool

Check the pool water with a salt indicator strip before opening a single bag. Salt does not evaporate, so measuring your starting level prevents accidental over-salting, which can only be fixed by draining water. The safest routine is to scatter the salt around the pool perimeter with the pump running, well away from the skimmer box. Keep the salt cell (the unit that turns salt into chlorine) turned off, and brush the granules immediately so heavy piles never sit against the liner or plaster.
The number of bags you need depends on your pool size in gallons and the current reading in parts per million. Your equipment manual also outlines a target salinity range, usually between 2,700 and 3,400 parts per million. Matching those numbers keeps your water balanced and prevents damage to your pump or heater. Here is how to prepare your equipment, spread the salt safely, and get everything dissolved without hassle.
Checking Baseline Salt Levels and Calculating Bag Count
Before you lift a single bag of salt, you need to know how much salt is already floating in your water. Salt does not vanish when pool water evaporates. Fresh rain, splash-out, and backwashing lower salt levels, but trace minerals and tap water refills often leave a measurable baseline behind. Salinity simply means the amount of salt in the water. Pool equipment measures this in parts per million (ppm). If you guess your starting point, you risk adding far too much, which leads to major headaches later.
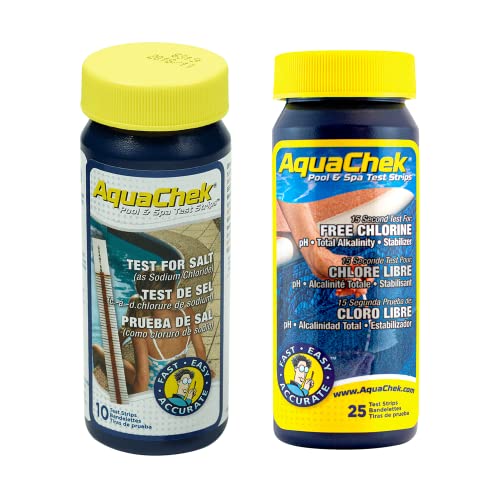
Use dedicated pool salinity indicator strips or an electronic salinity meter to measure the water. Reliable white salinity strips measure sodium chloride levels from 400 to 7,000 ppm, giving you a clear reading without counting reagent drops. Take your water sample about eighteen inches below the surface, away from return jets and skimmer openings. Once you have that number, compare it to the target salinity listed in the user manual for your salt chlorination system. Most residential salt systems require a sweet spot between 2,700 and 3,400 ppm, with 3,200 ppm serving as a common target.
To calculate how many bags to buy, you must find your total pool volume in gallons. For a standard rectangular pool, multiply the length by the width, multiply that by the average depth, and then multiply by 7.5. For a round above-ground pool, multiply the diameter by itself, multiply by the average depth, and multiply by 5.9. As a general rule of thumb, adding one 40-pound bag of high-purity pool salt to 10,000 gallons of water raises salinity by roughly 480 to 500 ppm.
Subtract your current salinity reading from your target level to determine your deficit. If your 20,000-gallon pool currently reads 2,200 ppm and your system requires 3,200 ppm, you need to raise salinity by 1,000 ppm. That jump requires about four 40-pound bags. Always round down your bag count on the first day. It is quick and easy to add an extra half bag tomorrow, but removing excess salt from pool water is an exhausting process.
- Measure your starting water salinity with a reliable indicator strip.
- Check your salt generator manual to confirm your target ppm range.
- Calculate your pool water capacity in total gallons.
- Calculate the difference between your target level and your current reading.
- Buy standard 40-pound bags of pool salt, rounding down to prevent accidental overfilling.
Adjusting Equipment Settings Before Adding Salt
Pouring salt into your pool requires specific equipment adjustments before you slit open the first bag. Your pool pump must remain running, but your salt cell (the unit that turns dissolved salt into chlorine) must be switched off completely. If you leave the salt cell powered on while dumping bags, dense clouds of undissolved salt will travel directly through the plumbing. When super-concentrated salt enters the cell, it can trigger false sensor errors, overload the electronics, and cause premature scale buildup on the delicate titanium plates. To understand how that hardware operates during normal cycles, read how salt pools work to make chlorine.
Leave your main circulation pump running on a standard or high-speed setting. Water needs to move briskly across the floor and through the return jets to help the crystals break down. If your pool plumbing includes a three-way valve that balances water intake between the surface skimmers and the bottom main drain, turn the valve so it draws heavily from the main drain. Salt is much heavier than water, so loose granules sink immediately toward the deep end floor. Drawing water through the main drain pulls that dense, salty layer into circulation and spreads it evenly.
Clear the pool of all automatic pool cleaners before adding chemicals. A robotic cleaner (a self-powered unit with its own internal debris basket) or a suction-side cleaner can easily suck up piles of raw salt crystals. Coarse salt granules can grind against internal drive gears, jam rubber tracks, and scratch the cleaner housing. Take the cleaner completely out of the water, set it safely on the pool deck, and inspect your skimmer baskets to ensure water flows freely without obstructions.
Adding Salt Around the Pool and Brushing the Floor
Adding pool salt requires a steady hand and a bit of physical elbow grease. Never dump multiple bags into a single spot, and never dump salt into the deep end bowl where it can settle into an unreachable sludge. Distributing the granules around the shallow perimeter allows the water current from your return jets to start breaking down the crystals right away.
- Carry the first bag to the shallow end of the pool, cut the top open with a utility knife, and walk slowly along the pool edge while pouring a steady ribbon of salt into the water about one to two feet out from the pool wall.
- Continue adding bags along the shallow end and down the sides of the pool, saving about one-fourth of your total bags to review water levels the following day.
- Grab a manual pool brush attached to a sturdy telescoping pole and immediately begin sweeping the fallen salt across the pool floor in long, sweeping strokes.
- Push the granules toward the main drain while keeping them moving constantly until you can no longer see white piles or grain outlines resting on the bottom surface.
Brushing is critical because resting salt damages pool finishes differently based on the surface material. In a pool with a vinyl liner, thick piles of raw salt create cold, concentrated chemical pockets that can bleach patterns, weaken the vinyl, or cause permanent floor wrinkles. Smooth fiberglass surfaces can develop discoloration and surface hazing if salt sits undisturbed in floor depressions or on wide steps. For plaster, gunite, or pebble aggregate (like Pebble Tec), resting salt can cause stubborn calcium stains and surface etching. Spend ten to fifteen minutes brushing right after pouring, and return for a second quick brushing session an hour later to catch any drifting granules.
Circulation Time and Costly Mistakes to Avoid
Patience is critical after you brush the pool floor. Pool salt typically takes between 24 and 48 hours to dissolve completely and distribute evenly throughout the entire body of water. The exact time depends on your water temperature and circulation speed. In warm summer water, high-purity fine salt can dissolve in less than twelve hours with regular brushing. In cold water below 60 degrees Fahrenheit, salt crystals dissolve at a sluggish pace and may require two full days of continuous pump operation.
Do not switch your salt cell back on until the full 24-hour window has passed and you have verified the salinity with a fresh indicator strip. If you turn the cell on too soon, the system will read an unstable salt level and may shut down on an automatic low-salt error code. Homeowners often panic when they see that low-salt warning light and rush out to dump more bags into the pool. That mistake leads directly to over-salting.
Over-salting is the most expensive mistake you can make with a saltwater pool. Salt does not evaporate, break down in sunlight, or get consumed by sanitation cycles. Once salinity climbs past your salt cell high-limit threshold (often around 4,000 to 4,500 ppm), the system shuts off to protect itself from electrical damage. The only way to lower your salt level is to turn off the equipment, drain thousands of gallons of pool water, and refill the pool with fresh tap water. You waste expensive water, throw away balancing chemicals, and spend hours resetting your pool chemistry.
Another severe mistake is pouring salt directly into the surface skimmer. Dumping salt into the skimmer sends a super-concentrated stream of corrosive brine straight through your plumbing lines, pump impeller, filter tank, and pool heater. Concentrated salt eats away at copper heater cores, corrodes pump seals, and damages internal gaskets within hours. Always pour salt directly into the open pool water, well away from the skimmer openings.
Keep a close eye on your other water parameters after adding salt. Salt systems naturally push water pH levels upward over time as the electrolytic cell runs its sanitation cycles. When managing your chemical balance, make sure you know how much acid to add to your pool to keep your pH in the safe range of 7.4 to 7.6, which protects your equipment from metal corrosion and scale formation.
Choosing Cleaning Tools to Help Salt Dissolve Evenly
Keeping the right cleaning tools on your pool deck makes distributing salt much easier and protects your pool surfaces from chemical wear. During the initial application, a heavy-duty manual pool brush with durable bristles is your primary tool. If you have a vinyl liner or smooth fiberglass pool, choose a brush with soft nylon bristles to prevent scratching the gel coat or puncturing the liner. For rough plaster or pebble aggregate pools, a brush with stiffer nylon or blended bristles gives you the scrubbing power needed to lift salt crystals out of tiny surface pits.
Once the salt has fully dissolved and your water pump has circulated for a full day, an automatic pool cleaner helps sweep away fine dust, stray sand, and settled debris left behind from chemical bags. A robotic cleaner (a self-powered unit with its own internal debris basket) works independently from your pool pump and scrubs the floor from the waterline down to the floor drain. If you use a robotic cleaner, confirm that it has durable rubber tracks or drive wheels that grip your specific floor surface smoothly. For electrical safety, always plug your cleaner into an outdoor GFCI outlet (a protected ground-fault outlet with a weatherproof cover) and keep the control box at least 10 feet back from the pool edge.
A suction-side cleaner (attaches to your pool skimmer or dedicated vacuum port and uses your pool pump suction) offers another practical way to keep the floor swept and circulate water. Before disconnecting suction hoses or adjusting vacuum ports, always turn off the circulation pump to avoid hand injuries or strong suction entrapment. Never allow anyone to swim while any cleaner, vacuum hose, or power cord is inside the pool. Storing these tools properly and selecting models that match your pool finish keeps your pool clean and your water perfectly balanced.

- VC Score9.4
BCP Score is a ranking system developed by bestcleanerproducts.com. BCP Score has no relationship or impact from any manufacturers or sales agent websites. Learn more
- BrandCPDI

- VC Score9.2
BCP Score is a ranking system developed by bestcleanerproducts.com. BCP Score has no relationship or impact from any manufacturers or sales agent websites. Learn more
- BrandHTH Store

- VC Score9.0
BCP Score is a ranking system developed by bestcleanerproducts.com. BCP Score has no relationship or impact from any manufacturers or sales agent websites. Learn more
- BrandCPDI

- VC Score8.8
BCP Score is a ranking system developed by bestcleanerproducts.com. BCP Score has no relationship or impact from any manufacturers or sales agent websites. Learn more
- BrandMAV AquaDoc
- VC Score8.8
BCP Score is a ranking system developed by bestcleanerproducts.com. BCP Score has no relationship or impact from any manufacturers or sales agent websites. Learn more
- BrandAquaChek

- VC Score8.4
BCP Score is a ranking system developed by bestcleanerproducts.com. BCP Score has no relationship or impact from any manufacturers or sales agent websites. Learn more
- BrandPondValue

- VC Score8.4
BCP Score is a ranking system developed by bestcleanerproducts.com. BCP Score has no relationship or impact from any manufacturers or sales agent websites. Learn more
- BrandHTH

- VC Score8.4
BCP Score is a ranking system developed by bestcleanerproducts.com. BCP Score has no relationship or impact from any manufacturers or sales agent websites. Learn more
- BrandWatersafe

- VC Score7.8
BCP Score is a ranking system developed by bestcleanerproducts.com. BCP Score has no relationship or impact from any manufacturers or sales agent websites. Learn more
- BrandPOOLWHALE
- VC Score-
BCP Score is a ranking system developed by bestcleanerproducts.com. BCP Score has no relationship or impact from any manufacturers or sales agent websites. Learn more
- BrandN/A
Last update on 2026-10-08 / Affiliate links / Images, Product Titles, and Product Highlights from Amazon Product Advertising API
FAQs
How long should I wait to swim after adding pool salt?
You can safely swim about 30 to 45 minutes after adding pool salt, provided you have brushed the floor thoroughly. Pool salt is pure sodium chloride, so it does not irritate human skin or eyes like concentrated sanitizers. Make sure no resting piles of undissolved granules remain on the pool bottom before entering the water, as walking on rough granules can cause slips or scratch pool liners.
Can you put pool salt directly into an above-ground pool?
You can add pool salt directly to an above-ground pool, but you must take extra care to protect the vinyl liner. Pour the salt slowly around the perimeter of the pool while keeping several feet away from the skimmer box. Brush the floor immediately with a soft nylon brush to keep the salt moving until every single granule has dissolved completely into the water.
Why is my salt cell reading low salt after I just added salt?
A salt cell often reads low salt after an addition because the salt has not fully dissolved or mixed through the entire volume of water. Dense salt water tends to sit at the bottom of the pool until the pump circulates it through the returns for 24 to 48 hours. Let your circulation pump run continuously, brush the floor one more time, and recheck the water with an indicator strip before adding any more salt.


How to Refinish a Fiberglass Pool

How Do You Keep Raccoons Out of Your Pool?

How to Fix Cyanuric Acid in Your Pool

How to Shape a Pool Cue Tip to Stop Miscues

12 Best Automatic Vacuum For Intex Above Ground Pool of 2026 To Keep Vinyl Floors Spotless

10 Best Automatic Pool Vacuum For Above Ground Pool of 2026 To End Manual Scrubbing

How Much Pool Clarifier Should You Use for Your Pool Size?

How Much Does a Pebble Tec Pool Cost to Build or Resurface?


