
How to Thread and Tighten a Pool Cover Winch

Most pool owners assume a winter cover tightener must be cranked down as hard as possible to survive freezing storms. In reality, overtightening snaps the wire or rips the metal eyelet holes, while proper setup only requires snugging the cable firmly against the pool wall. Feeding both wire ends through the center turning rod and rotating the crank clockwise lets the spring locking catch secure the line without damaging the cover.
A few small details will change how you handle the tool. Some winches feature a single slotted post in the middle, while others use two separate entry holes on the casing. Pool size and cover age also decide how much tension the seams can safely handle. When spring arrives, loosening the line depends on whether the body has a quick release lever or a manual latch. The steps below walk through the proper threading order and tension checks to keep everything secure.
A Winch Ratchet Locks Tension With A Small Spring Latch
A pool cover winch is a simple hand crank tightener that pulls your winter cover cable snug around the outside of the pool wall. It relies on four main parts: the outer metal frame, a center turning rod (often called a spool), a toothed gear wheel, and a spring locking catch (known mechanically as a pawl). Understanding how these parts interact removes the guesswork when you stand outside in cold weather trying to secure your pool.
The mechanism works on a one-way ratcheting principle. When you turn the hand crank clockwise, the center turning rod rotates to wind up the cable. As the rod turns, the toothed gear wheel spins with it. The small spring locking catch rests directly against those gear teeth. Each time a tooth passes, the catch lifts up and snaps down into the next groove with a distinct clicking sound.
That clicking sound tells you the winch is doing its job. The angled front of each gear tooth pushes the catch out of the way during forward rotation. But the flat back of each tooth stops the catch from moving backward. The moment you let go of the crank handle, the cable tries to unwind, which pulls the flat side of a gear tooth hard against the catch. That physical block is what holds the cable tight all winter long without slipping.
Mechanical confusion usually happens when the spring catch gets stuck or pushed out of position. If leaves, dirt, or ice get jammed behind the small spring, the catch cannot drop into the teeth. When that happens, the turning rod will spin freely backward the second you let go of the handle. Keeping the gear teeth clean and confirming that the catch drops fully into every notch ensures the winch holds through severe winter storms.
Thread Both Cable Ends Through The Center Turning Rod
Setting up your winter cover cable takes only a few minutes when you follow the right sequence. Before threading the wire, verify that your pool equipment is fully prepared for freezing temperatures. For example, make sure you winterize a pool heater to prevent freeze damage and blow out your plumbing lines before pulling the cover over the top rails. Once the cover rests evenly over the pool with equal overlap on all sides, follow these steps to thread and tighten the winch.
- Weave the cable through the cover eyelets: Start at one side of the pool and feed the plastic-coated steel cable through every metal eyelet hole (grommet) around the entire perimeter. Keep the cable flat against the pool wall without twisting or looping over top rail caps. Continue all the way around until both ends meet at your chosen tightening spot.
- Position the winch between two eyelets: Pick a spot between two metal eyelet holes that is easy to reach from the ground. Avoid placing the winch directly over a vertical pool upright or right next to your skimmer box, where tight metal can rub against plastic fittings.
- Feed the cable ends through the outer guides: Take the left cable end and push it through the hole on the left side of the winch frame. Take the right cable end and push it through the hole on the right side of the winch frame. Both cable ends should now point toward the center turning rod inside the frame.
- Push both ends through the center slot: Look closely at the center turning rod. Most standard winches feature a open split or center slot cut directly through the middle of the rod. Push both cable ends through this center slot at the same time, feeding them in opposite directions or side by side. Pull roughly six to ten inches of excess wire out through the back of the slot so the cable cannot slip out when tension begins.
- Turn the hand crank clockwise: Grip the winch frame firmly with one hand to hold it steady. Turn the butterfly handle or crank lever clockwise with your other hand. As the center turning rod spins, it traps the cable ends and begins winding the wire around itself.
- Guide the initial wire coils: Use your free fingers to keep light tension on the loose cable tails during the first two full turns. This keeps the cable seated flat against the turning rod and stops the wire from bunching up against the frame walls.
- Secure the remaining slack: Once the cable reaches proper tension, do not cut off the extra wire tails hanging out of the center rod. Fold the excess cable neatly and tuck it behind the taut perimeter wire. You will need that extra length next autumn if the cover shifts or if you reinstall the hardware on a different side.
Keep Cable Snug Under The Rail Without Over-Stretching Grommets
A pool cover cable is not meant to suspend heavy snow loads or support standing water. Its single purpose is holding the cover edges flat against the pool wall so winter winds cannot get underneath. If strong winds get under the edge of the cover, the fabric billows like a parachute, which can pull the entire cover into the water or rip the seams apart. Getting the tension right protects both the pool structure and the cover fabric.
Use the belt test to check if your cable is tight enough. Think of the cable like a belt around a pair of pants. It needs to sit securely in the groove just beneath the pool top rail ledge. Walk up to the pool wall halfway around from the winch and gently pull outward on the cable with two fingers. A properly tightened cable should give about one to two inches before pulling tight against the wall. If the cable sags down the wall on its own, it is too loose. If it feels like a stiff guitar string with zero give, it is too tight.
Inspect the metal eyelet holes all the way around the pool perimeter. Each eyelet should hang naturally below the top rail. If you see the round metal rings stretching into ovals, or if the fabric around the eyelets is puckering and pulling tight toward the center of the pool, stop tightening immediately. Over-cranking places tremendous strain on those eyelets. When heavy ice and snow accumulate in mid-winter, that extra downward weight will rip over-tightened grommets clean out of the vinyl or woven cover material.
Water level also plays a direct role in proper cover tension. When you complete your winter shutdown routines, such as knowing how to winterize a saltwater pool properly, you lower the water level slightly below the skimmer mouth. The winter cover must dip down to rest directly on the surface of that water. If the cable is cranked excessively tight, the cover cannot float on the water surface, and the weight of snow will yank the cable inward, damaging pool top rails.
Release The Spring Latch To Unwind Tension In Spring
Removing the pool cover winch in the spring requires caution. After months of exposure to rain, ice, and wind, the cable holds stored tension, and the aluminum gears may have dirt or mineral build-up stuck between the teeth. Never rush the release process, and never let the crank handle spin freely without a firm hand grip.
- Pump off all standing water first: Before touching the winch, use a submersible cover pump to clear standing rainwater and melted snow off the top of the cover. If hundreds of pounds of water are pressing down on the cover, releasing the cable can cause the winch handle to whip around dangerously fast.
- Grip the crank handle securely: Place your dominant hand firmly on the hand crank handle. Hold the winch body with your other hand. Do not position your fingers inside the frame or near the gear teeth where they could be pinched.
- Relieve gear pressure with a slight forward turn: Turn the crank handle clockwise just a fraction of an inch. This slight forward movement pulls the gear tooth away from the spring locking catch, taking the resting pressure off the latch mechanism.
- Disengage the spring locking catch: While holding that forward pressure on the handle, use your thumb or the tip of a flat-blade screwdriver to pull the spring locking catch back away from the gear teeth.
- Back off the crank slowly: With the catch held open, slowly allow the crank handle to rotate counterclockwise in your hand. Let the rod unwind one rotation at a time. Maintain control of the handle until all tension leaves the cable.
- Pull the wire free from the spool: Once the cable is completely loose, unwind the remaining coils from the center turning rod by hand. Slide both cable ends out through the center slot and pull them back through the outer frame holes.
- Inspect and store the hardware: Pull the cable smoothly through all the metal eyelet holes around the pool. Check the plastic coating for cracks or exposed metal strands, wipe away dirt from the winch gears, and store both pieces together in a dry container for the summer.
Avoid Over-Cranking And Pulling On Sharp Top Rail Edges
Most broken pool winches and ripped winter covers stem from a few preventable mistakes during installation. Being aware of these issues helps you protect your pool walls and hardware from unnecessary winter damage.
- Using wrenches or power tools on the crank: Winch frames and gears are constructed from lightweight cast aluminum. They are specifically engineered to be tightened by hand. Never attach locking pliers, an adjustable wrench, or a cordless drill socket to the crank nut. Forcing the mechanism with tools will strip the soft aluminum gear teeth or sheer the turning rod off at the base.
- Tightening without distributing perimeter slack: As you turn the winch, the steel wire naturally binds against the metal eyelets closest to you due to friction. If you stand in one place and crank continuously, you will pull extreme tension on the nearest three or four eyelets while the opposite side of the pool remains loose. Walk around the pool twice while tightening, pulling slack by hand toward the winch so tension distributes evenly around the entire perimeter.
- Dragging the cable across sharp screws or rail edges: Above-ground pool top rails and upright posts often have exposed sheet metal screws or sharp corners under the ledge. If the cable pulls hard across a sharp screw head, winter winds will cause friction that slices through the protective red or clear plastic coating. Once the coating splits, bare steel touches pool wall paint, leading to rust streaks. Position the cable so it rests against smooth wall paneling.
- Routing the cable across skimmer openings: Make sure the cable routes clean and clear beneath your pool skimmer box. If you recently had to unclog a pool skimmer line safely or put on a winter faceplate cover, verify that the cable does not press against the sharp bottom corners of the skimmer housing, which can crack brittle plastic during freezing weather.
- Hanging supplemental weights from the winch frame: Some pool owners try to hold down extra cover slack by hanging gallon water jugs or bricks directly from the winch body. Winch frames are not designed to support hanging deadweight. Heavy objects swinging in the wind will bend the aluminum frame, causing the center turning rod to bind and warp.
Choose Rust-Proof Aluminum Winches And Coated Steel Replacement Cables
If your pool cover winch has stripped gear teeth, a cracked frame, or a rusted spring catch, replacing the hardware before winter arrives is essential. A damaged winch cannot maintain tension against high winds, leaving your pool cover vulnerable to blowing off during winter storms. The right replacement hardware keeps your pool clean and secure until spring opening.
When selecting a replacement winch, look for a heavy-duty model built with rust-proof aluminum and stainless steel components. Aluminum provides the necessary strength to hold cable tension while remaining completely immune to red rust from winter rain and melting snow. A stainless steel spring catch ensures the locking latch continues to flex and drop into gear teeth smoothly, even in sub-freezing temperatures where cheaper carbon steel springs become brittle and snap.
Look closely at the hand crank design as well. A winch with a wide, butterfly-style crank or an extended turning lever gives you significantly better leverage when working in chilly autumn weather. Small, flat turning tabs can be difficult to grip with cold fingers or work gloves, making it harder to achieve smooth, controlled tension without slipping.
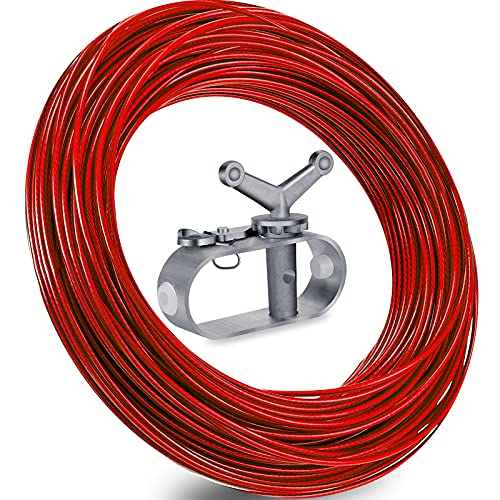
For the cable itself, always choose a multi-strand steel core sealed inside a thick, weather-resistant plastic sleeve. Bare wire cables will scratch the paint on your pool wall panels and wear down metal eyelet holes through friction. A flexible plastic coating protects your pool surfaces while allowing the cable to glide easily through grommets during seasonal installation and removal.
Before purchasing replacement hardware, measure your pool dimensions to select the right cable length. Above-ground pools come in round, oval, and rectangular designs ranging from compact 15-foot setups to large 33-foot installations. Replacement cables are widely available in standard lengths such as 100 feet and 131 feet. Choose a length that leaves at least six to eight feet of extra slack beyond your pool perimeter so you have plenty of wire to thread through the center turning rod comfortably.

- VC Score9.2
BCP Score is a ranking system developed by bestcleanerproducts.com. BCP Score has no relationship or impact from any manufacturers or sales agent websites. Learn more
- BrandFOXDISK

- VC Score8.8
BCP Score is a ranking system developed by bestcleanerproducts.com. BCP Score has no relationship or impact from any manufacturers or sales agent websites. Learn more
- BrandPAMASE

- VC Score8.8
BCP Score is a ranking system developed by bestcleanerproducts.com. BCP Score has no relationship or impact from any manufacturers or sales agent websites. Learn more
- BrandRobelle

- VC Score8.8
BCP Score is a ranking system developed by bestcleanerproducts.com. BCP Score has no relationship or impact from any manufacturers or sales agent websites. Learn more
- BrandFerraycle

- VC Score8.4
BCP Score is a ranking system developed by bestcleanerproducts.com. BCP Score has no relationship or impact from any manufacturers or sales agent websites. Learn more
- BrandSwimline

- VC Score8.4
BCP Score is a ranking system developed by bestcleanerproducts.com. BCP Score has no relationship or impact from any manufacturers or sales agent websites. Learn more
- BrandTECARATE

- VC Score8.2
BCP Score is a ranking system developed by bestcleanerproducts.com. BCP Score has no relationship or impact from any manufacturers or sales agent websites. Learn more
- BrandYUSUKEGU

- VC Score8.2
BCP Score is a ranking system developed by bestcleanerproducts.com. BCP Score has no relationship or impact from any manufacturers or sales agent websites. Learn more
- BrandLUTER
- VC Score7.8
BCP Score is a ranking system developed by bestcleanerproducts.com. BCP Score has no relationship or impact from any manufacturers or sales agent websites. Learn more
- BrandShappy

- VC Score7.8
BCP Score is a ranking system developed by bestcleanerproducts.com. BCP Score has no relationship or impact from any manufacturers or sales agent websites. Learn more
- BrandDIRAEEN
Last update on 2026-10-08 / Affiliate links / Images, Product Titles, and Product Highlights from Amazon Product Advertising API


How to Refinish a Fiberglass Pool

How Do You Keep Raccoons Out of Your Pool?

How to Fix Cyanuric Acid in Your Pool

How to Shape a Pool Cue Tip to Stop Miscues

12 Best Automatic Vacuum For Intex Above Ground Pool of 2026 To Keep Vinyl Floors Spotless

10 Best Automatic Pool Vacuum For Above Ground Pool of 2026 To End Manual Scrubbing

How Much Pool Clarifier Should You Use for Your Pool Size?

How Much Does a Pebble Tec Pool Cost to Build or Resurface?








