
How to Winterize a Saltwater Pool to Prevent Freeze Damage

Closing a saltwater pool works mostly like closing any backyard pool, but you must disconnect the salt cell and store it indoors to protect it. Leaving trapped water inside that plastic housing or the plumbing will quickly crack the casing once temperatures drop below freezing. Salt also goes to waste if you dump it in now, because the system shuts off automatically in cold water anyway.
The exact work depends on your local climate, whether your pool is inground or above ground, and how your pipe system is set up. Mild regions with brief frosts might get away with basic drain plugs, but places with deep freezes require pushing all water out of the lines with air pressure. Having a straight plastic bypass pipe to take the cell's place also changes how you seal the lines. Here is how to walk through each step safely so your equipment survives until spring.
Wait Until Water Drops Below Sixty-Five Degrees
Closing a pool too early is a common mistake. When the late summer sun is still warm, algae multiplies quickly inside stagnant water under a dark cover. Wait until your pool water temperature stays consistently below 65 degrees Fahrenheit before closing. Algae goes dormant in cooler water, allowing your closing chemicals to last through the cold months instead of burning off within weeks.
Saltwater systems have a built-in limit that makes early closing tricky. Your salt cell (the plastic tube with metal plates that makes chlorine) requires warm water to operate. Most control boxes feature a cold-water sensor that shuts down chlorine production once water drops below 50 to 60 degrees. If you close while the weather is warm, algae can take hold, but if you keep running the system in cold water, the cell stops sanitizing automatically.
Monitor water temperatures using a basic floating pool thermometer placed in the deep end. Check the reading in the morning over several days. Once water temperatures remain reliably below 65 degrees, you can safely winterize without worrying that a sudden warm stretch will turn your pool green.

Balance Pool Water and Avoid Adding Winter Salt
Before covering your pool, you need clean water with balanced chemistry. Dirt, leaves, and dead algae left behind will settle on the bottom and cause stains on vinyl liners or plaster finishes over the winter.
Start with a thorough cleaning. Skim leaves from the surface, brush the walls and the waterline (the tile or vinyl border where the water meets the pool wall), and vacuum the floor to reduce strain on winter chemicals.
Next, measure water balance with a reliable drop kit or chemical strip. Adjust the water until it reaches these baseline targets:
- pH: Keep pH between 7.2 and 7.6. Acidic water corrodes metal hardware, while high pH encourages mineral scale.
- Total Alkalinity: Maintain alkalinity between 80 and 120 parts per million to stabilize pH.
- Calcium Hardness: Keep calcium between 200 and 400 parts per million to protect plaster and equipment surfaces.
Never add extra pool salt right before putting on the winter cover. Salt requires active circulation and warmer water to dissolve completely. In cold water, salt granules sink straight to the bottom, where they can sit for months and bleach or etch your pool surface. Because your salt generator will be switched off and disconnected, late salt additions provide zero sanitizing benefit. Save your salt for spring opening.
Instead, use standard winterizing chemicals to protect your water:
- Pool shock: Add chlorine or non-chlorine shock at least 24 hours before covering so the pump circulates it to kill active bacteria.
- Algaecide: Pour in a non-foaming algaecide to stop algae spores from blooming during late-winter warm spells.
- Metal sequestrant: Add a stain and scale preventer to keep dissolved minerals and salt residue from settling onto pool walls.
Remove and Store Your Salt Chlorinator Cell Indoors
The salt chlorinator cell is the most delicate and expensive part of your saltwater setup. Inside the plastic housing sits a set of coated titanium plates that run electrical currents through salty water. When water freezes, it expands by roughly nine percent. If water freezes inside that sealed housing, it cracks the plastic shell, snaps temperature sensors, and bends the plates.
Removing and storing the cell takes about twenty minutes:
- Turn off electrical power: Flip the circuit breaker powering the pool pad at the main panel. Check the equipment control box (the power supply unit mounted near your filter) to confirm power is completely off. Working on wet plumbing while power is connected creates an immediate shock hazard.
- Unplug the cell cord: Trace the cable from the salt cell to the control box. Unplug the quick-disconnect cord from the power box, or unthread the locking collar holding the plug in place. Coil the cord loosely and store it in a dry spot.
- Loosen the pipe unions: Locate the threaded union collars on both ends of the cell. Turn them counter-clockwise by hand to unscrew them from the plumbing line. If the collars are stuck, use a rubber strap wrench to loosen them without cracking the plastic fittings.
- Inspect for scale buildup: Look inside the cell at the metal plates. If you see white, crusty calcium scale, clean the cell before storage. Stand the cell upright, fill it with a mild cell cleaning solution or diluted acid mixture recommended by your manufacturer, let it soak until bubbling stops, and rinse with clean water.
- Install a dummy cell: A dummy cell is a straight plastic spacer pipe that replaces the cell during winter. Thread the dummy cell into the open unions where your salt cell sat. This keeps plumbing aligned, allows you to blow out lines easily, and blocks debris. If you lack a dummy cell, leave unions open or cap them.
- Store the cell indoors: Carry the clean, dry cell inside. Store it in a heated basement, closet, or utility room where temperatures stay above freezing. Never leave it in an unheated outdoor shed.

Blow Out Standing Water and Seal Every Pipe
Water left inside pool pipes will freeze into solid ice. That ice exerts massive pressure against pipe walls, bursting buried PVC lines, cracking skimmers, and shattering pump housings. Clearing lines with air pressure and sealing openings with airtight plugs protects your system completely.
Follow these steps to clear and seal your plumbing:
- Lower the water level: Use your pump or a submersible pump to lower the water level. For solid covers, drop water four to six inches below the bottom of the skimmer throat. For mesh covers that allow rain to pass through, lower water twelve to eighteen inches below the skimmer.
- Drain the equipment pad: Remove drain plugs from the pump strainer basket and pump wet end. Pull the drain plug on your filter tank and open the top air relief valve. If you have a heater, pull its drain plugs as well. Proper steps for winterizing your pool pump to prevent freeze damage keep trapped water from splitting the pump housing or impeller.
- Blow out the return lines: Connect an air blower or shop vac to the equipment pad plumbing. Blow out the lines (pushing standing water out of pipes with air pressure) until air bubbles steadily from the return jets inside the pool.
- Seal the return lines: While air bubbles from the wall jet, insert a winter plug (a rubber expansion plug or threaded plug with an O-ring) into the opening. Tighten the wing nut or screw the plug tight. Sealing while air is blowing keeps water from rushing back in, creating an airtight lock.
- Clear and seal the skimmers: Blow air through skimmer suction lines back to the equipment pad until all water clears. Pour non-toxic pool antifreeze (propylene glycol formulated for pools) into the skimmer pipe for extra freeze protection. Never use toxic automotive antifreeze.
- Protect skimmer throats: Thread an ice compensator (a hollow plastic tube that absorbs ice expansion) into the bottom of each skimmer. If ice forms in the skimmer box, it crushes the hollow tube rather than the rigid skimmer walls. Plug the second port if your skimmer has one.
Secure the Winter Cover and Monitor Off-Season Water
Once your plumbing lines are sealed and your salt equipment is indoors, your winter cover provides the final barrier against freezing weather and debris.
Spread the cover evenly across the pool, ensuring proper overlap on the deck or top rails. If you use a safety cover with tension springs, hook the straps onto your deck anchors using an installation rod. Adjust strap tension so the cover sits flat and taut, with springs compressed roughly halfway. If a brass anchor sticks or binds during setup, review our guide on removing pool cover anchors without deck damage to repair the deck fitting safely.
For standard tarp covers, secure the edges with water bags or cover clips. Never use cinder blocks, bricks, or rocks to hold down a cover. If a brick falls in, it can tear a vinyl liner or gouge plaster, causing costly structural repairs.
Inspect your pool occasionally throughout winter. On solid covers, use an automatic cover pump to remove rainwater and melted snow so heavy water does not stress the cover or pool walls. On mesh covers, verify that the water level underneath has not dropped too low, which can cause the cover to stretch and sag under heavy snow.
Select the Right Winter Supplies for Your Saltwater Pool
Using the right winterizing supplies makes closing simple and protects your saltwater pool from freeze damage. High-grade closing accessories prevent small leaks that lead to cracked underground pipes or stained plaster in spring.
Here is what to look for when selecting supplies:
- Threaded and expansion plugs: Choose heavy-duty rubber expansion plugs with stainless steel bolts, or threaded plugs with thick rubber O-rings. Check your return jet sizing before buying, as in-ground pools typically use 1.5-inch or 2-inch fittings. Plugs that fit loosely allow water to seep back into cleared lines.
- Dummy bypass pipes: Check if your salt cell manufacturer offers an exact-fit dummy pipe. Matching the original union threading guarantees a tight seal and saves you from altering plumbing lines each year.
- Winter chemical kits: Select a closing kit sized for your pool capacity, commonly available for pools up to 15,000, 20,000, or 30,000 gallons. Confirm the kit includes non-foaming algaecide, slow-release winterizers, and stain inhibitors compatible with saltwater setups.
- Robotic pool cleaners: Run an automatic cleaner with a fine debris basket across the floor and walls before draining water. Removing settled silt and fine organic matter gives your winter chemicals a clean baseline to protect.
Confirm all pipe sizes, pool gallons, and cover dimensions before purchasing closing gear. Matching accessories to your specific setup keeps plumbing dry, protects your salt cell indoors, and ensures an easy opening next season.

- VC Score9.2
BCP Score is a ranking system developed by bestcleanerproducts.com. BCP Score has no relationship or impact from any manufacturers or sales agent websites. Learn more
- BrandIn The Swim

- VC Score9.2
BCP Score is a ranking system developed by bestcleanerproducts.com. BCP Score has no relationship or impact from any manufacturers or sales agent websites. Learn more
- BrandHTH Store

- VC Score9.2
BCP Score is a ranking system developed by bestcleanerproducts.com. BCP Score has no relationship or impact from any manufacturers or sales agent websites. Learn more
- BrandGLB

- VC Score9.2
BCP Score is a ranking system developed by bestcleanerproducts.com. BCP Score has no relationship or impact from any manufacturers or sales agent websites. Learn more
- BrandSwimline

- VC Score9.0
BCP Score is a ranking system developed by bestcleanerproducts.com. BCP Score has no relationship or impact from any manufacturers or sales agent websites. Learn more
- BrandRx Clear

- VC Score9.0
BCP Score is a ranking system developed by bestcleanerproducts.com. BCP Score has no relationship or impact from any manufacturers or sales agent websites. Learn more
- BrandEasyGoProducts
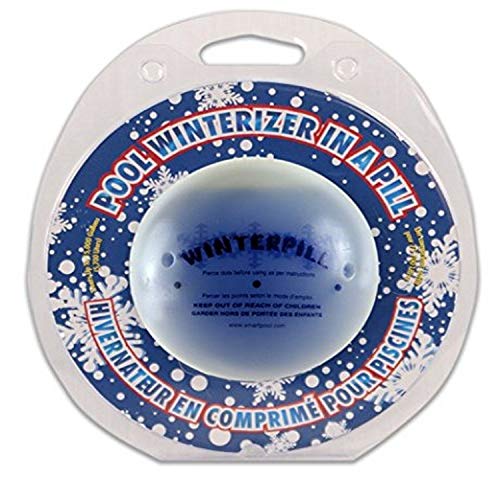
- VC Score8.8
BCP Score is a ranking system developed by bestcleanerproducts.com. BCP Score has no relationship or impact from any manufacturers or sales agent websites. Learn more
- BrandSeaKlear

- VC Score8.6
BCP Score is a ranking system developed by bestcleanerproducts.com. BCP Score has no relationship or impact from any manufacturers or sales agent websites. Learn more
- BrandRx Clear
Last update on 2026-10-08 / Affiliate links / Images, Product Titles, and Product Highlights from Amazon Product Advertising API


How to Refinish a Fiberglass Pool

How Do You Keep Raccoons Out of Your Pool?

How to Fix Cyanuric Acid in Your Pool

How to Shape a Pool Cue Tip to Stop Miscues

12 Best Automatic Vacuum For Intex Above Ground Pool of 2026 To Keep Vinyl Floors Spotless

10 Best Automatic Pool Vacuum For Above Ground Pool of 2026 To End Manual Scrubbing

How Much Pool Clarifier Should You Use for Your Pool Size?

How Much Does a Pebble Tec Pool Cost to Build or Resurface?


