
How to Treat New Pool Water in the Right Order

Turn on the pump and balance first. Fresh water looks clean, but adding strong chlorine too soon can cause milky clouds or surface stains. The right sequence is to run circulation, check your starting levels, and balance total alkalinity and pH first. Alkalinity acts as a buffer that stops wild pH swings. Once those two readings settle, you can add stabilizer to shield chlorine from sunlight and finally sanitize the pool.
Your exact routine depends on your water source and pool surface. Well water often carries dissolved iron, which requires a metal preventer so the water does not turn green or brown. Vinyl liners need dry chemicals dissolved in a bucket first to prevent bleaching, while fresh plaster needs proper calcium levels to protect the finish. Here is the exact order to treat your water safely from the first fill.
The Short Version
- Start your pool pump immediately after filling to get the fresh water circulating, and let it run for at least 8 to 12 hours before taking any water measurements.
- Add a sequestering agent (a liquid that keeps dissolved metals from staining pool surfaces) right away if your water came from a private well or an older municipal line.
- Balance your water chemistry in strict sequence: adjust total alkalinity first, set the pH second, and balance calcium hardness third.
- Introduce cyanuric acid stabilizer to protect your water from sunlight, add your initial sanitizer dose, and let the system run for 24 continuous hours before letting anyone swim.
Starting Circulation and Checking Baseline Water Levels
Fresh water straight from a garden hose or a water truck is completely raw. It has not circulated through a filter, it has no sanitizer, and its mineral content reflects your local water source rather than a balanced swimming environment. Getting the water moving is your very first priority.
- Inspect your equipment and start the pump. Walk around the equipment pad before flipping the breaker. Make sure the pump strainer basket is seated properly, the pump lid is clamped tight, and the filter air relief valve is open. Turn on the pump to prime it. Once water shoots out of the air relief valve in a steady stream, close the valve. Check the pressure gauge on top of your filter tank to establish your clean baseline pressure. If your setup uses sand, verify that your filter has the proper bed depth; our guide on how much sand a pool filter needs explains how proper sand volume keeps your water from staying cloudy during this initial run.
- Let the water circulate for 8 to 12 hours. Raw fill water is cold, stratified, and unevenly mixed. Running the pump continuously mixes the water completely from top to bottom and draws out fine dust or sediment left behind during pool construction or liner installation. Do not add balancing chemicals during this initial mixing period. Let the pump do its job so you get an accurate reading later.
- Measure your starting water numbers. Once the water has circulated thoroughly, collect a sample from elbow depth, away from the return jets. Use liquid reagent drops or dip strips to record your baseline total alkalinity, pH, and calcium hardness. Write these numbers down in a notebook. Knowing where your water starts prevents you from over-correcting later on.
Binding Metals if You Filled From a Well
Filling a pool from a well introduces high concentrations of dissolved minerals, particularly iron, copper, and manganese. Municipal tap water can also carry dissolved copper from aging household pipes. These metals remain invisible while dissolved in acidic or neutral water, looking completely clear to the naked eye.
The problem starts when you add chlorine. Chlorine oxidizes dissolved metals almost instantly. The moment high-strength sanitizer contacts dissolved iron, the water rusts right before your eyes, turning rusty brown, dark orange, or tea green. Dissolved copper turns the water turquoise or bright emerald green. If left untreated, these oxidized minerals settle against your pool floor and bake into the finish, leaving dark stains that are difficult to scrub off.
To prevent this reaction, add a metal sequestering agent (a liquid that keeps dissolved metals from staining by locking them in solution) before adding any chlorine. Pour the recommended dose around the perimeter of the pool with the pump running on high speed. Let the sequestering agent circulate for at least 24 to 48 hours. This waiting period allows the product molecules to bind to every metal ion in the water so chlorine cannot oxidize them later.
Balancing Total Alkalinity, pH, and Calcium Hardness in Order
Pool chemicals behave like falling dominoes. Changing one chemical directly alters the behavior of the next. Adjusting them out of order forces you to chase shifting numbers, wasting chemicals and clouding the water. Always balance your water in this exact order.
- Adjust total alkalinity first. Total alkalinity serves as a buffer that prevents wild pH swings. When alkalinity is too low, your pH bounces erratically whenever rain falls or swimmers enter. When alkalinity is too high, your pH locks up and becomes nearly impossible to lower. Aim for 80 to 120 parts per million (ppm). If your reading is below 80 ppm, add sodium bicarbonate (baking soda) in small doses around the perimeter. If alkalinity is above 120 ppm, add muriatic acid or dry sodium bisulfate to lower it. Wait at least 4 to 6 hours with the pump running before checking the reading again.
- Dial in the pH second. Once alkalinity is stable, set your pH level. The ideal range is 7.2 to 7.6. Keeping pH in this zone protects your equipment from corrosion, prevents eye irritation, and allows your sanitizer to work at peak power. If your pH is below 7.2, raise it with soda ash. If it reads above 7.6, add small amounts of muriatic acid directly over the deep-end return jet. Always mix acid into a bucket of water before pouring it into the pool, and never pour raw acid into the skimmer.
- Correct calcium hardness third. Calcium hardness refers to the dissolved mineral level that protects pool walls and equipment from aggressive water. If water has too little calcium, it turns corrosive and dissolves minerals directly out of concrete, plaster, or tile grout. For concrete, gunite, or plaster pools, maintain calcium hardness between 200 and 400 ppm using calcium chloride flakes. Vinyl liners and fiberglass pools do not leach minerals, but they still require a baseline level of 150 to 250 ppm to prevent foaming and protect metal ladders, heater cores, and light fixtures. Dissolve calcium chloride in a bucket of cold water before adding it, as it generates heat as it dissolves.
Introducing Stabilizer and Sanitizer to Protect Your Water
With your water balanced and buffered, you can safely sanitize the pool without causing chemical cloudiness or surface scaling. Sunlight and bacteria are the two main threats to clean water, and you handle them in two straightforward steps.
- Add cyanuric acid stabilizer. Cyanuric acid acts as sunscreen that keeps chlorine from breaking down under direct ultraviolet sunlight. Without stabilizer, the sun can burn off up to ninety percent of free chlorine within two hours, leaving your pool open to algae growth. Target a stabilizer level between 30 and 50 ppm for traditional chlorine pools. Cyanuric acid dissolves very slowly. The safest way to add granular stabilizer is to pour it into an old sock, tie the top, and hang the sock in front of a return jet or leave it inside the skimmer basket. Squeeze the sock occasionally over the next day until the granules dissolve completely.
- Add your initial sanitizing shock. Shock refers to a high-strength dose of chlorine added to sanitize fresh water and eliminate any organic matter introduced during filling. Calculate your pool volume in gallons and add enough liquid chlorine or dissolved calcium hypochlorite to raise free chlorine to 3.0 to 5.0 ppm. If you plan to run a saltwater chlorinator, review how to use pool salt safely during initial pool startups; salt cells work best after you build an initial chlorine residual with standard liquid shock first.
- Run the pump continuously for 24 hours. Let the pump circulate day and night after adding your shock dose. Continuous circulation pushes the sanitizer through every pipe, main drain, and return jet, guaranteeing that no stagnant pockets of untreated water remain in the plumbing lines.
First-Fill Mistakes to Avoid
Small shortcuts during a fresh pool fill can lead to stained plaster, bleached liners, or milky water that takes weeks to clear. Keep these practical precautions in mind as you work through the startup process:
- Never throw dry granular shock directly onto a vinyl liner. Heavy chlorine granules sink straight to the pool floor. Undissolved granules resting against vinyl pull the pigment out of the material, leaving permanent white spots and making the liner brittle. Always dissolve granules in a five-gallon bucket of pool water first.
- Never add multiple chemicals at the exact same time. Adding acid and chlorine together produces toxic gas. Adding calcium hardness increaser and alkalinity increaser at the same time turns your water into a milky haze of insoluble chalk. Space each chemical addition out by at least two to four hours.
- Do not shock well water before using a metal sequestering product. Shocking high-iron well water without a sequestering agent will instantly turn your clear water brown or green, turning your first fill into a major cleanup project.
- Do not guess your pool volume. Dosing chemicals relies entirely on exact gallon capacity. Over-dosing acid can ruin pool heaters, while under-dosing stabilizer leaves your sanitizer useless. Measure your pool dimensions carefully to calculate the true volume before opening chemical jugs.
- Never swim while chemical levels remain high. High shock levels cause skin irritation and burning eyes. Keep everyone out of the pool until chlorine falls back into the standard swimming range.
Confirming Your Water Is Balanced and Ready for Swimmers
Before inviting anyone into the pool, verify that the water is physically clear and chemically safe. Start by evaluating the physical clarity. You should be able to stand at the edge of the shallow end and clearly see the screw heads on the main drain cover at the bottom of the deep end. If the water looks dull, milky, or cloudy, the filtration system needs more time to polish the water.
Next, pull another water sample from elbow depth and check all five primary parameters. Confirm your numbers fall within these standard target ranges:
- Free Available Chlorine: 1.0 to 3.0 ppm (safe and comfortable for skin and eyes)
- pH Level: 7.2 to 7.6 (matches human tear ducts to prevent burning)
- Total Alkalinity: 80 to 120 ppm (buffers the pH against rain and swimmer waste)
- Calcium Hardness: 200 to 400 ppm for plaster; 150 to 250 ppm for vinyl and fiberglass
- Cyanuric Acid: 30 to 50 ppm (shields chlorine from ultraviolet rays)
If your chlorine level reads above 5.0 ppm after the startup shock, wait another afternoon. Sunlight will naturally lower the chlorine reading into the safe 1.0 to 3.0 ppm zone. Once your readings match these target numbers and the water is clear, your fresh pool is safe for swimming.
If your water remains cloudy after three full days of filtering, or if unusual stains appear across the floor despite using a sequestering agent, pause chemical additions. Take a water sample to a local pool supply center for a complete professional mineral analysis to rule out high total dissolved solids or hidden mineral imbalances.
Helpful Pool Cleaners and Clarifying Aids for a Fresh Fill
Filling a pool kicks up plaster dust in newly built concrete pools and pulls fine airborne dirt into above-ground and vinyl pools. Even after balancing chemicals, microscopic particles can stay suspended in the water because they are too small for sand or cartridge filters to trap easily.
Startup clarifiers help solve this issue by acting like a magnet for fine debris. They bind microscopic particles together into larger clumps, allowing your pool filter to capture them quickly. Using a clarifier alongside a reliable pool cleaner speeds up water clearing substantially during the first week of operation.
When selecting a cleaner for fresh pool water, choose a design that matches your specific pool finish and cleaning setup:
- Robotic pool cleaners: These self-powered units feature internal collection canisters and operate independently from your pool pump. They excel at picking up fine silt and plaster dust without sending that debris through your filter tank, keeping filter pressure low during the startup phase.
- Suction-side pool cleaners: These cleaners connect directly to a dedicated suction port or skimmer line, using the power of your main pool pump to vacuum the floor. They work well for daily maintenance, but ensure your pump basket stays clear when picking up heavy startup debris.
- Pressure-side cleaners: Connecting to the water return line, these cleaners use water pressure to sweep debris into an attached collection bag, preventing heavy dirt from overloading your main filtration system.
Before purchasing a cleaner, verify compatibility with your pool surface. Slick fiberglass and smooth waterline tile require cleaners with soft brushes or specialized climbing rings, while rough plaster and concrete need durable rubber skirts and aggressive scrubbing brushes. For electrical safety, ensure any power supply unit plugs into a protected outdoor GFCI outlet set back at least 10 feet from the water edge, and never run any cleaner while people are swimming.

- VC Score9.2
BCP Score is a ranking system developed by bestcleanerproducts.com. BCP Score has no relationship or impact from any manufacturers or sales agent websites. Learn more
- BrandClorox Pool&Spa

- VC Score9.2
BCP Score is a ranking system developed by bestcleanerproducts.com. BCP Score has no relationship or impact from any manufacturers or sales agent websites. Learn more
- BrandGLB
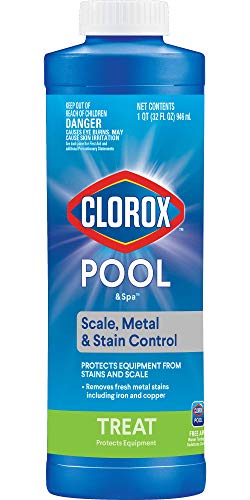
- VC Score9.2
BCP Score is a ranking system developed by bestcleanerproducts.com. BCP Score has no relationship or impact from any manufacturers or sales agent websites. Learn more
- BrandClorox

- VC Score9.0
BCP Score is a ranking system developed by bestcleanerproducts.com. BCP Score has no relationship or impact from any manufacturers or sales agent websites. Learn more
- Brandpoolrx
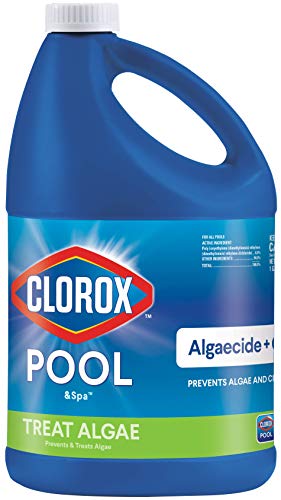
- VC Score9.0
BCP Score is a ranking system developed by bestcleanerproducts.com. BCP Score has no relationship or impact from any manufacturers or sales agent websites. Learn more
- BrandClorox Pool & Spa

- VC Score9.0
BCP Score is a ranking system developed by bestcleanerproducts.com. BCP Score has no relationship or impact from any manufacturers or sales agent websites. Learn more
- BrandPool RX
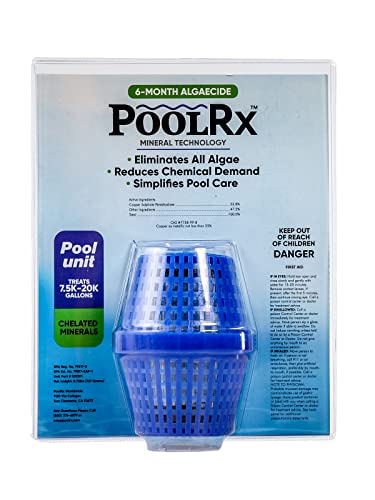
- VC Score8.8
BCP Score is a ranking system developed by bestcleanerproducts.com. BCP Score has no relationship or impact from any manufacturers or sales agent websites. Learn more
- Brandpoolrx

- VC Score8.6
BCP Score is a ranking system developed by bestcleanerproducts.com. BCP Score has no relationship or impact from any manufacturers or sales agent websites. Learn more
- BrandMAV AquaDoc

- VC Score7.8
BCP Score is a ranking system developed by bestcleanerproducts.com. BCP Score has no relationship or impact from any manufacturers or sales agent websites. Learn more
- BrandMAV AquaDoc
Last update on 2026-10-08 / Affiliate links / Images, Product Titles, and Product Highlights from Amazon Product Advertising API
FAQs
How long must the pump run after filling the pool?
Keep your pool pump running continuously for at least 24 to 48 hours after filling. This extended run time mixes cold fill water, distributes startup chemicals evenly, and filters out initial construction dust or hose sediment. Once your water is balanced, clear, and sanitized, you can return to your regular daily timer cycle of 8 to 12 hours per day.
What should I do if filling from a well turns the water brown or green?
Do not add more shock if well water discolors right after filling. Brown or green water from a well is caused by oxidized iron or copper reacting with chlorine, not algae. Turn the pump on high and add a full dose of metal sequestering agent to hold the minerals in suspension. Run the filter continuously for 48 hours, rinse or backwash the filter element, and let the color fade before adding more chlorine.
How long after treating brand new water can we swim?
You can safely swim once your water is balanced and free chlorine drops below 4.0 ppm, which typically takes 24 to 48 hours after your initial shock treatment. Swimming in fresh water with chlorine levels above 5.0 ppm or a pH below 7.2 can irritate skin, redden eyes, and damage swimwear. Check your water with a dip strip or drop kit to confirm safe numbers before diving in.
Do I need to add stabilizer right away?
Yes, outdoor pools filled with fresh water need cyanuric acid stabilizer added during the initial treatment sequence. Fresh tap or well water contains zero stabilizer, meaning ultraviolet rays from the sun can destroy all of your free chlorine within two hours. Adding 30 to 50 ppm of stabilizer protects your chlorine investment and prevents immediate algae growth.


How to Refinish a Fiberglass Pool

How Do You Keep Raccoons Out of Your Pool?

How to Fix Cyanuric Acid in Your Pool

How to Shape a Pool Cue Tip to Stop Miscues

12 Best Automatic Vacuum For Intex Above Ground Pool of 2026 To Keep Vinyl Floors Spotless

10 Best Automatic Pool Vacuum For Above Ground Pool of 2026 To End Manual Scrubbing

How Much Pool Clarifier Should You Use for Your Pool Size?

How Much Does a Pebble Tec Pool Cost to Build or Resurface?








