
How to Replace a Pool Filter Safely

Release all tank pressure before opening anything. Cutting the power and turning the air release knob lets trapped air vent safely so the lid cannot blow off. After that, simply unlock the tank clamp, swap the dirty filter cartridge for a clean one, and lubricate the rubber sealing ring before closing the tank.
A few details change based on your specific setup. Small above-ground systems usually feature plastic lock rings you can turn by hand, while large in-ground tanks rely on heavy metal clamps holding high water pressure. Exact sizing matters just as much, so measuring the height, outer diameter, and center core holes prevents buying the wrong piece if the original part number faded away. Follow these clear steps to finish the job cleanly and keep your water flowing properly.
The Short Version
- Cut power completely: Switch off the circulation pump at the main electrical breaker so the motor cannot kick on unexpectedly while your hands are on the equipment.
- Release all pressure: Open the air relief valve (the small knob on top of the tank that lets out trapped air) and wait until the round pressure dial drops to zero before touching any clamps.
- Swap and seal: Open the housing, lift out the old cartridge (the pleated cylinder that catches dirt), clean the tank belly, and lubricate the rubber sealing ring with silicone grease.
- Bleed air on restart: Keep the air knob open when you restart the motor, stand clear of the tank lid, and close the valve only when a steady stream of water shoots out.
Shutting Off Power and Relieving Pressure Safely
Working on a pool filter requires complete respect for water pressure. A sealed filter housing can hold significant pressure when running. If you loosen a clamp while that force remains trapped inside, the heavy plastic lid can fly off violently. This can shatter nearby PVC plumbing or cause serious personal injury. Taking two minutes to shut down the system properly prevents equipment damage and keeps you completely safe.
- Cut the electrical power at the circuit breaker. Do not simply turn off the pump using an automated smartphone app or a mechanical dial timer. Timers can cycle back on automatically, and mobile software can glitch. Walk to your electrical sub-panel or main breaker box and flip the switch to off. If your pool pump plugs into an outdoor GFCI outlet (a protected ground-fault outlet with a weatherproof cover), unplug the heavy cord directly from the receptacle.
- Inspect the pressure gauge. Look closely at the pressure gauge (the round dial on top of the tank that shows water pressure). While the pump is running, this dial typically reads between 10 and 20 pounds per square inch. When the pump stops, the dial should begin to drop, but trapped air pockets can maintain dangerous force inside the dome.
- Open the air relief valve. Find the air relief valve (a small knob or lever located on top of the tank next to the gauge). Turn this knob counter-clockwise by hand. You will immediately hear a loud, sharp hissing sound as pressurized air shoots out of the small port. Keep your face and eyes angled away from the opening so mist or debris does not blow into your eyes.
- Wait for water to emerge. Keep the relief valve open until the hissing sound fades out completely and a solid trickle of pool water runs down the side of the tank. Look back at the round pressure dial. Confirm that the needle sits firmly against the zero mark. Never attempt to loosen a clamp or turn a locking ring until the needle rests on zero.
- Close your plumbing shut-off valves. If your equipment pad sits below the waterline of the pool, gravity will push water backward through the pipes while the housing is open. Turn the intake and return handles to the closed position to prevent pool water from flooding your yard while you work. If you are doing late-season maintenance, you can also review how to protect your pool pump in winter to keep plumbing lines safe from freezing temperatures.
How to Measure and Pick the Right Replacement Filter
A pool filter cartridge is a cylindrical core wrapped in pleated fabric that strains fine particles out of the water. Over several seasons of catching body oils, sunscreen, dust, and fine silt, the fabric fibers become compacted and permanently clogged. Routine hose rinsing stops lowering the tank pressure, signaling that the material has reached the end of its working life. To get water flowing freely again, you need an exact replacement match that fits snugly inside your housing.
The fastest way to identify your replacement element is to look at the hard rubber end caps on your old cartridge. Manufacturers typically mold the part number directly into the plastic rubber on the top or bottom rim. If the lettering has degraded from exposure to pool sanitizers, you can easily gather three physical measurements using a standard tape measure:
- Outside diameter: Measure directly across the widest circular top of the cartridge from outer edge to outer edge. Small above-ground pool filters typically measure around 4 to 5 inches across, while large in-ground systems measure between 7 and 9 inches across.
- Total length: Lay the cartridge flat and measure from the outer surface of the top plastic end cap down to the outer surface of the bottom end cap. Do not include extended molded handles or raised locating nubs in this length unless the original brand specification calls for them.
- Center hole openings: Measure the inside diameter of the opening on both ends. Some cartridges have open round holes on both the top and bottom to slide over internal pipes. Others feature an open hole on the bottom and a solid molded handle on the top.
Pay close attention to the listed surface area of the fabric, which is marked in square feet. A 100-square-foot filter and a 120-square-foot filter might share similar outer dimensions, but the larger unit packs significantly more pleats around the center core. Matching your exact pump flow rate and housing size prevents water from slipping past loose seals without being filtered.
Opening the Tank and Swapping the Filter Element
Once the pressure dial reads zero and the water valves are closed, you can open the housing. Take your time during this step to avoid stripping metal hardware or gouging the plastic lip where the two halves meet.
- Remove the tank drain plug. Locate the threaded drain plug at the very bottom base of the filter tank. Twist it counter-clockwise and pull it out. Allowing the standing water inside the tank to drain onto the ground lightens the housing and carries away heavy grit that settled at the bottom.
- Loosen the belly band or locking collar. On small above-ground cartridge systems, the lid is held by a large threaded locking ring that you twist counter-clockwise by hand. On larger in-ground systems, a heavy metal clamp band wraps around the center seam, held tight by a long brass bolt and heavy spring. Use a socket wrench to loosen the brass nut. Back the nut off until the spring loosens completely and the metal clamp pulls free from the tank rim.
- Lift off the top housing dome. Carefully wiggle the top lid back and forth to break the suction seal. Never jam a flathead screwdriver or metal pry bar into the seam between the two halves. Metal tools will scratch or crack the plastic lip, leading to persistent leaks that cannot be fixed with a new seal. If the lid feels stuck, tap the side gently with a rubber mallet or the palm of your hand until the seal releases, then lift the lid straight up.
- Pull the old cartridge straight out. Lift the dirty cylinder out of the lower tank body. If your filter uses a multi-cartridge cluster, first lift off the top plastic manifold that connects the elements together, then remove each cartridge one at a time. Old filters can be heavy because trapped silt and wet fabric hold gallons of water.
- Wash out the lower tank belly. Take a garden hose and spray down the inside walls and base of the lower tank. Flush all settled dirt, hair, and sand out through the open bottom drain port. Once the tank floor is spotless, screw the drain plug back into the base hand-tight.
- Slide the fresh cartridge into position. Lower the new replacement cylinder into the housing. Make sure the open hole on the bottom aligns squarely over the raised guide pipe at the bottom of the tank. Press down firmly with both hands until the cartridge sits level and secure on its base. For multi-element units, place the top guide manifold back over the upper openings, making sure every cylinder seats into its matching port.
Inspecting and Lubricating the Rubber Sealing Ring
The O-ring (the thick rubber sealing ring that prevents leaks between the tank halves) keeps high-pressure water inside the housing. If this ring pinches, cracks, or dries out, water will spray out around the belly band the moment you turn the pump back on. Follow this quick inspection checklist every single time you open the filter:
- Remove and stretch the rubber ring: Lift the rubber sealing ring completely out of its plastic channel. Bend the rubber between your fingers every few inches, checking for tiny hairline cracks, flattened spots, splits, or rough dry patches. If the rubber feels brittle or stiff, discard it and install a fresh ring.
- Wipe the seating channel clean: Use a clean microfiber cloth to wipe out the groove where the ring rests. Remove all accumulated dirt, dead algae, and hard water scale. Even a tiny grain of sand trapped beneath the rubber ring can create a pressurized spray.
- Coat with silicone pool lubricant: Squeeze a nickel-sized amount of silicone-based or Teflon-based pool lubricant onto your fingers. Rub a smooth, even film around the entire circumference of the ring until it looks glossy. Lubrication prevents the rubber from pinching or dragging when the clamp tightens.
- Avoid petroleum jelly: Never use household petroleum jelly or motor oils on pool rubber. Petroleum products break down synthetic rubber compounds, causing the ring to swell, soften, lose its shape, and fail within a few weeks.
- Seat the ring flat: Press the slick ring back into its clean channel. Run your index finger around the entire loop to confirm that the rubber sits flat without any twists or bunched sections.
Restarting the Pump and Bleeding Out Remaining Air
Reassembling the tank and restarting the circulation pump requires methodical care. The empty filter housing currently holds cubic feet of air that must be pushed out before full water circulation can resume.
- Reinstall the tank lid and clamp band. Place the upper dome straight down over the lower base, making sure the rubber ring stays flat in its groove. Position the metal clamp band around the center lip. Tighten the brass bolt with your socket wrench. As the nut tightens, tap around the outside of the metal band with a rubber mallet to help the clamp seat evenly. Continue tightening until the coils on the tension spring press firmly together according to the guide on the tank label.
- Ensure the air relief valve is open. Verify that the small knob on top of the dome remains turned to the open position. Never start a circulation pump with a closed relief valve after opening the tank.
- Reopen all plumbing valves. Open your suction intake valves and pool return lines. Check the clear lid on your pump strainer basket to ensure the pot holds water to prime the motor.
- Stand clear and restore power. Walk over to your circuit breaker panel or switch box. Stand to the side of the equipment, well clear of the filter dome lid, and flip the breaker on. The motor will begin humming and pulling water into the system.
- Bleed the trapped air. As water enters the filter housing, it forces trapped air upward. You will hear a loud rush of air blowing out through the open relief valve, and air will churn out of the pool return jets. Stay clear of the tank while this air purges.
- Close the valve on a solid stream. The moment water begins shooting out of the relief valve port in a steady, continuous stream without sputtering air, turn the knob clockwise to close it tight.
- Record your clean baseline pressure. Look at the round dial on the pressure gauge. The needle will settle at your clean operating baseline, typically between 8 and 15 pounds per square inch depending on your plumbing layout. Use a water-resistant marker to write this starting number on the side of the tank. When your pressure rises 8 to 10 pounds above this clean starting mark, you will know the pleats are full of dirt and require service. Maintaining clear water also depends on chemistry, so take time to review how to measure chlorine in a pool for safe swimming alongside your fresh filtration schedule.
Choosing the Right Replacement Tools and Accessories
Keeping your filtration system running smoothly depends on pairing the right physical parts with practical protective accessories. When shopping for replacement filter cartridges, look for heavy-duty polyester or trilobal filtration fabrics. These fabrics feature sharp, diamond-shaped fibers that catch fine dirt particles across a larger surface area than flat woven paper, keeping water clear for longer stretches.
You can also protect your new cartridge from premature clogging by using pre-filter skimmer socks. These elastic mesh nets stretch over your pool skimmer baskets to catch hair, pine needles, bugs, and coarse yard debris before anything enters the underground plumbing. This basic layer of protection keeps heavy muck away from your filter pleats, significantly extending the time between manual cleanings.
Before purchasing replacement elements, verify the exact model number of your filter housing rather than guessing based on pool gallons alone. Check the outer diameter, height, and core opening dimensions against your equipment manual. Selecting elements built with durable plastic core supports and reinforced end caps ensures your filter can withstand high flow rates without collapsing inward under pressure.

- VC Score9.4
BCP Score is a ranking system developed by bestcleanerproducts.com. BCP Score has no relationship or impact from any manufacturers or sales agent websites. Learn more
- BrandIntex

POOLPURE PCC105-PAK4 Replaces Pentair CCP420, 178584, Ultral-A6, Unicel C-7471, 817-0106,
View on Amazon- VC Score9.4
BCP Score is a ranking system developed by bestcleanerproducts.com. BCP Score has no relationship or impact from any manufacturers or sales agent websites. Learn more
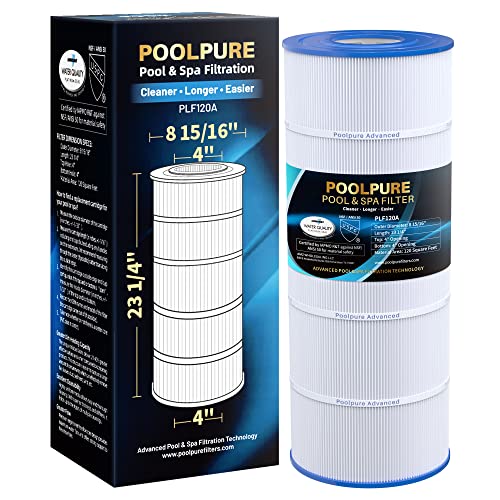
- BrandPOOLPURE
- VC Score9.4
BCP Score is a ranking system developed by bestcleanerproducts.com. BCP Score has no relationship or impact from any manufacturers or sales agent websites. Learn more
- BrandPOOLPURE

- VC Score9.0
BCP Score is a ranking system developed by bestcleanerproducts.com. BCP Score has no relationship or impact from any manufacturers or sales agent websites. Learn more
- BrandIMPRESA

- VC Score9.0
BCP Score is a ranking system developed by bestcleanerproducts.com. BCP Score has no relationship or impact from any manufacturers or sales agent websites. Learn more
- BrandBlack Diamond Stoneworks
- VC Score9.0
BCP Score is a ranking system developed by bestcleanerproducts.com. BCP Score has no relationship or impact from any manufacturers or sales agent websites. Learn more
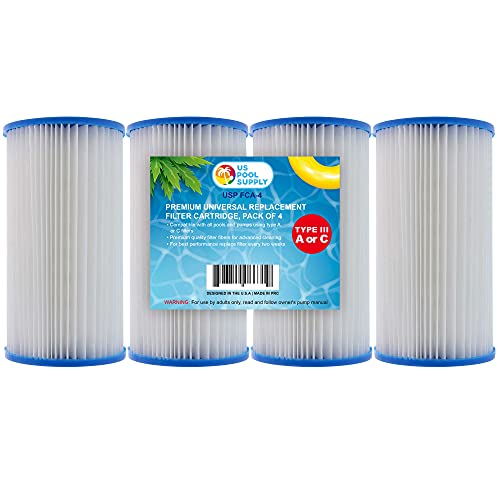
- BrandU.S. Pool Supply

- VC Score8.8
BCP Score is a ranking system developed by bestcleanerproducts.com. BCP Score has no relationship or impact from any manufacturers or sales agent websites. Learn more
- BrandIntex

- VC Score8.8
BCP Score is a ranking system developed by bestcleanerproducts.com. BCP Score has no relationship or impact from any manufacturers or sales agent websites. Learn more
- BrandIMPRESA

- VC Score6.8
BCP Score is a ranking system developed by bestcleanerproducts.com. BCP Score has no relationship or impact from any manufacturers or sales agent websites. Learn more
- BrandTonGass

- VC Score-
BCP Score is a ranking system developed by bestcleanerproducts.com. BCP Score has no relationship or impact from any manufacturers or sales agent websites. Learn more
- BrandKimiBEE
Last update on 2026-10-08 / Affiliate links / Images, Product Titles, and Product Highlights from Amazon Product Advertising API
FAQs
How do I know when to replace a pool filter cartridge instead of cleaning it?
Cleaning removes loose surface dirt, but fine oils and mineral scale eventually saturate the fabric weave over two to three seasons. If you thoroughly rinse your cartridge with a hose and the pressure gauge immediately returns to more than 5 pounds above your clean starting baseline, the material is clogged permanently. You should also replace the cartridge immediately if you discover ripped pleats, a cracked plastic center core, or brittle rubber end caps.
Why are air bubbles blowing out of my pool return jets after a filter change?
When you open the filter housing, the tank and adjacent pipes fill with ambient air. When you restart the pump, that volume of air gets pushed through the lines and exits into the pool through the return wall fittings. These bubbles should stop completely within two minutes once all air purges through the open relief valve. If bubbling continues indefinitely, check the clear pump strainer lid to make sure its rubber ring is not drawing in outside air on the suction side.
Do I really need to grease the rubber ring every time I open the filter?
Yes, applying a fresh film of silicone lubricant protects the rubber from friction tears and keeps the material supple. When you torque the heavy metal clamp band closed, the metal presses down with hundreds of pounds of mechanical force. Lubricant allows the rubber to slide smoothly into its molded groove without pinching or bunching, which prevents leaks and keeps the ring from sticking to the lid during future maintenance.
What should I do if the filter tank leaks water along the center seam after startup?
Immediately turn off the electrical breaker and open the air relief valve to vent all water pressure. Never attempt to tighten clamp bolts or tap the metal band while the housing holds pressure, because sudden shifts can cause the tank to fail. Once the gauge drops to zero, loosen the clamp, lift the dome, clean out any grit stuck under the rubber ring, realign the seal, and tighten the band evenly before trying again.


How to Refinish a Fiberglass Pool

How Do You Keep Raccoons Out of Your Pool?

How to Fix Cyanuric Acid in Your Pool

How to Shape a Pool Cue Tip to Stop Miscues

12 Best Automatic Vacuum For Intex Above Ground Pool of 2026 To Keep Vinyl Floors Spotless

10 Best Automatic Pool Vacuum For Above Ground Pool of 2026 To End Manual Scrubbing

How Much Pool Clarifier Should You Use for Your Pool Size?

How Much Does a Pebble Tec Pool Cost to Build or Resurface?


