
How to Repair a Fiberglass Pool Slide

Most pool owners assume that a cracked slide is finished and bound for the trash. In reality, you can safely fix the damage at home by filling shallow chips with waterproof epoxy and reinforcing through-cracks with fiberglass cloth. Taking care of these rough spots right away keeps exposed glass fibers from scratching swimmers or snagging swimsuits.
The right fix depends on where the crack sits and how deep it goes. Light surface gouges along the slick sliding bed sand down and fill easily, but deep breaks across weight-bearing ladder steps or structural legs can make the slide unsafe to ride. The weather matters too, since the resin needs dry air and warm temperatures to harden before water runs again. Checking the slide carefully tells you what steps will make it safe for the next ride.
The Short Version
- Identify the crack depth: Hairline surface marks only need a waterproof filler, but cracks that go all the way through the fiberglass body require reinforced fiberglass cloth on the back.
- Prep thoroughly: Clean the area with rubbing alcohol or acetone, sand away loose edges, and wipe off all dust so your repair compound can form a permanent bond.
- Smooth the patch flush: Feather the edges by sanding from medium grit down to ultra-fine wet sandpaper so the repaired surface feels completely seamless to sliding swimmers.
- Know when to stop: Never attempt a DIY patch on broken support legs, cracked ladder rungs, or warped flumes that flex heavily under normal body weight.
Inspecting the Slide Damage: Surface Cracks Versus Deep Breaks
Before you buy any materials, you need to understand what kind of damage you are looking at. A fiberglass pool slide is built in layers. On the outside is the gelcoat (the smooth, shiny outer layer that gives the slide its color and lets riders glide without friction). Beneath that slick surface sits woven fiberglass cloth bonded together with heavy resin. This thick inner core gives the slide its strength and holds up riders as they zoom down into the water.
Damage usually falls into two categories: cosmetic surface flaws or structural breaks. You can figure out which one you have by running your fingers carefully over the area and checking the underside of the flume bed.
Use this quick checklist to diagnose the issue:
- Crazing (spiderweb hairline surface cracks): These look like tiny shattered glass lines across the gelcoat. They happen when sunlight and temperature shifts age the surface over several seasons. Crazing does not go through the slide body and rarely catches skin, making it a purely cosmetic repair.
- Surface chips and gouges: Small chunks of the outer gelcoat have flaked away, often leaving rough white or brown fiberglass fibers exposed underneath. These chips can snag bathing suits or scratch legs, so they need prompt filling.
- Through-cracks: These are visible cracks that extend completely through the fiberglass shell. If you press firmly on one side of the crack and the other side moves, the structural core is broken. Water can seep into the laminate layers, causing delamination (fiberglass layers separating from each other and turning soft).
- Underside fractures: Look underneath the slide with a flashlight. If you see dark lines, splintered glass strands, or white stress marks where the flume curves or bolts to the ladder, the slide has suffered structural strain.
Cosmetic chips and surface crazing can be fixed in an afternoon right on the pool deck. A through-crack on the sliding bed can also be repaired at home, but only if you have clear access to the back of the slide to add structural reinforcement.
Supplies You Need for Fiberglass Repair
Fixing a slide requires supplies that withstand pool chemicals, direct sunlight, and continuous running water. Regular household caulk, silicone, or plastic glues will quickly peel off under the pressure of sliding bodies.
For surface gouges and chips, you need a two-part waterproof epoxy putty or a dedicated gelcoat repair paste. A moldable epoxy putty works well for small dings because you knead the two components together with your fingers and press it straight into the void. It hardens completely solid without shrinking or sagging, creating a durable base that you can sand flat.
For cracks that split through the fiberglass body, you will need a fiberglass resin repair kit that includes liquid polyester or epoxy resin, liquid hardener, and woven fiberglass cloth or matting. The woven cloth acts like rebar in concrete, distributing weight across the break so the patch does not snap the first time an adult uses the slide.
You will also need proper preparation and finishing tools:
- Rubbing alcohol or pure acetone to strip away suntan lotions, algae, and grime.
- A clean plastic putty knife or spreader to apply and shape the repair material.
- Dry sandpaper in 80-grit and 120-grit for roughing up the surface so the resin bites in.
- Wet-or-dry sandpaper in 220-grit, 400-grit, and 600-grit (or finer) for smoothing the patch.
- A small handheld drill with an eighth-inch drill bit if you need to stop a running crack.
- Nitrile gloves, safety glasses, and a dust mask to protect your lungs from fiberglass dust.
- Marine polishing compound and paste wax to restore the slick, friction-free shine.
Fixing Chips and Surface Cracks
When you have a small chip or hairline crazing that does not go through the body, your goal is to fill the low spot and blend it flush with the surrounding gelcoat. Follow these steps to complete a surface repair:
- Wash and degrease the area: Scrub the damaged spot with mild soap and water to clear away pool dirt. Wipe it down thoroughly with rubbing alcohol or acetone on a clean rag. Any trace of body oils, sunscreen, or pool water minerals will keep the repair material from sticking.
- Sand the rough edges: Take a small piece of 120-grit sandpaper and lightly sand inside and around the chip. You want to knock down any raised flakes of old gelcoat and create a clean, slightly roughened surface. Wipe away all sanding dust with a dry cloth.
- Mix your filler: If you are using a two-part epoxy putty, cut off equal amounts of the two components. Knead them together in your hands until the material forms a uniform color with no streaks. If you are using a liquid gelcoat paste, mix the paste with its supplied hardener on a disposable piece of cardboard according to the container directions.
- Press the filler into the void: Use your plastic putty knife to press the material firmly into the chip. Push hard enough to force out any trapped air bubbles beneath the putty. Leave the filler slightly higher than the surrounding slide surface, because you will sand it down flat once it cures.
- Allow the patch to cure: Let the material sit undisturbed until it reaches full hardness. Most standard epoxy putties set in under an hour, but you should wait at least 24 hours before heavy sanding and water exposure. Check the packaging instructions to confirm exact cure times for your weather conditions.
Reinforcing Cracks That Go All the Way Through
If a crack penetrates the entire fiberglass shell on the sliding flume, simply smearing putty on top will fail. The slide flexes every time someone rides down, which will pop a surface-only patch out within days. You must reinforce the back of the slide with fiberglass cloth before you finish the top.
- Stop the crack from spreading: Take a small drill with an eighth-inch drill bit and drill a tiny hole directly at each end of the crack. This is called stop-drilling. It relieves internal stress and keeps the crack from traveling farther down the slide over time.
- Grind a shallow groove on the front: Using 80-grit sandpaper or a rotary tool, gently bevel the edges along the front of the crack to make a shallow V-shape. This wider groove gives your repair resin more surface area to grip.
- Prep the underside: Move to the back of the slide. Sand a wide area around the crack, roughly three to four inches past the damage in every direction, using coarse 80-grit sandpaper. Wipe away the dust with acetone. The rough surface gives the fiberglass cloth the mechanical grip it needs.
- Cut your fiberglass cloth patches: Cut two or three pieces of woven fiberglass cloth. Make the first piece roughly two inches wider than the crack on all sides. Cut the second piece an inch larger than the first, and the third piece larger still. Staggering the sizes creates a tapered patch that spreads stress smoothly across the fiberglass.
- Apply the resin and cloth: Mix your fiberglass resin and hardener according to the kit instructions. Working quickly, brush a layer of wet resin directly onto the sanded underside. Lay the smallest cloth patch over the wet resin. Dab your brush against the cloth to saturate it completely until it turns transparent and has no white, dry spots. Lay the next larger piece over it and saturate it with more resin. Repeat with the final layer, pressing out any air bubbles with your brush or a small roller.
- Fill the front seam: Once the structural patch on the underside has cured rock-hard, return to the front of the slide. Fill the shallow V-groove you created earlier with waterproof epoxy putty or gelcoat repair paste, pressing it firmly so it bonds with the back reinforcement. Smooth it with your plastic putty knife and let it cure fully for at least 24 hours.
Sanding and Polishing for a Friction-Free Ride
This is the most critical step for swimmer safety. Raw fiberglass fibers or uneven repair edges will act like coarse sandpaper against bare skin. You need to achieve feathering (sanding edges flat so you cannot feel the transition with your eyes closed).
Start by wrapping 220-grit sandpaper around a firm, flat sanding block. Never use bare fingertips to push the sandpaper, as your fingers will create uneven grooves in the patch. Sand the high spots of your cured putty using circular motions until the patch is nearly level with the original slide surface.
Next, switch to wet sanding. Dip a piece of 400-grit wet-or-dry sandpaper into a bucket of clean water and sand the patch and surrounding area. Keep the slide wet as you work. The water flushes away dust and prevents the paper from clogging. You will notice the patch getting smoother and the hard line between the repair and the original slide disappearing.
Finish the wet sanding stage with 600-grit or 1000-grit paper. Run your bare fingers back and forth across the repair with your eyes shut. If you can feel a ridge, an edge, or a dip, keep sanding. Swimmers will feel any bump that your fingers detect.
Once the surface feels completely seamless, apply a dab of marine polishing compound to a microfiber cloth. Buff the area in circles to restore a glossy shine to the dull, sanded spot. Finish by applying a coat of high-grade marine or car paste wax. This creates the ultra-slick barrier riders need to slide effortlessly down into the pool water.
Red Flags: Signs the Slide Is Unsafe and Must Be Replaced
While many slide problems are simple to patch, some kinds of structural failure cannot be safely fixed at home. A pool slide holds riders high above concrete pool decks and deep water. If the structure fails under a rider, severe injury can occur. If your slide has reached the end of its lifespan, planning a replacement is just as important as planning other seasonal pool costs, such as budgeting how much it costs to open a pool in the spring.
Inspect your slide for these critical red flags before attempting any repair:
- Cracks near ladder steps or mounting points: If you find cracks radiating around the bolts that secure the slide to the pool deck, or where the ladder connects to the flume, the slide is compromised. These areas handle immense leverage, and a glued patch will not hold up under shifting rider weight.
- Extensive structural delamination: If large sections of the slide sound hollow when tapped, or if the flume flexes and bends like cardboard when you push it with your palm, the interior fiberglass layers have separated. Delamination across a wide area cannot be resolved with surface patches.
- Severe ladder and handrail instability: Rust, cracks, or loose fittings in the support legs and safety rails present immediate fall hazards. If the frame wobbles when an adult climbs the steps, the unit is unsafe.
- Splits wider than twelve inches across the flume: A major fracture that runs across the entire sliding runway indicates severe fatigue. Even reinforced cloth may not provide enough strength to protect heavy riders.
If you discover any of these issues, do not risk a DIY repair. Close the slide to swimmers, remove the ladder, and contact a professional pool equipment installer or the slide manufacturer to replace the damaged sections. In situations where an entire aging pool deck setup needs a major overhaul, some homeowners even decide to evaluate how to remove a swimming pool rather than rebuild aging, high-maintenance features.
Choosing the Right Fiberglass Repair Supplies
Picking the right patch materials makes the difference between a repair that lasts five seasons and one that peels off after five rides. Look for kits specifically designed for marine, boat, or pool fiberglass surfaces rather than general construction fillers.
When selecting a repair compound, verify the pot life (how many minutes you have to work with the mixed material before it starts hardening). In hot summer weather, resins and putties cure much faster than on mild spring days. Choosing a compound with at least 15 to 20 minutes of working time gives you plenty of leeway to press the putty into position and shape it cleanly.
Also confirm that the kit specifies 100 percent waterproof performance and resistance to treated pool water. Pool water contains chlorine, salt, and balancing chemicals that easily degrade ordinary household epoxies. A true marine-grade or pool-grade product cures into a hard, non-porous seal that withstands chemical exposure and high-pressure water flow without softening.

- VC Score9.2
BCP Score is a ranking system developed by bestcleanerproducts.com. BCP Score has no relationship or impact from any manufacturers or sales agent websites. Learn more
- BrandEpoxybond Pool Putty
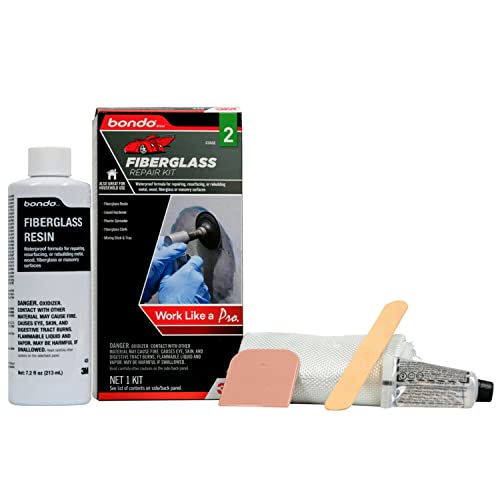
- VC Score9.0
BCP Score is a ranking system developed by bestcleanerproducts.com. BCP Score has no relationship or impact from any manufacturers or sales agent websites. Learn more
- Brand3M

- VC Score8.6
BCP Score is a ranking system developed by bestcleanerproducts.com. BCP Score has no relationship or impact from any manufacturers or sales agent websites. Learn more
- BrandBirllaid
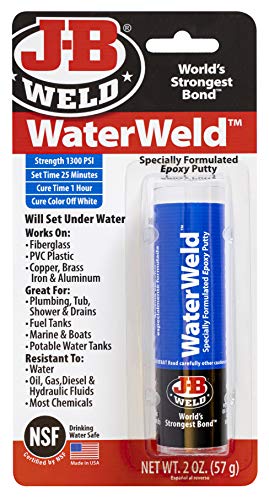
- VC Score8.6
BCP Score is a ranking system developed by bestcleanerproducts.com. BCP Score has no relationship or impact from any manufacturers or sales agent websites. Learn more
- BrandJ-B Weld
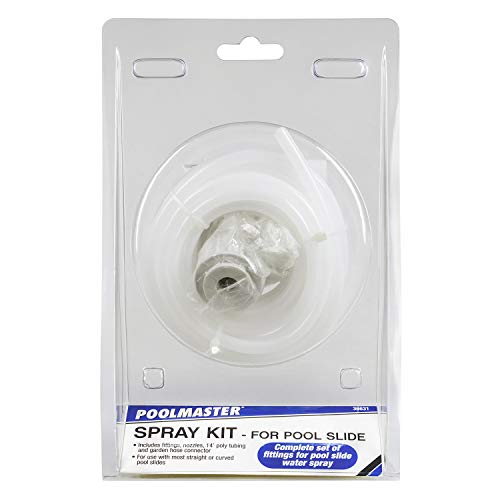
- VC Score8.2
BCP Score is a ranking system developed by bestcleanerproducts.com. BCP Score has no relationship or impact from any manufacturers or sales agent websites. Learn more
- BrandPoolmaster

- VC Score8.2
BCP Score is a ranking system developed by bestcleanerproducts.com. BCP Score has no relationship or impact from any manufacturers or sales agent websites. Learn more
- BrandTvwen

- VC Score8.0
BCP Score is a ranking system developed by bestcleanerproducts.com. BCP Score has no relationship or impact from any manufacturers or sales agent websites. Learn more
- BrandTikfoam

- VC Score7.4
BCP Score is a ranking system developed by bestcleanerproducts.com. BCP Score has no relationship or impact from any manufacturers or sales agent websites. Learn more
- BrandMagicEzy

- VC Score7.4
BCP Score is a ranking system developed by bestcleanerproducts.com. BCP Score has no relationship or impact from any manufacturers or sales agent websites. Learn more
- BrandBetter Boat
Last update on 2026-10-08 / Affiliate links / Images, Product Titles, and Product Highlights from Amazon Product Advertising API
FAQs
Can I use waterproof repair tape to patch a cracked pool slide?
No, waterproof tape should never be used as a permanent repair on a pool slide. While heavy-duty tape can seal air leaks on vinyl floats or stop minor pipe drips, it cannot withstand the friction and weight of sliding bodies. The edges of the tape will quickly peel, trapping water beneath it and exposing swimmers to rough edges that can cause painful cuts.
How long does a fiberglass slide repair take to cure before kids can ride it?
Most two-part epoxies and resins take between 1 and 4 hours to harden, but you should wait at least 24 hours before allowing anyone to use the slide. Full chemical curing takes a full day, especially if the air is humid or temperatures drop overnight. Rushing swimmers onto the slide too early can flex the patch, ruin your sanding work, or pull the bond loose.
Will a DIY fiberglass patch be noticeable on my pool slide?
Yes, the patch will usually look slightly different from the rest of the slide, even if you purchase white or blue repair paste. Factory gelcoat fades gradually under sun exposure, making an exact color match difficult on older slides. However, if you feather the edges flat and buff the spot with marine polishing compound, the repair will feel completely invisible to swimmers sliding down.
Can I fix a through-crack on my slide without taking it apart?
You can repair a through-crack without removing the slide only if you have open, unobstructed access to the underside of the flume bed. If the back of the cracked area is sealed inside an enclosed housing or hidden behind structural supports, you must unbolt and remove that section of the slide to apply the structural fiberglass cloth from behind.

How to Refinish a Fiberglass Pool

How Do You Keep Raccoons Out of Your Pool?

How to Fix Cyanuric Acid in Your Pool

How to Shape a Pool Cue Tip to Stop Miscues

12 Best Automatic Vacuum For Intex Above Ground Pool of 2026 To Keep Vinyl Floors Spotless

10 Best Automatic Pool Vacuum For Above Ground Pool of 2026 To End Manual Scrubbing

How Much Pool Clarifier Should You Use for Your Pool Size?

How Much Does a Pebble Tec Pool Cost to Build or Resurface?








