
How to Patch a Vinyl Pool Liner Without Draining It

Check the tear immediately and seal it underwater rather than emptying the pool. Draining the water shrinks the vinyl and can permanently damage the sand base underneath the floor. Special waterproof pool glue cures right beneath the surface, pressing flat over the rip to stop water loss right away.
The exact fix depends on where the damage sits and how large it has grown. Small snags and punctures patch cleanly, but long tears along a seam often mean replacing the liner completely. Spots above the waterline dry quickly for simple peel-and-stick patches, while submerged holes need a liquid adhesive that bonds through the water. Here is how to prepare the vinyl and seal the leak before it spreads.
Find the leak and check the tear size first
Before buying supplies, locate the damage and check whether a patch will hold. A dropping water level leaves distinct clues behind. If water is escaping quickly, you may notice soft spots in the pool base (the sand or dirt under the liner) or dirt gathering in a small circle on the floor. Escaping water pulls fine silt straight toward the hole.
Use this checklist to find the leak and decide if a patch is the right fix:
- Turn off your pump: Shut off the pool pump so the water calms down completely. Still water makes tiny leaks much easier to trace.
- Run a dye test: Fill a plastic syringe with food coloring. Swim slowly to suspect spots, such as seams, corners, or around ladder steps. Squirt a tiny cloud of dye an inch from the liner. If there is a tear, the colored cloud gets sucked straight into the hole.
- Inspect the pool floor: Put on goggles and look closely along the floor for dropped toys, sharp stones, or small punctures.
- Measure the tear length: Punctures and tears under 6 inches patch easily. If you have a clean slice across a flat floor or wall, a patch will seal it tight. If a tear stretches across several feet, a patch will usually pull loose under the water pressure.
Never drain your pool to find a hole. Water weight keeps your liner stretched in place. Draining the pool causes the vinyl to shrink and pull away from the walls, which can wash out the pool base beneath it.
Liquid glue kits hold better underwater than peel patches
When you look for repair materials, you will find two main options: liquid glue kits and peel-and-stick patches. Both fix vinyl, but they perform differently once submerged.
A liquid glue kit includes a tube of waterproof pool glue (often called vinyl adhesive) and a sheet of flexible vinyl. This adhesive does not merely stick to the surface. It slightly melts the top layer of the patch and liner, chemically welding them together. The glue cures underwater without washing away into the pool. This makes liquid glue kits the best choice for floor tears, underwater punctures, and high-traffic areas where swimmers walk.
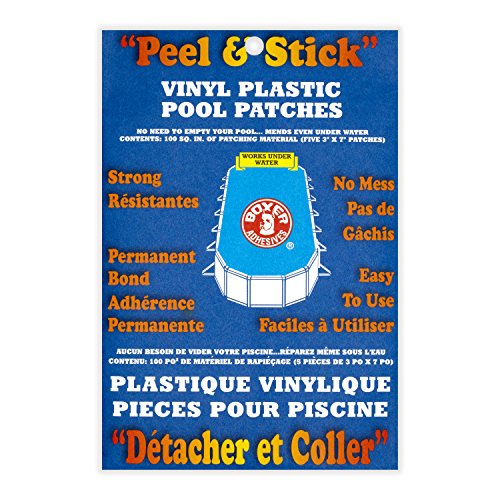
Peel-and-stick patches use a sticky backing that you press directly over the hole. They work well for quick fixes on inflatable pool toys, above-ground splash pools, or dry liner sections above the water. But underwater, water can easily get trapped behind the edges during placement, causing the patch to lift off over time. For a lasting repair beneath the water surface, liquid glue kits offer much stronger holding power.
Patch underwater tears by folding glue against itself first
You do not need to lower your pool water to seal an underwater puncture. Follow these steps to apply a secure underwater patch:
- Scrub the damaged area: Use a soft sponge or cloth to wipe the liner around the tear. Algae and sunscreen build up on underwater surfaces. Cleaning the vinyl ensures the waterproof pool glue sticks directly to the liner rather than a layer of slime.
- Cut a patch with rounded corners: Cut a patch that extends at least 2 inches past the tear on all sides. Always cut the patch into a circle or an oval. Sharp corners snag on pool brushes or feet and peel loose.
- Apply the waterproof pool glue: Spread a generous layer of glue over the back of the patch, making sure the glue reaches the rounded edges.
- Fold the patch in half: Fold the patch like a taco, glue-side to glue-side. This keeps pool water from washing the glue away while you swim down to the bottom.
- Place the patch over the tear: Swim to the tear, unfold the patch right against the liner, and press it firmly over the hole.
- Push out water and bubbles: Use your thumbs to press hard from the center of the patch toward the outer edges. This forces out trapped water and air so the adhesive makes direct contact with the liner.
- Hold pressure on the patch: Hold the patch in place for two to three minutes. If the repair is on the pool floor, place a smooth, clean weight or small sandbag on top for 24 hours while the bond cures.
Clean and dry the vinyl before patching above water
Tears above the waterline (the line where water meets the pool wall) often happen from pool poles, deck furniture, or winter cover clips. These dry repairs need a slightly different technique:
- Clean and degrease the vinyl: Wipe the torn area with rubbing alcohol or a mild vinyl cleaner to remove body oils and dirt. Avoid harsh household bleach, which dries out the vinyl.
- Dry the area completely: Wipe the liner dry with a clean towel. Any moisture left behind can create air pockets that weaken the adhesive.
- Shape your patch: Cut a round patch that covers the tear with at least 2 inches of overlap around the perimeter.
- Apply the adhesive: If using a liquid glue kit, spread a thin layer of glue and wait twenty seconds until it feels tacky. If using a peel-and-stick patch, remove the backing paper cleanly without touching the sticky surface.
- Press and roll: Place the patch over the tear. Use your thumb or a small roller to press firmly from the center outward, pushing out all trapped air pockets.
Wait two hours before splashing water onto the new patch. If you need to add fresh water to your pool after the repair, check your chemical levels. Learning how to raise the pH of a pool without clouding the water will help you protect your liner from acidic water damage.
Square corners and trapped water make vinyl patches peel
Most patch failures happen because of small application errors. Avoid these common mistakes to make sure your repair stays sealed:
- Leaving square edges: Pointed corners catch on vacuum heads, pool toys, and feet. Always round off every edge before applying glue.
- Skipping the scrub: Algae and slick oils prevent glue from bonding to vinyl. Always wipe the liner surface clean before sticking anything to it.
- Using household glue or silicone: Standard superglue dries hard and cracks under water pressure, while bathroom silicone breaks down in chlorinated water. Use only glue designed for pool vinyl.
- Leaving trapped water underneath: If you do not smooth the patch from the middle outward, water pockets stay trapped beneath the vinyl. That water stops the adhesive from welding the two sheets together.
- Running pool cleaners too soon: Keep your suction-side cleaner or robotic cleaner away from the fresh patch for at least 24 hours. Heavy cleaner tracks or brushes can peel the edges before the adhesive fully cures.
- Pulling the torn edges together: Do not stretch torn vinyl to close a gap before patching. Stretching pulls on the patch and causes it to pop loose. Let the patch bridge the gap naturally.
Replace the liner if seams split or vinyl turns brittle
Patches work wonders for punctures and small tears, but some types of damage mean the liner has reached the end of its life.
If you see a split along a factory seam, patching will rarely hold. Liner panels are welded together at the factory under high heat. When a seam splits, water pressure pulls the joint apart faster than any glue can hold it. A patch on a seam split usually fails within a few days.
You should also inspect the texture of the vinyl. Over years of sun exposure and chemical use, vinyl loses its oils and becomes stiff. If your pool liner feels brittle like cardboard rather than flexible, patching will not help. Pressing down on aged vinyl often cracks the liner around the tear. If the liner has shrunk and pulled completely out of the liner bead (the locking top edge strip), you need a full liner replacement.
Inspecting your liner closely is especially helpful before winter. Checking for leaks when you close an inground pool for winter protects the pool walls from caving inward during a freeze. If you ever take down an above-ground pool, knowing how to fold a pool liner without cracking it will keep the vinyl soft for future seasons.
Choose the right patch kit for your pool liner
Keeping a quality vinyl repair kit on hand lets you fix punctures before water loss damages your pool walls. When looking for a repair kit, verify that the adhesive is clearly rated for underwater use. A wet-and-dry waterproof pool glue allows you to fix leaks immediately without the expense of draining your pool.
Look for kits that offer durable vinyl sheets or pre-cut patches that match your pool color. Clear vinyl patches work well across patterned floors, while solid blue patches blend cleanly into plain walls. Make sure the kit provides flexible vinyl sheets that you can easily cut with scissors. Keeping a tube of pool glue and patch material in your pool shed ensures you can seal sudden tears quickly and protect your pool base all season long.

- VC Score9.2
BCP Score is a ranking system developed by bestcleanerproducts.com. BCP Score has no relationship or impact from any manufacturers or sales agent websites. Learn more
- BrandSuperDi

- VC Score8.6
BCP Score is a ranking system developed by bestcleanerproducts.com. BCP Score has no relationship or impact from any manufacturers or sales agent websites. Learn more
- BrandPool Above

- VC Score8.2
BCP Score is a ranking system developed by bestcleanerproducts.com. BCP Score has no relationship or impact from any manufacturers or sales agent websites. Learn more
- BrandSwimline

- VC Score8.2
BCP Score is a ranking system developed by bestcleanerproducts.com. BCP Score has no relationship or impact from any manufacturers or sales agent websites. Learn more
- BrandGeneric
- VC Score8.0
BCP Score is a ranking system developed by bestcleanerproducts.com. BCP Score has no relationship or impact from any manufacturers or sales agent websites. Learn more
- BrandBoxer Adhesives

- VC Score7.6
BCP Score is a ranking system developed by bestcleanerproducts.com. BCP Score has no relationship or impact from any manufacturers or sales agent websites. Learn more
- BrandPoolmaster

- VC Score7.2
BCP Score is a ranking system developed by bestcleanerproducts.com. BCP Score has no relationship or impact from any manufacturers or sales agent websites. Learn more
- BrandWILLBOND

- VC Score6.6
BCP Score is a ranking system developed by bestcleanerproducts.com. BCP Score has no relationship or impact from any manufacturers or sales agent websites. Learn more
- BrandSyhood

- VC Score5.8
BCP Score is a ranking system developed by bestcleanerproducts.com. BCP Score has no relationship or impact from any manufacturers or sales agent websites. Learn more
- BrandNuanchu
Last update on 2026-10-08 / Affiliate links / Images, Product Titles, and Product Highlights from Amazon Product Advertising API


How to Refinish a Fiberglass Pool

How Do You Keep Raccoons Out of Your Pool?

How to Fix Cyanuric Acid in Your Pool

How to Shape a Pool Cue Tip to Stop Miscues

12 Best Automatic Vacuum For Intex Above Ground Pool of 2026 To Keep Vinyl Floors Spotless

10 Best Automatic Pool Vacuum For Above Ground Pool of 2026 To End Manual Scrubbing

How Much Pool Clarifier Should You Use for Your Pool Size?

How Much Does a Pebble Tec Pool Cost to Build or Resurface?


