
How to Open an Inground Pool Step by Step

Most pool owners assume spring startup is as simple as pulling off the cover and dumping in chlorine shock. That shortcut often causes costly damage, from burned-out pump motors to cracked underground pipes. The safe approach follows a strict order of hands-on steps: clearing the cover, removing the winter plugs (the stoppers sealing your pipes), and priming the pump with water so the system never runs dry.
The exact timeline depends on what you find underneath the cover. A solid tarp holding dirty puddles takes more cleanup work than a porous mesh cover, and murky green water needs days of continuous filtering compared to clear water. Your equipment also changes your first moves, especially if you manage a saltwater system instead of standard chlorine tablets. Here is the direct process to restart your equipment safely and get your pool ready for swimming.
The Short Version
- Drain dirty standing water and remove rotting leaves from your winter cover before taking it off, which stops winter grime from dumping into your clean pool water.
- Remove all winter plugs (rubber or threaded stoppers that seal pool pipes against freezing) from your skimmers and wall returns, then reinstall the drain plugs on your pump and filter.
- Fill the pool until the water level reaches halfway up the skimmer opening, fill the pump strainer pot with water to prime the system, and start circulation.
- Vacuum heavy silt directly to waste, brush every wall, and balance your alkalinity and pH before adding a heavy dose of chlorine shock.
Clearing and Removing the Pool Cover
Opening your pool begins with the cover, and rushing this part is the easiest way to turn clear winter water into dark swamp muck. Over several months, rain, snow, decomposing leaves, and windblown dirt collect on top of the material. If that dirty soup slides into your pool while you pull the cover off, you will spend extra days and extra money clearing the water.
Take your time and work through these steps to uncover the pool safely:
- Pump off standing water: Place a submersible cover pump on the lowest sag of the cover. Let it pump all sitting surface water onto your lawn or into a yard drain. If you have an automatic cover, you can read our guide on how to clean an automatic pool cover safely to avoid putting excess strain on the mechanical tracks.
- Rake away wet leaves: Use a soft pool leaf rake on a telescoping pole to scoop out soggy leaves and twigs. Do not use metal garden rakes or sharp tools, because they easily puncture vinyl fabric and tear safety mesh. Keep skimming until the top of the cover is completely clear of debris.
- Loosen the anchors: For solid covers held by water bags, slide the water tubes away and empty them. For safety covers secured by deck springs, insert a notched safety cover rod over each brass anchor, twist, and slide the spring off. Screw the brass deck anchors flush into the concrete patio so nobody stubs a toe.
- Fold and slide the cover: Grab a helper so you have one person on each side of the pool. Slowly pull the cover toward one end of the deck, folding it back and forth like an accordion. This folding motion traps any leftover grit inside the folds instead of dumping it into the water.
- Clean and store the cover: Stretch the cover out on the lawn or driveway. Scrub it with a soft brush and clean water or a mild pool cover cleaner. Let it dry completely in the sun so it does not grow mildew, then roll it tightly and pack it inside a sealed storage bin to prevent mice and bugs from chewing holes in it over the summer.
Reconnecting Equipment and Removing Winter Plugs
Before you flip any electrical switches or run water through the system, you must reverse every winterizing step you performed in the fall. Starting a pool pump while the plumbing lines remain plugged creates sudden suction blockages and extreme water pressure. That mistake can blow pipe fittings apart or burn out the pump motor within minutes.
Walk around your pool deck and equipment pad with this checklist:
- Pull all pool wall and skimmer plugs: Remove the winter plugs (rubber or threaded stoppers that seal pool pipes against freezing) from inside each skimmer throat. Pull out any foam rope or plastic freeze-guard tubes you inserted into the skimmer lines. Next, remove the threaded winter plugs from the return jets (wall openings that push filtered water back into the pool).
- Thread in directional eyeballs: Screw your directional eyeball fittings back into each return jet opening. Angle the eyeball openings downward and slightly to the side at a 45-degree angle. This pushes water in a gentle circular current around the pool walls, driving surface dirt directly toward the skimmer baskets.
- Reinstall equipment drain plugs: Head to the equipment pad and screw the plastic drain plugs back into the pump housing, the strainer pot, the bottom of the filter tank, and the pool heater. Inspect the small rubber O-rings on each plug. If an O-ring looks dry, cracked, or flat, replace it or spread a small dab of silicone-based pool lubricant over it to form a watertight seal.
- Reattach gauges and accessories: Screw the pressure gauge back onto the top of your filter valve, wrapping the threads in fresh white Teflon tape. Reattach the small sight glass on the backwash valve if your filter uses one. Reconnect your chlorinator or your salt cell if you removed it for freeze protection.
- Reinstall deck safety gear: Reinstall the ladders, handrails, and step fittings in the pool. Secure the wedge bolts firmly with a wrench, and verify that the rubber bumpers on the bottom of ladder rails are in place so bare metal does not scratch plaster or puncture a vinyl liner.
Raising the Water Level and Priming the Pump
Most pool owners drain water below the skimmer mouth in the fall to keep ice from cracking the skimmer box. Running a pump without enough water pulls air into the pipes, causing the motor to spin dry and overheat. You must bring the pool back to its normal operating depth before starting circulation.
Follow these steps to restore the water line and prime the equipment:
- Fill the pool: Drop a clean garden hose into the deep end and turn on the water. Fill the pool until the water level reaches the halfway mark on your skimmer opening. If your water level is too low, the skimmer will suck in a vortex of air. If it is too high, floating debris will not spill over the skimmer weir door properly.
- Check your valves: Inspect your intake valves in front of the pump. Open the valves for the skimmers and the main floor drain so water can move freely from the pool toward the equipment pad. Set your multiport valve on the filter to the "Filter" position. If your setup uses a sand filter and you suspect the media is worn, confirm your tank capacity by reading how much sand does a pool filter need before the summer season starts.
- Prime the pump: Priming means filling the pump basket with water so suction starts without running dry. Remove the clear pump lid, clear out any spider webs or leaves, and pour a five-gallon bucket of water directly into the strainer basket until water reaches the intake pipe. Inspect the thick lid O-ring, lubricate it with silicone pool grease, and twist the lid back on hand-tight.
- Open the filter air valve: Twist the manual air relief valve on top of the filter tank counterclockwise until it clicks open. This gives trapped air inside the pipes and tank an escape route when the water starts moving.
- Switch on the power: Flip the main circuit breaker on, then switch on the pump motor. Look through the clear pump lid. You should see water churning and filling the pot within 30 to 60 seconds. Trapped air will hiss loudly out of the filter air valve. Once a steady stream of water squirts out of the relief valve without spitting air, close the valve firmly. Check your pressure gauge to verify that operating pressure sits in a normal range, which is typically between 10 and 18 pounds per square inch.
Vacuuming Winter Debris and Brushing the Walls
Even with a tight cover, fine silt, dead worms, pollen, and algae dust settle across the pool floor by springtime. Do not send this heavy muck straight into your filter system, or you will pack the filter media with thick sludge and spike your operating pressure in minutes.
If your pool floor has thick patches of dark leaves or swampy organic muck, hook up a manual vacuum hose, fill the hose with water, and set your multiport valve to "Waste." Vacuuming to waste bypasses the filter tank completely and shoots the dirty water straight out through your backwash pipe and out of the pool. You will lose an inch or two of water during this process, so keep a garden hose running in the shallow end while you work to keep the water level above the skimmers.
If the pool floor only shows a thin layer of light dust or clean sand, you can leave the filter valve on "Filter" and vacuum slowly across the floor. Move the vacuum head in overlapping, straight lines. Moving too fast stirs up the silt into the water column, turning the pool cloudy before the vacuum head can pull it in.
Once you finish vacuuming the floor, grab your pool brush and scrub every square foot of the pool interior. Brush the steps, the swim-out benches, behind the ladders, and along the waterline tile. Brushing breaks up microscopic algae colonies clinging to the walls and forces them into suspension, allowing your circulation system and sanitizers to destroy them.
Match your brush bristles to your pool finish. For a vinyl liner pool or smooth fiberglass pool, use a brush with soft nylon bristles to avoid scratching the surface or puncturing the liner. For plaster, concrete, or pebble aggregate pools, use a combination nylon and stainless-steel wire brush to scrape off hard mineral scale and stubborn winter algae blooms.
Balancing Water Chemistry and Shocking
Pouring chemicals into cold, stagnant water without a plan wastes sanitizer and leaves your pool cloudy. Chlorine works poorly if your pH and alkalinity sit outside normal ranges. Follow a clear sequence so your sanitizers can clear the water quickly.
- Circulate the water first: Let your pump run continuously for at least 12 to 24 hours before you check your chemicals. This blends your old pool water with the fresh tap water you added from the garden hose, giving you an accurate reading across the entire pool.
- Measure baseline chemistry: Collect a water sample from elbow depth, away from the return jets. Use liquid reagents or multi-parameter indicator strips to measure total alkalinity, pH, calcium hardness, and cyanuric acid (stabilizer). If you want a deep walkthrough of chemical order for fresh fills, check our guide on how to treat new pool water in the right order.
- Adjust alkalinity and pH: Always balance total alkalinity first, bringing it between 80 and 120 parts per million (ppm). Alkalinity acts as a chemical cushion that stops pH from swinging wildly. Next, adjust your pH so it lands between 7.4 and 7.6. If your pH sits above 7.8, chlorine loses over half of its killing power, making pool shock far less effective.
- Add pool shock: Pool shock is a heavy dose of chlorine added to kill algae quickly and burn off combined chloramines. Wait until dusk or nightfall to add your shock, because daytime sunlight burns off unstabilized chlorine before it can sanitize the pool. Broadcast granular shock evenly around the perimeter of the deep end, or dissolve it in a bucket of pool water first if you have a vinyl liner to prevent chemical bleaching on the floor. Use enough shock to raise your free chlorine level up to 10 to 20 ppm, depending on how green the water appears.
- Run the filter around the clock: Keep the pool pump running 24 hours a day for the next three to five days. Backwash sand and diatomaceous earth filters or rinse cartridge elements whenever your tank pressure gauge climbs 8 to 10 pounds above its clean starting pressure. Keep the water filtering until it turns completely clear and your chlorine reading stabilizes between 1 and 3 ppm.
Choosing a Pool Cleaner for Spring Opening
Opening a pool produces a steady stream of leaves, windblown pollen, and dead algae dust over the first two weeks of circulation. While manual vacuuming handles the initial heavy spring sludge, keeping a dedicated pool cleaner running saves hours of manual labor and keeps debris out of your main skimmer baskets.
Robotic cleaners work particularly well for spring openings because they operate as completely self-contained units. A robotic cleaner runs on an electric motor and traps dirt inside its own internal filter basket or collection canister instead of pulling debris through your skimmers. This takes a massive strain off your pool pump and keeps your primary filter from clogging every afternoon. Suction-side cleaners attach to your skimmer or dedicated vacuum line, making them budget-friendly, but they send everything directly into your main filter tank. Pressure-side cleaners attach to a return jet line and sweep debris into an attached bag, which works great for larger leaves if your pool plumbing includes a dedicated booster pump line.
Before choosing a cleaner for spring maintenance, check these practical features:
- Pool surface compatibility: Slick fiberglass and smooth waterline tile require cleaners equipped with soft foam climbing rings or special sticky tracks to climb walls. Rough concrete, gunite, or pebble finishes need durable rubber tracks and sturdy scrubbing bristles that will not wear down quickly on abrasive plaster. Vinyl liners require gentle rubber drive wheels that do not pinch or rub the liner material.
- Basket capacity and filtration level: Spring openings involve both large leaf fragments and microscopic dead algae dust. Look for a cleaner that includes interchangeable filter panels: an open mesh basket for catching spring leaves and an ultra-fine pleated panel that captures fine silt and cloudiness.
- Electrical and suction safety: Always plug electric cleaners into an outdoor GFCI outlet (a protected ground-fault outlet with a weatherproof cover), and keep the power supply unit at least 10 feet back from the pool edge. Never let anyone swim while an automatic cleaner or power cable remains in the water. If you use a suction cleaner, turn off the circulation pump before disconnecting hoses from the skimmer to avoid hand injuries from strong suction.

- VC Score10.0
BCP Score is a ranking system developed by bestcleanerproducts.com. BCP Score has no relationship or impact from any manufacturers or sales agent websites. Learn more
- BrandHTH

- VC Score8.6
BCP Score is a ranking system developed by bestcleanerproducts.com. BCP Score has no relationship or impact from any manufacturers or sales agent websites. Learn more
- BrandSimpooltec

- VC Score8.6
BCP Score is a ranking system developed by bestcleanerproducts.com. BCP Score has no relationship or impact from any manufacturers or sales agent websites. Learn more
- BrandXtremepowerUS

- VC Score8.6
BCP Score is a ranking system developed by bestcleanerproducts.com. BCP Score has no relationship or impact from any manufacturers or sales agent websites. Learn more
- Brandscottchen PRO

- VC Score8.4
BCP Score is a ranking system developed by bestcleanerproducts.com. BCP Score has no relationship or impact from any manufacturers or sales agent websites. Learn more
- BrandThermacell

- VC Score8.4
BCP Score is a ranking system developed by bestcleanerproducts.com. BCP Score has no relationship or impact from any manufacturers or sales agent websites. Learn more
- BrandDearHouse

- VC Score8.0
BCP Score is a ranking system developed by bestcleanerproducts.com. BCP Score has no relationship or impact from any manufacturers or sales agent websites. Learn more
- BrandMylle
- VC Score7.8
BCP Score is a ranking system developed by bestcleanerproducts.com. BCP Score has no relationship or impact from any manufacturers or sales agent websites. Learn more
- BrandPAXCESS

- VC Score7.6
BCP Score is a ranking system developed by bestcleanerproducts.com. BCP Score has no relationship or impact from any manufacturers or sales agent websites. Learn more
- BrandMP mypole

- VC Score7.4
BCP Score is a ranking system developed by bestcleanerproducts.com. BCP Score has no relationship or impact from any manufacturers or sales agent websites. Learn more
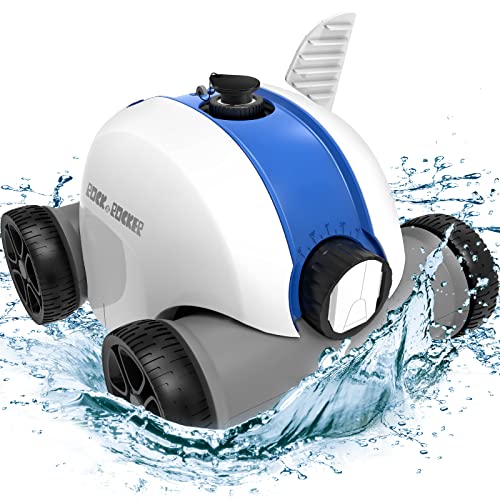
- BrandRock&Rocker
Last update on 2026-10-08 / Affiliate links / Images, Product Titles, and Product Highlights from Amazon Product Advertising API
FAQs
How many days after opening an inground pool can you swim?
Most inground pools require three to five days of continuous filtration and chemical adjustments before the water is safe for swimming. You must wait until the water is completely clear and the main drain on the deep end floor is plainly visible from the deck. Measure your sanitizers to confirm that free chlorine has dropped back into the safe swimming range of 1 to 3 parts per million and your pH sits between 7.4 and 7.6.
What happens if I start the pool pump with the winter plugs still installed?
Starting your pump with winter plugs in place blocks incoming water and creates a powerful vacuum inside the suction pipes. The pump will run dry within moments, causing the plastic impeller to warp, melting the shaft seal, and burning out the pump motor. In severe situations, the extreme negative pressure can even crack underground PVC plumbing joints, leading to expensive subterranean leaks.
Should I drain my inground pool completely before opening it in the spring?
You should never drain an inground pool completely during spring opening unless an experienced professional explicitly instructs you to do so for structural repairs. Inground pools rely on thousands of gallons of water weight to resist underground water pressure. Emptying the pool can cause concrete and gunite shells to pop out of the ground or cause vinyl liners to shrink, wrinkle, and tear off the walls.
Why is my pool water cloudy even after adding chlorine shock?
Cloudy water following a heavy shock treatment usually consists of millions of dead algae cells floating suspended in the pool water. Your filtration system needs time to capture these microscopic particles. Keep your pump running continuously, brush the walls daily, and backwash your filter when the pressure gauge climbs. If the cloudiness persists after three days of filtering, add a pool water clarifier to bind the tiny particles into larger clumps that your filter can trap.


How to Refinish a Fiberglass Pool

How Do You Keep Raccoons Out of Your Pool?

How to Fix Cyanuric Acid in Your Pool

How to Shape a Pool Cue Tip to Stop Miscues

12 Best Automatic Vacuum For Intex Above Ground Pool of 2026 To Keep Vinyl Floors Spotless

10 Best Automatic Pool Vacuum For Above Ground Pool of 2026 To End Manual Scrubbing

How Much Pool Clarifier Should You Use for Your Pool Size?

How Much Does a Pebble Tec Pool Cost to Build or Resurface?








