
How to Make a Pool Sand Filter for Small Pools

Cloudy pool water is nothing to stress over when store-bought equipment feels out of reach. Building a homemade sand filter works reliably using a heavy-duty container, slotted plastic pipes at the base, and special pool silica sand. The sand catches tiny floating debris as water trickles downward, sending clear water back out.
A few practical limits change how well this project works. Thin household buckets can quickly crack under normal pump pressure, so this build only suits small stock tanks or compact splash pools with gentle flow. The sand type also matters, since ordinary play sand blows straight into the water and makes it murky. Knowing what parts to choose keeps the tank intact and protects your pump motor.
How does a pool sand filter actually work?
A sand filter cleans pool water through simple mechanical straining. Your pool pump pushes dirty water into the top of a closed tank. That water trickles down through a thick bed of special sand grains. As the water slips between the tightly packed grains, tiny bits of dirt, hair, body oils, and algae get caught in the microscopic spaces between the sand. By the time the water reaches the bottom of the tank, the debris stays behind, leaving clean water to flow back into your pool.
At the bottom of the tank sits a collector pipe with tiny openings, known as laterals (slotted pipes that stop sand from leaving). These tiny slits are narrow enough to let water pass freely while keeping the sand grains inside the tank. Without them, your pump would blow pounds of gritty sand straight onto your pool floor.
Over time, the trapped debris fills up the empty spaces in the sand bed. When this happens, water has a harder time getting through, which raises the pressure inside the tank. In a manufactured filter, you turn a lever to wash that dirt away. In a homemade setup, you have to manage this flow yourself to keep water moving smoothly and prevent the pump from straining.
If the sand bed is too loose or uneven, water can create channels through the grains. This is called channeling, and it happens when water forces open easy pathways instead of flowing through the entire sand bed. When channeling occurs, dirty water slips right through without getting cleaned at all. Building a reliable filter means forcing the water to spread out evenly across the sand surface.
What supplies and tools do you need to start?
Building your own filter requires sturdy parts that can handle moving water without leaking. Never cut corners on the container, because water creates steady force even at low speeds. Here is what you need to gather before assembling the system:
- A heavy-duty rigid container: Use a thick plastic cooler or a heavy-wall drum with a locking, screw-top lid. Do not use standard thin five-gallon paint buckets, because their walls flex and their snap lids easily pop off under water flow.
- Bulkhead fittings with rubber gaskets: You need two threaded bulkheads (usually 1.5-inch or 1.25-inch) to create watertight plumbing pass-throughs through the wall of your container.
- Schedule 40 PVC pipe and fittings: Pick up several feet of rigid PVC pipe, a few 90-degree elbows, a tee fitting, and threaded adapters that match your bulkhead sizes.
- Pool-grade silica sand: You must use medium grade #20 silica sand, which is specifically ground to trap dirt between 20 and 40 microns. Never use regular sandbox play sand, masonry sand, or beach sand, because the irregular dust will turn your pool cloudy and pass right through the pipes.
- PVC primer and cement: This permanently bonds your plastic pipe joints so they do not blow apart under water flow.
- A fine-tooth hacksaw or rotary tool: You will use this to cut narrow slits into your collector pipes.
- Hole saw and power drill: Choose a hole saw size that matches the exterior diameter of your bulkhead fittings.
- Teflon tape and silicone lubricant: Wrap all threaded pipe fittings with tape to prevent persistent dripping around the container walls.
How do you build a DIY sand filter step by step?
Assembling a working filter takes patience, especially when sealing the plumbing connections. Work on a flat, dry surface and double-check all measurements before drilling into your container.
- Drill the inlet and outlet holes. Use your hole saw to cut one hole near the top rim of the container for dirty water coming in. Cut a second hole near the very bottom for clean water heading back to the pool. Smooth the edges of both holes with sandpaper to remove plastic burrs that could break the rubber seal.
- Install the bulkhead fittings. Push the threaded bulkhead body through each hole from the inside. Place the rubber gasket on the wet side of the container wall to seal against water leaks, and hand-tighten the plastic locking nut on the outside. Snug it down with an adjustable wrench, but avoid over-tightening, which can pinch or distort the rubber gasket.
- Build the bottom slotted lateral pipes. Assemble a small PVC manifold using a tee fitting and two capped pipe extensions that lay flat along the bottom of the container. Use your hacksaw to cut dozens of narrow, parallel slits halfway through each pipe extension, spacing them about an eighth of an inch apart. Keep these cuts hairline-thin so sand grains cannot fall inside. Glue this assembly to the inside of your bottom bulkhead fitting.
- Add a protective water cushion. Before adding any sand, pour clean water into the container until it covers the bottom slotted pipes by at least four or five inches. This water layer cushions the falling sand so the weight does not snap or crack your PVC pipes while filling.
- Add the pool sand media. Pour your #20 silica sand gently into the container. Fill the vessel roughly halfway to two-thirds full, leaving several inches of clear open space between the top of the sand and the upper inlet fitting.
- Install the top water diffuser. Connect a short PVC elbow or tee fitting to the inside of the upper bulkhead. Point this fitting sideways or slightly upward against the container wall. This diffuses the incoming water so it splashes softly across the sand surface instead of blasting a deep hole into the sand bed.
- Connect the hoses and check the seals. Hook your low-power pump hose to the top inlet bulkhead, and attach your return hose from the bottom bulkhead back to the pool. Tighten all hose clamps securely, plug your pump into an outdoor GFCI outlet (a protected ground-fault outlet with a weatherproof cover), and check all joints for water drips.
Why is pump pressure dangerous for homemade plastic tanks?
The biggest risk with any homemade sand filter is trapped pressure. Pool pumps are designed to push water with genuine force, often generating between 10 and 25 pounds of pressure per square inch (PSI). That might sound small, but across the broad surface area of a bucket lid, 10 PSI creates hundreds of pounds of outward force trying to rip the lid off.
Standard household buckets and storage bins are molded for holding still liquids, not pressurized flow. If your slotted bottom pipes get clogged with dirt or sand, the water cannot escape as fast as the pump pushes it in. Within seconds, the internal pressure spikes. An unrated plastic container will belly outward, crack down the seam, or blow its lid off like a projectile.
A sudden container failure creates multiple immediate hazards. First, it can blast gallons of water into your yard, potentially spraying toward power cords or your outdoor GFCI outlet. Second, if the tank splits while you are away, your pump can run completely dry, overheating the internal seals and burning out the motor. Understanding choosing the right pool pump for your setup helps prevent overpowering small vessels.
If you build this project, only pair it with a very low-power circulation pump or a small fountain-style pump rated under a few hundred gallons per hour. Never connect a standard pool pump rated at 0.5 horsepower or higher to a homemade plastic container. If you notice the container walls bulging even slightly, shut the pump off immediately and disconnect power before touching the plumbing.
How do you flush out trapped dirt without a valve?
Manufactured sand filters use a multi-port valve (a water flow control lever) to quickly reverse water flow and clean the sand. With a DIY filter, you have to perform this backwash (reversing flow to flush out trapped dirt) manually. Doing this every week or two keeps your sand clean and stops your container from clogging.
- Shut off power to the pump. Always disconnect the power cord from the outlet before touching any plumbing connections. Never swap hoses while the motor is running, because the sudden blockage can damage the pump impeller.
- Reverse your hose connections. Disconnect the pump hose from the top inlet and hook it up to the bottom bulkhead fitting instead. Then, attach a waste hose to the top bulkhead fitting and run that hose out onto your lawn or toward a drain.
- Turn the pump on to backwash. Plug the pump back in and let it push water backward through the bottom slotted pipes. As water flows upward through the sand, it lifts the grains, loosens the trapped debris, and flushes dirty brown water out through the top hose. Run this for about two minutes until the discharge water turns clear.
- Let the sand bed settle. Shut the pump off again. Wait about 60 seconds to let the floating sand grains settle back down evenly to the bottom of the container.
- Restore normal filter connections. Move your pump hose back to the upper bulkhead, and connect your pool return hose back to the bottom bulkhead. Turn the pump back on and watch your pool return jet to make sure no loose sand blows into the pool.
Should you build a filter or buy a budget system?
A homemade sand filter can be an entertaining weekend project for a tiny plunge tub or a metal stock tank, but it requires regular babysitting. Between buying thick-walled containers, bulkheads, PVC fittings, valves, and heavy sand bags, the parts bill can add up faster than you expect. You also miss out on built-in safety features like pressure relief valves and sealed lids that resist cracking.
For most above-ground pools, a factory-made entry-level sand filter system is both safer and more practical. Pre-built systems feature heavy, rotomolded tanks specifically rated to withstand steady water pressure. They also include convenient multi-port valves that let you filter, backwash, rinse, and waste-drain with the simple turn of a handle, saving you from disconnecting messy plumbing hoses every week.
When shopping for a compact sand filter, look for a unit that matches the water capacity of your pool without overwhelming your hoses. A tank diameter of 12 to 14 inches is usually plenty for pools up to 10,000 or 15,000 gallons. Check that the system includes an integrated pump with a pre-filter strainer basket, which catches large leaves before they reach the sand bed. A built-in pressure gauge is also essential, because it tells you exactly when the filter is dirty without any guessing.
If your current pool setup is constantly turning green and your DIY attempts keep springing leaks, reading about safely replacing a pool filter system will show you how straightforward installing a factory-rated setup can be. Investing in an enclosed, certified unit protects your pump motor and gives you peace of mind whenever you leave the pool running unattended.

- VC Score9.2
BCP Score is a ranking system developed by bestcleanerproducts.com. BCP Score has no relationship or impact from any manufacturers or sales agent websites. Learn more
- BrandIntex
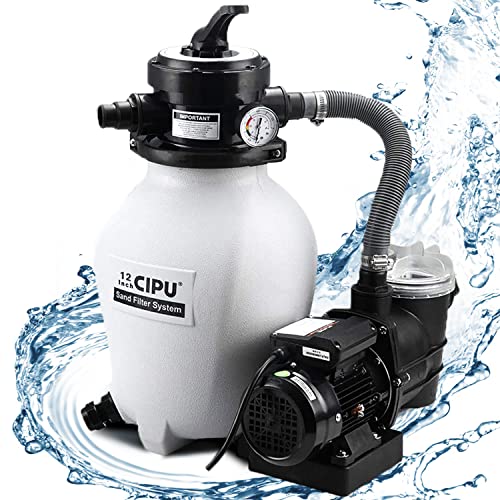
- VC Score9.0
BCP Score is a ranking system developed by bestcleanerproducts.com. BCP Score has no relationship or impact from any manufacturers or sales agent websites. Learn more
- BrandCIPU

- VC Score9.0
BCP Score is a ranking system developed by bestcleanerproducts.com. BCP Score has no relationship or impact from any manufacturers or sales agent websites. Learn more
- BrandGAME

- VC Score9.0
BCP Score is a ranking system developed by bestcleanerproducts.com. BCP Score has no relationship or impact from any manufacturers or sales agent websites. Learn more
- BrandZeo, Inc
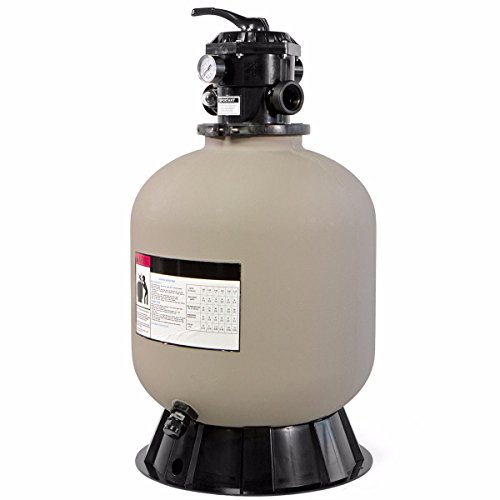
- VC Score9.0
BCP Score is a ranking system developed by bestcleanerproducts.com. BCP Score has no relationship or impact from any manufacturers or sales agent websites. Learn more
- BrandXtremepowerUS

- VC Score8.6
BCP Score is a ranking system developed by bestcleanerproducts.com. BCP Score has no relationship or impact from any manufacturers or sales agent websites. Learn more
- BrandIntex

- VC Score8.6
BCP Score is a ranking system developed by bestcleanerproducts.com. BCP Score has no relationship or impact from any manufacturers or sales agent websites. Learn more
- BrandSwimline

- VC Score8.0
BCP Score is a ranking system developed by bestcleanerproducts.com. BCP Score has no relationship or impact from any manufacturers or sales agent websites. Learn more
- BrandXtremepowerUS
Last update on 2026-10-08 / Affiliate links / Images, Product Titles, and Product Highlights from Amazon Product Advertising API
FAQs
Can you use regular play sand in a homemade sand filter?
No, you should never use children's play sand or construction sand in any pool filter. Play sand has tiny, uneven grains and fine dust that easily slip through your slotted pipes and settle right on the pool floor. It also packs too tightly, which blocks water flow, creates pressure spikes, and quickly clouds up your swimming area.
How do you know when your DIY sand filter needs cleaning?
You can tell your homemade filter is dirty when the water returning to the pool slows to a weak trickle. Trapped debris clogs the spaces between the sand grains, making it hard for water to escape the container. If you notice weak return flow or see the sides of your plastic container flexing, it is time to shut off the pump and flush the sand bed.
Can you connect an automatic pool cleaner to a homemade sand filter?
Most automatic pool cleaners will not work with a DIY sand filter. Suction-side cleaners rely on strong, consistent pump suction to pull debris across the pool floor, which requires more horsepower than a homemade container can safely handle. Running a vacuum through a weak DIY setup will likely stall the cleaner and cause the pump to choke on trapped air.
What should you do if your container starts leaking around the bulkheads?
Always turn off the pump and unplug it before attempting to fix a water leak. Drain the water level inside the tank below the leaking fitting so the plastic surfaces are dry. Check whether the rubber gasket slipped out of alignment, apply thread seal tape to all plastic pipe threads, and snug the nut down firmly by hand without crushing the rubber washer.


How to Refinish a Fiberglass Pool

How Do You Keep Raccoons Out of Your Pool?

How to Fix Cyanuric Acid in Your Pool

How to Shape a Pool Cue Tip to Stop Miscues

12 Best Automatic Vacuum For Intex Above Ground Pool of 2026 To Keep Vinyl Floors Spotless

10 Best Automatic Pool Vacuum For Above Ground Pool of 2026 To End Manual Scrubbing

How Much Pool Clarifier Should You Use for Your Pool Size?

How Much Does a Pebble Tec Pool Cost to Build or Resurface?


