
How to Install a Unibead Pool Liner Without Wrinkles

A backyard owner stands by an empty pool frame, staring at a giant roll of vinyl and wondering how this strange two-way plastic edge actually attaches. Installing a unibead liner comes down to hanging the built-in hook over the metal wall or peeling off the top strip to snap the bead into a track. Letting the sheet warm under the afternoon sun softens the vinyl so it slides into position without snagging.
The exact method depends on whether your pool uses an existing track receiver or bare walls, along with the outdoor temperature on setup day. Sunshine and air around 70 to 80 degrees keep the material pliable enough to push wrinkles toward the walls over a smooth sand base and cove. Here is how to hang the vinyl cleanly, smooth the floor, and seal the fittings without damaging your new pool.
The Short Version
- Match the edge to your wall setup: Leave the curved J-hook intact to drape directly over a bare metal wall rim, or peel off the hook strip along the score line if your pool uses an attached bead receiver track.
- Warm the vinyl in direct sunlight: Spread the liner out on clean grass during a sunny day between 70 and 80 degrees Fahrenheit so the material softens, stretches naturally, and avoids seam tears.
- Pull out floor ripples with a vacuum: Center the bottom seams, hang the rim evenly, and use a shop vacuum hose inserted behind the wall to suction air out and flatten wrinkles before adding water.
- Never cut openings early: Fill the pool with several inches of water to lock the floor down, and wait until the water level reaches just below the skimmer and return jet before screwing on faceplates and cutting openings.
J-Hook Versus Beaded Mode: How Unibead Fits Your Specific Wall
A unibead liner is a two-in-one liner edge manufactured with two distinct mounting profiles molded together. The top section forms a curved vinyl lip called a J-hook, while the section right beneath it forms a standard square bead. This dual design lets one liner fit two completely different pool wall styles, but you must know which style your pool uses before you begin hanging the vinyl.
In J-hook mode, the curved lip hangs directly over the top edge of a bare steel pool wall. This method is common on pools that do not have an attached channel along the rim. The hook drapes over the metal rim, and the pool stabilizer rails clamp down right over the vinyl hook to hold it in place. J-hook installation gives you an exact, uniform hang around the perimeter without leaving excess vinyl bunched up on the outside of your pool wall.
In beaded mode, the liner clicks into a bead receiver, which is an open groove track mounted along the top inside edge of the pool wall. If your pool has this track, you do not want the thick J-hook sitting above it. Instead, you look for the score line running along the liner edge and gently peel or slice the upper hook strip away from the lower bead. Removing the hook leaves behind a clean, standard bead that snaps directly into the receiver groove. When comparing pool setups or planning other backyard pool builds, such as installing an inground pool kit, knowing your exact wall attachment style is essential before ordering or modifying vinyl.
The golden rule is simple: inspect your wall rim before you alter the vinyl edge. If your wall has an open horizontal track facing inward toward the water, peel the hook off along the groove to create a beaded liner. If your wall has a plain metal top rim covered by plastic coping strips, leave the J-hook intact and hang it directly over the steel.
Base Prep: Checking Cove, Floor Pads, and Sun Warming
Taking time to prepare the base prevents early liner failures, seam separations, and hidden punctures. A vinyl liner holds thousands of gallons of water, and that weight presses every square inch of the material firmly against whatever sits underneath. Any rough spot, sharp stone, or uneven sand pocket will show through the bottom and create a weak point.
- Inspect the pool cove: The pool cove is an angled wedge of dense sand or pre-formed foam running along the bottom inside wall of the pool. It should stand 6 to 8 inches high with an angled slope. The cove stops the vinyl from squeezing under the bottom metal rail of the pool frame. If using sand, pack it firmly and smooth out any dips. If using foam cove strips, check that all pieces are securely taped together and tight against the wall.
- Lay down protective floor padding: Place a durable geotextile floor pad over your smoothed sand or dirt base. A good pad stops sharp pebbles, stray tree roots, and insects from poking through the liner. It also prevents heels from creating deep divots in the sand base while people swim.
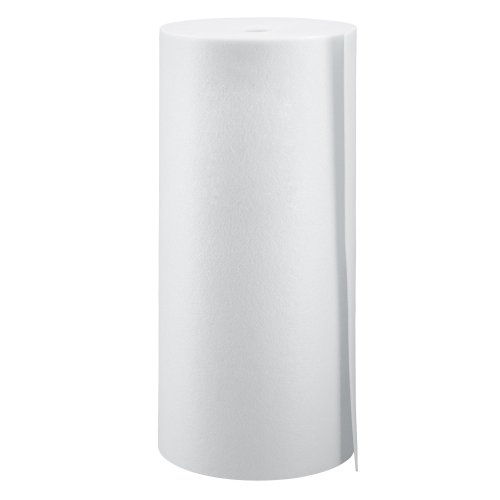
- Add wall foam cushioning: Taping 1/8-inch closed-cell wall foam over steel wall panels creates a soft barrier that protects the liner from rough metal, screw heads, and surface rust. Wall foam also acts as a light insulator that keeps pool water warmer on cool nights.
- Warm the vinyl in the sun: Unpack the liner and let it rest flat on clean grass in direct sunlight for 20 to 30 minutes before installation. Vinyl requires an outside temperature between 70 and 80 degrees Fahrenheit to become supple. Cold vinyl remains stiff, resists stretching, forms stubborn wrinkles, and can tear along factory seams when pulled toward the wall rim.
Hanging the Liner: Step-by-Step Wall Placement
Hanging a unibead liner requires balance and patience. Rushing to attach one side while pulling hard on the other will leave the bottom seam crooked and cause severe wrinkles on the pool floor. Follow these steps to hang the liner evenly around your pool perimeter.
- Place the liner in the pool center: Remove your shoes and step into the pool area wearing only socks or clean bare feet. Carry the warmed, folded liner into the exact center of the pool floor, setting it down gently so you do not gouge the smoothed sand base.
- Unroll and align the bottom seams: Unfold the liner outward toward the walls. Locate the circular seam that connects the flat floor vinyl to the vertical wall vinyl. Shift the floor section until this seam sits evenly spaced all the way around the pool, resting right at the base of your pool cove.
- Set four anchor points: Do not hang the liner in a continuous circle from one starting spot, as this bunches extra material at the end. Instead, attach the liner at four opposing compass points: north, south, east, and west. In J-hook mode, slip the hook over the bare wall rim. In beaded mode, press the bead firmly into the bead receiver groove at each point.
- Hang the remaining wall sections: Work in pairs from your four anchor points toward the middle of each quadrant. Press the hook over the rim or click the bead into the track. The vertical wall of the liner should hang straight down like a curtain, without twisting diagonally. If you notice the liner pulling too tightly on one side, stop and shift the slack toward the tighter section.
- Lock beaded liners in place: If you are using a bead receiver track, tap a flexible plastic liner lock strip into the small groove right above the liner bead. The liner lock acts as a wedge that stops the bead from popping out of the track while water fills the pool.
Wrinkle Removal: Using Light Water and Vacuum Suction
Floor wrinkles shorten the life of your pool liner. Dirt, silt, and algae settle into raised creases, making them difficult to brush clean. Automatic pool cleaners can catch their rubber skirts or drive wheels on large folds, wearing the vinyl thin and creating premature leaks. Removing floor ripples before filling the pool requires the right combination of vacuum suction and water weight.
An industrial wet and dry shop vacuum is the most effective tool for pulling wrinkles out of a new liner. Remove the paper filter from the vacuum canister so air flows freely. Insert the vacuum hose through the skimmer opening on the pool wall, feeding the hose down between the steel pool wall and the back of the liner. Stop the hose roughly 12 to 18 inches above the pool cove. Do not let the hose touch the sand base directly, or it will pull sand up and create large voids under your floor.
Seal all openings to make the space behind the liner airtight. Use broad painter's tape or duct tape around the skimmer opening where the vacuum hose enters. Walk to the return jet fitting on the pool wall and tape over that opening from the outside as well. When the seal is complete, turn on the shop vacuum. Within two to three minutes, the vacuum will pull air out from behind the liner, creating negative pressure that draws the vinyl snug against the walls and floor.
While the vacuum runs, step onto the pool floor in clean socks. Starting in the center of the pool, gently sweep and nudge remaining floor ripples outward toward the cove using the flat soles of your feet or a soft push broom. Once the floor is smooth, place a garden hose in the center of the pool. Wrap a clean shop towel around the hose nozzle to prevent metal edges from scuffing the vinyl. Run 1 to 2 inches of water across the bottom to pin the floor in place. Keep the vacuum running continuously until this initial water layer fully covers the floor, then turn the vacuum off and pull the hose out from behind the wall.
Filling and Cutting: Installing Gaskets and Faceplates Safely
The single most expensive mistake during a liner installation is cutting skimmer and return jet openings too early. Water weighs over eight pounds per gallon, and as thousands of gallons enter the pool, the vinyl naturally settles and stretches downward. If you fasten faceplates and cut holes before the water reaches them, the settling vinyl will pull hard against the screws, ripping huge tears below the fittings.
- Fill the pool up to the return jet: Let water fill the pool until the level reaches roughly 2 to 3 inches below the bottom of the return jet opening. As you fill, monitor water clarity; if local water sources carry rust or sediment, treat the water early, similar to managing pool water quality when learning how to clean your pool after a dead bird without having to drain fresh water.
- Mount the return jet faceplate: Locate the round wall opening behind the vinyl by pressing lightly with your fingertips. Place the rubber gasket against the liner, align the return jet faceplate, and insert the stainless steel screws. Tighten the screws evenly using a hand screwdriver. Avoid using power drills, which can strip screw holes in the steel wall or crack the plastic faceplate.
- Cut the return opening: Once the faceplate is firmly clamped against the wall and gasket, take a fresh utility knife and slice out only the circle of vinyl visible inside the fitting throat. Never cut outside the faceplate border.
- Fill up to the skimmer opening: Allow the water to continue rising until it sits 2 to 3 inches below the bottom edge of the skimmer mouth. This guarantees all vertical liner stretch has finished before you lock the skimmer in place.
- Fasten and trim the skimmer: Position the skimmer faceplate and gaskets over the wall cutout. Thread all screws by hand in a crisscross pattern, tightening them until the gasket compresses evenly against the pool wall. Carefully slice out the rectangular vinyl panel inside the skimmer mouth, then fill the pool to its normal operating level halfway up the skimmer opening.
Gear to Protect and Secure Your Pool Liner
Installing a unibead liner correctly requires a few protective accessories that shield the vinyl from physical wear and environmental damage. The right gear prevents punctures from below, cushions the wall panels, and keeps the top bead securely locked in place for seasons to come.
When selecting accessories for your liner project, focus on three primary items: geotextile floor pads, high-density wall foam, and flexible bead lock strips. Floor pads should be thick, puncture-resistant cloth sized specifically to match your pool diameter, such as 18-foot, 24-foot, or 30-foot round sizes. Wall foam should use closed-cell construction around 1/8-inch thick to resist moisture absorption while cushioning the vinyl against steel wall rust. If your pool uses a bead receiver track, pick up a roll of vinyl liner lock that provides enough total length to circle your entire pool perimeter, ensuring the bead never pops free under heavy wave action.

- VC Score9.2
BCP Score is a ranking system developed by bestcleanerproducts.com. BCP Score has no relationship or impact from any manufacturers or sales agent websites. Learn more
- BrandSuperDi
- VC Score9.2
BCP Score is a ranking system developed by bestcleanerproducts.com. BCP Score has no relationship or impact from any manufacturers or sales agent websites. Learn more
- BrandBlue Wave

- VC Score9.2
BCP Score is a ranking system developed by bestcleanerproducts.com. BCP Score has no relationship or impact from any manufacturers or sales agent websites. Learn more
- BrandSmartline

- VC Score9.0
BCP Score is a ranking system developed by bestcleanerproducts.com. BCP Score has no relationship or impact from any manufacturers or sales agent websites. Learn more
- BrandSmartline

- VC Score9.0
BCP Score is a ranking system developed by bestcleanerproducts.com. BCP Score has no relationship or impact from any manufacturers or sales agent websites. Learn more
- BrandSmartline

- VC Score9.0
BCP Score is a ranking system developed by bestcleanerproducts.com. BCP Score has no relationship or impact from any manufacturers or sales agent websites. Learn more
- BrandFBULWSEC

- VC Score8.8
BCP Score is a ranking system developed by bestcleanerproducts.com. BCP Score has no relationship or impact from any manufacturers or sales agent websites. Learn more
- BrandRhino Pad

- VC Score8.8
BCP Score is a ranking system developed by bestcleanerproducts.com. BCP Score has no relationship or impact from any manufacturers or sales agent websites. Learn more
- BrandSmartline
- VC Score8.4
BCP Score is a ranking system developed by bestcleanerproducts.com. BCP Score has no relationship or impact from any manufacturers or sales agent websites. Learn more
- BrandSmartline
Last update on 2026-10-08 / Affiliate links / Images, Product Titles, and Product Highlights from Amazon Product Advertising API
FAQs
Do I need to cut off the J-hook if my pool has a bead receiver track?
Yes, you must remove the J-hook strip if you are inserting the liner into a bead receiver track. Leaving the hook attached adds unnecessary bulk that stops the bead from seating fully into the receiver groove. Simply find the pre-cut score line running below the hook and peel the upper strip away by hand.
Can I install a unibead pool liner on a cool or cloudy day?
You should wait for a sunny day with temperatures between 70 and 80 degrees Fahrenheit before installing vinyl. Cold vinyl becomes rigid and stiff, making it nearly impossible to smooth out floor wrinkles or stretch the material toward the walls. Working in warm sunlight allows the vinyl to expand naturally and sit flat without ripping seams.
How do I fix a bead that slips out of the track after the pool is filled?
Pour warm water over the slipped section of vinyl to soften the material and make it pliable again. Once warm, pull the liner upward by hand and push the bead back into the receiver track groove. Press a strip of flexible liner lock into the seam right above the bead to wedge it securely in place.
When should I turn off the shop vacuum during the installation?
Keep the shop vacuum running continuously until the pool floor is covered with at least 1 to 2 inches of water. The weight of that shallow water layer holds the floor vinyl firmly against the sand base. Once the water pins the floor down and the wall ripples remain smooth, switch off the vacuum and slide the hose out from behind the wall.


How to Refinish a Fiberglass Pool

How Do You Keep Raccoons Out of Your Pool?

How to Fix Cyanuric Acid in Your Pool

How to Shape a Pool Cue Tip to Stop Miscues

12 Best Automatic Vacuum For Intex Above Ground Pool of 2026 To Keep Vinyl Floors Spotless

10 Best Automatic Pool Vacuum For Above Ground Pool of 2026 To End Manual Scrubbing

How Much Pool Clarifier Should You Use for Your Pool Size?

How Much Does a Pebble Tec Pool Cost to Build or Resurface?


