
How to Fix a Pool Skimmer Leak Without Draining It

Most pool owners assume that repairing a leaking skimmer requires draining thousands of gallons of water or tearing up the patio deck. That is rarely true, because you can almost always seal the gap directly underwater using a moldable two-part epoxy putty. Once you confirm the leak with a quick dye check, pressing this waterproof putty into the crack creates a rock-solid barrier that holds up for years.
The exact repair depends on how your pool is built and where the water is escaping. Concrete pools typically separate along the throat seam (the joint where the plastic housing meets the pool wall), while vinyl pools usually have worn gaskets behind the plastic faceplate frame. If water keeps dropping well below the skimmer mouth, a cracked underground pipe is likely responsible rather than a simple surface crack. Here is how to find the leak point and seal it before sinking soil damages your deck.
How to Confirm Your Skimmer Is Leaking
Swimming pools naturally lose a small amount of water to evaporation every day, usually around a quarter of an inch depending on sunlight, wind, and outdoor temperature. But when your pool starts losing an inch or two each day, you are dealing with a structural leak. The most telling clue of a skimmer leak is where the water level stops dropping. If your water level steadily falls until it reaches the bottom lip of the skimmer throat (the front opening in the pool wall where water enters) and then suddenly halts, your skimmer is almost certainly the culprit. Once the water drops below that lower edge, pool water can no longer reach the crack, so the water loss stops.
Letting a skimmer leak linger causes serious structural and mechanical damage. When water escapes through the skimmer body, it pours directly into the surrounding soil right underneath your pool deck. Over time, that water washes away the supporting dirt and gravel base. Without solid ground beneath it, the heavy concrete deck can shift, crack, or collapse entirely. At the same time, when water drops below the skimmer mouth, the skimmer draws large pockets of air directly into your suction lines. That air fills the pump basket, causing your pump to lose its prime, run dry, overheat, and burn out its motor.
You can confirm the exact leak point using a simple dye check without draining any water. Start by turning off your pool pump at the breaker box so the pool water becomes completely still. Wait ten to fifteen minutes until all surface ripples disappear. Take a small squeeze bottle or syringe filled with dark food coloring or pool pH indicator dye. Kneel next to the skimmer opening and slowly bring the tip of the dropper close to the seams, corners, and plastic walls inside the skimmer throat. Squeeze out a small bead of dye without swirling the water. If the skimmer is watertight, the cloud of dye will drift slowly in place. If there is a crack or a failed seal, the dye will get drawn directly into the gap like smoke into an exhaust fan.
Here is a quick checklist to confirm that your skimmer is the source of your water loss:
- Water level halts at the lip: Water drops steadily every day until it hits the bottom edge of the skimmer mouth, then stops completely.
- Air bubbles at the return jets: You see constant streams of fine air bubbles blowing back into the pool while the pump runs.
- Dry pump basket: The clear pump lid reveals large air pockets, and the pump struggles to maintain full water flow.
- Dye draw at the seams: Colored dye squirted near the skimmer corners or concrete joints gets pulled straight into an opening while the pump is off.
- Soggy ground behind the pool: The dirt, grass, or patio stones immediately behind the skimmer box feel unusually soft, damp, or sunken.
The Three Most Common Skimmer Leak Points
Skimmer leaks generally happen in one of three distinct spots, depending on your pool construction and climate. The most frequent failure in concrete and gunite pools happens at the skimmer throat seam. A skimmer is a separate plastic box set inside the concrete deck, while the pool shell is an enormous concrete basin. Because these two structures are made of different materials and bear different weights, ground settling causes them to move at slightly different rates. Over a few seasons, this shifting pulls the plastic skimmer throat away from the pool wall plaster. The joint between them splits open, creating an easy exit route for pool water.
The second common failure point is a physical crack in the plastic skimmer housing. Skimmers are molded from rigid plastic that becomes brittle after years of constant sun exposure, chlorine contact, and ground pressure. Shifting soil can twist the plastic box, causing stress fractures along the sidewalls, the bottom corners, or around the internal weir door hinges. In colder climates, winter freeze damage is a major cause of split plastic. If water gets trapped inside the skimmer body during freezing weather, expanding ice will crack the housing wide open. When winter arrives, knowing how to close an inground pool for winter properly by blowing out lines and installing freeze plugs protects the plastic housing from expensive ice fractures.
The third leak point is unique to vinyl liner pools: the skimmer faceplate (the plastic frame screwed over a vinyl liner around the opening). In a vinyl pool, the skimmer mounts behind the wall panel, and the faceplate clamps the flexible liner against a rubber or cork gasket. Over years of use, pump vibrations can cause the faceplate screws to back out. Gaskets also dry out, rot, or degrade from heavy sanitizers. If someone overtightened the screws in the past, the plastic frame itself might have cracked. Once water slips past that gasket, it travels directly behind the liner, rusting metal wall panels and washing out the smooth sand base underneath your pool floor.
It is also worth noting the warning signs of cracked underground plumbing pipes. If you run a dye check with the pump turned completely off and watch the dye get pulled straight down into the bottom suction hole of the skimmer, the underground PVC pipe beneath the housing may be broken. Ground settling, heavy vehicle traffic near the deck, or freezing temperatures can snap pipe fittings buried directly below the skimmer base. If your pool water continues to drop past the skimmer mouth all the way down toward the bottom drain, the leak is not in the skimmer box itself. A cracked underground suction line requires professional pressure checks and underground pipe excavation rather than a surface patch.
Step-by-Step Fixes for Throat Seams, Plastic Cracks, and Vinyl Faceplates
You do not need to drain your pool below the skimmer opening to make these repairs. In fact, draining water can cause severe damage. Emptying water from a vinyl liner pool causes the vinyl to shrink, wrinkle, or pop out of its track. In concrete pools, dropping the water level relieves internal pressure, which can cause structural issues if the surrounding ground has a high water table. You can seal both concrete throat seams and plastic cracks completely underwater using two-part pool epoxy putty (two-part moldable repair stick that cures rock-hard underwater).
To seal separated concrete throat seams or plastic cracks in your skimmer, follow these steps:
- Turn off the pool pump: Shut down the pump at the breaker box so water movement stops completely. You need calm water so suction does not pull your uncured putty out of the crack.
- Clean the repair area: Use a stiff nylon brush, scouring pad, or wet sandpaper to vigorously scrub the crack and the surface around it. Scrape away all algae, calcium scale, and loose plaster. Epoxy putty will not bond to slick algae or dirty plastic.
- Cut equal parts of epoxy putty: Cut off equal portions from the resin and hardener sticks of your two-part pool epoxy putty.
- Knead the putty thoroughly: Mix the two parts together in your hands above water for at least two full minutes. Knead, roll, and fold the material until it turns one solid, uniform color with zero streaks or color marbling. Warm putty kneads much easier than cold putty.
- Roll the putty into a rope: Shape the blended putty between your palms into a long, thin roll, roughly the thickness of a pencil.
- Press the putty into the crack: Push the putty firmly into the crack or open throat seam underwater. Use your thumbs to force the material deep into the gap. Feather and smooth the edges flat against the surrounding plastic and plaster with your fingers so pool cleaners or skimmer nets do not snag on the patch later.
- Allow the putty to cure: Leave the putty undisturbed. It will chemically cure underwater without shrinking or sagging. Keep the pool pump turned off for at least four to six hours so the patch can set rock-hard.
If you have a vinyl liner pool and your dye check showed water escaping around the faceplate frame, use these steps to resolve the leak:
- Inspect and tighten the faceplate screws: Take a manual handheld Phillips screwdriver and check each screw around the faceplate frame. Never use a cordless drill or power driver, because power tools easily strip the plastic screw holes in the skimmer body.
- Use an alternating pattern: Tighten each screw by hand using a crisscross pattern, similar to tightening lug nuts on a car wheel. Work from top to bottom and side to side to distribute pressure evenly across the rubber gasket. In many cases, hand-tightening loose screws stops the leak immediately.
- Fix stripped screw holes: If a screw turns endlessly without catching, the plastic hole behind it has stripped out. Remove the loose screw, insert a small sliver of plastic wall anchor into the hole, and drive a slightly wider, marine-grade stainless steel screw in by hand to restore a firm grip.
- Reseal a leaking faceplate gasket: If tightening the screws does not stop the leak, the gasket behind the liner has failed or the faceplate is cracked. Back out the screws carefully while holding the liner in place. Apply a thin bead of underwater pool sealant along the back rim of the faceplate frame, press it firmly against the liner, and drive the screws back into their original holes.
- Rebalance your pool chemistry: After completing the repair and refilling your pool to its normal operating level, check your water chemistry. Fresh tap water alters your chemical balance; knowing how to raise the pH of a pool without clouding the water will help you get your pool water back to clear, balanced swimming conditions.
What to Look for in an Underwater Repair Putty
Homeowners often try to fix a leaking skimmer using household silicone caulk or liquid hot tub leak sealers. Liquid sealers meant for hot tubs are designed for small, closed plumbing circuits and get diluted and wasted in tens of thousands of gallons of pool water. Standard silicone caulk requires dry surfaces to cure and quickly peels away under pool water pressure. To stop a skimmer leak securely without draining your pool, you need a dedicated two-part pool epoxy putty stick.
When selecting a repair putty, verify that the packaging explicitly states it cures and hardens underwater. A quality pool putty relies on an internal chemical reaction between resin and catalyst, meaning it does not need exposure to air to turn solid. Look for a simple one-to-one mix ratio that lets you cut equal slices and knead them together by hand above water. The putty must also be rated as non-shrinking and non-sagging, ensuring it stays firmly packed inside deep gaps without pulling away from the edges as it hardens.
Surface compatibility is equally important. Your putty needs to bond reliably to both PVC plastic and concrete plaster, bridging the gap between two completely different materials. Check the color options as well. Most pool putties come in white or off-white, which blends cleanly with standard white skimmer bodies and light plaster. If you have a dark aggregate finish, look for a gray or black putty formulation so your finished repair remains discreet.

- VC Score9.2
BCP Score is a ranking system developed by bestcleanerproducts.com. BCP Score has no relationship or impact from any manufacturers or sales agent websites. Learn more
- BrandEpoxybond Pool Putty

- VC Score9.2
BCP Score is a ranking system developed by bestcleanerproducts.com. BCP Score has no relationship or impact from any manufacturers or sales agent websites. Learn more
- BrandAquabeacon
![Epoxybond Atlas Pool Putty Epoxy Leak Sealer Kit + Valuable Instructional Videos by Swimming Pool Leak Detector [ Solves #1 DIYer Complaint [ So You Get it Right The 1Time ]](https://m.media-amazon.com/images/I/41S7P1MyM-L._SL500_.jpg "Epoxybond Atlas Pool Putty Epoxy Leak Sealer Kit + Valuable Instructional Videos by Swimming Pool Leak Detector [ Solves #1 DIYer Complaint [ So You Get it Right The 1Time ]")
- VC Score8.8
BCP Score is a ranking system developed by bestcleanerproducts.com. BCP Score has no relationship or impact from any manufacturers or sales agent websites. Learn more
- BrandEpoxybond
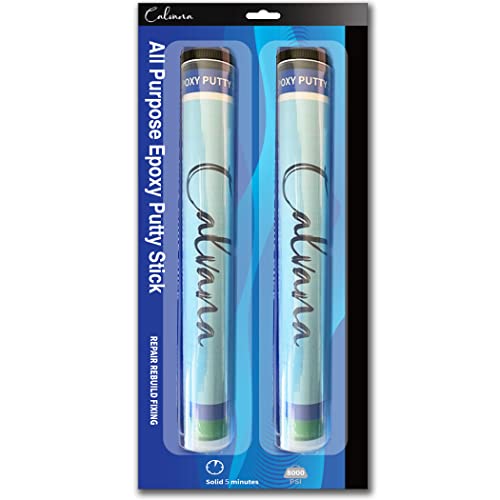
- VC Score8.8
BCP Score is a ranking system developed by bestcleanerproducts.com. BCP Score has no relationship or impact from any manufacturers or sales agent websites. Learn more
- BrandCalvana

- VC Score8.6
BCP Score is a ranking system developed by bestcleanerproducts.com. BCP Score has no relationship or impact from any manufacturers or sales agent websites. Learn more
- BrandRola-Chem
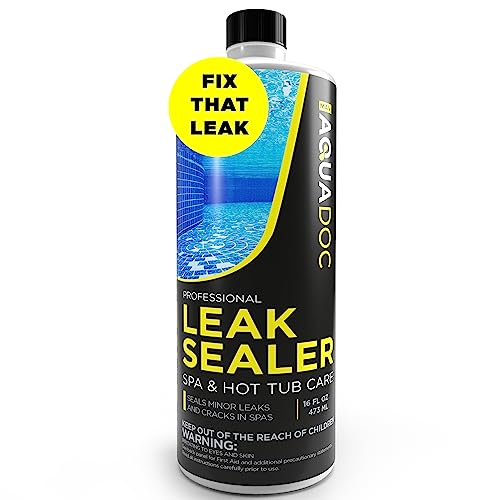
- VC Score7.0
BCP Score is a ranking system developed by bestcleanerproducts.com. BCP Score has no relationship or impact from any manufacturers or sales agent websites. Learn more
- BrandMAV AquaDoc

- VC Score6.6
BCP Score is a ranking system developed by bestcleanerproducts.com. BCP Score has no relationship or impact from any manufacturers or sales agent websites. Learn more
- BrandCrtiin

- VC Score-
BCP Score is a ranking system developed by bestcleanerproducts.com. BCP Score has no relationship or impact from any manufacturers or sales agent websites. Learn more
- BrandBespoke+
Last update on 2026-10-08 / Affiliate links / Images, Product Titles, and Product Highlights from Amazon Product Advertising API
FAQs
How long does pool epoxy putty take to harden underwater?
Most two-part pool epoxy putties begin to firm up within twenty to thirty minutes after mixing, giving you plenty of working time to press the material into place. The putty generally reaches a hard cure within four to six hours underwater and reaches full structural strength in about twenty-four hours. Keep your pool pump turned off during the initial curing window so water movement does not disturb the fresh patch.
Can I use silicone caulk instead of epoxy putty to fix a skimmer leak?
Standard silicone caulk is not recommended for underwater skimmer repairs because it needs clean, dry surfaces to adhere properly and cure. Under pool water pressure and constant chemical exposure, silicone quickly loses its grip on smooth plastic skimmer walls and peels off. Two-part epoxy putty is far superior because it chemically cures while submerged, bonds tightly to both plastic and plaster, and will not shrink or wash away.
Will running my pool pump ruin the epoxy repair while it cures?
Running the pool pump immediately after applying your putty can pull the soft material through the crack or wash it away from the surface before it bonds. You should leave the circulation pump turned off for at least four to six hours after pressing the putty into place. Once the putty feels completely rock-hard to the touch, you can safely switch the pump back on and resume normal filtration.

How to Refinish a Fiberglass Pool

How Do You Keep Raccoons Out of Your Pool?

How to Fix Cyanuric Acid in Your Pool

How to Shape a Pool Cue Tip to Stop Miscues

12 Best Automatic Vacuum For Intex Above Ground Pool of 2026 To Keep Vinyl Floors Spotless

10 Best Automatic Pool Vacuum For Above Ground Pool of 2026 To End Manual Scrubbing

How Much Pool Clarifier Should You Use for Your Pool Size?

How Much Does a Pebble Tec Pool Cost to Build or Resurface?


