
How to Fix a Pool Liner Without Draining the Pool

A sudden leak or a sagging pool wall looks alarming, but it is rarely a reason to panic. Most small tears can be sealed with underwater vinyl patches, while loose edges can be reset into the track without emptying a single drop of water. Leaving the water inside protects the shape of the pool and keeps the material from shrinking.
The right fix depends on what went wrong and how old the vinyl is. A puncture under the surface calls for a different touch than a liner pulling loose from the track, which is the channel along the top wall. Pliable material stretches easily, while older, brittle vinyl needs gentle handling, especially if a tear stretches past a few inches. Here is how to track down the leak, patch the hole, or snap a loose edge back into place.
Pinpointing Liner Punctures and Hidden Underwater Leaks
Vinyl pool liners are durable, but everyday accidents happen. Punctures occur when sharp gravel under the pool floor pushes upward, dog claws scratch the shallow end, or a dropped maintenance pole strikes the bottom. Tears happen when heavy patio furniture blows into the water or when pool ladder bumpers wear thin and expose bare metal. A pulled-out edge occurs when the liner bead slips free from the coping track, leaving loose vinyl sagging along the pool wall.
Finding the exact source of a leak can feel overwhelming when thousands of gallons of water fill the pool. Whatever you do, never drain the pool to search for a leak. Water weight holds the vinyl flat against the pool walls and floor. If you drain the water, the vinyl shrinks, pulls away from the corners, and wrinkles. That shrinkage causes massive rips that ruin the liner for good, and it leaves the sand or vermiculite floor underneath exposed to shifting.
Start your search by inspecting the most common failure points. Look closely at the vinyl surrounding the skimmer opening, the water return fittings, underwater light niches, and the main drain. Check the vinyl right behind your pool ladder steps where rubber feet often wear down. If your ladder is corroded or loose, check how to remove a pool ladder safely so you can inspect the vinyl behind it without scratching the deck or liner.
When a close visual look does not reveal the leak, you can track down the hole using food coloring. Water escaping through a tear creates an outward suction pull that draws liquid right into the hole. Here is how to confirm the exact location using the food coloring method:
- Turn off your pool circulation pump and wait at least thirty minutes until the water is completely still. Any surface ripple or current from the return jets will scatter the food coloring before you can spot the leak.
- Fill a small plastic syringe or medicine dropper with dark red or dark blue food coloring.
- Put on a swim mask or goggles and move quietly into the pool. Wade or swim slowly toward suspected seams, corners, or fittings without splashing.
- Hold the tip of the syringe about one inch away from the liner surface and squeeze out a tiny cloud of coloring.
- Watch the dye carefully. If the vinyl is intact, the dye cloud will drift aimlessly and spread outward. If a puncture is nearby, the suction will pull the dye directly into the hole and out through the pool wall.
Patching Tears and Punctures Underwater Step by Step
You do not need to drain your pool to apply a vinyl patch. High-grade vinyl adhesives and waterproof repair tapes cure completely underwater. In fact, the weight of the water works in your favor by providing constant, even pressure that pushes the patch flat against the pool floor or wall. As long as you clean the surface and cut your patch correctly, an underwater repair can hold securely for years.
The secret to a lasting underwater patch is removing the slick film that coats submerged pool surfaces. Vinyl accumulates a thin layer of algae, body oil, and chemical residue that blocks adhesive from bonding to the raw vinyl. Clearing this layer takes only a few seconds, but it makes the difference between a patch that holds forever and one that floats away the next morning.
- Scrub the vinyl surface around the hole using a clean washcloth, microfiber towel, or nylon scrubbing pad. Wipe away all slick algae and residue within a six-inch circle around the tear.
- Measure the tear and cut a vinyl patch from waterproof tape or a vinyl repair sheet. Make sure the patch extends at least one to two inches past the tear on all sides to create a watertight perimeter.
- Round every corner of the patch using scissors. Sharp, square corners catch on pool brush bristles, swimmer feet, and vacuum heads, which causes the edges to peel up. Rounded corners stay smooth against the pool liner.
- Apply your adhesive according to your repair kit style. If you use a liquid vinyl cement, spread an even layer across the patch and fold the patch in half like a taco so the glue touches itself. This prevents the pool water from washing the cement away as you swim down. If you use peel-and-stick waterproof tape, peel the protective backing film just before you submerge it.
- Dive down to the repair site, open the folded patch or position the tape directly over the puncture, and press it firmly against the vinyl. Smooth the patch from the center outward to push away all trapped water bubbles.
- Hold firm hand pressure on the patch for two full minutes so the initial bond sets. If the patch is on the pool floor, place a smooth dive weight or a plastic-wrapped brick over the patch for twenty-four hours to lock the seal in place.
How to Reset a Slipped Liner Bead Back into Its Track
A slipped liner looks alarming because the vinyl sags down into the water, exposing the bare metal or plastic pool wall behind it. This problem happens when cold weather, excessive splashing, or normal ground settling pulls the bead loose. The bead is the thick top rim of the liner that hooks into the pool wall. The track is the metal or plastic channel running along the top of the pool wall that holds that bead securely in place.
Never pull or yank on cold vinyl with your bare hands. Cold vinyl is completely stiff and has zero stretch. If you try to force a cold liner back into the channel, you will snap the bead off the vinyl sheet, turning a simple adjustment into an expensive replacement job. Vinyl becomes flexible when warmed, which lets you stretch it back up to the top rail without tearing the material.
- Warm the sagging vinyl to restore its stretch. Fill a bucket with hot tap water and pour it slowly over the pulled-out section of liner. Hot tap water softens the vinyl within seconds, giving it the elasticity you need to pull it upward. Never use boiling water, which can melt the vinyl.
- Grip the top of the liner firmly with both hands. If the vinyl feels slick, use a damp hand towel or rubber dishwashing gloves to get a solid grip.
- Pull the liner upward toward the top rail with steady, gentle force. Work gradually so the material stretches evenly across the entire sagging span rather than stressing one single point.
- Hook the bead back into the receiver channel. Start at one end where the bead is still locked inside the track, and work your way toward the center, pressing the bead into the groove inch by inch with your thumbs.
- Secure the bead with liner lock. Liner lock is a flexible plastic wedge strip that jams into the track to hold the liner tight. Press the tapered wedge of the strip into the small gap right above the bead inside the channel.
- Tap the liner lock firmly into place using a rubber mallet or a scrap piece of wood. The locking wedge pinches the bead tightly inside the track channel so it cannot pull loose again when water shifts.
Critical Mistakes to Avoid: When to Patch Versus Replace
Fixing a pool liner yourself saves thousands of dollars, but simple mistakes can ruin a salvageable pool. Knowing what to avoid preserves the integrity of your vinyl and protects the ground structure underneath your pool floor.
- Draining the water: Emptying a vinyl pool causes the liner to shrink within hours. Once vinyl loses the outward pressure of water, it pulls away from walls and corners and will tear if you attempt to refill it.
- Leaving sharp ninety-degree corners on patches: Square patch corners snag on pool brushes and vacuum skirts, which eventually pulls the patch away from the tear.
- Using household duct tape or silicone caulk: Everyday glues and tapes dissolve in chlorinated pool water and leave sticky residues that prevent real vinyl patches from sticking.
- Using boiling water or heat guns on cold vinyl: High heat melts the vinyl sheet, warps the track, or burns permanent holes into the liner wall.
- Ignoring sand washouts behind the vinyl: If water has leaked behind the liner for weeks, it can wash away the sand floor, creating sinkholes. Inspect the ground texture with your feet before patching.
Not every damaged liner can be saved with a patch. You need to weigh the age of the vinyl, the size of the rip, and the location of the tear before deciding between a quick patch and a full replacement.
Start by checking the age and flexibility of your liner. Vinyl liners generally last ten to fifteen years. Over time, sunlight and pool sanitizers strip the plasticizers from the vinyl, making it brittle. If your liner feels stiff, rough, or snaps like a dry leaf when pinched above the waterline, patches will not hold. The tension on brittle vinyl will simply tear a new hole right along the edge of your repair.
Next, measure the size and shape of the damage. Small punctures, pinholes, and tears up to four inches long hold patches very well. Straight cuts up to six inches can hold if they sit on a flat wall or flat floor area away from high-stress points. But if you have a rip longer than six to eight inches, water pressure against the patch will usually push it loose over time.
Pay close attention to factory seams. If a heat-welded seam splits open, patching almost never works. Seams hold the structural shape of the entire pool, and patch glue cannot match the strength of the original factory weld. When a seam opens up, replacement is usually your only reliable choice.
If your liner is too old or damaged to repair, plan your replacement carefully. If you need to empty the pool for a new liner, review how to dispose of pool water safely and legally so you avoid flooding nearby yards or violating local drainage rules. Once your new liner is installed and filled, make sure you know how to balance a newly filled pool so proper water chemistry keeps the fresh vinyl soft and flexible for years to come.
What to Look for in Pool Liner Repair Supplies
Having the right repair supplies ready saves you from scrambling when a leak starts. Two main repair tools handle almost every common liner issue: waterproof vinyl patch kits and plastic liner lock strips.
When selecting patch materials, you can choose between peel-and-stick repair tapes and wet-set liquid adhesive kits. Peel-and-stick waterproof tape works best for quick, flat repairs because it requires no mixing and bonds on contact underwater. Wet-set vinyl kits, which pair liquid solvent cement with clear vinyl sheets, provide a chemical weld that fuses the patch directly into the pool liner material for heavy-duty floor tears.
Check the thickness and appearance of your patch material. Look for thick, heavy-gauge vinyl that resists punctures from pool poles and vacuum heads. Clear patches are ideal for pool floors because they allow your pool pattern to show through, making the repair nearly invisible. For solid blue walls, matching blue patch tape blends into the background nicely.
For slipped liners, pick up a roll of flexible plastic liner lock. These wedge strips come in continuous rolls that you can cut to length with utility shears. Look for flexible plastic that bends easily around pool corners without snapping, and verify that the wedge thickness matches the gap in your pool coping track.

- VC Score9.2
BCP Score is a ranking system developed by bestcleanerproducts.com. BCP Score has no relationship or impact from any manufacturers or sales agent websites. Learn more
- BrandSuperDi

- VC Score9.0
BCP Score is a ranking system developed by bestcleanerproducts.com. BCP Score has no relationship or impact from any manufacturers or sales agent websites. Learn more
- BrandGorilla
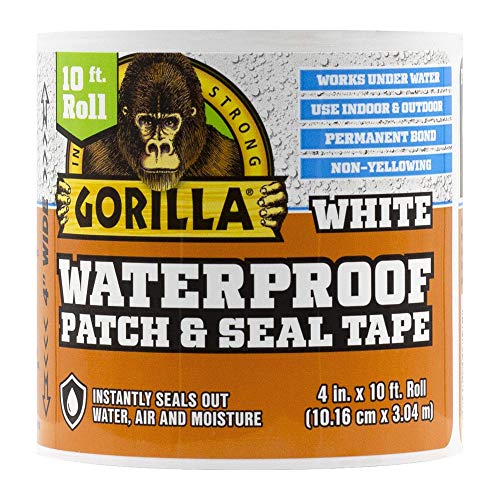
- VC Score8.8
BCP Score is a ranking system developed by bestcleanerproducts.com. BCP Score has no relationship or impact from any manufacturers or sales agent websites. Learn more
- BrandGorilla
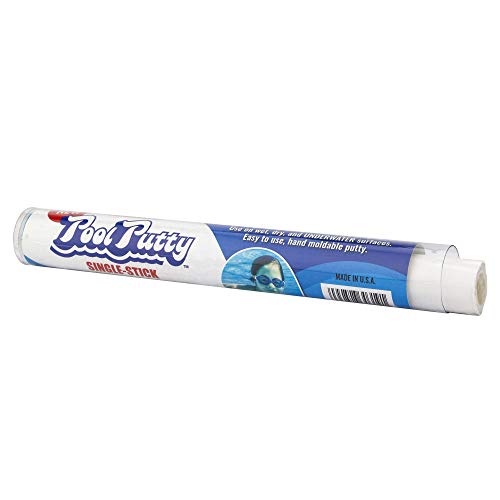
- VC Score8.4
BCP Score is a ranking system developed by bestcleanerproducts.com. BCP Score has no relationship or impact from any manufacturers or sales agent websites. Learn more
- BrandEpoxybond Pool Putty

- VC Score8.2
BCP Score is a ranking system developed by bestcleanerproducts.com. BCP Score has no relationship or impact from any manufacturers or sales agent websites. Learn more
- BrandHTH
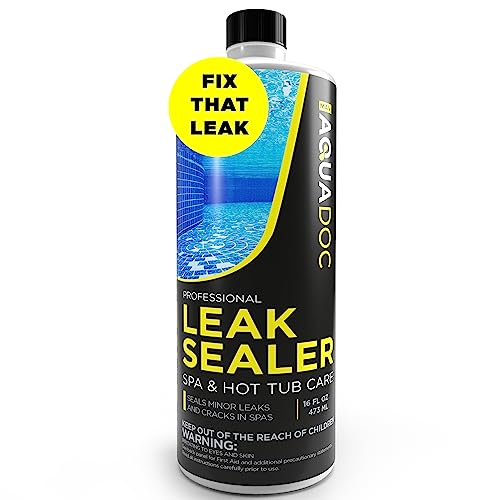
- VC Score7.0
BCP Score is a ranking system developed by bestcleanerproducts.com. BCP Score has no relationship or impact from any manufacturers or sales agent websites. Learn more
- BrandMAV AquaDoc

- VC Score6.6
BCP Score is a ranking system developed by bestcleanerproducts.com. BCP Score has no relationship or impact from any manufacturers or sales agent websites. Learn more
- BrandKapStrom

- VC Score6.6
BCP Score is a ranking system developed by bestcleanerproducts.com. BCP Score has no relationship or impact from any manufacturers or sales agent websites. Learn more
- BrandSyhood
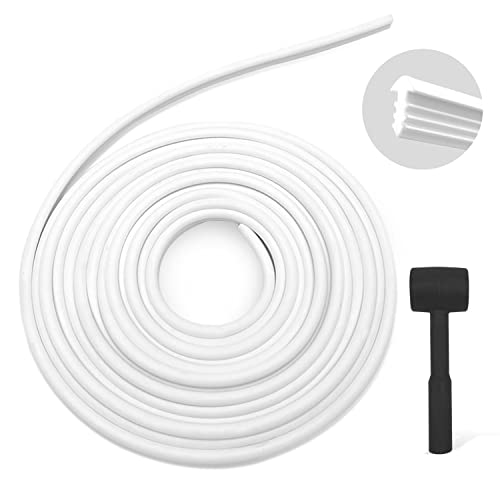
- VC Score5.6
BCP Score is a ranking system developed by bestcleanerproducts.com. BCP Score has no relationship or impact from any manufacturers or sales agent websites. Learn more
- BrandJantens
Last update on 2026-10-08 / Affiliate links / Images, Product Titles, and Product Highlights from Amazon Product Advertising API
FAQs
Can I patch a pool liner with water still in the pool?
Yes, you can patch a pool liner completely underwater without draining any water. Modern vinyl patch adhesives and waterproof patch tapes are formulated to cure and bond in water. In fact, water pressure helps push the patch flat against the pool floor or wall, creating a tight seal.
How long does an underwater pool liner patch last?
A properly applied underwater vinyl patch can easily last several years, often outliving the remaining life of the pool liner itself. As long as you scrub away algae before applying the patch and round the patch corners to stop snagging, the bond remains watertight. If the vinyl around the patch becomes brittle from age, however, new tears may develop nearby.
What should I do if a patch keeps peeling off at the corners?
If a patch peels up, it usually means the surface was slick with algae when applied or the corners were cut square. Peel off the loose patch, scrub the area thoroughly with a textured washcloth to remove biofilm, and cut a fresh patch with generously rounded edges. Hold the new patch firmly in place for two full minutes so the adhesive grips the clean vinyl.


How to Refinish a Fiberglass Pool

How Do You Keep Raccoons Out of Your Pool?

How to Fix Cyanuric Acid in Your Pool

How to Shape a Pool Cue Tip to Stop Miscues

12 Best Automatic Vacuum For Intex Above Ground Pool of 2026 To Keep Vinyl Floors Spotless

10 Best Automatic Pool Vacuum For Above Ground Pool of 2026 To End Manual Scrubbing

How Much Pool Clarifier Should You Use for Your Pool Size?

How Much Does a Pebble Tec Pool Cost to Build or Resurface?


