
How to Safely Bypass a Pool Heater

Water pooling under the pool heater casing usually means an internal leak has broken out just when the pool needs filtering. The solution is to shut off the pump and turn the bypass valve, which routes circulating water directly back to the pool without letting a drop enter the damaged unit.
The exact steps depend on your plumbing setup. Many pads already feature a three-way diverter valve (a plastic handle that points water down a separate pipe), while older setups rely on three separate inline shutoff valves. Systems without any existing bypass line require cutting into the rigid pipe to glue in a manual bypass loop. Here is how to route water safely around the heater without building up pressure or starving your pump.
Why bypass your heater and what safety checks come first?
Bypassing a pool heater means routing water straight from your pool filter back to the pool return jets without letting it enter the heater. Pool owners usually do this when the heater develops a leak, needs replacement parts, or requires winter servicing. You might also want to bypass the unit during heavy chemical treatments. High doses of pool shock or low water pH can strip metal from the heat exchanger (the internal metal tubes that transfer heat to the water). Setting up a bypass lets your pool pump and filter keep running every day so your pool water stays clean and clear, even when the heater sits completely idle.
Working around pool equipment requires a few basic safety precautions before you touch any plumbing or valves. Your pool equipment pad (the flat concrete base where the pump, filter, and heater sit) combines high water pressure, high-voltage electricity, and often natural gas or propane. Rushing into the job without shutting down power can ruin your equipment or cause serious injuries.
Always complete these critical safety checks before starting your bypass:
- Cut power to the heater: Switch off the dedicated electrical breaker for the heater at your main breaker panel. If your heater has an external power switch on its cabinet, switch that off as well. This prevents the unit from trying to ignite when there is no water inside.
- Shut off the fuel supply: If you have a gas heater, locate the manual gas shutoff valve on the black iron pipe leading into the heater cabinet. Turn the valve handle so it sits perpendicular to the gas pipe. This stops any gas from reaching the burners.
- Turn off the main circulation pump: Never turn plumbing valves while your pool pump is running. Sudden valve movements under pressure can blow gaskets, crack valve housings, or rupture PVC pipes. Turn the pump off at the timer or breaker before adjusting anything.
- Bleed residual pressure: Find the air relief valve on top of your pool filter tank. Turn it counterclockwise to release built-up air and water pressure before you handle any pipes or valves.
How do you set existing valves to bypass the heater?
Many in-ground pool pads already feature bypass plumbing installed by the original builder. These setups usually rely on either a single three-way diverter valve (a handle valve that points water down a different pipe) or a three-valve manifold. If your pad already has these valves, routing water around the heater takes less than two minutes once the pump is turned off.
- Shut down the pool pump: Turn off the pump motor using the automation panel, timer clock, or main power switch. Wait for the water to stop moving and watch the filter pressure gauge drop to zero.
- Trace your plumbing lines: Stand at your filter tank and follow the pipe coming out of the filter port. This pipe leads toward the heater. Look for a junction where the pipe splits into two directions. One path leads straight into the heater inlet port, while the other path skips the heater and connects directly into the return line heading back to the pool.
- Adjust the bypass valves:
- For a single three-way diverter valve: Look at the valve handle. Most pool valves have a raised tab or the word "OFF" stamped on one edge of the handle. Rotate the handle so the "OFF" edge points directly toward the pipe that feeds the heater inlet. This completely blocks water from entering the heater while leaving the straight bypass pipe wide open.
- For a three-valve setup: You will see two valves attached to the heater (one on the inlet pipe, one on the outlet pipe) and one valve in the middle bypass pipe. Turn both the inlet valve handle and the outlet valve handle across their pipes to close them. Then, turn the middle bypass valve handle parallel to its pipe to open it fully.
- Open the filter air relief valve: Turn the small valve on top of your filter tank to let air escape when water starts moving again.
- Restart the pump and check the pressure: Turn your pool pump back on. Listen closely to the motor and watch the pressure gauge on your filter tank. Air will hiss out of the filter relief valve for several seconds. Once a steady stream of water shoots out, close the relief valve. Confirm that your filter pressure gauge reads in its normal range, which is typically between 10 and 20 pounds per square inch. If the pressure spikes rapidly above 30 pounds per square inch, shut the pump off immediately because a valve is set the wrong way.
How do you plumb a new manual bypass loop?
If your pool equipment pad only has a straight pipe running from the filter directly into the heater, you need to plumb your own bypass loop. Doing this requires basic PVC plumbing skills, schedule 40 PVC pipe, a pipe cutter or handsaw, PVC primer, and PVC cement. You can use two standard three-way diverter valves or build a loop using three ball valves and two PVC tee fittings.
- Turn off all power and drain the lines: Switch off the circuit breakers for both the pump and the heater. Shut off the gas line valve if applicable. Remove the drain plugs from the bottom of your filter and the heater header to drain all standing water from the pipes. Dry pipes are necessary for PVC glue to bond properly.
- Measure and cut the existing plumbing: Use a pipe cutter or fine-tooth handsaw to cut out a section of pipe between the filter and the heater inlet. Make a second cut on the return line after the heater outlet. Leave at least three inches of bare pipe exposed on each side of your cuts so you have enough room to glue on new fittings. Smooth away any plastic burrs along the cut edges using medium-grit sandpaper.
- Dry-fit the bypass assembly: Assemble your pipes and valves without glue first to make sure everything lines up cleanly. Place one three-way diverter valve on the pipe coming from the filter. Place a second diverter valve or a standard PVC tee fitting on the return line coming out of the heater. Cut a straight piece of PVC pipe to bridge the gap between these two fittings. This straight pipe becomes your bypass line. Make sure all pipes slide fully into the valve sockets without twisting or straining the existing plumbing.
- Clean, prime, and glue the joints: Mark your dry-fitted pipes with a pencil to note the correct angles. Take the pieces apart. Apply purple PVC primer to the outside of the pipe ends and the inside of the valve sockets. While the primer is still tacky, apply a generous, even layer of PVC cement over the primed areas. Push the pipe firmly into the fitting socket, give it a quick quarter-turn to spread the cement evenly, and hold the joint tightly together for thirty seconds. Holding the joint prevents the tapered fitting from pushing the pipe back out.
- Allow full curing time: Let the freshly glued PVC joints cure completely before running any water through them. Check the curing table on your glue can for exact times based on outdoor temperature and humidity. Most standard PVC cements require at least two to four hours for low pressure, but waiting twelve to twenty-four hours is safest for pressurized pool systems.
- Check the installation: Once the glue has cured, position your new valves into the bypass setting. Open the filter air relief valve, turn on the pump, and inspect every glued joint for moisture or pinhole leaks.
What costly mistakes should you avoid during a bypass?
Plumbing mistakes on an equipment pad can lead to expensive repairs within seconds. Keep this practical checklist in mind whenever you adjust or install your bypass setup:
- Avoid deadheading the pool pump: Deadheading happens when you block water flow completely while the pump runs. If you close the valves leading to the heater but forget to open the bypass line, water has nowhere to go. Pressure inside the closed system spikes in an instant. This sudden spike can crack PVC pipes, blow the lid off your filter tank, or warp the pump impeller. Always double-check that at least one clear path remains open for water to travel from the pump back to the pool return jets.
- Never let the heater dry fire: Dry firing occurs when a heater turns on without water circulating through its internal passages. Without water to carry away the intense heat, the heat exchanger can melt, warp, or crack in less than a minute. Always keep the heater power breaker switched off whenever your bypass valves are engaged.
- Watch your system water flow: If you notice weak water pressure at your return jets after adjusting your valves, check for flow restrictions before assuming the bypass failed. Just as you would when learning how to unclog a pool skimmer line safely, confirm that your pump strainer basket and skimmers remain free of leaves so water can reach the pump steadily.
- Protect your heater from corrosive chemical spikes: Many pool owners install bypass loops specifically to protect their heaters when balancing pool water. If you are learning how to add chlorine tablets to your pool safely, remember that inline chemical feeders should always sit after the heater in the plumbing line. Bypassing the heater during heavy chemical shocks keeps concentrated chlorine from eating away delicate copper heat exchanger tubes.
- Drain the heater if freezing weather approaches: Bypassing the heater isolates it from water circulation, but water can still sit trapped inside the heater manifold. If temperatures drop below thirty-two degrees Fahrenheit, that trapped water will freeze, expand, and split the copper or cupro-nickel tubes. Always pull the lower drain plugs on an isolated heater before winter arrives.
When should you call a licensed pool technician?
Most handy pool owners can turn existing diverter handles or glue simple PVC fittings without trouble. Some equipment pad issues, however, carry safety hazards that require professional training and specialized tools.
Call a licensed pool technician or a certified gas fitter if you notice any of these signs:
- You smell gas around the equipment pad: If you smell rotten eggs or natural gas near the heater, leave the area immediately. Do not attempt to turn electrical switches or adjust plumbing. Shut off your main gas supply from a safe distance and call your utility company or an emergency gas technician.
- Pipes are crowded with zero clearance: Older equipment pads often have pipes crammed tightly together with no straight pipe available between fittings. If there is no room to cut and glue new valves without replumbing the entire pad from the pump onward, a professional can reconfigure the layout cleanly.
- Internal electrical short circuits: If turning off the heater causes breaker trips on other equipment, or if you see scorched wiring inside the heater access panel, stop immediately. High-voltage pool wiring requires a licensed electrician.
- The heater is leaking exhaust or soot: Heavy black soot around the heater cabinet often points to improper combustion or a blocked heat exchanger. A professional should inspect the internal burners and venting before you ever put the unit back into service.
What bypass valves and kits should you look for?
If you plan to install or upgrade a bypass setup, choosing the right plumbing hardware saves hours of frustration. Pool equipment pads handle continuous vibration, direct sunlight, and pressurized water, so standard household plumbing parts will not hold up over time.
Look for heavy-duty three-way diverter valves made from ABS plastic or CPVC rather than cheap hardware-store ball valves. Quality pool diverter valves use silicone or rubber o-rings and feature removable cover plates secured by stainless steel screws. This design allows you to open the valve body, lubricate the internal seals, or replace worn parts years down the road without cutting any pipes out of your system.
Make sure the valve ports match your existing plumbing dimensions. Most in-ground residential pool systems use either 1.5-inch or 2-inch schedule 40 PVC pipe. Many quality diverter valves feature dual-sized ports that accept a 1.5-inch pipe glued inside the socket or a 2-inch slip fitting over the outside collar. Pick valves with clear handle indicators that show exactly which port is closed so you never risk deadheading your pump by accident.

- VC Score9.6
BCP Score is a ranking system developed by bestcleanerproducts.com. BCP Score has no relationship or impact from any manufacturers or sales agent websites. Learn more
- BrandGAME

- VC Score9.0
BCP Score is a ranking system developed by bestcleanerproducts.com. BCP Score has no relationship or impact from any manufacturers or sales agent websites. Learn more
- BrandFibroPool
- VC Score8.8
BCP Score is a ranking system developed by bestcleanerproducts.com. BCP Score has no relationship or impact from any manufacturers or sales agent websites. Learn more
- BrandGAME

- VC Score7.6
BCP Score is a ranking system developed by bestcleanerproducts.com. BCP Score has no relationship or impact from any manufacturers or sales agent websites. Learn more
- BrandGAME
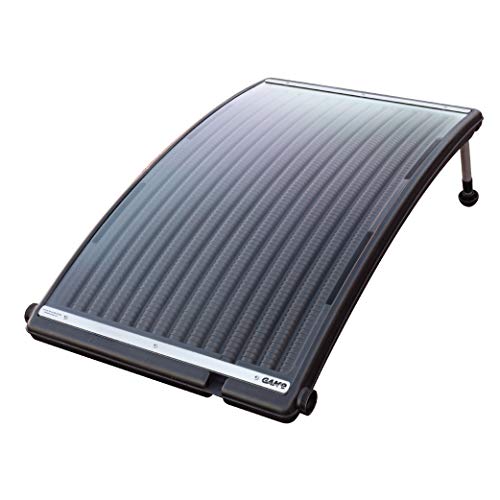
- VC Score7.2
BCP Score is a ranking system developed by bestcleanerproducts.com. BCP Score has no relationship or impact from any manufacturers or sales agent websites. Learn more
- BrandGAME

- VC Score6.8
BCP Score is a ranking system developed by bestcleanerproducts.com. BCP Score has no relationship or impact from any manufacturers or sales agent websites. Learn more
- BrandIntex

- VC Score6.2
BCP Score is a ranking system developed by bestcleanerproducts.com. BCP Score has no relationship or impact from any manufacturers or sales agent websites. Learn more
- BrandHPXmas
Last update on 2026-10-08 / Affiliate links / Images, Product Titles, and Product Highlights from Amazon Product Advertising API
FAQs
Can you run the pool pump while bypassing the heater?
Yes, running the pool pump while bypassing the heater is the entire point of installing a bypass loop. The bypass lets water travel from your pool skimmers, through the pump and filter, and directly back into the pool return jets without entering the heater. This keeps your water filtered, skimmed, and chemically balanced while your heater sits completely turned off.
Which way does the handle face to bypass a heater?
On a standard three-way pool diverter valve, the handle features a raised tab or a flat edge stamped with the word "OFF." To bypass the heater, rotate the handle until this "OFF" indicator points directly toward the pipe that leads into the heater inlet port. This position seals off the path to the heater while leaving the straight bypass pipe completely open.
Does bypassing a pool heater lower your water pressure?
Bypassing a pool heater usually decreases filter pressure slightly rather than increasing it. Water encounters friction and resistance as it winds through the narrow internal tubes of a heat exchanger. Sending water through a straight, open bypass pipe reduces that resistance, which often drops your filter tank pressure by one to three pounds per square inch and improves return jet flow.
Will bypassing a pool heater protect it from winter freezing?
Bypassing the heater stops new water from entering the unit, but it does not protect the heater from freezing by itself. Water will remain trapped inside the internal metal tubes unless you physically remove the drain plugs located at the bottom of the heater headers. To prevent freezing damage, bypass the unit, open the heater drain plugs, and blow out any standing water with a shop vacuum.


How to Refinish a Fiberglass Pool

How Do You Keep Raccoons Out of Your Pool?

How to Fix Cyanuric Acid in Your Pool

How to Shape a Pool Cue Tip to Stop Miscues

12 Best Automatic Vacuum For Intex Above Ground Pool of 2026 To Keep Vinyl Floors Spotless

10 Best Automatic Pool Vacuum For Above Ground Pool of 2026 To End Manual Scrubbing

How Much Pool Clarifier Should You Use for Your Pool Size?

How Much Does a Pebble Tec Pool Cost to Build or Resurface?


