
How Much Does It Cost to Repair a Pool in 2026?

Fixing a damaged pool ranges from a minor out-of-pocket patch to a major structural rebuild. The final expense hinges entirely on which specific part failed and whether someone has to empty the water to reach it. Postponing the work out of worry only makes things worse, as a tiny unnoticed leak can slowly wash away the supporting soil beneath the yard.
Every pool style behaves differently. An above-ground vinyl liner often accepts a fast underwater glue job, while a thick concrete basin needs specialized plaster and heavy labor. Mechanical issues with circulating pumps, surface drain boxes, or underground plumbing lines also take far more effort than sealing a torn seam. Here is a clear breakdown of each common problem so you can decide between an easy afternoon fix and calling in a contractor.
Comparing Pool Repair Costs by Problem and Method
When your pool starts losing water or the pump begins screeching, fear of a massive repair bill can tempt you to ignore the problem. Putting off a fix is the most expensive choice you can make. A small leak that lets half an inch of water escape every day does not just waste water and chemicals. That escaped water saturates the ground under your pool deck, washing away the supporting dirt and turning a minor patch job into thousands of dollars in foundation damage.
Your repair bill depends almost entirely on which component fails and whether you can fix it yourself. Doing your own repair using specialized pool patch tapes, underwater vinyl adhesives, or two-part epoxies generally costs between $15 and $50 in basic supplies. In contrast, calling an independent pool service technician usually starts with a diagnostic visit fee between $100 and $200 simply to drive out and inspect the pool. From there, professional labor rates typically range from $75 to $150 per hour, plus the retail price of replacement parts.
Pool construction also changes the price tag. Above-ground pools use thinner vinyl liners and external equipment, meaning replacement parts cost much less and surface repairs are straightforward to reach. Inground pools made with a gunite (sprayed concrete shell) or thick inground vinyl require heavier materials, complex plumbing runs buried under concrete, and higher labor fees when specialized work is needed. Reviewing your overall pool equipment expenses helps you decide whether patching an aging piece of hardware makes sense or if full replacement is the smarter financial move.
Steps to Inspect and Patch Minor Leaks Underwater
You do not need to drain your pool to fix small surface cracks, torn vinyl seams, or skimmer gaps. Draining a pool is stressful, costly, and can ruin your pool shell. Use this step-by-step checklist to find the leak and repair it underwater on your own.
- Confirm physical water loss with a simple bucket check. Place a five-gallon bucket filled with pool water on your pool steps, mark both the pool water level and the bucket water level with tape, and compare them after twenty-four hours. Reason: This tells you whether your water loss is normal summer evaporation or a physical leak, preventing you from spending money on unnecessary repairs.
- Inspect the skimmer throat and faceplate screws. Check the plastic walls inside the skimmer (the surface drain box with a debris basket), looking for hairline fractures or loose mounting screws. Reason: The skimmer absorbs ground movement and vibrations from the pump, making cracked plastic and loose faceplate gaskets the single most common leak location in residential pools.
- Trace suspected leak points with dark food coloring. Turn off the pool pump so the water is completely still, dive near the suspected seam or crack, and release a small stream of food coloring an inch away from the surface. Reason: If a crack is leaking water into the surrounding soil, the dye gets pulled directly into the crack like a vacuum, confirming the exact leak location.
- Clean the repair surface underwater with a soft scrub pad. Gently scour the plaster, fiberglass, or vinyl around the leak to clear away algae, suntan lotion film, and mineral scale. Reason: Underwater adhesives and epoxy compounds need direct contact with the clean surface to bond properly, and slippery algae prevents a secure seal.
- Cut waterproof tape or vinyl patches with rounded edges. If you are using patch tape or vinyl sheets, use scissors to round off every sharp corner before sticking it down. Reason: Sharp square corners catch on pool brush bristles, vacuum skirts, and swimmer feet, causing the patch to peel back over time.
- Knead your underwater putty or apply vinyl cement. Mix two-part epoxy putty by hand until it turns a uniform shade, or apply a generous layer of underwater vinyl adhesive to the patch backing and fold the patch in half as you take it underwater to keep the glue intact. Reason: Two-part epoxy requires friction and physical kneading to activate its chemical curing process, while vinyl adhesive must stay concentrated on the patch until it reaches the liner surface.
- Press the repair material firmly over the hole for several minutes. Push the mixed putty directly into the crack or smooth the patch flat over the torn vinyl, working from the center outward to push away all trapped water. Reason: Firm manual pressure squeezes out water pockets and ensures full contact between the adhesive and the pool shell.
- Keep the circulation pump turned off for at least an hour. Leave the water calm while the adhesive or putty takes its initial set. Reason: Strong water currents from return jets can peel up the edge of a fresh patch before the chemical bond gains sufficient strength.
Repairing or Replacing Pool Pumps and Filters
Equipment pad repairs range from five-minute gasket swaps to complete motor replacements. When a pool pump motor starts making a loud, high-pitched screeching sound, the internal bearings are usually worn out from moisture intrusion. Replacing motor bearings or the entire pump motor generally costs between $200 and $500 for the part if you do the work yourself, while a service company will typically charge $400 to $900 for parts and labor. If the entire pump is over eight to ten years old, replacing the entire pump assembly with an energy-efficient variable-speed model is often wiser than investing money into an obsolete motor.
Air leaks on the suction side of the pump are another common headache. When you see steady streams of bubbles shooting out of your return jets, the pump is pulling air past a dry lid O-ring or a loose pipe union. This issue can cause cavitation (the pump sucking air bubbles instead of water), which sounds like gravel rattling around inside the pump basket and eventually ruins the spinning plastic impeller. You can usually fix this issue for under $20 simply by replacing the rubber pump lid O-ring and coating it with silicone pool lubricant.
Filter repairs depend on whether you have a sand, cartridge, or diatomaceous earth system. A leaking multiport valve handle or cracked internal gasket can often be fixed with a $30 rebuild kit. But if the fiberglass or plastic tank body itself develops a structural crack, you must replace the entire unit. High water pressure makes patching a split filter tank dangerous because the tank can rupture under pressure. You can check how much a new pool filter costs to compare different filter styles and budget for a safe replacement unit.
Costs for Major Liner Replacements and Structural Resurfacing
When damage spreads beyond a few small cracks or pinholes, simple patch supplies will no longer protect your pool shell. A vinyl pool liner that has been in place for ten to fifteen years loses its chemical plasticizers over time, becoming brittle, faded, and stiff. Once an old liner shrinks and pulls out of the coping track at the top of the wall, trying to patch tears will only result in new tears next to the old ones. A full professional vinyl liner replacement generally runs between $1,500 and $3,500 for an above-ground pool, and between $4,000 and $7,500 for an inground pool, depending on the thickness of the material and pool dimensions.
Concrete and gunite pools face different long-term surface problems. Over decades, the protective plaster coating wears down, exposing rough concrete, developing structural cracks, or spalling (chipping off in large chunks). Resurfacing an inground concrete pool involves draining the water, chipping away loose plaster, applying a bond coat, and troweling on fresh plaster or pebble aggregate. A professional replastering job typically costs between $6,000 and $15,000, depending on pool size, local contractor rates, and whether you choose standard white quartz or durable pebble aggregate.
Never drain an inground pool without consulting an expert first. Draining removes thousands of pounds of water weight that hold the pool shell down against the surrounding earth. In areas with high water tables, hydrostatic pressure (groundwater pressure pushing against the pool shell) can literally crack the pool floor or float an empty concrete pool right out of the dirt like a ship. Qualified contractors open hydrostatic relief valves in the main drain to let groundwater enter harmlessly while the pool is empty during resurfacing.
Warning Signs That Mean You Must Call a Professional
DIY repairs make sense for visible surface tears and simple pipe joints, but certain pool failures carry severe safety risks or threaten your property foundation. If you encounter any of the following problems, put your tools away and contact a licensed contractor:
- Breakers tripping at the electrical panel: If your pump or cleaner trips the breaker at the outdoor GFCI outlet (a protected ground-fault outlet with a weatherproof cover), stop running the system immediately. Water intrusion inside high-voltage motor windings creates an immediate shock hazard that requires an electrician or qualified pool technician to diagnose.
- Underground water loss: If your pool loses water only when the pump is running, the break is almost certainly inside an underground return line buried under your concrete deck or lawn. Locating and digging up buried plumbing requires specialized acoustic listening equipment and pressure-testing plugs that home handymen do not own.
- Structural cracks splitting the pool shell: A hairline surface scratch in plaster is cosmetic, but a crack that runs through the concrete shell, continues across the deck, or causes tiles to fall off at the waterline (the tile border where water meets the pool wall) signals foundation movement. Patching over a shifting crack will not stop the pool from splitting open.
- Sinkholes and settling pool decks: If you notice pavers dropping, concrete decking separating from the pool coping, or squishy, mud-soaked ground near the pool perimeter, water is washing away the structural soil base. Continuing to run the pool risks a complete wall collapse that can destroy surrounding landscaping and home foundations.
Choosing the Right DIY Pool Repair Supplies
If your inspection reveals that your problem is a minor surface leak or loose fitting, having the proper patch materials on hand can save you hundreds of dollars in service call fees. Before you order patch compounds, check the exact material of your pool surface. Vinyl liners require flexible patch tapes or clear vinyl adhesives that remain soft after drying, while gunite, plaster, and fiberglass require rigid, two-part epoxy putties that cure rock-hard under water.
Also confirm the cure time and underwater rating of any sealant you consider. Standard household silicones and general-purpose construction adhesives wash away or dissolve when exposed to chlorinated pool water. Look specifically for products designed to cure underwater without requiring water drainage. Keep an eye on the color of the putty or tape as well. Selecting an aqua, white, or off-white patch compound that blends into your pool floor or skimmer plastic helps keep your repair unobtrusive while protecting your pool structure for years to come.

- VC Score9.2
BCP Score is a ranking system developed by bestcleanerproducts.com. BCP Score has no relationship or impact from any manufacturers or sales agent websites. Learn more
- BrandAMERICAN LUXURY GIFTS

- VC Score9.0
BCP Score is a ranking system developed by bestcleanerproducts.com. BCP Score has no relationship or impact from any manufacturers or sales agent websites. Learn more
- BrandRH Adhesives

- VC Score9.0
BCP Score is a ranking system developed by bestcleanerproducts.com. BCP Score has no relationship or impact from any manufacturers or sales agent websites. Learn more
- BrandGorilla

- VC Score9.0
BCP Score is a ranking system developed by bestcleanerproducts.com. BCP Score has no relationship or impact from any manufacturers or sales agent websites. Learn more
- BrandAMERICAN LUXURY GIFTS
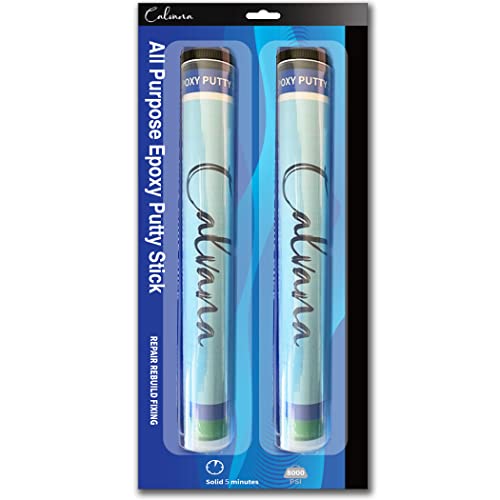
- VC Score8.8
BCP Score is a ranking system developed by bestcleanerproducts.com. BCP Score has no relationship or impact from any manufacturers or sales agent websites. Learn more
- BrandCalvana
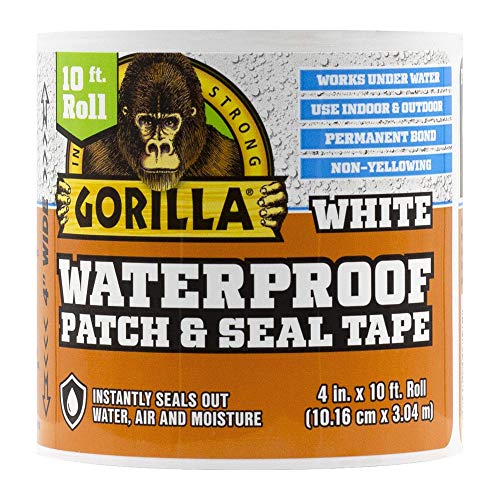
- VC Score8.8
BCP Score is a ranking system developed by bestcleanerproducts.com. BCP Score has no relationship or impact from any manufacturers or sales agent websites. Learn more
- BrandGorilla

- VC Score8.8
BCP Score is a ranking system developed by bestcleanerproducts.com. BCP Score has no relationship or impact from any manufacturers or sales agent websites. Learn more
- BrandAMERICAN LUXURY GIFTS

- VC Score8.6
BCP Score is a ranking system developed by bestcleanerproducts.com. BCP Score has no relationship or impact from any manufacturers or sales agent websites. Learn more
- BrandJ-B Weld

- VC Score8.6
BCP Score is a ranking system developed by bestcleanerproducts.com. BCP Score has no relationship or impact from any manufacturers or sales agent websites. Learn more
- BrandJ-B Weld

- VC Score7.4
BCP Score is a ranking system developed by bestcleanerproducts.com. BCP Score has no relationship or impact from any manufacturers or sales agent websites. Learn more
- BrandBetter Boat

- VC Score8.4
BCP Score is a ranking system developed by bestcleanerproducts.com. BCP Score has no relationship or impact from any manufacturers or sales agent websites. Learn more
- BrandEpoxybond Pool Putty

- VC Score8.0
BCP Score is a ranking system developed by bestcleanerproducts.com. BCP Score has no relationship or impact from any manufacturers or sales agent websites. Learn more
- BrandRiakrum
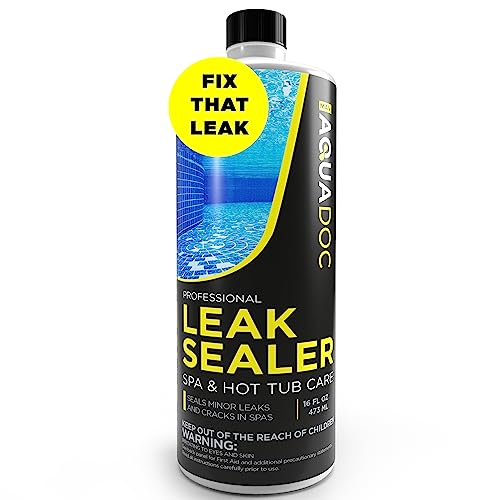
- VC Score7.0
BCP Score is a ranking system developed by bestcleanerproducts.com. BCP Score has no relationship or impact from any manufacturers or sales agent websites. Learn more
- BrandMAV AquaDoc

- VC Score6.6
BCP Score is a ranking system developed by bestcleanerproducts.com. BCP Score has no relationship or impact from any manufacturers or sales agent websites. Learn more
- BrandKapStrom
Last update on 2026-10-08 / Affiliate links / Images, Product Titles, and Product Highlights from Amazon Product Advertising API
Frequently Asked Questions
Can I patch a pool leak without draining the water?
Yes, you can patch most minor liner tears, skimmer cracks, and small plaster chips without draining the pool. Specialized underwater epoxy putties, vinyl adhesives, and waterproof patch tapes are chemically formulated to stick and cure directly under water. Draining your pool should always be a last resort, as removing water can cause liners to shrink or lead to shell damage from groundwater pressure.
How much water loss is normal before I should suspect a leak?
Normal evaporation typically causes a quarter inch to half an inch of water loss per day during hot, dry, or windy weather. If your pool consistently loses more than half an inch of water every twenty-four hours, you likely have a physical leak. Performing a bucket check on your pool steps helps you verify whether water loss is due to evaporation or an actual plumbing or surface leak.
Is it better to repair a pool pump motor or replace the entire unit?
If your pump is less than five years old and only needs a shaft seal, O-ring, or replacement motor, repairing the existing unit is usually much cheaper than a full replacement. But if your pump is over eight years old, runs on an outdated single-speed motor, or has a warped plastic housing, investing in a modern variable-speed pump will save you more money on long-term electricity and repair bills.
How long does an underwater patch usually hold up?
A properly applied underwater patch made with dedicated pool vinyl adhesive or two-part epoxy can easily hold up for two to five years. Its lifespan depends on how thoroughly you cleaned the surface before applying the patch and whether you rounded the corners to prevent peeling. While underwater patches are considered permanent fixes for small tears, widespread brittleness across an aging liner will eventually require replacing the entire liner.


How to Refinish a Fiberglass Pool

How Do You Keep Raccoons Out of Your Pool?

How to Fix Cyanuric Acid in Your Pool

How to Shape a Pool Cue Tip to Stop Miscues

12 Best Automatic Vacuum For Intex Above Ground Pool of 2026 To Keep Vinyl Floors Spotless

10 Best Automatic Pool Vacuum For Above Ground Pool of 2026 To End Manual Scrubbing

How Much Pool Clarifier Should You Use for Your Pool Size?

How Much Does a Pebble Tec Pool Cost to Build or Resurface?


