
How to Winterize a Fiberglass Pool Without Damaging the Shell

Many pool owners assume that closing for the cold months means emptying the basin completely. Doing that with a fiberglass shell is a costly mistake. Moisture in the ground can heave an empty shell right out of the dirt, so you must keep the pool full of water. Real winterizing simply means balancing the water, clearing and plugging the underground pipes, and draining the pump and filter.
A few local conditions will shape your exact routine. Freezing northern winters require far more pipe protection than mild southern cold snaps. Areas with high groundwater demand extra caution so wet dirt does not press inward against the walls. The style of winter cover makes a difference as well, since mesh lets winter rain seep through while a solid tarp keeps everything out. Here is the safe, step-by-step way to protect your lines and keep the shell secure until spring.
The Short Version
- Keep the pool full of water: Never empty a fiberglass pool completely, because water pressure in the surrounding soil can crack the structure or push the entire shell upward out of the dirt.
- Blow out and seal the plumbing: Push water out of underground pipes using forced air, then seal every line with an expansion plug (a rubber stopper that seals pipe openings) to prevent freeze bursts.
- Drain all equipment pad units: Pull the drain caps from your pump, filter, heater, and chlorinator so trapped water cannot freeze and crack the internal parts.
- Balance the water and fasten your cover: Adjust your water chemistry, treat with winter chemicals safe for the gelcoat (the smooth outer surface layer of the fiberglass), and secure a tight winter cover.
The Golden Rule: Never Empty a Fiberglass Pool
The single most dangerous mistake you can make with an inground fiberglass pool is pumping out all the water for the winter. Concrete pools have thick, heavy walls that can sometimes sit empty during cold weather, but a fiberglass shell is comparatively thin, flexible, and lightweight. The massive weight of the water inside is the only force holding that shell down in its excavated bed.
During late fall, winter, and early spring, rain and melting snow soak into the earth surrounding your pool. This moisture creates hydrostatic pressure, which is simply water pressure in the surrounding soil pressing inward against the buried walls. If that soil gets wet while your pool sits empty, the underground water behaves like a lake beneath a boat. It can bow the fiberglass walls inward, buckle the floor, create deep stress cracks, or lift the entire pool shell right out of the ground.
Freezing temperatures make that outside ground pressure even worse. Wet dirt expands as it turns to solid ice. When expanding frozen soil pushes against an empty, brittle fiberglass wall, the shell can fracture permanently. To protect your pool, always leave the shell filled with water. Depending on your cover style, you will either leave the pool at normal operating level or lower it just a few inches below the skimmer opening. The water inside serves as a physical brace against the frozen earth all winter long.
Step 1: Clean the Surface and Balance the Water
Closing a dirty pool invites stains that can permanently discolor your fiberglass finish. Leaves, acorns, dirt, and dead algae sitting on the floor under a dark cover will slowly leach tannins and minerals into the pool. Over months of dormancy, these compounds bond directly to the gelcoat, leaving stubborn rings and dark spots that are difficult to scrub away in the spring.
- Skim and scoop loose debris: Use a leaf net to remove all floating matter from the surface. Then, drag a leaf rake net slowly across the floor to pick up leaves, twigs, and heavy dirt before vacuuming.
- Brush the entire pool shell: Scrub the steps, seating ledges, walls, and floor with a nylon-bristled brush. Never use a stainless steel wire brush on fiberglass, because stiff wire bristles will scratch the glossy gelcoat and create microscopic grooves where algae can root.
- Vacuum settled dirt: Run a manual vacuum or an electric robotic cleaner (a self-powered unit with its own internal debris basket) to pick up fine silt and sand. If your suction seems weak when connecting a manual hose, take time to check how to adjust pool skimmer suction safely to pull settled sediment smoothly without running the pump dry.
- Check and adjust chemical balance: Use a reliable test kit to measure your pH, total alkalinity, and calcium hardness. Adjust total alkalinity first so it sits between 80 and 120 parts per million. Then adjust your pH to land between 7.2 and 7.6. Keep calcium hardness balanced between 200 and 400 parts per million to protect the pool surface from leaching or mineral scaling.
- Add sanitizer or shock: Add your pool shock several days before your planned closing date. Run the circulation pump for at least eight to twelve hours so the sanitizer distributes evenly. Never drop chlorine tablets directly onto the floor, and avoid pouring concentrated granular shock straight onto the steps, as settling granules can bleach the fiberglass surface.
Step 2: Adjust Water Levels and Clear the Plumbing Lines
Water left inside buried PVC pipes will freeze, expand, and split the plumbing underground. Fixing a cracked pipe under concrete decking is one of the most expensive pool repairs possible, so clearing these lines is the most critical technical step of winterizing.
- Determine your winter water height: Your target water level depends on the type of cover you own. If you use a solid vinyl tarp that holds standing rainwater on top, drop the pool water about four to six inches below the bottom of the skimmer mouth. If you use a permeable mesh safety cover, winter rain and snowmelt will seep down into the pool, so lower the water twelve to eighteen inches below the skimmer. Never lower the water below the shallow end floor. If you prefer not to drain any water at all, you can install a snap-in faceplate plug over the skimmer mouth to seal it completely at standard operating level.
- Drop the water with care: Set your pool filter multiport valve to the waste setting, or use a clean submersible utility pump to pump out water gradually. Watch the waterline constantly so you do not drain the pool too low.
- Blow out the return lines: Connect a commercial air blower or a strong wet-dry shop vacuum to the pump strainer housing or the return side of your equipment pad. Force air through the underground plumbing to blow out the lines, which simply means pushing all water out of the pipes using forced air.
- Cap the wall fittings: As air clears the return line, water will begin spraying out of the wall return jets in the pool, followed by a continuous burst of air bubbles. While the air blower is still running, screw in a threaded winter plug or insert an expansion plug (a rubber stopper that seals pipe openings when you tighten its wing nut). Tighten the plug firmly until the rubber bulges against the inside pipe wall, forming an airtight barrier.
- Clear and protect the skimmer: Blow air through the skimmer line until the pipe is empty. Screw a skimmer guard (a hollow plastic tube that absorbs freezing ice pressure) into the threaded hole at the bottom of the skimmer well. If trapped rainwater freezes inside the skimmer box over the winter, the expanding ice will crush the hollow plastic tube instead of splitting the rigid walls of your skimmer.
- Add non-toxic pool antifreeze: If you live where the ground freezes several feet deep, pour winter pool antifreeze down the cleared skimmer pipe. Always verify that you are using non-toxic pool antifreeze, never automotive coolant, which contains dangerous chemicals that ruin pool liners and water quality.
Step 3: Drain the Pump, Filter, and Heater
Water expands by roughly nine percent when it turns into solid ice. Any puddle left inside your plastic pump housing, brass heater manifold, or fiberglass filter tank can easily split the equipment wide open during a hard freeze. Follow this checklist to drain everything on your equipment pad.
- Shut off main electrical breakers: Switch off the dedicated electrical circuit breakers that power your pool equipment. This prevents timers from turning the pump back on while the plumbing is dry.
- Drain the pool pump: Unscrew both drain caps on the pump body. There is usually one near the clear lid strainer pot and another near the motor impeller casing. If you are unfamiliar with your pump parts, review how to winterize a pool pump to prevent freeze damage for a detailed look at protecting internal seals. Place the small drain plugs inside the pump strainer basket and put the lid back on loosely so the plugs do not go missing over the winter.
- Drain the pool filter: For sand filters, unscrew the bottom drain cap to let water drain out of the sand bed, then rotate the multiport valve handle so it sits in the neutral winter position. For cartridge filters, remove the bottom plug, release the top air valve, open the tank band, and remove the fabric cartridges. Hose the cartridges clean and store them in an enclosed garage or shed. For diatomaceous earth filters, open the drain valve, wash down the internal fabric grids, and leave the drain open.
- Drain the heater: Remove all drain plugs from the heater manifold and heat exchanger. If your heater manual recommends it, blow low-pressure air through the unit to clear residual moisture from the narrow heating tubes.
- Remove sensitive accessories: Unscrew the fragile water pressure gauge from your filter tank and bring it indoors. Freezing moisture trapped behind the dial can break the internal spring. If your pool uses an inline salt chlorine generator, unplug the electronic cell, unthread the unions, and store the cell inside where it will stay warm and dry.
Step 4: Add Closing Chemicals and Secure the Winter Cover
Once the pipes and equipment pad are completely cleared and capped, you need to prepare the pool water for months of sitting in the dark without circulation. Adding the right protective products now saves days of scrubbing when warm weather returns.
- Distribute winter algaecide: Pour a broad-spectrum winter algaecide evenly around the perimeter of the pool. Algae can grow even in chilly water whenever early spring sunshine warms the upper layers, so having a long-lasting algaecide in place stops green blooms before they begin.
- Add stain and scale inhibitors: Pour in a sequestering agent formulated to keep dissolved iron, copper, and calcium floating suspended in the water. Because the pump is turned off all winter, standing water allows loose minerals to settle on the fiberglass shell, where they can form rough, discolored rings on the gelcoat.
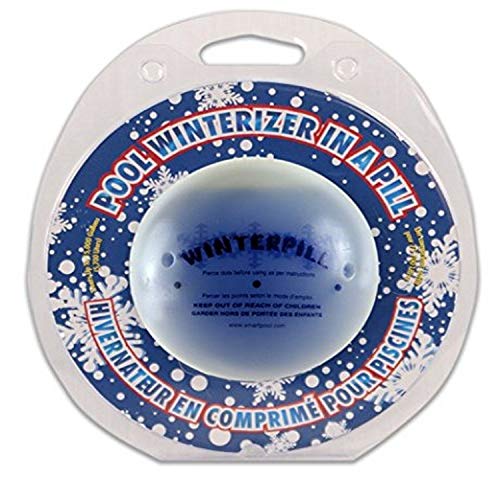
- Use surface-safe winter sanitizers: Avoid tossing slow-dissolving chlorine tablets or heavy oxidizers into a pool that has stopped circulating. Undissolved chlorine sinking to the floor will bleach the pigment right out of your gelcoat. Instead, use non-chlorine winter oxidizers or specialized slow-release floating winterizer capsules designed specifically to float under covers.
- Fit your winter cover:
- Mesh safety covers: Fasten the heavy-duty straps over your deck anchors using an installation rod. Adjust the tension springs until the straps pull taut and the cover sits suspended above the water like a sturdy trampoline. Verify that the cover overlaps the fiberglass pool coping evenly by at least one foot on every side.
- Solid tarp covers: Lay the solid vinyl tarp flat across the pool, giving the center enough slack to rest on top of the water level. Lay vinyl water tubes around the perimeter, filling them roughly three-quarters full with garden hose water so they have room to freeze without bursting. Never anchor a cover with patio chairs, cinder blocks, or rocks. Heavy items can easily slip into the pool under snow weight and gouge the fiberglass shell.
- Set up a winter cover pump: If you use a solid tarp, place a small submersible cover pump on top of the fabric. Rain and melting snow will create heavy puddles that stress the tarp seams and drag the edges down into the pool if left unpumped.
Choosing Winterizing Supplies for Fiberglass Pools
Closing a fiberglass pool requires tools and chemicals that protect plumbing without scratching or discoloring the delicate gelcoat finish. When shopping for winterizing accessories, look for products built specifically for slick composite shells rather than rough plaster pools.
For chemical protection, look for winter closing kits that use non-chlorine oxidizers and broad-spectrum algaecides. Harsh chlorine shock can fade the color of fiberglass when circulation stops, so non-bleaching formulas are much safer for off-season storage. Slow-release winter capsules that float under the cover work exceptionally well with mesh covers, continuously releasing clarifiers and mineral controls for months.
For freeze protection, check the sizing of your skimmer openings and pipe fittings before ordering plugs. Many fiberglass pools use standard threaded wall fittings that accept threaded winter plugs with rubber O-rings, while smooth ports need tapered rubber expansion plugs with stainless steel wing nuts. For your skimmers, choose combination winter tubes that screw into the bottom plumbing ports while providing a crushable hollow body to absorb expanding ice. If you prefer to keep your pool water at full summer level, look for press-in faceplate skimmer plugs, which create a watertight seal over the skimmer mouth without requiring you to lower the water.
For seasonal cleaning, select scrubbers and pads marked safe for fiberglass, gelcoat, and marine composite finishes. Stiff bristle heads and rough scrubbing blocks will abrade the smooth outer layer of your pool, creating cloudy patches and tiny scratches that catch dirt. Soft, non-scratch scrubbing sticks and citrus-based stain removers lift waterline scale and organic leaves gently without damaging the glossy shell.

- VC Score9.2
BCP Score is a ranking system developed by bestcleanerproducts.com. BCP Score has no relationship or impact from any manufacturers or sales agent websites. Learn more
- BrandIn The Swim

- VC Score9.2
BCP Score is a ranking system developed by bestcleanerproducts.com. BCP Score has no relationship or impact from any manufacturers or sales agent websites. Learn more
- BrandGLB

- VC Score9.2
BCP Score is a ranking system developed by bestcleanerproducts.com. BCP Score has no relationship or impact from any manufacturers or sales agent websites. Learn more
- BrandIn The Swim

- VC Score9.0
BCP Score is a ranking system developed by bestcleanerproducts.com. BCP Score has no relationship or impact from any manufacturers or sales agent websites. Learn more
- BrandRx Clear
- VC Score8.8
BCP Score is a ranking system developed by bestcleanerproducts.com. BCP Score has no relationship or impact from any manufacturers or sales agent websites. Learn more
- BrandSeaKlear

- VC Score8.8
BCP Score is a ranking system developed by bestcleanerproducts.com. BCP Score has no relationship or impact from any manufacturers or sales agent websites. Learn more
- Brandpoolrx

- VC Score8.8
BCP Score is a ranking system developed by bestcleanerproducts.com. BCP Score has no relationship or impact from any manufacturers or sales agent websites. Learn more
- BrandSimpooltec

- VC Score8.2
BCP Score is a ranking system developed by bestcleanerproducts.com. BCP Score has no relationship or impact from any manufacturers or sales agent websites. Learn more
- BrandHorizon

- VC Score8.0
BCP Score is a ranking system developed by bestcleanerproducts.com. BCP Score has no relationship or impact from any manufacturers or sales agent websites. Learn more
- BrandBosh Chemical

- VC Score6.6
BCP Score is a ranking system developed by bestcleanerproducts.com. BCP Score has no relationship or impact from any manufacturers or sales agent websites. Learn more
- BrandLamprey Hardware
Last update on 2026-10-08 / Affiliate links / Images, Product Titles, and Product Highlights from Amazon Product Advertising API
FAQs
Can I leave my fiberglass pool completely full of water for the winter?
Yes, you can keep the water at normal operating level if you use watertight faceplate covers on your skimmer mouths and blow out your return lines from the equipment pad. Keeping the pool full maintains maximum weight against the surrounding soil, which offers the best protection against ground shifting. You must still clear all plumbing pipes and place freeze-absorbing tubes inside the skimmer wells.
What happens if I drain my fiberglass pool during freezing weather?
Draining the pool removes the internal weight that counteracts groundwater in the soil. Moisture in the ground creates inward pressure that can bow the fiberglass walls, crack the floor, or lift the empty shell out of the dirt. In freezing climates, the expanding frozen earth can also crush the hollow, unsupported walls, causing irreparable structural cracks.
Do I need pool antifreeze in my plumbing pipes?
Adding non-toxic swimming pool antifreeze provides an extra layer of safety if you live in a climate where the ground freezes several feet deep. Once you blow out the lines with air and tighten expansion plugs, pouring pool antifreeze down the pipes protects against any small pockets of trapped condensation. Never use automotive antifreeze, which is toxic and damages pool surfaces.
How do I protect my skimmer from cracking if water freezes inside it?
Screw a hollow skimmer guard directly into the threaded drain hole at the bottom of the skimmer well. When water inside the skimmer housing freezes, it expands inward and crushes the hollow plastic tube instead of pushing outward against the brittle skimmer housing. You can also slip an empty plastic bottle or closed-cell foam block inside the well to absorb ice pressure.


How to Refinish a Fiberglass Pool

How Do You Keep Raccoons Out of Your Pool?

How to Fix Cyanuric Acid in Your Pool

How to Shape a Pool Cue Tip to Stop Miscues

12 Best Automatic Vacuum For Intex Above Ground Pool of 2026 To Keep Vinyl Floors Spotless

10 Best Automatic Pool Vacuum For Above Ground Pool of 2026 To End Manual Scrubbing

How Much Pool Clarifier Should You Use for Your Pool Size?

How Much Does a Pebble Tec Pool Cost to Build or Resurface?


