
How to Unclog a Pool Pump and Restore Water Flow

Clearing a clogged pool pump starts with shutting off the electrical breaker, opening the lid, and scooping trapped debris out of the basket and impeller (the spinning wheel with fins that pushes water). The right fix depends on whether wet leaves are packed inside that wheel or stuck further back in the underground suction pipe.
How the equipment behaves usually reveals the spot: a humming motor with no water flow points to a jammed impeller, while an empty pump pot pulling air means the pipe itself is blocked. Inground systems also deal with longer pipe runs than above-ground pools, which changes how you flush the line. Leaving a starved pump running can quickly melt plastic fittings and ruin the motor, but checking the right spots in order gets water moving safely again.
Low Flow and Humming Motors Signal a Clogged Pump
When debris chokes your pool circulation system, your equipment pad gives off clear warning signs. The most obvious sign is weak water movement at the return jets on the pool wall. If the water returning to the pool feels like a gentle trickle instead of a firm current, water is struggling to reach or leave the pump. At the same time, look through the clear lid on top of the pump housing. Under normal conditions, that chamber stays completely full of solid water. When a blockage chokes the intake, you will see large pockets of swirling air, or the water level inside the pot will drop until the chamber sits half empty.
The sound of the pump motor tells you where the trouble might be. A motor that spins at full speed with a normal hum while the housing stays dry usually points to a clogged suction pipe or a jammed skimmer line. The pump wants to move water, but an obstruction underground prevents water from reaching the equipment pad. If the motor produces an unusual, low buzzing or humming sound and refuses to spin, debris has likely wedged directly into the pump impeller (the spinning wheel with curved fins that pushes water). That physical jam locks the motor shaft in place, creating an electrical strain that generates heat quickly.
Your filter pressure gauge provides another reliable clue. When your pool filter collects dirt over several weeks, the tank pressure rises, signaling that it is time to learn how to backwash a sand pool filter safely to purge trapped grime. A suction clog causes the exact opposite reaction. When leaves, pine needles, or twigs block the water before it reaches the pump, the pressure gauge on your filter tank drops down near zero. The pump cannot push water into the filter tank if water cannot enter the pump housing in the first place.
Running a starved pump causes severe damage in a short period. Pool pumps rely on the continuous flow of cool pool water to keep internal seals, plastic diffusers, and PVC pipes at safe temperatures. When water stops moving, the water trapped inside the pump pot begins to boil from motor friction. That boiling water softens and warps the threaded PVC fittings connected to the pump, leading to permanent air leaks, melted basket housings, and burnt motor windings that require expensive equipment replacement.
Shut Off Power and Release Filter Pressure First
Working on pool equipment requires strict attention to electrical and pressure safety. Never open a pump housing while the equipment has power or while the system remains pressurized.
- Cut power at the main electrical breaker: Walk to the subpanel or main breaker box and flip the pump breaker to the off position. Do not rely solely on an automated timer or a simple on-off toggle switch. Automated controllers can turn the motor on unexpectedly while your fingers are inside the housing, creating a severe injury risk.
- Confirm the motor is completely silent: Stand by the equipment pad and verify that no humming, clicking, or vibration comes from the motor housing before touching any plumbing valves.
- Locate the air relief valve: Find the air relief valve (the small knob on the filter tank that releases trapped pressure), usually positioned directly on top of the filter tank next to the pressure gauge.
- Vent the tank pressure slowly: Turn the valve knob counterclockwise. You will hear a sharp hiss as trapped air escapes from the tank. Keep your face and body turned away from the top of the filter. Leave the valve open until the hissing stops completely and the pressure gauge needle rests firmly at zero.
- Adjust line valves if necessary: If your equipment pad sits below the pool water level, such as on an above-ground pool setup, close the shut-off valves on the suction and return lines to prevent pool water from flooding your work area when you remove the pump lid.
Clean the Pump Basket and Clear the Impeller Fins
Most pump clogs happen right inside the pump pot, either in the mesh basket or directly inside the spinning fins just past the basket. Follow these steps to clean out both areas safely.
- Remove the pump lid: Turn the locking ring or loosen the hand knobs securing the clear pump lid. Lift the lid off and set it aside on a clean cloth. Check the thick rubber O-ring underneath the lid for cracks, splits, or grit. Wipe away any dirt sticking to the rubber seal.
- Pull and empty the strainer basket: Lift out the strainer basket (the mesh bucket inside the pump that catches leaves). Dump packed leaves, seed pods, and pine needles into a waste bin. Spray the basket clean with a garden hose to clear fine debris from the mesh holes. Inspect the plastic basket carefully; if it has cracked or split at the bottom, small twigs and pebbles have likely slipped past it into the machinery.
- Reach inside the impeller intake: Look inside the empty pump housing toward the motor side. You will see a round hole leading directly into the impeller. Insert your index finger into this opening. Be gentle, as broken plastic or sharp seed husks can settle inside.
- Fish out wedged debris: Curl your finger into the curved fins of the impeller. Pull out packed pine needles, palm fibers, small sticks, or tangled hair. If the debris is packed too tightly for your fingers, use a small piece of flexible wire or a soft nylon drain brush to hook the material. Avoid using rigid metal screwdrivers, which can chip or snap the plastic impeller vanes.
- Verify free rotation: Once the fins feel clear, gently spin the impeller with your fingertips. It should rotate with smooth, slight resistance from the motor shaft. If the wheel remains locked, continue clearing debris until it turns freely.
- Reinstall the basket: Slide the strainer basket back into the housing. Make sure the intake port on the front of the basket lines up with the suction pipe opening at the front of the pump pot. If you install the basket backward, the pump lid will not seal properly.
Flush Blocked Suction Lines With a Garden Hose Bladder
If the basket and impeller are clean but the pump still pulls no water, the obstruction sits inside the underground suction line between the pool skimmer and the equipment pad. Leaves often clump together at sharp pipe elbows buried underground.
- Never use metal plumbing snakes: Metal drain snakes and mechanical augers can easily puncture or crack thin-walled schedule 40 PVC pipes buried beneath concrete pool decks. Repairing cracked underground pool lines requires expensive deck demolition. Always use water pressure instead of metal blades.
- Clear the pool skimmer: Walk to the pool deck and remove the skimmer lid and skimmer basket. Check that the suction hole at the bottom of the skimmer throat is free of large toys or stuck plastic bags. Keep this hole open so dislodged debris has an exit path.
- Attach a hydro pressure drain bladder: Thread a rubber drain bladder onto the end of a standard garden hose. A hydro pressure bladder is an expanding rubber nozzle that swells up inside a pipe to form a tight seal, shooting high-pressure water down the line to dislodge blockages.
- Insert the bladder into the pump suction port: At the equipment pad, insert the bladder through the empty pump pot and push it several inches into the suction pipe leading back toward the pool. Make sure the bladder sits fully inside the PVC pipe so it does not expand inside the open pump pot.
- Turn on the garden hose spigot: Turn on the outdoor water faucet to full pressure. The bladder will immediately swell with water, locking itself firmly against the inner pipe wall. Once pressurized, it will shoot a concentrated jet of water backward through the plumbing toward the pool.
- Monitor the skimmer opening: Have a helper stand near the pool skimmer to watch for dislodged material. Within a minute or two, the backward water flow should push a heavy clump of leaves, dirt, and pine needles out through the skimmer hole into the pool.
- Shut off the hose and deflate: Turn off the garden hose spigot. Wait thirty seconds for the bladder to deflate completely before pulling it out of the pump pipe. Immediately scoop the dislodged leaves out of the skimmer well with a hand net so the pump does not suck them right back into the line.
Fill the Pump Housing With Water to Restore Prime
Once the blockage is gone, the pump housing sits full of air. Pool pumps are designed to circulate water, not pull air, so you must prime the system manually before turning the motor back on.
- Fill the pump pot: Grab a five-gallon bucket of pool water or bring your garden hose over to the equipment pad. Pour water directly into the open pump housing until the water level reaches the bottom lip of the inlet pipe. This water provides the initial liquid seal the impeller needs to generate vacuum suction.
- Inspect and lubricate the lid O-ring: Check that the rubber O-ring sits cleanly in its groove on the pump pot or lid. If the rubber feels dry or powdery, spread a thin layer of pool-grade silicone lubricant over the ring. Never use petroleum-based jelly, which degrades pool rubber over time.
- Seal the pump lid: Place the clear lid over the housing and tighten the hand knobs or lock ring firmly. Tighten it by hand until snug. Do not use wrenches or strike the lid with a hammer, as overtightening cracks the plastic housing and distorts the rubber seal.
- Keep the filter air valve open: Verify that the air relief valve on top of the filter tank remains turned open. As the pump starts pulling water, it must push trapped air out of the filter tank through this vent.
- Restore power at the breaker: Flip the main electrical breaker back to the on position. The motor should spin immediately with its normal, steady pitch.
- Watch for water flow: Look through the clear lid. Within thirty to sixty seconds, water should begin churning violently, followed by a steady stream that fills the entire chamber without large air bubbles.
- Close the air relief valve: Walk over to the filter tank. Air will blow out of the relief valve with a steady hissing sound. As soon as a solid stream of water squirts out of the valve port, turn the knob clockwise to shut it. Check your pressure gauge; it should rise to its normal operating range. If the pump runs for more than two minutes without catching water, shut the power off immediately to prevent seal overheating, re-fill the pot, and try once more.
Stop Future Clogs and Know When to Call Help
Routine maintenance keeps leaves and outdoor debris from reaching your pump in the first place, saving you from clearing jammed pipes during swim season.
- Empty skimmer baskets weekly: Clean out skimmer baskets every few days, especially during windy weather or autumn leaf drop. A full skimmer basket cracks under pump suction, allowing full-sized leaves and twigs to shoot straight into underground pipes.
- Use an in-line leaf canister: If you use a suction-side pool cleaner attached to your skimmer or dedicated vacuum port, install an in-line leaf canister on the vacuum hose. This clear canister traps heavy yard debris before it ever enters your pool plumbing.
- Maintain correct pool water levels: Keep your pool water halfway up the skimmer opening. If the pool water level drops too low, the skimmer sucks a vortex of air into the system, causing the pump to lose prime and mimic the symptoms of a physical clog.
- Trim overhanging branches: Cut back tree branches, bushes, and flowering plants that drop seed pods, blossom clusters, or needle clusters directly over the pool surface.
- Call a pool professional for electrical failure: If the motor hums loudly but will not spin even after you have cleared the impeller fins completely, the motor capacitor or internal bearings have failed. Shut off the breaker and contact an equipment repair technician.
- Get help for melted fittings or persistent air leaks: If the pump ran dry for a long time, the inlet PVC pipe may have warped or shrunk where it threads into the pump body. If water leaks under the equipment pad or the pump refuses to hold a prime despite clearing all clogs, a technician must re-plumb the suction inlet.
Water Pressure Bladders Clear Stubborn Underground Pipe Clogs
When clearing underground pool plumbing lines, a dedicated water pressure drain bladder is the safest tool for dislodging packed leaf blockages. These expanding rubber tools connect directly to your household garden hose and slide easily into rigid PVC pool pipes. When shopping for a drain bladder to keep in your pool maintenance shed, check the diameter rating printed on the tool. Most residential pool suction lines use either 1.5-inch or 2-inch PVC pipe. Make sure you select a bladder size that covers the 1-inch to 2-inch or 1.5-inch to 3-inch pipe diameter range so it can expand properly against the inside wall of your pool plumbing.
Check the hose connection before purchasing. You want a heavy-duty brass or reinforced composite collar with standard garden hose threading so it screws tightly onto your outdoor hose without blowing off under municipal water pressure. Choosing a model made from thick, durable industrial rubber ensures the bladder can handle repeated expansion inside rough pipe interiors without puncturing. Having this simple tool on hand lets you flush out packed underground suction lines safely in minutes, protecting your pool pipes from dangerous mechanical snakes while restoring full water circulation to your pool pump.

- VC Score9.4
BCP Score is a ranking system developed by bestcleanerproducts.com. BCP Score has no relationship or impact from any manufacturers or sales agent websites. Learn more
- BrandDrainX

- VC Score9.0
BCP Score is a ranking system developed by bestcleanerproducts.com. BCP Score has no relationship or impact from any manufacturers or sales agent websites. Learn more
- BrandDRAINADO

- VC Score8.8
BCP Score is a ranking system developed by bestcleanerproducts.com. BCP Score has no relationship or impact from any manufacturers or sales agent websites. Learn more
- BrandDrainX
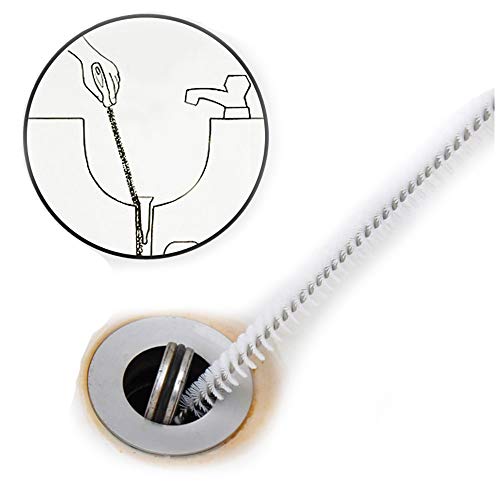
- VC Score8.8
BCP Score is a ranking system developed by bestcleanerproducts.com. BCP Score has no relationship or impact from any manufacturers or sales agent websites. Learn more
- BrandALINK

- VC Score8.4
BCP Score is a ranking system developed by bestcleanerproducts.com. BCP Score has no relationship or impact from any manufacturers or sales agent websites. Learn more
- BrandDrainX

- VC Score8.4
BCP Score is a ranking system developed by bestcleanerproducts.com. BCP Score has no relationship or impact from any manufacturers or sales agent websites. Learn more
- BrandDrainX

- VC Score8.0
BCP Score is a ranking system developed by bestcleanerproducts.com. BCP Score has no relationship or impact from any manufacturers or sales agent websites. Learn more
- BrandDrainX
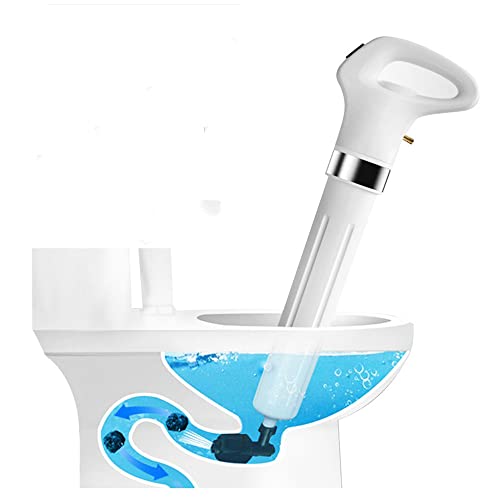
- VC Score7.8
BCP Score is a ranking system developed by bestcleanerproducts.com. BCP Score has no relationship or impact from any manufacturers or sales agent websites. Learn more
- BrandKOOYORK
Last update on 2026-10-08 / Affiliate links / Images, Product Titles, and Product Highlights from Amazon Product Advertising API


How to Refinish a Fiberglass Pool

How Do You Keep Raccoons Out of Your Pool?

How to Fix Cyanuric Acid in Your Pool

How to Shape a Pool Cue Tip to Stop Miscues

12 Best Automatic Vacuum For Intex Above Ground Pool of 2026 To Keep Vinyl Floors Spotless

10 Best Automatic Pool Vacuum For Above Ground Pool of 2026 To End Manual Scrubbing

How Much Pool Clarifier Should You Use for Your Pool Size?

How Much Does a Pebble Tec Pool Cost to Build or Resurface?








