
How to Patch and Repair a Pool Cover

Most small tears are simple to patch. Just clean and dry the damaged spot, round off the patch corners, and apply matching patches to both sides with at least an inch and a half of overlap. Sealing both the top and underside creates a tight bond that stops winter winds, heavy snow, and puddles from pulling the tear open again.
The right fix depends on your cover material, how wide the hole is, and where it sits. Solid vinyl tarps need waterproof glue, while woven covers require breathable mesh material that lets melting snow drain through. Tears under three inches seal securely, but wide rips or torn straps that hold heavy weight need professional restitching rather than peel-and-stick kits. Here is how to inspect the damage and seal the tear so your pool stays protected.
The Short Version
- Small tears under 3 inches across the main fabric are simple to fix at home using peel-and-stick woven patches or heavy waterproof tape.
- Always clean and dry both sides of the tear, round off the patch corners with scissors, and apply matching patches to both the top and underside.
- Leave at least 1.5 inches of overlap (a border reaching past the tear) on every side so the adhesive grips solid, undamaged fabric.
- Never patch straps that hold heavy weight with tape or glue; broken webbing requires commercial restitching or replacement to keep pets and children safe.
Decide If the Damage Is Patchable
Before you gather supplies, take a close look at the damaged spot. Some tears are simple afternoon repairs, while other types of damage mean the cover has reached the end of its life. Checking the tear against a few basic rules helps you avoid wasting time on a patch that will fail under the first rainstorm.
- Measure the tear size: Holes and rips under 3 inches across are ideal for patches. When a hole stretches past 3 inches, the surrounding material pulls unevenly under tension. Wind and snow will peel the patch loose at the edges.
- Check the location of the tear: You can safely patch open fabric panels away from seams. If the rip runs directly through a weight-bearing strap (the thick webbing that holds heavy weight across the pool), do not use an adhesive patch. Those straps support the tension of the springs and the weight of snow, and glue cannot hold that force.
- Check the feel of the surrounding material: Rub your fingers along the fabric around the tear. If the cover feels soft and flexible, an adhesive patch will stick tightly. If the material feels stiff, powdery, or brittle from years in the sun, new patches will pull the old fibers apart instead of sealing them.
- Count the total number of tears: One or two small puncture holes from a falling tree branch are easy to mend. If you see dozens of tiny splits scattered across several sections, the fabric is breaking down from age and sun exposure. Patching one spot will only lead to another tear a few weeks later.
Step-by-Step Patch Method for Mesh Safety Covers
A mesh safety cover (a woven cover held by deck springs) stays pulled tight all winter. Because this woven fabric stays under constant tension, sticking a single patch on top will not work. Snow weight and wind will pop it off within days. To get a permanent fix, you must sandwich the tear between two peel-and-stick patches so their adhesive layers lock together through the open weave of the fabric.
- Release tension around the damaged area: Use your cover installation rod to unhook the deck springs closest to the rip. Trying to patch fabric while it is stretched tight causes wrinkles in the repair. Slack fabric allows the patch to lie flat without pulling.
- Wash and dry the fabric thoroughly: Dirt, pool chemicals, and dried algae prevent patch adhesive from sticking. Scrub both the top side and the underside of the torn area with warm water, mild liquid dish soap, and a soft nylon brush. Rinse the area with clean water, then wipe it with a dry towel. Let the mesh dry completely in the sun before moving forward. Any trapped dampness ruins the bond.
- Cut your patches to size: Choose a peel-and-stick mesh patch kit made from woven adhesive material that matches your cover color, such as green or blue. Most kits come in sizes like 4 by 8 inches or 8 by 12 inches. Cut two identical pieces large enough to cover the tear while leaving at least 1.5 inches of overlap (a border reaching past the tear) on all sides.
- Round off all four corners: Take scissors and trim the sharp square corners of both patches into smooth, rounded edges. Square corners catch on pool poles, shoes, and snow shovels, which causes the patch to peel back over time. Rounded corners stay flat and resist lifting.
- Place a flat backing board under the tear: Slide a flat piece of plywood, a stiff plastic cutting board, or a smooth wooden block underneath the mesh directly below the rip. This gives you a firm surface to press against so your patches bond evenly.
- Apply the underside patch first: Peel the paper backing off the first patch. Reach under the cover and center the sticky side over the tear against your board. Press down firmly across the entire surface, working from the center outward to push away any trapped air pockets.
- Apply the top patch directly over the first: Peel the backing from the second patch. Align it directly over the bottom patch so the two shapes match up on both sides of the tear. Press down firmly with the heel of your hand. Use a small roller or the back of a large spoon to rub hard across the entire patch. This pressure forces the adhesive through the tiny holes in the mesh weave, locking the two patches into a single bonded sandwich.
- Let the glue cure before rehooking the springs: Let the repaired area rest undisturbed for at least 2 to 4 hours in warm daylight. Once the adhesive sets firmly, reattach your deck springs to bring the cover back to its normal tension.
Sealing Rips on Solid Vinyl Covers
Solid vinyl covers and winter tarps are designed to block both water and sunlight. A puncture in a solid cover lets dirty surface water and rotting debris seep into your clean water, which makes it much harder to get pool water crystal clear and keep it that way when you open your pool. Because rain and melting snow collect in puddles on top of a solid cover, your patch must form an airtight, waterproof barrier.
- Pump away standing water: Before touching the rip, use a small cover pump or siphon hose to clear away any water resting on the vinyl. Working on a flooded cover is impossible, and water weight can pull the tear wider while you work.
- Clean the vinyl with rubbing alcohol: Wipe down at least 6 inches around the tear on both the top and underside. Use rubbing alcohol on a clean microfiber cloth to cut through oily film, tree sap, and algae. Allow the surface to air dry for five minutes so no moisture remains.
- Cut waterproof repair tape: Use a clear or color-matched heavy waterproof repair tape designed for tarps and outdoor covers. Cut two pieces that leave at least 1.5 inches of overlap around the tear. Just like with mesh patches, cut the corners into smooth curves with scissors to prevent edge peeling.
- Support the cover from below: Slide a flat piece of wood or plastic beneath the vinyl to create a firm work surface. If the cover is already off the pool, lay the torn section on a clean garage floor or patio.
- Smooth the tape in place: Peel back one inch of the protective backing. Line up the tape past the edge of the rip, stick down the leading edge, and slowly peel the rest of the backing away while smoothing the tape down with your other hand. This prevents wrinkles and trapped air bubbles.
- Seal the opposite side: Flip the fabric or reach underneath to apply your second patch directly across from the first. Use a wallpaper seam roller or a clean wooden block to press down hard over both patches. The pressure activates the adhesive and creates a watertight seal that keeps dirty puddles from draining into your pool.
Replacing Broken Straps and Latches
Not all cover damage happens in the middle of the fabric. Wind gusts and heavy winter tension can snap plastic buckles, break hold-down straps, or crack the safety latches that keep covers anchored against the ground. Because these parts keep the cover from blowing away, they require mechanical fixes rather than glue or tape.
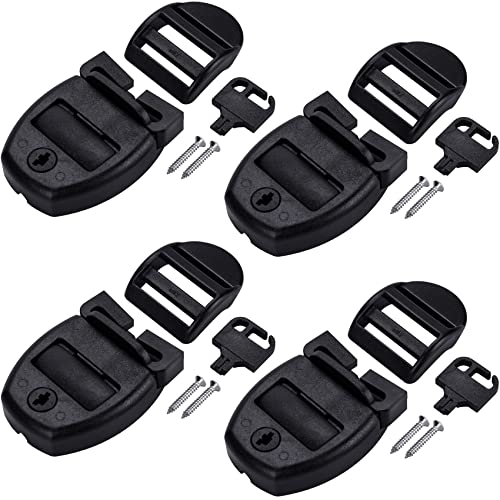
For hot tub covers and smaller protective spa tops, broken plastic latches are very common. Wind can snap the plastic prongs, leaving the cover loose. You can fix this quickly with a strap repair kit. These kits usually include 1-inch wide replacement clips, sliding lock buckles, keys, and mounting screws. To install one, cut away the broken plastic buckle from the fabric strap, slide the strap through the new latch body, and secure the lower latch base to the hot tub cabinet using the provided screws. These latches lock with a key, which prevents strong winds from lifting the cover and keeps curious children safe.
For in-ground pool safety covers, damaged straps are much more serious. The wide black webbing running across your cover carries the full structural load of the deck springs. If a strap tears away from the fabric or frays through, never try to fix it with peel-and-stick tape or household glue. Those adhesives slip under tension. For a frayed strap, your only safe option is heavy-duty stitching using thick, outdoor polyester or nylon thread. If several inches of webbing have snapped, remove the cover and take it to a local pool service company or an industrial canvas shop. They use commercial sewing machines to double-stitch new webbing directly into the cover panels.
Costly Patching Mistakes to Avoid
A weak patch often gives out in the middle of January, dumping leaves, silt, and snow directly into your swimming pool. You can keep your repair secure through freezing weather by avoiding these common mistakes:
- Patching only one side of the cover: A single patch on the top or underside leaves the exposed adhesive open to water or tension from behind. Always patch both sides so the patches grip each other through the fabric.
- Leaving square, 90-degree corners on your patch: Sharp corners peel up when rubbed by winter debris, pool skimmer poles, or snow shovels. Always cut rounded corners on every patch piece before peeling the backing.
- Using household duct tape or packing tape: Standard silver duct tape uses rubber-based glue that breaks down when exposed to rain, pool chlorine, and sunlight. Within two weeks outdoors, duct tape turns into a slimy mess that leaves sticky residue without sealing the hole.
- Applying patches to cold or damp fabric: Adhesive needs warmth and dry fibers to form a strong grip. If you must patch during chilly weather, warm the fabric gently with a handheld hair dryer on low heat before and after sticking the patch down.
- Leaving the cover stretched tight during the repair: Working on tight fabric causes the patch to bridge across tension wrinkles. When the cover shifts later, those wrinkles pull the patch right off. Always unhook the nearest springs to give yourself slack fabric.
When Safety Requires a Total Replacement
Safety covers serve one critical job: keeping people, pets, and wildlife out of the water if they accidentally step onto the pool. While small patches keep out leaves and twigs, they cannot restore structural strength to a cover that has lost its integrity. Knowing when to stop patching protects your family and saves you money in the long run.
If a rip stretches longer than 3 inches across a main panel, adhesive patches cannot be trusted to support heavy weight. A child or pet stepping on a large patched area could cause the repair to split open. You should also replace the entire cover if you notice widespread thread rot. Look at the stitching along the webbing straps. If the white or black thread is fraying, fuzzing, or breaking when you scrape it lightly with a fingernail, the seams across the entire pool are failing.
Another clear sign for replacement is brittle fabric. Years of direct summer sun break down polypropylene mesh and vinyl. If the material feels crunchy or flakes into tiny pieces when folded, the fabric will continue tearing next to any patch you apply. When structural straps pull completely away from the main cover in multiple places, do not risk using the cover for another season. Order a replacement cover measured to match your existing deck anchor layout so your pool stays completely secure.
What to Look for in Cover Repair Kits and Maintenance Tools
Choosing the right repair supplies makes the difference between a patch that lasts for years and one that fails during the first winter storm. When you shop for repair supplies, check that the material matches your exact cover type. For mesh safety covers, look for peel-and-stick patch kits made of durable woven adhesive material. These woven patches let water filter through while blocking debris, keeping the tension balanced across the pool surface.
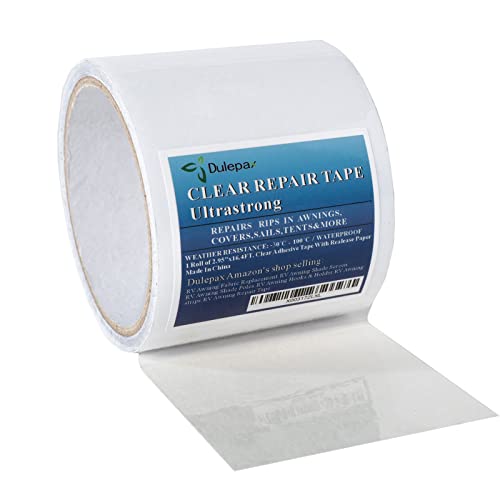
Check the size and color options before you buy. Most kits provide pre-cut sheets measuring 4 by 8 inches or larger 8 by 12 inches in forest green, blue, or black. Picking a color that matches your pool cover makes the repair blend in so it is barely visible from across the yard. For solid vinyl covers, choose an ultra-strong waterproof tape that resists extreme freezing temperatures and direct sun exposure without drying out or cracking.
When a cover tears, dirt and dead leaves often slip into the water before you notice the hole. Having reliable pool equipment on hand helps you manage that fallen debris. Using a suction cleaner or a self-powered robotic cleaner allows you to quickly vacuum up sunken leaves from the pool floor once you pull the cover back. Keeping the water clean under your cover prevents organic stains and protects your pool surfaces all winter long.

- VC Score10.0
BCP Score is a ranking system developed by bestcleanerproducts.com. BCP Score has no relationship or impact from any manufacturers or sales agent websites. Learn more
- BrandAmerican Spa Parts

- VC Score9.4
BCP Score is a ranking system developed by bestcleanerproducts.com. BCP Score has no relationship or impact from any manufacturers or sales agent websites. Learn more
- BrandLFUTARI

- VC Score9.0
BCP Score is a ranking system developed by bestcleanerproducts.com. BCP Score has no relationship or impact from any manufacturers or sales agent websites. Learn more
- BrandXuniea

- VC Score8.8
BCP Score is a ranking system developed by bestcleanerproducts.com. BCP Score has no relationship or impact from any manufacturers or sales agent websites. Learn more
- BrandHonoson
- VC Score8.8
BCP Score is a ranking system developed by bestcleanerproducts.com. BCP Score has no relationship or impact from any manufacturers or sales agent websites. Learn more
- BrandOIIKI

- VC Score8.8
BCP Score is a ranking system developed by bestcleanerproducts.com. BCP Score has no relationship or impact from any manufacturers or sales agent websites. Learn more
- BrandARDILA VEELA

- VC Score8.8
BCP Score is a ranking system developed by bestcleanerproducts.com. BCP Score has no relationship or impact from any manufacturers or sales agent websites. Learn more
- BrandHonoson

- VC Score8.8
BCP Score is a ranking system developed by bestcleanerproducts.com. BCP Score has no relationship or impact from any manufacturers or sales agent websites. Learn more
- BrandAmerican Spa Parts
Dulepax-Fabric,Boat Covers ,Tent ,Awning Repair Tape,RV Covers ,Tarp Repair Kit,Canvas
View on Amazon- VC Score8.2
BCP Score is a ranking system developed by bestcleanerproducts.com. BCP Score has no relationship or impact from any manufacturers or sales agent websites. Learn more
- BrandDulepax

- VC Score6.6
BCP Score is a ranking system developed by bestcleanerproducts.com. BCP Score has no relationship or impact from any manufacturers or sales agent websites. Learn more
- BrandKapStrom
Last update on 2026-10-08 / Affiliate links / Images, Product Titles, and Product Highlights from Amazon Product Advertising API
FAQs
Can I patch a pool cover while it is still installed on the pool?
Yes, you can patch small tears while the cover is on the pool, but you must unhook the nearest deck springs first to remove tension. Slide a flat piece of plywood or a stiff board under the torn section to give yourself a firm surface. This allows you to press the top and bottom patches tightly together without sagging into the water.
What kind of tape holds up best on a pool cover during freezing winter weather?
Heavy waterproof repair tape made with an acrylic or modified butyl adhesive holds up best in freezing temperatures. Standard duct tape dries out and falls off when wet, but outdoor repair tapes are designed to stay flexible and sticky in snow, ice, and direct sunlight.
Why do self-adhesive patches sometimes peel off after a few months?
Patches usually peel off because the cover was slightly damp or dirty when the patch was applied, or because the corners were left square. Dirt and moisture prevent the glue from soaking into the fibers. Sharp corners catch on passing debris, which slowly levers the patch away from the fabric.
Can I use clear silicone caulk to fix a hole in my pool cover?
Silicone caulk does not work well as a standalone pool cover patch. Silicone creates a rubbery plug, but it has very little pull strength and will peel away from woven mesh under winter tension. It is much safer to use matching peel-and-stick woven patches or commercial vinyl repair tape.


How to Refinish a Fiberglass Pool

How Do You Keep Raccoons Out of Your Pool?

How to Fix Cyanuric Acid in Your Pool

How to Shape a Pool Cue Tip to Stop Miscues

12 Best Automatic Vacuum For Intex Above Ground Pool of 2026 To Keep Vinyl Floors Spotless

10 Best Automatic Pool Vacuum For Above Ground Pool of 2026 To End Manual Scrubbing

How Much Pool Clarifier Should You Use for Your Pool Size?

How Much Does a Pebble Tec Pool Cost to Build or Resurface?








