
How to Patch a Vinyl Pool Liner Without Draining It

Pool liner tears patch easily underwater. There is no need to drain thousands of gallons or wait for the walls to dry. A round piece of vinyl paired with specialized waterproof pool glue sticks directly over the hole, sealing the leak against the pool wall before water washes away the ground underneath.
How you handle the fix depends on a few key factors. Tiny punctures seal up fast, but rips stretching several inches or split seams (the factory joints where vinyl sheets meet) need extra support so they do not spread. Fresh vinyl flexes easily to grip adhesive, whereas older, brittle plastic requires a gentle touch so it does not crack. Holes resting above the waterline also need a slightly different setup than leaks sitting deep on the floor. The steps below show how to secure the patch so it never curls or leaks again.
How do you find and prep the leak?
A sudden drop in your pool waterline is stressful, but finding the exact source does not require special equipment. Most pools lose a quarter of an inch of water daily to normal summer evaporation. If your pool loses more than that, water is escaping through a puncture or a split seam. Escaping water is dangerous because it softens and washes away the sand or soil supporting the pool floor, which can cause sinkholes or buckle steel walls.
Before you patch anything, you need to pinpoint the hole and prep the vinyl surface. Follow this checklist to find and clean the damaged spot:
- Turn off the pool pump: Switch off your circulation pump and let the pool water sit completely still for fifteen minutes. Still water allows you to trace water movement without current interference.
- Perform a dye test: Fill a small syringe or squeeze bottle with dark food coloring or leak detection dye. Slip into the pool with a mask or reach down from the deck. Squeeze a small puff of dye about an inch away from suspect areas. If a tear is present, the suction pulls the dark dye straight into the hole like smoke down a chimney.
- Check high-wear trouble spots first: Start your search around steps, ladder bumpers, return jets, and the pool skimmer faceplate. Liners often stretch and puncture where hard plastic fittings bolt against the pool wall. Also check the pool floor if you use long poles, sharp toys, or heavy vacuum heads.
- Mark the puncture immediately: Once the dye reveals the hole, mark it right away. Use a soft waterproof grease pencil or place a small piece of painter tape a few inches away from the spot. Murky water or sunlight reflections make tiny pinholes disappear the moment you look away.
- Scrub away algae and slime: Wipe down the vinyl around the puncture using a soft microfiber cloth or kitchen sponge. Do not use harsh scouring pads that scratch the pattern. Pool liners accumulate body oils, sunscreen, and algae film. Waterproof pool glue cannot form a lasting bond against slick bio-film.
- Feel the vinyl texture: Press your fingertips around the damaged area to check its flexibility. The vinyl should feel supple and rubbery. If the material feels stiff, crunchy, or brittle under your fingers, the surrounding liner may split further when you apply pressure.
Do you really need to drain the pool?
You should almost never drain your pool to fix a torn vinyl liner. In fact, emptying the water often causes far more structural destruction than the leak itself. Thousands of gallons of pool water provide heavy downward and outward pressure that keeps the vinyl sheet pressed firmly against the walls and floor.
When you drain the pool, old vinyl loses that continuous outward support and shrinks quickly under direct sunlight. Shrunken vinyl pulls tightly across corners, tears away from the skimmer box, and pops out of the top mounting track. Once an established liner shrinks, it will never stretch back into position without tearing. For in-ground pools, high underground water tables can also force empty liners to float upward like giant bubbles or cause unprotected side walls to cave inward.
Waterproof pool glue (vinyl adhesive) is chemically formulated to cure while fully submerged. The solvent works like a cold chemical weld. It repels surrounding water molecules as soon as you press the patch against the liner, melting the two vinyl surfaces slightly so they fuse into a single solid piece. Above-ground pools and in-ground pools both benefit from leaving the water in place during repairs because water pressure acts as an invisible clamp, pressing the new patch flat against the tear while the glue sets.
The only time you should consider draining water is when a rip sits right along the waterline border. For waterline repairs, lowering the water level by just three to four inches lets you work on a dry surface. Even then, you only drop the water low enough to expose the tear, never emptying the pool basin completely.
How do you apply the patch step by step?
Patching a submerged tear takes only a few minutes once your materials are ready. You will need a sheet of vinyl liner material, a tube of waterproof pool glue, sharp household scissors, and a clean towel. Work methodically through these steps to ensure a watertight seal:
- Measure and cut the patch: Measure the length and width of the tear. Cut your patch so it extends at least one to two inches past the damage in every single direction. For example, if you are sealing a one-inch puncture, your patch should measure at least three inches across. Giving the patch plenty of surface area ensures the glue holds under heavy water movement.
- Round off every corner: Use scissors to trim the patch into an oval or circle with smooth, rounded edges. Never leave sharp, square corners on a vinyl patch. Square corners lift easily when swimmers brush against them or when pool cleaner wheels roll over the repair.
- Coat the patch with waterproof pool glue: Squeeze a generous, even layer of pool glue onto the back of the vinyl patch. Spread the adhesive all the way to the outer perimeter, making sure no dry spots remain near the edges. Avoid spreading the glue too thin, as pool water will dilute a weak layer before it bonds.
- Fold the patch in half: Fold the patch in half like a taco, with the wet glue touching itself on the inside. This fold protects the adhesive from rinsing away in the pool water as you swim down or reach toward the bottom of the pool.
- Position the patch over the hole: Take the folded patch underwater to the marked location. Position the folded seam directly over the center of the puncture, then slowly peel the two halves open flat against the pool wall or floor.
- Smooth out trapped water bubbles: Press down firmly in the center of the patch with both thumbs. Slide your fingers outward in star-shaped strokes toward the outer edges. This motion forces out trapped water pockets and excess glue, ensuring the patch sits flush against the original vinyl.
- Hold continuous pressure: Hold your hands firmly against the patch for at least two to three minutes without letting it slide. If the repair sits on the pool floor, place a smooth, soft weight on top of it, such as a clean dive weight or a plastic zip-top bag filled with smooth river stones. Leave the weight resting on the patch for twenty-four hours.
- Protect the repair during curing: Allow the patch to cure completely for forty-eight hours before using equipment near it. If you run a robotic cleaner (a self-powered unit with its own internal debris basket) or a suction-side cleaner (which attaches to your pool skimmer or dedicated vacuum port and uses your pool pump suction), steer it away from the patched area. Cleaner drive wheels, tracks, and rubber suction skirts can grab fresh edges and peel the repair off before the chemical bond reaches full strength.
Why do pool liner patches peel off?
When a vinyl patch fails, the issue is almost always installation error rather than faulty glue. Pool patches experience constant water movement, shifting chemical levels, and friction from pool maintenance tools. Review this checklist of common patching mistakes to keep your repair from peeling at the borders:
- Leaving square edges: Pointed ninety-degree corners are the leading cause of failed patches. The sharp tips lack enough surface area to stay glued down, so they curl outward. Once a tiny corner curls, passing swimmers and pool brushes catch it and peel the entire sheet away.
- Skipping the cleaning prep: Gluing a patch over invisible algae or sunscreen film creates a weak bond. The glue sticks to the slime layer instead of fusing to the vinyl underneath. Always wipe the area thoroughly with a soft cloth before applying adhesive.
- Stretching the vinyl during placement: Pulling or tugging on the patch while sticking it down puts the material under tension. Vinyl has memory and will try to shrink back to its original shape. That internal pull lifts the outer edges away from the wall within a few days.
- Starving the perimeter of glue: Applying glue only in the middle of the patch leaves the borders dry. Water immediately works its way under dry borders, separating the patch from the pool wall. Always coat the patch all the way to the rounded rim.
- Running pool cleaners too soon: Automated vacuums generate surprising mechanical drag. Letting a cleaner sweep over a patch within twelve hours of application can rip the fresh repair right off the wall. Give the adhesive two full days to cure before running bottom cleaners.
When should you replace the liner instead?
Patching is an affordable, effective way to stop leaks, but a patch cannot save a liner that has reached the end of its useful life. Vinyl pool liners contain chemical plasticizers that keep the material soft and flexible. Over years of exposure to direct sunlight and sanitation chemicals, those plasticizers break down, leaving the liner stiff, faded, and brittle.
You can read more about how long vinyl pools and liners last to gauge whether your pool surface is simply aging out. When vinyl loses its flexibility, patching one hole often causes another rip right next to it. Pushing on brittle vinyl to seal a tear can crack the material around your fingers like dry pasta.
Damage size also determines whether a patch will hold. Pinholes, dog claw punctures, and clean slits under four inches long are ideal for patching. But long tears exceeding six to eight inches are under massive horizontal tension from the weight of the water. Even strong waterproof glue struggle to hold wide tears together over time, and the patch will slowly split down the middle.
Pay close attention to where the damage is located. If the tear runs along a seam (the factory joint where two vinyl sheets meet), patches rarely hold. Seams sit under uneven tension, and glue cannot seal properly across the raised ridge of the joint. Similarly, tears that radiate outward from the corners of skimmers or step faceplates indicate that the liner has shrunk and is pulling apart at its mounting screws. In those situations, installing a new liner is the only safe way to protect your pool walls and ground base from erosion.
What should you look for in repair kits?
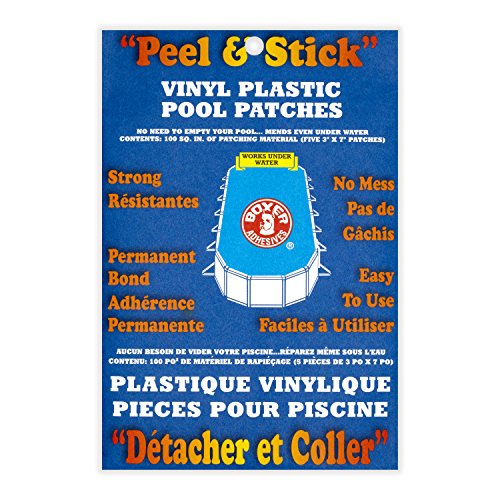
Choosing the right repair supplies makes the difference between a permanent fix and a patch that lifts off in a week. When shopping for pool liner repair supplies, check whether you need a liquid adhesive kit or pre-glued peel-and-stick patches. Liquid waterproof pool glue kits provide the strongest, longest-lasting chemical bond for underwater repairs because the solvent welds the patch directly into the pool wall. Peel-and-stick patches work well for quick emergency fixes or above-waterline repairs where you need immediate sealing without handling messy tubes.
Look closely at vinyl thickness (gauge, the standard measure of vinyl sheet thickness). Thicker material offers better puncture resistance against pool toys and automatic cleaner brushes. If you have an above-ground pool, matching the patch thickness to your liner helps the repair flex evenly with the surrounding wall. Clear repair patches are useful because they blend over printed tile patterns and solid colors without leaving an obvious solid square on your pool floor. Keep a basic patch kit in your pool shed so you can seal unexpected punctures immediately before escaping water washes out the sand base beneath your pool.

- VC Score9.0
BCP Score is a ranking system developed by bestcleanerproducts.com. BCP Score has no relationship or impact from any manufacturers or sales agent websites. Learn more
- BrandSmartline
- VC Score9.0
BCP Score is a ranking system developed by bestcleanerproducts.com. BCP Score has no relationship or impact from any manufacturers or sales agent websites. Learn more
- BrandSmartline

- VC Score9.0
BCP Score is a ranking system developed by bestcleanerproducts.com. BCP Score has no relationship or impact from any manufacturers or sales agent websites. Learn more
- BrandSmartline

- VC Score8.6
BCP Score is a ranking system developed by bestcleanerproducts.com. BCP Score has no relationship or impact from any manufacturers or sales agent websites. Learn more
- BrandSmartline

- VC Score8.4
BCP Score is a ranking system developed by bestcleanerproducts.com. BCP Score has no relationship or impact from any manufacturers or sales agent websites. Learn more
- BrandSmartline

- VC Score8.0
BCP Score is a ranking system developed by bestcleanerproducts.com. BCP Score has no relationship or impact from any manufacturers or sales agent websites. Learn more
- Brand10Leccion
- VC Score8.0
BCP Score is a ranking system developed by bestcleanerproducts.com. BCP Score has no relationship or impact from any manufacturers or sales agent websites. Learn more
- BrandBoxer Adhesives

- VC Score7.8
BCP Score is a ranking system developed by bestcleanerproducts.com. BCP Score has no relationship or impact from any manufacturers or sales agent websites. Learn more
- BrandPoolmaster

- VC Score6.6
BCP Score is a ranking system developed by bestcleanerproducts.com. BCP Score has no relationship or impact from any manufacturers or sales agent websites. Learn more
- BrandSyhood
Last update on 2026-10-08 / Affiliate links / Images, Product Titles, and Product Highlights from Amazon Product Advertising API
FAQs
How long does a vinyl pool patch last?
A properly applied vinyl patch with rounded corners can last for several years. Because quality waterproof pool glue fuses the patch directly into the liner material, the seal often lasts for the remaining lifespan of the liner itself. Inspect the edges each spring when opening the pool to make sure they remain flat.
Can you patch a tear along a seam?
Patching a tear directly along a factory seam is very difficult and usually serves only as an emergency temporary fix. The raised ridge of the seam prevents the patch from sitting completely flush, and water tension constantly pulls the two joined sheets apart. If a seam splits open, plan on replacing the liner soon.
Will a pool patch hold during freezing winters?
Yes, cured waterproof pool glue and vinyl patches remain flexible in freezing weather. As long as the patch was installed and fully cured while water temperatures were moderate, winter ice and cold pool water will not cause the bond to release. Avoid scraping winter pool poles or ice chunks against the repair area during the off-season.
Can you patch a pool liner with duct tape?
No, standard duct tape or household tapes should never be used on a pool liner, even as a temporary repair. Regular tape adhesives break down quickly underwater, leaving behind a gummy mess that makes it harder for genuine pool glue to stick later. Always use vinyl repair patches designed specifically for underwater pool use.


How to Refinish a Fiberglass Pool

How Do You Keep Raccoons Out of Your Pool?

How to Fix Cyanuric Acid in Your Pool

How to Shape a Pool Cue Tip to Stop Miscues

12 Best Automatic Vacuum For Intex Above Ground Pool of 2026 To Keep Vinyl Floors Spotless

10 Best Automatic Pool Vacuum For Above Ground Pool of 2026 To End Manual Scrubbing

How Much Pool Clarifier Should You Use for Your Pool Size?

How Much Does a Pebble Tec Pool Cost to Build or Resurface?


