
How to Patch an Intex Pool Without Draining It

Most leaks in flexible pool plastic take only a few minutes to seal without draining the water by pressing a waterproof patch directly over the hole. The exact technique changes based on whether the rip sits deep underwater or along an air chamber. Draining thousands of gallons wastes money and ruins swim time, but a fast repair keeps the water right where it belongs.
Where the damage happens decides what steps work best. A tiny puncture on the liner floor needs a rounded patch pressed flat underwater to force out trapped bubbles. In contrast, an air leak on the inflatable top ring requires bone-dry vinyl and firm pressure. Tears running along a joined seam also demand extra care compared to a simple pinhole. Here is how to track down the leak, apply a lasting patch, and save your summer afternoon.
The Short Version
- You do not need to drain your pool: Waterproof peel-and-stick vinyl patches and wet-set vinyl glues can seal holes directly under water while the pool stays completely full.
- Always round the corners: Cut every patch into a circle or oval with curved edges so water movement and swimming feet cannot catch a sharp corner and peel it up.
- Clean the plastic first: Use a clean cloth or sponge to wipe away the slick, invisible layer of algae around the tear under water before pressing the patch down.
- Fix the top ring with the air partly out: For inflatable rings, locate the leak with soapy water, let some air out to release pressure, dry the vinyl completely, and let the patch cure before pumping it back up.
Finding Hidden Pinholes and Leaks
A puddle of water spreading across the lawn or a top ring that goes soft every afternoon tells you water or air is escaping. Before you can fix anything, you have to find the exact spot where the flexible pool plastic gave out. Finding a tiny hole in thousands of gallons of water seems tricky, but simple household tricks make it straightforward.
Start by walking the outside wall of the pool on foot. Look for soft mud, standing puddles, or damp patches of grass pressed against the liner. Check the plastic fittings where your pool pump hoses connect to the wall. Water often drips from a loose hose clamp, runs down the outside wall, and pools on the ground, tricking you into thinking the flexible pool plastic has torn.
If the outside is dry, look inside the pool along the floor. Small rocks, sticks, or dropped toys cause most floor punctures. If you have a small splash pool or shallow ring pool, the steps to find and patch leaks in an inflatable pool follow a very similar pattern of checking high-wear areas along the floor seams.
To pinpoint a suspected leak underwater, use dark food coloring. Turn off your pool filter pump so the water becomes completely still. Float over the suspect area with a small syringe or dropper filled with dark food coloring. Hold the tip about an inch above the liner and release a tiny cloud of dye. If there is a hole, the suction of the water escaping into the ground will pull the stream of food coloring straight toward the puncture like a tiny drain.
For an inflatable top ring that will not hold air, use liquid dish soap mixed with warm water in a spray bottle. Pump the ring up until it feels firm, then spray the soapy mix across the vinyl. Watch closely for clusters of expanding soap bubbles. Pay special attention to the air valve stem and the joined edge where two sections of plastic meet, as these spots experience the most stretching.
Patching an Underwater Leak Without Draining
Draining an above-ground pool wastes money, dumps thousands of gallons of treated water into your yard, and can cause the flexible pool plastic to wrinkle or collapse under its own weight. You can easily apply a patch while the pool is full by following these steps.
- Scrub the repair spot: Vinyl underwater collects a fine, slippery layer of algae and sunscreen film. Even if the plastic looks spotless, adhesive cannot grip a slick surface. Take a clean microfiber washcloth or clean kitchen sponge underwater and scrub the area around the puncture thoroughly.
- Measure and cut your patch: Measure the tear and cut a vinyl patch that extends at least one to two inches past the damage in every direction. If you have a one-inch slit, cut a patch that is three to four inches across to give the adhesive plenty of clean plastic to hold.
- Round every single corner: Never apply a square or rectangular patch with sharp ninety-degree corners. Sharp edges catch against the water current, pool vacuum brushes, and children's toes. Use scissors to trim the corners into smooth, rounded edges, turning the patch into a smooth oval or circle.
- Prepare the adhesive for the dive: If you use peel-and-stick patches, peel off the backing paper right before bringing it under water. If you use a liquid vinyl adhesive kit, spread an even layer of glue across the patch while above water. Fold the patch in half like a taco, with the sticky glued side touching itself. This fold stops the pool water from washing away the wet glue while you push the patch down to the bottom.
- Place and press the patch: Swim down to the hole, unfold the patch directly over the tear, and press the center firmly onto the hole. Use the palms of your hands or the side of your thumbs to smooth outward from the middle to the edges. This pushing motion drives out all trapped water pockets and air bubbles.
- Hold firm pressure: Hold the patch flat against the liner with firm hand pressure for at least two full minutes so the initial bond takes hold. If the repair is on the pool floor, you can place a smooth, clean brick or a small bag of play sand wrapped in a soft towel over the patch. Leave that gentle weight in place for 24 hours while the adhesive cures.
Fixing Dry Vinyl and the Inflatable Top Ring
The inflatable top ring on an Intex pool holds the entire pool upright as water fills the basin. When the ring loses air, the pool walls sag, allowing gallons of water to spill over the sides into your yard. Fixing dry vinyl or the inflatable air chamber requires a slightly different approach than an underwater fix.
- Release some air pressure: Never try to patch an air leak while the ring is pumped tight. The air pushing through the puncture will blow a bubble right through your wet adhesive or lift the sticky tape before it grabs. Open the air valve and let out enough air so the vinyl ring feels soft, slack, and relaxed.
- Clean and dry the spot completely: Air chamber vinyl needs a spotless surface for tape or glue to stick. Clean the spot using rubbing alcohol or warm soapy water, then dry it completely with a clean towel. Rubbing alcohol removes skin oils, sunscreen, and pool chemical residue without leaving any greasy film behind.
- Cut a generous patch with rounded edges: Cut your patch so it extends at least one inch beyond the hole on all sides. Just like underwater repairs, trim the corners into smooth curves so clothes and arms do not snag the edges.
- Support the back of the vinyl: Because an uninflated ring is hollow, pressing down on it can wrinkle the plastic. Slide a small, flat object behind the vinyl if you can, such as a smooth plastic lid, or pull the plastic tight across your knee to make a firm, flat backing.
- Press firmly and smooth out air pockets: Place the patch directly over the puncture. Press down hard with your thumb, rubbing in circles from the center out to seal every edge. Run the smooth edge of a plastic spoon or credit card over the patch to press down the adhesive.
- Respect the drying time: Let the patch sit undisturbed for at least 12 hours before pumping the ring back up. The adhesive needs time to bond deeply with the flexible pool plastic. If you pump up the ring right away, the stretching vinyl will pull apart the fresh seal.
Why Pool Patches Peel Off and How to Prevent It
Pool patches should last for seasons, but many peel away after just a few days. Understanding why repairs fail helps you avoid doing the same job twice.
The most common mistake is leaving sharp square corners on the patch. Water in a pool is always moving from wind, filter pump jets, and splashing swimmers. That circulating water constantly pushes against flat edges. A sharp ninety-degree corner offers an easy lip for moving water to grab, slowly prying the edge away until the whole patch floats off.
Another major reason for failure is trapped water or air pockets under the patch. If you slap a patch down and do not work out the bubbles, water remains trapped between the adhesive and the pool floor. As pool water pushes outward against the liner, that trapped pocket expands and weakens the glue line. Always smooth patches from the center outward to ensure total contact.
Skipping the cleaning step also ruins repairs. Underwater plastic feels slippery because of microscopic algae, even if the pool looks crystal clear. Glue will stick to that algae film rather than the actual vinyl. When the algae dies or shifts, the patch releases. Always scrub the liner with a clean cloth right before placing the patch.
Avoid using harsh household chemicals to clean pool vinyl. Solvents like acetone, paint thinner, or gasoline melt the plasticizers that make pool liners flexible. These chemicals leave the vinyl brittle and cause tiny stress cracks around your repair. Stick to clean water, mild liquid dish soap, or standard rubbing alcohol.
When a Tear Is Too Big to Patch Safely
Not every pool tear should be repaired. While small pinholes and punctures are easy to seal, some damage threatens the structural safety of the entire pool.
Small pinholes, minor punctures from dog claws, and clean straight cuts under two inches long are safe to patch. When patched properly, the repaired spot is often stronger than the surrounding vinyl.
Tears along a joined edge, also called a factory seam, are a different story. The joined edges take the full pulling force of the thousands of pounds of water sitting in the pool. When a seam begins to pull apart or split, standard vinyl adhesive cannot reliably hold against that constant sideways pulling force. A patched seam can suddenly tear wide open without warning.
Long tears stretching more than four to six inches along a side wall also present a severe blowout hazard. If a wall patch fails under the weight of the water, hundreds of gallons can surge out in seconds, eroding the ground under the pool legs, ruining landscaping, and flooding basements. If the pool liner is old, brittle, and sun-baked, the plastic around the patch will simply snap under pressure. When tears split across structural seams or the vinyl feels crunchy and stiff, the safest path is to replace the liner.
Choosing the Right Vinyl Repair Kit
Finding the right repair kit means matching the patch material to where the leak is located and whether water is present. Having the proper kit on hand saves your lawn and keeps your pool open all summer.
For underwater liner holes, look for kits specifically labeled for wet or underwater use. These kits use waterproof adhesives that cure in the presence of water rather than dissolving. Some come as pre-cut peel-and-stick patches coated with high-tack adhesive that grabs wet plastic immediately. Others supply a tube of liquid vinyl solvent glue alongside flexible vinyl sheets. Liquid solvent kits create an exceptionally strong repair because the glue slightly softens the existing plastic, welding the two layers together.
For inflatable top rings and dry repairs above the waterline, heavy-duty waterproof vinyl tape rolls or clear TPU repair patches work best. These patches stretch naturally with the vinyl as the air chamber warms in the sun and expands, preventing the seal from snapping.
Before purchasing, check that the patch material remains flexible after drying. Rigid plastic patches will crack or peel when the pool liner shifts under foot traffic. Clear patches are also helpful, as they blend directly into blue, printed, or patterned pool walls without leaving an ugly mark.

- VC Score10.0
BCP Score is a ranking system developed by bestcleanerproducts.com. BCP Score has no relationship or impact from any manufacturers or sales agent websites. Learn more
- BrandHannaera

- VC Score8.6
BCP Score is a ranking system developed by bestcleanerproducts.com. BCP Score has no relationship or impact from any manufacturers or sales agent websites. Learn more
- BrandBirllaid

- VC Score8.0
BCP Score is a ranking system developed by bestcleanerproducts.com. BCP Score has no relationship or impact from any manufacturers or sales agent websites. Learn more
- BrandIntex
- VC Score8.0
BCP Score is a ranking system developed by bestcleanerproducts.com. BCP Score has no relationship or impact from any manufacturers or sales agent websites. Learn more
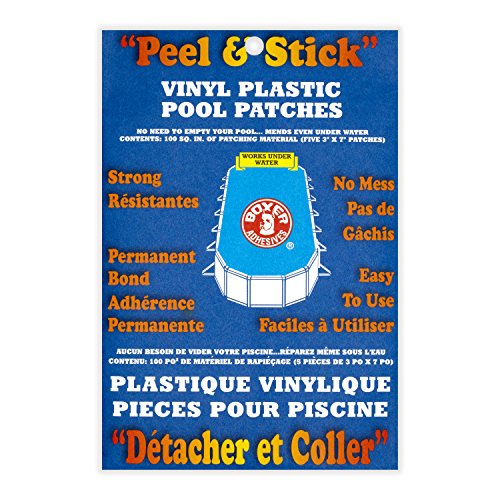
- BrandBoxer Adhesives

- VC Score8.0
BCP Score is a ranking system developed by bestcleanerproducts.com. BCP Score has no relationship or impact from any manufacturers or sales agent websites. Learn more
- BrandIntex

- VC Score7.6
BCP Score is a ranking system developed by bestcleanerproducts.com. BCP Score has no relationship or impact from any manufacturers or sales agent websites. Learn more
- BrandIntex

- VC Score7.2
BCP Score is a ranking system developed by bestcleanerproducts.com. BCP Score has no relationship or impact from any manufacturers or sales agent websites. Learn more
- BrandGWHOLE

- VC Score6.8
BCP Score is a ranking system developed by bestcleanerproducts.com. BCP Score has no relationship or impact from any manufacturers or sales agent websites. Learn more
- BrandKapStrom
Last update on 2026-10-08 / Affiliate links / Images, Product Titles, and Product Highlights from Amazon Product Advertising API
FAQs
Do I need to empty my Intex pool before patching a hole?
No, you do not need to empty the pool. Underwater peel-and-stick vinyl patches and specialized wet vinyl repair glues bond firmly under water while the pool stays full. Draining the pool wastes water and can damage the shape of your flexible pool plastic.
How long should I wait to swim after applying an underwater patch?
You should wait at least 12 to 24 hours before heavy swimming or running a pool vacuum over the area. While wet-set patches grab the vinyl quickly, the adhesive needs time to reach full strength without feet kicking it or water currents pulling at the edges.
Can I patch an Intex pool leak from the outside?
You can patch from the outside, but patching from the inside underwater works much better. Inside water pressure pushes the inner patch tightly flat against the pool wall, helping seal the hole. An outside patch has water pressure constantly pushing against the glue, trying to pop it off.
Can I use duct tape or a bike tire patch on my pool?
Duct tape and bicycle tire patches will not work as a lasting fix. Duct tape glue dissolves quickly in pool water, turning into a slimy mess within hours. Bike tire patches use rubber and rubber cement designed for tires, which does not bond properly with flexible pool vinyl.


How to Refinish a Fiberglass Pool

How Do You Keep Raccoons Out of Your Pool?

How to Fix Cyanuric Acid in Your Pool

How to Shape a Pool Cue Tip to Stop Miscues

12 Best Automatic Vacuum For Intex Above Ground Pool of 2026 To Keep Vinyl Floors Spotless

10 Best Automatic Pool Vacuum For Above Ground Pool of 2026 To End Manual Scrubbing

How Much Pool Clarifier Should You Use for Your Pool Size?

How Much Does a Pebble Tec Pool Cost to Build or Resurface?


