
How to Install an Overlap Pool Liner Without Wrinkles

Spread the folded liner across the lawn under direct sunshine before touching the pool frame. Natural sunlight softens the heavy vinyl sheet so it stretches into place without ripping or bunching. Once the bottom sits centered across the floor, drape the edges over the wall and press plastic coping strips onto the rim to hold everything steady.
Getting a smooth finish depends on three critical factors. Aim for outdoor temperatures between 70 and 80 degrees, because cold vinyl turns rigid and resists shifting. The sand base must stay level, supported by a solid pool cove (a raised sand or foam wedge along the bottom wall rim) to protect lower seams. Crucially, wait to cut any wall openings until the rising pool water supports the vinyl completely. Here is how to handle each step safely.
Prepping the Floor Base and Building the Pool Cove
Vinyl liners mirror every bump, rock, and groove on the ground beneath them. If you place a new liner over rough dirt, every pebble will press upward against the vinyl once thousands of gallons of water push down. Over time, those pressure points turn into pinholes or torn seams. Taking the time to smooth the pool floor and protect the perimeter saves your liner before water ever touches it.
Start by clearing the entire floor area inside your pool frame. Remove rocks, roots, twigs, and dried clumps of soil. Sifted masonry sand works best for the base because it compacts smoothly without sharp edges. Much like the careful ground work needed when you level an Intex pool on uneven ground, a steel-walled pool demands a flat, firm base so the water weight distributes evenly across the entire surface.
Next, build a pool cove (a raised sand or foam wedge along the bottom wall rim). The cove is one of the most critical parts of your pool structure. Without it, the heavy water pressure inside the pool will force the flexible vinyl outward beneath the bottom metal wall rail. When vinyl squeezes into that metal gap, it pinches, stretches, and rips open. A proper cove creates a gentle ramp that transitions the liner smoothly from the flat floor up onto the upright metal wall.
You can build a cove using clean masonry sand banked 6 to 8 inches high against the wall and sloping out about 8 inches onto the floor. Tamp the sand firmly so it does not shift under your feet. Alternatively, you can use preformed foam pool cove strips that peel and stick directly to the bottom metal wall. Foam cove strips keep their shape permanently and will not wash out if water ever gets behind the liner.
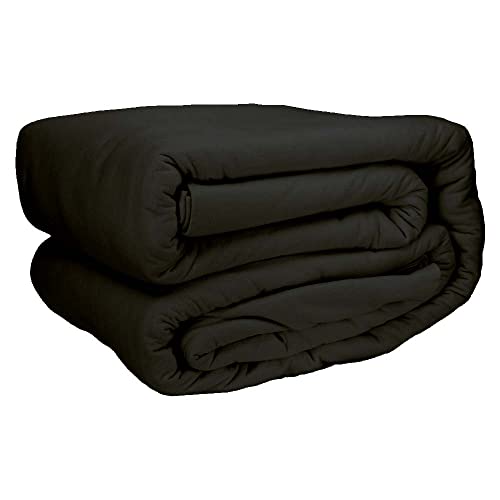
To give your liner an extra layer of defense, place a protective cloth fiber pad over the sand floor. A thick liner pad acts as a puncture guard against stray roots, buried stones, and nutgrass that can sprout through packed sand. It also creates a clean vapor barrier between the damp earth and the metal bottom rims of your pool wall.
Review this quick checklist before you bring the new vinyl inside the pool frame:
- Clear every stone, root, twig, and piece of debris from the dirt or sand base.
- Tamp the sand floor flat so your footsteps do not leave deep indentations.
- Shape a solid 6-to-8-inch cove around the entire bottom perimeter using sand or foam.
- Cover the inside wall bolts with two layers of heavy-duty duct tape so the liner never rubs against metal screw heads.
- Lay out your protective floor pad and smooth any large folds before unpacking the vinyl.
Sun-Warming, Centering, and Hanging the Overlap Vinyl
Vinyl behaves like bread dough. When it is warm, it stretches smoothly, conforms to corners, and releases its packing creases. When it is cold, vinyl becomes stiff, brittle, and unyielding. Trying to hang a cold liner is the fastest way to tear a seam or lock in permanent floor wrinkles.
Pick a sunny day with outside temperatures between 70 and 80 degrees Fahrenheit. Unpack the liner on a clean grassy patch or a smooth tarp and let it sit in direct sunlight for an hour before installation. The heat from the sun softens the vinyl sheet, making it pliable enough to handle without snapping under tension. If you try to install the liner on a cloudy, chilly morning, the vinyl will resist your hands and pull too tightly against the pool walls.
Once the vinyl is warm and soft, carry it inside the pool. Always take off your shoes and work in clean socks or bare feet so you do not damage the sand cove or puncture the vinyl. Look for the circular or oval floor seam. An overlap liner (a vinyl sheet made to fold over the pool wall) features a distinct bottom seam that separates the flat floor section from the vertical wall section.
Position the liner directly in the center of the pool floor. Pull the floor seam outward in every direction until it sits an equal distance from the pool cove all the way around. If the floor is off-center by even a foot, one side of your pool will have excess material bunched against the wall, while the opposite side will pull so tight that it cannot reach the bottom rim.
Now you can begin hanging the vinyl over the top of the pool wall:
- Lift the top edge of the vinyl wall and drape it over the top metal rim of the pool wall by about 3 to 6 inches.
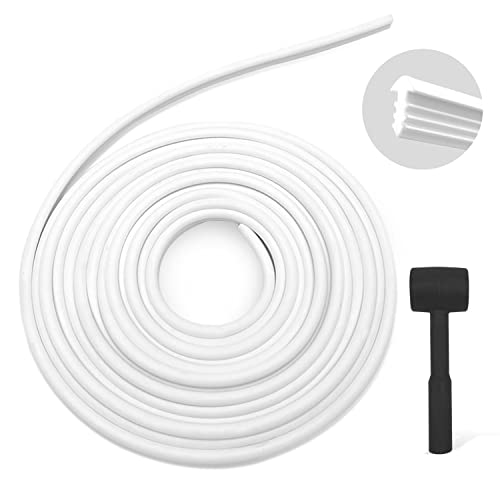
- Fasten the draped vinyl loosely using coping strips (plastic clips that hold vinyl to the wall top). Push each clip down over the vinyl and the metal rim to keep the liner from falling back into the pool.
- Work around the pool in quarters. Clip the liner at the twelve, three, six, and nine o'clock positions first. This balances the weight of the vinyl and keeps your floor seam centered.
- Fill in the spaces between your initial clips, placing coping strips along the entire perimeter.
- Check the bottom floor of the liner. The vinyl must rest completely on the sand base. If the floor is suspended in the air like a drumhead, release your coping clips and give the liner more slack before adding any water.
Smoothing Wrinkles with Water and Cutting Wall Openings
Water is both your best tool and your biggest challenge when setting an overlap liner. One gallon of water weighs over eight pounds. Just one inch of water across a 24-foot pool adds thousands of pounds of pressure onto the floor. Once that water weight settles on the vinyl, you cannot budge any wrinkles that remain underneath.
Place a garden hose in the center of the pool floor. Wrap the metal nozzle in a clean rag or soft towel so the hard brass fitting cannot scratch or pierce the soft vinyl. Turn on the water at a gentle flow rate. Stay inside the pool with bare feet while the first half-inch of water begins to accumulate in the center.
Work out the wrinkles while the water is shallow. Start in the exact middle of the pool and use the balls of your feet or the palms of your hands to push wrinkles outward toward the pool cove. Work in expanding circles. As you push the vinyl outward, the water will roll over the smoothed surface and pin it flat against the sand bed.
Keep a close eye on the top wall rim as the water level climbs toward two inches. The weight of the water will pull the vinyl downward into the bottom cove. If you clamped the coping clips too tightly, the pulling vinyl can buckle your steel pool wall inward. Remove coping strips a few at a time to let the wall vinyl slide downward into place, then re-clamp them with moderate tension.
Do not cut holes for your skimmer or return jet yet. Cutting holes too early is a common mistake that ruins replacement liners. If you cut the wall openings while the pool is empty or half-full, the rising water will continue to pull the vinyl down, ripping the cut openings right past the gasket seals.
Follow these steps to seal your wall fittings safely once the water is deep enough:
- Fill the pool until the water level sits about two to three inches directly below the return jet or skimmer opening. At this height, the vinyl has finished stretching and will not shift any further.
- Place the rubber gasket against the pool wall fitting. If your pool uses a butterfly gasket, slide it over the metal wall edge so it protects both the inside and outside surfaces.
- Align the faceplate (a plastic frame screwed around the wall opening) over the liner. Feel for the pre-drilled screw holes in the metal wall through the vinyl using your fingers.
- Push the mounting screws through the faceplate, through the vinyl, and into the metal wall holes. Drive the screws in by hand with a standard manual screwdriver. Avoid power drills, which easily strip out the soft metal holes or crack the plastic faceplate.
- Tighten the screws in an alternating pattern, moving from opposite corners like you would tighten lug nuts on a car wheel, to create an even, leak-free seal.
- Take a fresh, sharp utility knife and carefully cut out the vinyl rectangle or circle from the inside of the faceplate opening.
Testing for leaks around your new wall fittings requires gentle patience. Unlike the simple submersion checks you use to find and patch leaks in an inflatable pool, steel-walled fittings stay under continuous pressure. Inspect the outer wall beneath the skimmer box with a dry paper towel while the filter pump runs to confirm no water drips past the faceplate screws.
Choosing the Right Floor Pads and Coping Accessories
An overlap liner relies entirely on its supporting hardware to stay smooth, stable, and protected. Selecting proper accessories before you start your project prevents installation delays and extends the life of your pool floor.
Protective pool pads made of dense cloth fiber provide the best defense for your pool floor. These pads come pre-cut for round and oval pool sizes, such as 24-foot round or 18-by-33-foot oval layouts. A solid pad stops sharp rocks and stray roots from puncturing the underside of the vinyl. It also cushions the bottom of the pool underfoot and creates a barrier that keeps wet earth from corroding the bottom metal track over time.
Coping strips are equally important for overlap liners. Overlap liners do not snap into a bead track; they fold directly over the top of the metal pool wall and rely on plastic clips to hold them in place under the metal top rails. Old plastic clips turn brittle and crack after seasons of exposure to sun and pool chemicals. Installing fresh, corrosion-free plastic coping clips ensures the liner will not slip down the wall as the pool fills with water.
Before purchasing your liner and accessories, measure your pool carefully. Check your pool diameter across the center from wall to wall, and measure your wall height from the bottom track to the top rim. Common wall heights include 48, 52, and 54 inches. Matching the liner gauge and wall height to your exact frame prevents excess slack or dangerous overstretching.
Once your pool is filled and running, care for your new liner with gentle maintenance tools. Choose pool vacuum heads and wall brushes designed specifically for vinyl surfaces. Soft nylon bristles clean away dust and algae without scratching the smooth vinyl print or tugging at floor seams.

- VC Score9.4
BCP Score is a ranking system developed by bestcleanerproducts.com. BCP Score has no relationship or impact from any manufacturers or sales agent websites. Learn more
- BrandGlosaie

- VC Score9.2
BCP Score is a ranking system developed by bestcleanerproducts.com. BCP Score has no relationship or impact from any manufacturers or sales agent websites. Learn more
- BrandSuperDi
- VC Score8.8
BCP Score is a ranking system developed by bestcleanerproducts.com. BCP Score has no relationship or impact from any manufacturers or sales agent websites. Learn more
- BrandRhino Pad

- VC Score8.6
BCP Score is a ranking system developed by bestcleanerproducts.com. BCP Score has no relationship or impact from any manufacturers or sales agent websites. Learn more
- BrandBlue Wave

- VC Score8.2
BCP Score is a ranking system developed by bestcleanerproducts.com. BCP Score has no relationship or impact from any manufacturers or sales agent websites. Learn more
- BrandSmartline

- VC Score8.2
BCP Score is a ranking system developed by bestcleanerproducts.com. BCP Score has no relationship or impact from any manufacturers or sales agent websites. Learn more
- BrandSmartline

- VC Score7.8
BCP Score is a ranking system developed by bestcleanerproducts.com. BCP Score has no relationship or impact from any manufacturers or sales agent websites. Learn more
- BrandQuality Pool Products
- VC Score5.6
BCP Score is a ranking system developed by bestcleanerproducts.com. BCP Score has no relationship or impact from any manufacturers or sales agent websites. Learn more
- BrandJantens
Last update on 2026-10-08 / Affiliate links / Images, Product Titles, and Product Highlights from Amazon Product Advertising API
FAQs
What should I do if the liner seems too small to reach the wall?
Never yank or pull hard on the vinyl to make it reach the pool wall. A liner that feels too small is usually too cold or not centered on the sand base. Let direct sunlight warm the liner above 70 degrees so it relaxes, and shift the floor seam so it sits an equal distance from the cove on all sides.
Can I reuse my old plastic coping strips during installation?
Reusing old coping strips is risky because sun exposure and chlorine make plastic weak and brittle over time. Old strips often snap or lose their grip when the rising water pulls the vinyl downward. Fresh plastic coping clips provide a tight, firm hold that prevents the liner from slipping off the metal wall.
What should I do if a floor wrinkle refuses to come out once the water starts rising?
If the water is less than one inch deep, you can push the wrinkle outward using the balls of your bare feet or work it toward the wall with your hands. If the water is deeper than one inch, the water weight will be too heavy to shift the vinyl safely. Turn off the hose, drain the shallow water, work out the stubborn fold, and resume filling.


How to Refinish a Fiberglass Pool

How Do You Keep Raccoons Out of Your Pool?

How to Fix Cyanuric Acid in Your Pool

How to Shape a Pool Cue Tip to Stop Miscues

12 Best Automatic Vacuum For Intex Above Ground Pool of 2026 To Keep Vinyl Floors Spotless

10 Best Automatic Pool Vacuum For Above Ground Pool of 2026 To End Manual Scrubbing

How Much Pool Clarifier Should You Use for Your Pool Size?

How Much Does a Pebble Tec Pool Cost to Build or Resurface?








