
How to Clean an Oven Without Harsh Fumes

Burnt crust and greasy drips on the oven floor look terrible, but cleaning them out is much simpler than most people think. The most reliable way to lift that grime is to coat the interior with a paste of baking soda and water, let it sit overnight, and wipe it clean with a damp cloth and a splash of vinegar. The waiting time softens the charred crust, so there is no need to scrub for hours or fill the kitchen with harsh chemical fumes.
A few details change the job slightly. Heavy, rock-hard buildup from years of spills might call for a second round, while exposed heating elements (the metal rods that glow red) must stay dry to avoid damage. The wire racks and door glass also need their own gentle care so surfaces do not get scratched. Here is how to handle each step safely from start to finish.
The Short Version
- Prep your space: Make sure the oven is completely cold, remove all wire racks, and wipe out dry crumbs with a paper towel before applying any liquids.
- Apply an overnight paste: Spread a mixture of baking soda and water over the enamel floor and walls, keeping it clear of the heating rods and the flexible door seal.
- Rinse and spritz: After 8 to 12 hours of soak time (letting the wet paste sit on the surface so it can dissolve the mess), wipe away the paste with a damp cloth, spray stubborn white spots with white vinegar, and wipe clean.
- Tackle racks and glass separately: Soak racks in a towel-lined bathtub with hot water and dish soap, and treat the window with a gentle paste or flat plastic scraper to protect the tempered glass from scratches.
What to Prep and Protect Before Starting
Cleaning an oven goes much faster when you spend five minutes protecting your kitchen and the sensitive parts of the appliance. Before you open any jars or spray bottles, double-check that every control knob is turned off and the oven cavity is completely cool to the touch. Laying an old beach towel or flattened cardboard box on the floor right beneath the door catches dirty water drips before they touch your kitchen flooring.
Take everything out of the oven cavity. That includes the metal wire racks, any hanging thermometer, roasting pans, and pizza stones. Pizza stones and unglazed baking tiles absorb moisture and cleaning agents easily, which can ruin them or cause foul odors the next time you bake. Once the cavity is empty, use a dry hand broom or paper towel to sweep out loose char and food crumbs from the oven floor. Clearing the dry debris first prevents you from pushing gritty black mud around later.
You also need to identify and protect the internal parts of your oven. Look at the bottom and top to see where the heat comes from. Electric ovens use a heating element (the metal rod that gets red-hot to heat the oven). Some ovens feature an exposed bottom heating element that sits on small metal feet an inch above the floor. Other modern ovens hide the bottom element beneath a smooth porcelain enamel panel. If your bottom heating element is exposed, you can gently lift it an inch or two to clean underneath it, but never bend it forcefully or hang heavy wet towels from it.
Avoid getting wet cleaners on the electrical connection points at the back where the heating element plugs into the oven wall. If you have a gas oven, identify the pilot light opening or the gas burner slots and keep all wet pastes far away from those openings. Clogging gas burner ports with dried paste creates uneven flames or prevents the oven from lighting properly.
Finally, find the door gasket (the flexible seal around the oven opening). This heat-resistant seal keeps high temperatures inside the oven while you bake. The gasket is delicate, whether it is made of woven fiberglass or soft rubber. Do not scrub this seal with abrasive pads, and do not soak it in cleaning paste. If the door gasket becomes torn, frayed, or dried out from harsh cleaners, heat will leak out into your kitchen, causing higher electric bills and unevenly baked food.
The Overnight Baking Soda Method Step by Step
Baking soda is one of the most reliable kitchen ingredients for tackling greasy ovens. It is a mild alkali, which means it chemically softens acidic grease and burnt drippings without releasing toxic air into your kitchen. Learning what makes a good green cleaner actually work shows that time and moisture do most of the hard labor for you. Here is the step-by-step process to get clean results without scrubbing your arms sore.
- Mix your paste: In a small bowl, combine half a cup of baking soda with about three tablespoons of water. Stir with a spoon until it forms a spreadable paste with the texture of frosting or pancake batter. If the mixture feels too dry and chalky, add a few extra drops of water until it glides smoothly.
- Coat the interior walls and floor: Put on a pair of rubber household gloves to keep grease and grime off your hands. Scoop up paste with a silicone spatula or your gloved fingers and spread it across the bottom floor, the back wall, and the side walls. For burnt, blackened crust (carbonized grease that has turned into hard black patches), dab an extra-thick layer of paste directly over the spot.
- Work carefully around sensitive parts: Keep your paste away from the electric heating elements, gas burner tubes, interior light covers, and the door gasket. You do not need to scrub the paste into the metal right now; simply coat the burnt surfaces and let the chemical reaction take place.
- Allow full soak time: Close the oven door and leave the paste alone for 8 to 12 hours, or overnight. As the wet baking soda rests against the burnt grease, it breaks the bond between the enamel steel and the burnt fat. By morning, parts of the white paste will turn dark brown or black as it absorbs the softened grease.
- Wipe away the dried paste: Open the oven door and grab a bucket of warm water and a microfiber cloth. Wet your cloth, wring it out so it is damp but not dripping, and begin wiping out the paste. The softened black residue should slide off in large chunks. Rinse your cloth frequently in the water bucket to keep from smearing grease across clean sections.
- Spritz with vinegar: Pour regular distilled white vinegar into a spray bottle. Mist any areas where chalky white baking soda film remains stuck to the enamel. The acidic vinegar will foam and bubble gently as it touches the alkaline baking soda. This reaction lifts the final layer of haze without any harsh chemical smells.
- Complete the final wipe-down: Take a fresh, clean microfiber cloth dampened with warm water and wipe down the entire interior one last time. Run your fingers across the metal floor once it dries. It should feel completely smooth, non-greasy, and clean.
How to Soak and Clean Oven Racks
Oven racks present a unique challenge because their wire frames are awkward to wash in a standard kitchen sink. Trying to scrub them in a porcelain bathtub without preparation can leave dark metal scratches on your tub surface. You can clean them easily by letting hot water and soap do the hard work in a protected space.
- Line your bathtub: Place two old bath towels completely flat across the bottom of your bathtub. These towels act as a protective barrier so the sharp wire ends of the metal racks do not scratch or chip your tub glaze.
- Position the racks: Lay your dirty oven racks flat on top of the towels. Try not to overlap them too tightly so the water and soap can reach every wire bar evenly.
- Add hot water and soap: Pour half a cup of standard liquid dish soap or three-quarters of a cup of laundry detergent directly over the racks. Turn on the hot water tap and fill the tub until the racks are fully covered by an inch or two of warm water. Swish the water around with your hand to disperse the soap evenly.
- Let them soak: Allow the racks to soak for at least 4 hours, though letting them sit overnight works best for heavy char. The hot water and concentrated soap dissolve sticky oil residues, loosening the hard baked-on crust.
- Scrub with a non-scratch pad: After soaking, lift one rack up slightly and wipe down each bar with a non-scratch scouring pad or an old nylon scrub brush. Most of the grease will wash away effortlessly. For small stubborn spots near the weld joints, dip your scrub sponge in a little dry baking soda to give it extra cleaning grip.
- Rinse and dry thoroughly: Drain the dirty tub water and use your shower head to rinse the soap off the racks with clean water. Dry each rack thoroughly with a clean towel before returning it to the oven. Putting wet racks back into an oven can cause rust spots on bare steel edges.
Cleaning the Glass Door Without Scratching
The interior glass window of an oven door usually collects brown, baked-on grease splatters that make it hard to see your food cooking. Oven doors use tempered glass, which is processed to withstand high cooking temperatures. However, tempered glass is vulnerable to surface scratches. Deep scratches cause weak spots that can crack when the glass heats up and cools down.
Never clean oven window glass with wire bristle brushes, steel wool pads, or coarse scouring powders. Even metal spatulas or razor blades held at an angle can dig tiny grooves into the glass pane. Instead, mix a paste using baking soda and warm water, making it slightly wetter than the paste you used for the oven walls.
Open the oven door completely flat so the glass is horizontal. Spread your paste evenly over the glass window with a soft cloth. Let the paste sit for 20 to 30 minutes to soften the greasy brown streaks. Then, take a damp microfiber cloth or a non-scratch scouring pad designed specifically for glass cooktops and rub the glass using gentle, overlapping circular motions.
If you encounter thick, burnt droplets that refuse to wipe away, use a flat plastic scraper tool. If you must use a metal razor scraper, hold the blade completely flat against the glass surface at a low 30-degree angle, keeping the blade wet. Never tilt the razor onto its corner, which can gouge the window. Wipe away all leftover paste with a damp cloth, spray the window with clean water or vinegar, and buff dry with a soft towel for a streak-free view.
Why Technicians Warn Against Using the Self-Clean Cycle
Most modern ovens come with a built-in self-clean button. It sounds like an effortless way to clean, but many appliance repair technicians strongly advise homeowners to avoid using it. Understanding what happens during this cycle explains why manual cleaning remains the safer choice for your home and your appliance.
The self-clean cycle works by turning the oven into a miniature incinerator. The appliance locks the door and raises the internal temperature to between 800 and 1,000 degrees Fahrenheit. The goal is to burn grease, fat drippings, and food residue into white ash that you can wipe out with a damp cloth once the cycle cools down. However, subjecting a home appliance to that level of heat brings serious drawbacks.
First, the cycle produces thick, noxious smoke and odors. As food crust and burnt grease burn away at extreme temperatures, they release irritating fumes and carbon monoxide into your living area. If your oven has non-stick interior coatings or trays, the extreme heat can release chemical vapors that are especially dangerous for household pets. Pet birds have delicate respiratory systems, and fumes from high-heat oven cycles have been known to be fatal to them.
Second, the intense heat stresses the oven components. Appliance technicians often report that their busiest repair periods happen right before major cooking holidays like Thanksgiving, when homeowners run a self-clean cycle to prepare for guests. The prolonged heat frequently damages the oven's electronic control board or trips the thermal fuse (a small safety switch that cuts off electrical power when the appliance overheats to prevent house fires). When the thermal fuse blows, the oven door remains locked shut, and the unit will not turn back on until a technician replaces the damaged part. Using a gentle soak method avoids this mechanical stress entirely.
Choosing a Cleaner for Severe Carbon Build-Up
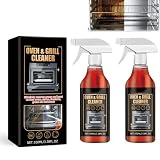
While pantry staples handle light to moderate spills, ovens with years of burnt-on crust and heavy carbonization may need a specialized cleaner. A commercial cleaner provides stronger grease-cutting agents that dissolve hardened buildup faster than standard baking soda paste.
When selecting a commercial product, prioritize fume-free or low-odor formulas. Traditional oven sprays rely on heavy caustic chemicals like sodium hydroxide (lye), which strip grease quickly but release overpowering vapors that irritate the throat and eyes. Modern fume-free formulas use milder grease-cutting compounds that cling to vertical oven walls without filling your kitchen with choking chemical mist. Look for complete kits that supply dedicated soaking bags for your wire racks and non-scratch scrubbing tools.
Before purchasing any cleaning agent, verify that it matches your specific oven type. Check your owner's manual to confirm the interior finish of your cavity. Many strong degreasers work well on standard porcelain enamel steel but can permanently pit or discolor aluminum trim, heating elements, and stainless steel door frames. If your oven features continuous-cleaning textured panels or specialized steam-clean liners, select a formula specifically rated for those sensitive surfaces.

- VC Score8.7
BCP Score is a ranking system developed by bestcleanerproducts.com. BCP Score has no relationship or impact from any manufacturers or sales agent websites. Learn more
- BrandFrigidaire
- VC Score8.6
BCP Score is a ranking system developed by bestcleanerproducts.com. BCP Score has no relationship or impact from any manufacturers or sales agent websites. Learn more
- BrandMYSQIHO

- VC Score8.5
BCP Score is a ranking system developed by bestcleanerproducts.com. BCP Score has no relationship or impact from any manufacturers or sales agent websites. Learn more
- BrandEverneat

- VC Score8.2
BCP Score is a ranking system developed by bestcleanerproducts.com. BCP Score has no relationship or impact from any manufacturers or sales agent websites. Learn more
- BrandOVEN PRIDE

- VC Score7.9
BCP Score is a ranking system developed by bestcleanerproducts.com. BCP Score has no relationship or impact from any manufacturers or sales agent websites. Learn more
- BrandWeiman
Last update on 2026-10-29 / Affiliate links / Images, Product Titles, and Product Highlights from Amazon Product Advertising API
FAQs
Can I really clean my oven with just baking soda and vinegar?
Yes, baking soda and vinegar work well on almost all common oven messes. Baking soda softens the acidic grease over an 8 to 12 hour soak time, while vinegar dissolves the leftover chalky film. This method takes patience, but it cleans effectively without producing harsh chemical fumes.
Is it safe to leave baking soda paste in the oven longer than overnight?
Leaving the paste on the oven walls for a full day will not damage porcelain enamel finishes. However, if the paste sits too long, it dries into a rock-hard crust that takes extra water and vinegar misting to rehydrate and wipe away. Sticking to 8 to 12 hours gives you the best balance between lifting grime and easy wiping.
How do I clean an oven with a hidden heating element?
Ovens with hidden heating elements have a smooth, flat porcelain floor with the heating rod tucked securely underneath. You can clean these floors easily because there is no exposed metal rod to work around. Simply spread your cleaning paste directly over the bottom floor, avoiding only the door gasket and side wall vents.
How often should an oven be deep cleaned?
Deep clean your oven every three to six months if you bake and roast meals regularly. If you notice smoke rising from the oven floor when preheating, or if cooking odors linger long after a meal is done, clean the interior right away. Placing a foil-lined baking sheet on the lowest rack during messy roasts also prevents future drips from burning onto the floor.


How to Refinish a Fiberglass Pool

How Do You Keep Raccoons Out of Your Pool?

How to Fix Cyanuric Acid in Your Pool

How to Shape a Pool Cue Tip to Stop Miscues

Best Far Infrared Sauna Sauna Heats: Top Picks of 2026

11 Best Far Infrared Sauna Carbon Fiber Heaters of 2026 For Balanced Full-Body Heat

11 Best Carbon Far Infrared Sauna of 2026 For Even Heat

10 Best Bluetooth Speaker For Sauna of 2026 For Heat and Steam


