
How to Use Wet Vacuum Cleaner Without the Guesswork

How to use wet vacuum cleaner sounds simple at first, yet plenty of people hesitate the moment they face standing water, muddy footprints, or a messy workshop floor. One wrong move can leave dirty water behind, clog the machine, or even damage a filter that wasn't designed for wet pickup. That's exactly why understanding the right sequence matters more than rushing through the job. A few practical habits can make cleanup smoother while helping the vacuum last much longer.
Fresh spills often tempt people to grab towels first, but a wet vacuum cleaner removes moisture far more efficiently when it's prepared correctly. Emptying the recovery tank before every job, checking whether the dry filter should be removed, and choosing the right attachment all play a bigger role than many expect. Small details like these save frustration later because dirty water has somewhere to go instead of backing up inside the machine. That little bit of preparation usually pays off in cleaner floors and less cleanup afterward.
Every surface tells a different story, and that's where experience really counts. Smooth tile may allow steady, overlapping passes, while textured concrete or garage floors often need slower movements to collect water hiding in tiny grooves. Carpet calls for even more patience because moisture sinks deeper than it appears on the surface. Paying attention instead of rushing often produces better drying results without making extra work.
Many cleaning problems begin after the job is finished rather than during it. Leaving dirty water inside the collection tank creates unpleasant odors, encourages mold growth, and shortens the life of seals and internal components. Washing the tank, rinsing accessories, and allowing everything to dry naturally can keep the machine ready for the next unexpected spill. Those simple maintenance habits protect both the equipment and the cleaning performance over time.
Safety deserves just as much attention as cleaning technique. Keeping electrical cords away from standing water, confirming the machine supports wet pickup, and never mixing incompatible cleaning chemicals all reduce unnecessary risks. A careful approach may take an extra minute, yet it often prevents expensive repairs and stressful surprises. Little by little, those smart habits become second nature every time another wet mess appears.

- VC Score9.2
BCP Score is a ranking system developed by bestcleanerproducts.com. BCP Score has no relationship or impact from any manufacturers or sales agent websites. Learn more
- BrandUltenic

- VC Score9.2
BCP Score is a ranking system developed by bestcleanerproducts.com. BCP Score has no relationship or impact from any manufacturers or sales agent websites. Learn more
- BrandHappy Tree

- VC Score9.0
BCP Score is a ranking system developed by bestcleanerproducts.com. BCP Score has no relationship or impact from any manufacturers or sales agent websites. Learn more
- BrandCRAFTSMAN

- VC Score9.0
BCP Score is a ranking system developed by bestcleanerproducts.com. BCP Score has no relationship or impact from any manufacturers or sales agent websites. Learn more
- BrandArmor All

- VC Score9.0
BCP Score is a ranking system developed by bestcleanerproducts.com. BCP Score has no relationship or impact from any manufacturers or sales agent websites. Learn more
- BrandBissell
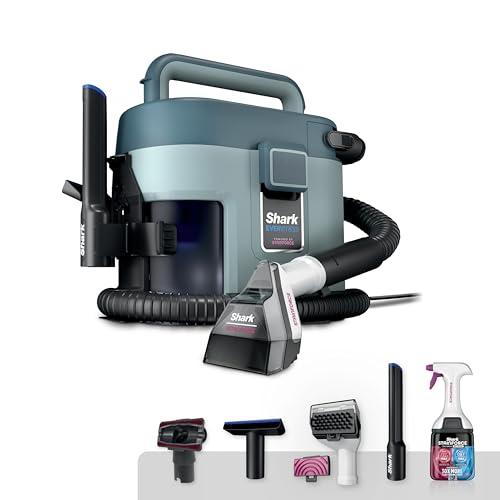
- VC Score9.0
BCP Score is a ranking system developed by bestcleanerproducts.com. BCP Score has no relationship or impact from any manufacturers or sales agent websites. Learn more
- BrandShark

- VC Score8.8
BCP Score is a ranking system developed by bestcleanerproducts.com. BCP Score has no relationship or impact from any manufacturers or sales agent websites. Learn more
- BrandVacmaster

- VC Score8.8
BCP Score is a ranking system developed by bestcleanerproducts.com. BCP Score has no relationship or impact from any manufacturers or sales agent websites. Learn more
- BrandFhyada

- VC Score8.8
BCP Score is a ranking system developed by bestcleanerproducts.com. BCP Score has no relationship or impact from any manufacturers or sales agent websites. Learn more
- BrandArmor All

- VC Score8.6
BCP Score is a ranking system developed by bestcleanerproducts.com. BCP Score has no relationship or impact from any manufacturers or sales agent websites. Learn more
- BrandTineco
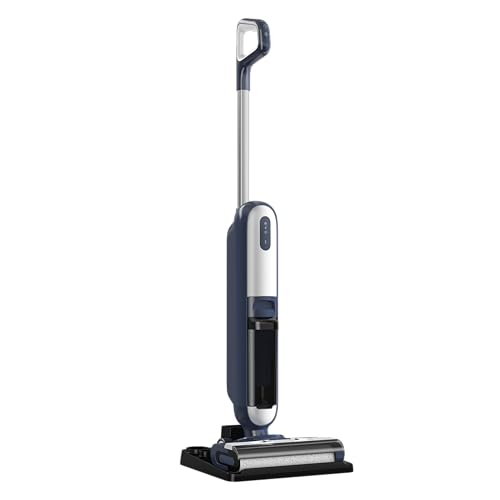
- VC Score8.0
BCP Score is a ranking system developed by bestcleanerproducts.com. BCP Score has no relationship or impact from any manufacturers or sales agent websites. Learn more
- BrandKMFurnila
Last update on 2026-07-13 / Affiliate links / Images, Product Titles, and Product Highlights from Amazon Product Advertising API
How To Use Wet Vacuum Cleaner Without Stress
A wet mess never waits for a convenient moment. A washer hose drips behind the machine, rainwater sneaks across the garage floor, or a plant tray overflows after one generous watering session, and suddenly towels feel like a losing battle. That is where how to use wet vacuum cleaner becomes more than a quick cleaning trick because the right setup can pull liquid out faster, reduce lingering smells, and keep damage from spreading. The key is knowing what the machine can handle before the motor starts humming.
Wet Vacuum Cleaner Basics
A wet vacuum cleaner is built to pick up liquids, damp debris, and heavier messes that a regular household vacuum should never touch. The big difference sits inside the tank design, airflow path, and filter setup, because water and ordinary dry-vac parts do not play nicely together. Many models require removing the paper or dry filter before liquid pickup, while some use a foam sleeve or special wet filter. Skip that step, and the machine may lose suction, spit moisture, or strain the motor.
Start by reading the label on the vacuum itself, not just the box or a vague product name. Some machines are wet-dry vacuums, while others are carpet extractors, hard-floor cleaners, or small spill vacs with narrower limits. That matters because standing water, muddy sludge, and damp carpet each ask for a slightly different approach. A good rule of thumb is simple: if the manual says dry only, keep it far away from puddles.
The tank should be empty before every wet job, even if the mess looks small. Old dust inside the canister turns into paste once liquid hits it, and that paste can clog screens, hoses, or drain ports. Starting with a clean tank gives the vacuum room to collect water without turning the cleanup into a nasty soup. It also helps you notice faster if the float shutoff rises and cuts suction.
Attachments matter more than people think. A wide squeegee nozzle can pull water off tile, concrete, and vinyl in smooth passes, while a crevice tool helps along baseboards, cabinet edges, and tight corners. For pool-related cleanup outside the house, match the mess to the right gear and keep water movement controlled; To handle cloudy pool residue more confidently, compare options like a pool vacuum for flocculant before tackling settled debris. The cleaner the attachment fits the surface, the less backtracking you will do.
Prepare The Area Before Suction
Good cleanup starts before the vacuum touches the puddle. Move cords, rugs, shoes, plant pots, storage bins, and anything that could hide water underneath. That quick scan prevents surprises, especially on slick tile where one hidden splash can send a foot sliding. It also keeps debris from jamming the hose while you are focused on the wet spot.
Unplug nearby appliances if the spill happened around laundry machines, freezers, aquarium pumps, or power strips. Water and electricity deserve a healthy dose of respect, not panic. Keep the vacuum cord behind you, away from the liquid path, and use a grounded outlet if the machine requires one. This is one of those safety habits that feels boring until it saves you from a real problem.
Pick up large solids by hand with gloves or a dustpan before using the vacuum. Leaves, gravel, broken soil clumps, pet food, and bits of mulch can clog a hose faster than expected. Around indoor plants, spilled potting mix often turns muddy and heavy, so scoop the thick stuff first and let the wet vacuum handle the remaining moisture. That small bit of patience protects suction power and makes the finish cleaner.
Check the tank line or maximum liquid mark before you begin. Wet vacuums often include a float that blocks airflow once the tank gets full, and the sound usually changes when that happens. Stop right away if suction drops suddenly or the motor pitch shifts. Forcing the machine past that point can push moisture into places it should not go.
Use Slow Passes For Better Pickup
Speed is the enemy of clean wet vacuuming. Quick swipes leave a thin film behind, especially on textured concrete, grout lines, rubber mats, and slightly uneven floors. Pull the nozzle slowly toward you so the suction channel has time to lift water instead of skating over it. Then overlap each pass by a few inches, just like mowing a small patch of lawn.
On hard floors, begin at the outer edge of the spill and work inward. That keeps liquid from spreading into dry areas and gives you a clear view of what is already finished. A squeegee attachment usually performs better when the rubber edge stays flat against the surface. If it chatters or skips, adjust the angle and slow down.
Carpet needs a different rhythm. Press the nozzle firmly enough to pull moisture from the fibers, but do not grind it into the backing like you are scrubbing a stain. Several slower passes beat one aggressive pass because trapped water often rises gradually. After the first round, wait a moment and run the vacuum again over the same area if the carpet still feels damp.
Garage floors, patios, and utility rooms often bring grit into the mix. That grit can settle at the bottom of the tank or lodge near the hose inlet. Pause occasionally and check whether the hose is still pulling strongly. If suction weakens, clear the blockage instead of pretending the machine will muscle through it.
Match The Method To The Mess
Clean water from a leaky pipe is usually easier to remove than dirty runoff, muddy plant water, or a backed-up appliance spill. The mess decides how careful you need to be with cleanup, disposal, and follow-up drying. For ordinary water, the focus is fast removal and airflow. For dirty liquid, sanitation and tank washing become just as important as suction.
Indoor plant spills can be sneaky because water slips under saucers, shelves, woven baskets, and lightweight stands. Lift those items before vacuuming so moisture does not sit underneath and create musty odors later. Soil mixed with water can stain porous grout or light flooring, so remove solids first and use steady passes after that. A wet vacuum cleaner helps most when the mess is loose enough to flow into the nozzle.
Tile floors are forgiving, but grout lines hold water like tiny trenches. Move the nozzle in more than one direction across grout if the first pass leaves dark damp lines. For homes with a lot of hard flooring, To cut down on everyday grit before wet cleanup is even needed, rely on a vacuum for tile floors that handles dry debris without blowing dust around. Dry debris control makes wet cleanup less messy later.
Some wet messes should not go into a standard wet vacuum at all. Flammable liquids, harsh solvents, hot ashes, and unknown chemical spills can create serious hazards. The same caution applies to fine hazardous dust mixed with water. If the liquid smells chemical or looks suspicious, stop and handle it according to the product label or local disposal guidance.
Clean The Machine After Every Job
The job is not finished when the floor looks dry. Dirty water sitting in the tank can sour quickly, and nobody wants that swampy smell blasting out during the next cleanup. Empty the recovery tank right after use, then rinse it with clean water. This simple habit keeps odor control from becoming a bigger chore.
Rinse the hose, nozzle, and any wet filter or foam sleeve if your model uses one. Mud, hair, grit, and plant debris cling inside corners where airflow later has to pass. Let the parts dry before reassembling, because sealing damp pieces inside the vacuum invites mildew. A dry machine is a happier machine, plain and simple.
Check the float cage or shutoff area for debris. That little part protects the motor from rising liquid, so it needs to move freely. If mud or lint jams it, the vacuum may shut off too early or fail to warn you properly. Treat the float mechanism like a safety valve, not a random plastic piece.
Special cleaning tools have their own maintenance habits, too. Small metal parts, suppressor components, and workshop items may need a different cleaning process than floors or carpets. To clean compact parts without turning the sink into a mess, use a separate approach such as an ultrasonic cleaner for suppressors instead of forcing a wet vacuum into the wrong job. Matching the tool to the task prevents damage and saves time.
How To Use Wet Vacuum Cleaner For Deep Wet Mess Cleanup
Some wet messes look harmless until they creep under shelves, into grout lines, or beneath a plant stand that nobody thinks to move. A wet vacuum cleaner helps most after the first rush is over, when the big puddle is gone but hidden moisture still needs attention. The goal is not just sucking up water, but controlling leftover dampness, preventing odors, and keeping the machine ready for the next ugly spill. That means slower passes, cleaner attachments, and a little patience after the floor starts looking dry.
Dry The Area After Suction
Visible water disappears first, but moisture often hangs around in seams, corners, and textured flooring. Run your hand near the surface, not directly through dirty water, and check for cool damp spots that still need another pass. A wet vacuum can pull up a lot, yet it does not replace airflow. Open a window, turn on a fan, or let the area breathe before moving furniture back.
Carpet and rugs need extra caution because the top fibers may feel almost dry while the backing stays damp. Slow overlapping passes can help, but pressure alone will not fix soaked padding. If water has sat for too long, the smell may stick around even after vacuuming. That is a sign to focus on drying time instead of repeating the same pass over and over.
Hard floors still have their own little headaches. Tile can hide water in grout, vinyl planks may trap moisture along seams, and brick surfaces can hold dampness in tiny pits. For rough indoor or patio surfaces, pair wet pickup with surface-safe cleaning habits, and for baked-in grime on masonry, a steam cleaner brick floors setup can make more sense than forcing the wet vacuum to scrub. The wet vacuum should remove liquid, while the right cleaner handles stuck-on residue.
Plant corners deserve a closer look because saucers, trays, and decorative pots often leak slowly. Lift each pot, wipe the bottom, and vacuum any water trapped beneath it. Damp wood shelves and plant stands can swell or stain if water sits there all afternoon. A quick check protects flooring, furniture, and the little indoor jungle you have been babying for months.
Handle Dirty Water Without Making A Second Mess
The recovery tank can get nasty fast, especially after muddy runoff, pet accidents, garage puddles, or soil-heavy plant spills. Empty it before the liquid reaches the maximum fill line. Pour slowly so sludge does not splash back onto the floor you just cleaned. A steady hand saves you from doing the same job twice.
Use a suitable drain or disposal spot based on what the vacuum collected. Plain water from a clean leak is one thing, while chemical residue, oily garage liquid, or unknown wastewater needs more care. Do not dump questionable liquid into garden beds, plant containers, or storm drains. Safe disposal matters because cleanup should not create a different problem outside.
Rinse the tank right after emptying it. Mud and fine debris cling to corners, and once they dry, they turn into stubborn crust. A quick rinse now beats scrubbing later. Keep the tank lid open while it dries so trapped moisture does not create a sour smell.
Food-related messes need a separate mindset. A wet vacuum may collect spilled water near a kitchen counter, but it should not be treated like a food storage tool. For keeping leftovers tidy after cleanup, especially flat slices and freezer portions, a vacuum sealer pizza option belongs in the kitchen workflow, not in the wet cleanup routine. Keeping those jobs separate is cleaner, safer, and far less gross.
Protect Suction Power Between Jobs
Suction drops usually have a reason. A kinked hose, clogged nozzle, dirty float cage, or damp filter can make a strong machine feel weak. Check those spots before blaming the motor. Most of the time, lost suction comes from a small blockage that takes less than a minute to clear.
Let washable filters dry fully before reinstalling them. A damp filter restricts airflow and can make dust stick like paste during the next dry cleanup. If your model uses a foam sleeve for wet pickup, rinse it gently and squeeze out water without twisting it hard. Rough handling can tear foam and reduce filter performance.
Store attachments where they can dry instead of tossing them into a sealed bin while wet. A nozzle with trapped dirty water can smell awful by the next use. Hoses should drain before storage too, especially long ones that hold water in low spots. Hang them loosely if space allows.
Keep dry and wet tasks mentally separate. After vacuuming liquid, do not immediately switch to sawdust, potting mix, or household dust unless the tank and filter setup are ready. Wet residue turns dry debris into clumps inside the hose. That sticky buildup is exactly what makes people think their wet vacuum cleaner is wearing out too soon.
Avoid Mistakes That Damage Floors Or The Machine
Do not drag a heavy wet vacuum across delicate flooring without checking the wheels. Grit stuck in the casters can scratch vinyl, laminate, or sealed wood. Wipe the wheels if the vacuum just came from the garage or patio. Small grit marks are annoying because they usually show up after the cleanup is finished.
Never vacuum hot liquid, flammable liquid, or unknown chemicals. The risk is not worth the shortcut. Wet vacuums are built for common liquid pickup, not every spill that can happen in a house, shed, or workshop. Safety limits protect both the person cleaning and the machine itself.
Watch the cord placement while you work. Keep it behind the vacuum and away from the wet path, especially near laundry rooms, basements, and plant shelves with grow lights. Water moves faster than expected across smooth floors. A simple cord check can prevent a tense moment.
Do not over-scrub carpet with the nozzle. Pressing too hard can push moisture deeper or rough up fibers instead of improving pickup. Use slow passes, pause, and repeat only where the area still feels damp. A calmer approach usually gets cleaner results than forcing the machine like a floor buffer.
Know What A Wet Vacuum Cleaner Cannot Fix
A wet vacuum handles liquid removal, not hidden damage. If water has soaked into drywall, subflooring, insulation, or carpet padding, the surface may look fine while moisture remains trapped inside. That is where fans, dehumidifiers, and sometimes professional help become part of the plan. The machine is useful, but it is not magic.
Odor can also outlast visible water. Dirty liquid, plant runoff, or pet messes may leave residue that needs a proper cleaner after vacuuming. Use products that match the surface instead of mixing random chemicals. Residue control is what keeps the room from smelling like yesterday’s accident.
Large flooding situations need caution. A household wet vacuum can collect water in batches, but it may fill quickly and require repeated emptying. If water keeps flowing in, stop the source first or the job turns into a loop. Removing water without fixing the leak is just chasing your tail.
Regular maintenance decides how reliable the vacuum feels months later. Clean the tank, dry the parts, check hoses, and store everything with airflow. Those plain habits keep wet pickup strong and reduce the chance of funky smells, weak suction, or surprise clogs during the next cleanup.


How to Refinish a Fiberglass Pool

How Do You Keep Raccoons Out of Your Pool?

How to Fix Cyanuric Acid in Your Pool

How to Shape a Pool Cue Tip to Stop Miscues

Best Far Infrared Sauna Sauna Heats: Top Picks of 2026

11 Best Far Infrared Sauna Carbon Fiber Heaters of 2026 For Balanced Full-Body Heat

11 Best Carbon Far Infrared Sauna of 2026 For Even Heat

10 Best Bluetooth Speaker For Sauna of 2026 For Heat and Steam








