
How to Use the V15 Vacuum on Hard Floors and Carpet

Most people assume the best way to clean with this vacuum is to crank it to maximum suction right out of the box. Doing that drains the battery in ten minutes, when you actually just need to keep it in Auto mode and let the dirt sensor balance the power. Snapping on the soft roller for bare floors and saving the motorized brush for rugs lifts far more grit without scattering crumbs or wasting battery life.
Everyday cleaning depends on your specific floor type, the power setting you select, and the tight corners you need to reach. Hardwood and tile need gentle contact so fine dust does not blow away, while thick carpets require firm bristles to lift pet hair. Lower power settings handle everyday crumbs across open rooms, leaving maximum suction for small, stubborn spots. Here is the simple routine to assemble the parts, read the screen alerts, and finish your whole home on a single charge.
Snap the wand together and charge the battery first
Assembling your vacuum takes only a few seconds once you understand how the latches work. The main body houses the motor, handle, clear dirt bin, and battery pack. To set it up for floor cleaning, slide the long metal extension wand directly into the suction inlet on the front of the main body until it clicks. Next, align your chosen floor nozzle with the bottom of the wand and press it firmly until the red latch locks into place. Every connection uses a spring-loaded red button, so parts should snap together without force. To clean stairs, car seats, or cushions, skip the long wand and click your cleaning tool directly into the main body.
The handle features a red trigger located right under your index finger. This is an instant-action switch rather than an on-off toggle. You hold the trigger while vacuuming, and release it as soon as you turn around furniture or lift the nozzle. There is no trigger lock by design. Running the motor only while the nozzle is actively on the floor preserves battery power throughout your cleaning routine.
Before your first cleaning session, charge the battery fully. You can slide the vacuum into the wall dock bracket or plug the charger cable directly into the port on the base of the handle. Blue lights on both sides of the battery pack pulse while charging and turn off completely once full.
- Plug the charging cable into the battery base until the blue indicator lights turn off.
- Line up the electrical pins on your wand or hand tool and push until the red latch clicks.
- Grip the handle and squeeze the red trigger to start the motor.
- Release the trigger whenever you pause moving across the floor to extend your run time.
Match your floor head to bare floors or carpet
Using the wrong cleaner head can scatter debris or cause unnecessary motor drag. The vacuum typically includes two motorized floor nozzles, each engineered for specific floor surfaces.
The soft roller head for hard floors features a plush roller wrapped in soft woven nylon and anti-static carbon fiber bands. This head is designed strictly for bare floors like sealed hardwood, laminate, tile, and vinyl. The soft fabric acts like a cloth, picking up fine dust while rolling over larger crumbs and pet kibble without tossing them across the room. An integrated light shines across the floor at a low angle to reveal hidden dust. Never use this soft roller on carpets or rugs, as dense fibers will cause the roller to drag and stall the motor.
The motorized carpet brush features stiff nylon bristles arranged in a spiral pattern alongside anti-tangle comb teeth. This head is built for low-pile carpets, plush rugs, and runners. The spinning brush roller agitates carpet fibers to pull up trapped dirt and pet hair, while the internal comb teeth clear hair so it does not wrap around the axle.
A red slider switch on the front edge of the motorized carpet brush adjusts suction relief vents:
- Plus sign (+): Closes the vents for maximum suction on flat carpets with light surface debris.
- Middle gate (=): Standard suction for everyday carpets, balancing strong pickup with easy pushing.
- Minus sign (-): Opens the vents to release suction if the head seals down too tightly against thick pile.
Run in auto mode to protect your battery life
If your battery drains in under ten minutes, the vacuum is likely set to Boost mode. The machine features three power settings, controlled by the silver button below the LCD screen on the back of the handle.
Press the silver button to switch between modes:
- Eco mode: Provides low, steady suction and quiet operation. It works well for light surface dust, delicate drapes, and hard floors, offering the longest run time.
- Auto mode: The best choice for daily cleaning. When using a motorized cleaner head, Auto mode activates an internal dirt sensor that monitors debris strikes. The vacuum automatically speeds up on dirty spots or thick carpet, then slows down on clean, bare floors to save power.
- Boost mode: Delivers max suction power for stubborn ground-in sand in entryways or car carpets. Because Boost mode drains the battery pack in roughly eight to twelve minutes, save it for tough spots and clean in Auto mode.
The LCD screen also displays a live countdown timer showing remaining minutes and seconds. Below that timer, a colored bar graph shows particle counts detected by the dirt sensor. You do not need to memorize particle sizes; simply watch the bars. When the bars stop climbing as you pass over an area, that spot is clean.
If your battery eventually loses holding capacity over several years of use, you can check how much is a new battery for a cordless vacuum to see replacement costs.
Slide the red bin lever down over your trash
Emptying the dust container properly prevents dust clouds from floating back into your room. The vacuum uses a sliding runner system that scrapes the internal metal shroud clean while opening the bottom hatch.
To empty the canister without making a mess, follow these steps:
- Press the red wand release button to disconnect the long tube, leaving just the handheld body.
- Lower the clear bin several inches inside your trash can to contain loose dust.
- Locate the red runner lever on the underside of the cylinder, keeping your hand off the power trigger.
- Push the red lever firmly downward. The clear cylinder slides along its track, while an internal rubber collar wipes pet hair and lint off the metal mesh shroud.
- At the end of the stroke, the bottom lid pops open, releasing the dirt directly into your can. Tap the rim gently to dislodge fine dust.
- Pull the clear bin back up along the track until the red lever clicks into place.
- Push the bottom door shut with your hand until it snaps securely.
Wipe any fine powder off the rubber rim with a dry cloth. Never submerge the clear bin or motor housing in water, as liquid will damage internal electrical components.
Rinse the filter monthly and keep roller bars clear
Washing the filter and checking the brush rollers keeps airflow strong and protects the motor. When fine dust clogs the filter, the LCD screen shows a wash alert, or the motor pulses in quick bursts to prevent overheating.
Clean the filter once a month using this checklist:
- Twist the purple filter cone counterclockwise and pull it off the back of the motor housing.
- Tap the filter over a trash can to remove loose, dry debris.
- Rinse the filter under cold tap water, running water through both the paper pleats and the inner foam. Never use soap, detergent, or a dishwasher.
- Gently squeeze the foam and shake out murky water until it runs completely clear.
- Shake off excess water and place the filter upright in a well-ventilated room.
- Allow it to dry completely for at least 24 hours. Never insert a damp filter, because moisture pulled into the motor can cause permanent electrical damage.
Inspect the brush bars every few weeks to keep them spinning freely:
- For the soft roller head for hard floors, lift the end cap lever to slide the roller out. Clear hair wrapped around the drive spindle, slide the roller back in, and secure the latch.
- For the motorized carpet brush, use a coin to turn the end cap slot a quarter turn counterclockwise. Slide the spinning brush roller out, snip away wrapped hair with scissors, and lock the roller back into place.
Choose vacuum heads that match your home flooring needs
Using the right attachments makes maintaining different floor types much easier. When your home has a mix of hardwood, low-pile rugs, and tight car interiors, extra cleaner heads and organizer brackets help you adapt the vacuum to every chore.
When selecting an extra floor nozzle, check the neck connector mechanism first. Cordless stick models use quick-release clips with internal electrical pins to drive the spinning brush roller. Make sure any attachment you consider matches that exact pin layout. Non-motorized universal heads will not spin their brush bars, which reduces cleaning performance on carpet.
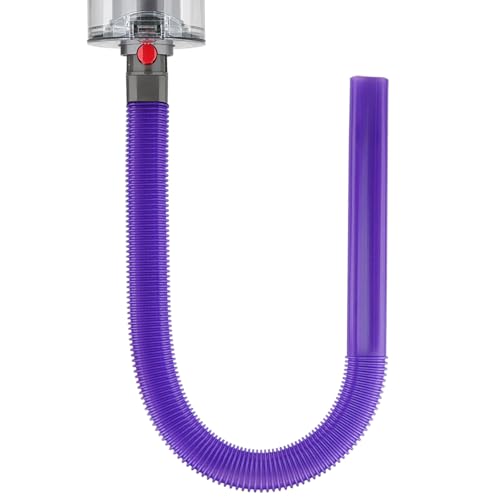
Next, consider the roller design. Glossy hardwood and vinyl plank floors need dedicated soft roller heads with plush microfiber surfaces that trap fine grit without scratching. Deep carpets and pet-heavy rooms require motorized heads with stiff bristles and integrated hair combs to prevent tangling. Adding flexible hoses, dedicated dusting brushes, or wall brackets keeps tools organized and ready for use. Selecting the right setup lets you switch tools quickly, whether you are deep-cleaning rugs or seeing what is the lightest cordless vacuum cleaner configuration for clearing cobwebs along high ceiling corners.

- VC Score10.0
BCP Score is a ranking system developed by bestcleanerproducts.com. BCP Score has no relationship or impact from any manufacturers or sales agent websites. Learn more
- BrandDyson

- VC Score9.2
BCP Score is a ranking system developed by bestcleanerproducts.com. BCP Score has no relationship or impact from any manufacturers or sales agent websites. Learn more
- BrandHaturi

- VC Score9.2
BCP Score is a ranking system developed by bestcleanerproducts.com. BCP Score has no relationship or impact from any manufacturers or sales agent websites. Learn more
- BrandLANMU

- VC Score9.2
BCP Score is a ranking system developed by bestcleanerproducts.com. BCP Score has no relationship or impact from any manufacturers or sales agent websites. Learn more
- BrandFullclean
- VC Score9.0
BCP Score is a ranking system developed by bestcleanerproducts.com. BCP Score has no relationship or impact from any manufacturers or sales agent websites. Learn more
- BrandFullclean

- VC Score8.8
BCP Score is a ranking system developed by bestcleanerproducts.com. BCP Score has no relationship or impact from any manufacturers or sales agent websites. Learn more
- BrandDyson

- VC Score8.8
BCP Score is a ranking system developed by bestcleanerproducts.com. BCP Score has no relationship or impact from any manufacturers or sales agent websites. Learn more
- BrandShieal

- VC Score8.4
BCP Score is a ranking system developed by bestcleanerproducts.com. BCP Score has no relationship or impact from any manufacturers or sales agent websites. Learn more
- BrandDyson

- VC Score8.4
BCP Score is a ranking system developed by bestcleanerproducts.com. BCP Score has no relationship or impact from any manufacturers or sales agent websites. Learn more
- BrandDyson

- VC Score7.8
BCP Score is a ranking system developed by bestcleanerproducts.com. BCP Score has no relationship or impact from any manufacturers or sales agent websites. Learn more
- BrandCOGLARING

- VC Score7.6
BCP Score is a ranking system developed by bestcleanerproducts.com. BCP Score has no relationship or impact from any manufacturers or sales agent websites. Learn more
- BrandAEROVAC
Last update on 2026-10-31 / Affiliate links / Images, Product Titles, and Product Highlights from Amazon Product Advertising API


How to Refinish a Fiberglass Pool

How Do You Keep Raccoons Out of Your Pool?

How to Fix Cyanuric Acid in Your Pool

How to Shape a Pool Cue Tip to Stop Miscues

Best Far Infrared Sauna Sauna Heats: Top Picks of 2026

11 Best Far Infrared Sauna Carbon Fiber Heaters of 2026 For Balanced Full-Body Heat

11 Best Carbon Far Infrared Sauna of 2026 For Even Heat

10 Best Bluetooth Speaker For Sauna of 2026 For Heat and Steam


