
How to Use Vacuum Cleaner Step by Step Made Simple

How to Use Vacuum Cleaner Step by Step sounds straightforward until dust keeps showing up in corners, pet hair clings to rugs, and freshly cleaned floors somehow still look messy. Plenty of people rush through vacuuming, only to realize later that dirt remains trapped in places they barely noticed. A few simple adjustments can make cleaning feel less like a chore and more like a process that actually delivers visible results. Small habits often create the biggest difference.
Starting with a quick room inspection helps prevent common frustrations. Loose cords, toys, lightweight rugs, and scattered items can interrupt cleaning and waste time. Clearing the floor first allows the vacuum to move freely while reducing the chance of clogs. Better flow means fewer stops and a more consistent clean from start to finish.
Vacuum settings matter more than many expect. Carpet fibers, hardwood floors, tile surfaces, and area rugs all respond differently to suction and brush roll settings. Using the correct configuration helps protect surfaces while improving dirt removal. A properly adjusted vacuum often collects debris that weaker settings leave behind.
Movement patterns also play a surprisingly large role. Slow, overlapping passes give the vacuum enough time to pull dust, crumbs, and embedded debris from the surface. Quick back-and-forth motions may feel productive, yet they frequently leave particles behind. Patience pays off, especially in high-traffic areas where dirt settles deeper than it appears.
Attention to edges and hidden spaces turns an average cleaning session into a thorough one. Baseboards, furniture legs, under couches, and room corners tend to collect dust long before the center of the floor looks dirty. Using attachments strategically helps reach those neglected spots. Suddenly, the entire room feels fresher instead of partially cleaned.
Maintenance deserves just as much attention as the cleaning process itself. Emptying the dust container, checking filters, and removing tangled hair from brush rolls helps maintain steady suction. Ignoring these tasks often leads to weaker performance and longer cleaning sessions. A well-maintained machine simply works better.
Consistency creates lasting results. Rather than waiting until dirt becomes obvious, regular vacuuming helps control dust buildup and reduces the effort required later. Floors stay cleaner, indoor spaces feel more comfortable, and cleaning becomes far less overwhelming. That's the practical value behind learning How to Use Vacuum Cleaner Step by Step correctly from the beginning.

- VC Score9.2
BCP Score is a ranking system developed by bestcleanerproducts.com. BCP Score has no relationship or impact from any manufacturers or sales agent websites. Learn more
- BrandEDLOENS

- VC Score8.8
BCP Score is a ranking system developed by bestcleanerproducts.com. BCP Score has no relationship or impact from any manufacturers or sales agent websites. Learn more
- BrandBissell
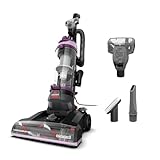
- VC Score8.8
BCP Score is a ranking system developed by bestcleanerproducts.com. BCP Score has no relationship or impact from any manufacturers or sales agent websites. Learn more
- BrandBissell

- VC Score8.8
BCP Score is a ranking system developed by bestcleanerproducts.com. BCP Score has no relationship or impact from any manufacturers or sales agent websites. Learn more
- BrandMiele

- VC Score8.8
BCP Score is a ranking system developed by bestcleanerproducts.com. BCP Score has no relationship or impact from any manufacturers or sales agent websites. Learn more
- Branddreame

- VC Score8.8
BCP Score is a ranking system developed by bestcleanerproducts.com. BCP Score has no relationship or impact from any manufacturers or sales agent websites. Learn more
- BrandEureka
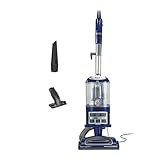
- VC Score8.8
BCP Score is a ranking system developed by bestcleanerproducts.com. BCP Score has no relationship or impact from any manufacturers or sales agent websites. Learn more
- BrandShark

- VC Score8.8
BCP Score is a ranking system developed by bestcleanerproducts.com. BCP Score has no relationship or impact from any manufacturers or sales agent websites. Learn more
- BrandShark

- VC Score8.6
BCP Score is a ranking system developed by bestcleanerproducts.com. BCP Score has no relationship or impact from any manufacturers or sales agent websites. Learn more
- BrandBissell

- VC Score8.4
BCP Score is a ranking system developed by bestcleanerproducts.com. BCP Score has no relationship or impact from any manufacturers or sales agent websites. Learn more
- BrandEureka
Last update on 2026-06-03 / Affiliate links / Images, Product Titles, and Product Highlights from Amazon Product Advertising API
How To Use Vacuum Cleaner Step By Step
Dirty floors rarely announce themselves all at once. Dust hides along baseboards, crumbs settle under chair legs, and pet hair somehow finds the one rug everyone walks across. A smart routine for how to use vacuum cleaner step by step helps you clean with fewer wasted passes, less frustration, and a lot more control. The trick isn’t rushing harder, it’s using the machine in a way that matches the room, the floor, and the mess in front of you.
How To Use A Vacuum Cleaner
A good cleaning session starts before the vacuum ever turns on. Pick up socks, toys, plant leaves, paper scraps, hair ties, and anything else that can jam the brush roll or block airflow. This small habit protects the machine and keeps suction power from dropping halfway through the room. Nobody wants to stop every few steps because a loose cord or stray wrapper got swallowed.
Check the dust cup or bag next, because a packed container makes even a strong vacuum feel weak. A vacuum needs open airflow to pull dirt through the hose, filter, and bin. Emptying it before cleaning gives you better pickup, especially on rugs, carpet edges, and dusty corners. It’s a boring step, sure, but it saves time once the cleaning starts.
Filters deserve a quick look too. A clogged filter can push dust back into the room, reduce suction, and make the motor work harder than it should. Washable filters should be fully dry before going back into the vacuum, because damp filters can create odor and airflow problems. Clean filters help maintain steady performance without turning the job into a tug-of-war.
Then choose the right attachment for the surface. A floor head handles broad areas, a crevice tool reaches tight gaps, and a brush attachment lifts dust from shelves, vents, and fabric surfaces. Using the wrong tool often means more effort with worse results. The right attachment makes cleaning accuracy feel almost effortless.
Prepare The Room Before Vacuuming
Room prep sounds fussy, but it makes vacuuming smoother from the first pass. Move lightweight chairs, small bins, plant stands, and floor baskets out of the way if they block normal traffic paths. This gives you open lanes and helps prevent random missed patches. A clear path turns vacuuming speed into something useful instead of sloppy.
Area rugs need a little attention before the vacuum reaches them. Shake small rugs outside if they hold loose grit, then place them flat so the vacuum doesn’t chew the corners. Thin rugs may need lower suction or a no-brush setting to avoid bunching. That one adjustment can protect rug fibers while still pulling up dust.
Cords are sneaky troublemakers. Lift phone chargers, lamp cords, and extension cables away from the vacuum path before starting. A cord caught in the brush roll can damage both the cord and the machine. Keeping the floor clear protects household safety and prevents those annoying mid-clean interruptions.
Plants, especially indoor pots near windows, can leave dry soil crumbs around the base. Vacuuming loose soil with a normal floor head can scatter it if the suction setting is too aggressive or the brush spins too fast. Use a slow pass and, for tight spots near pots, switch to a crevice tool. Small, controlled movements handle plant debris better than fast sweeping motions.
Choose The Right Vacuum Setting
Vacuum settings aren’t there for decoration. Carpet, hardwood, tile, terrazzo, laminate, and rugs all need slightly different handling. A brush roll that digs nicely into carpet may scatter debris across hard floors. Matching the setting to the surface improves dirt pickup and reduces unnecessary wear.
Carpet usually needs the brush roll engaged so the bristles can lift dust from deeper fibers. Low-pile carpet often works better with a lower height setting, while thicker carpet may need extra clearance so the vacuum glides instead of dragging. If the vacuum feels stuck, the height may be too low. A smoother glide helps maintain consistent suction without straining your arms.
Hard floors need a gentler touch. Turn off the brush roll if the vacuum allows it, or use a hard-floor setting designed to prevent debris scatter. Fine dust, crumbs, and dry plant soil can shoot backward if the spinning brush is too aggressive. For delicate stone or smooth surfaces, compare cleaning needs with a dedicated stick vacuum for terrazzo floors to keep daily maintenance easier.
Suction control matters around curtains, small rugs, and upholstery. Too much suction can pull fabric into the nozzle, while too little leaves lint and hair behind. Start with moderate suction, then increase only where debris stays put. This gives you better control instead of turning cleaning into a wrestling match.
Vacuum In Slow Overlapping Passes
Speed is the biggest reason floors still look dusty after vacuuming. A fast pass may collect surface crumbs, but it often misses grit lodged deeper in carpet fibers or along textured floors. Slow movement gives the vacuum enough time to pull debris into the airflow path. That steady pace creates deeper cleaning without needing fancy tricks.
Overlap each pass by a few inches instead of treating vacuuming like mowing a lawn in a hurry. The edges of the vacuum head don’t always pick up as strongly as the center. Overlapping reduces those faint dirty lines that show up once sunlight hits the floor. It’s a simple way to get more even results across the whole room.
Change direction on carpeted areas that see heavy foot traffic. Vacuum forward and back, then shift slightly and go across the same zone from another angle. Dirt gets trapped differently depending on how the fibers bend. This cross-pass method helps lift embedded debris that one direction may leave behind.
High-traffic paths need extra patience. Entryways, hallway strips, kitchen transitions, and the space near sofas collect more grit than quiet corners. Give those areas one or two slower passes before moving on. A little extra attention keeps wear patterns from building up too quickly.
Use Attachments For Edges And Tight Spaces
The main vacuum head handles open floor space, but edges need a different approach. Dust likes to settle where walls meet floors, especially behind doors and beside furniture legs. A crevice tool reaches into those narrow gaps without scraping the baseboards. That detail work creates a cleaner finish you can actually see.
Furniture changes the way dust moves around a room. Airflow pushes lint and hair under couches, beds, cabinets, and low shelves. Use a wand extension or slim attachment to reach those hidden lanes instead of pretending they don’t exist. Hidden dust piles can make a room feel stale even after the visible floor looks clean.
Upholstery tools help with sofas, dining chairs, cushions, and fabric benches. Pet hair and crumbs cling to fabric differently than they sit on hard floors. Short, firm strokes usually work better than long, lazy passes. This gives you stronger fabric cleanup without grinding debris deeper into the material.
Separate cleaning tasks should stay separate if the surfaces are unrelated. Pool cleaning, for example, needs its own equipment and setup rather than a household vacuum routine. To manage pool debris on a tighter budget, compare pool vacuum under 200 options instead of improvising with indoor tools. That separation protects equipment lifespan and avoids messy mistakes.
Step By Step Guide To Using A Vacuum Cleaner Effectively
Floors that stay fresh longer aren’t just about running the vacuum faster. Hidden dust under couches, stubborn carpet crumbs, and pet hair on rugs all demand a smarter approach. Knowing step by step how to use vacuum cleaner can transform a frustrating chore into a smooth, predictable routine. Each method tweaks suction, attachments, and patterns to get better results with less effort.
Adjust Suction For Each Surface
Different flooring responds differently. Hardwood and area rugs need moderate suction, while deep carpet fibers require higher power. Overpowering delicate floors can scratch or scatter debris, and too little suction leaves visible dirt. The right setting helps maintain surface integrity and ensures thorough cleaning.
For hardwood floors, consider a specialized vacuum or low-brush mode. It preserves shine while removing dust effectively. Some vacuums even have separate modes for tile or laminate, making surface adaptation a key factor in efficient cleaning.
Area rugs often catch pet hair and sand. Slower, overlapping passes allow the vacuum to lift debris without causing fibers to bunch. Using an attachment designed for edges ensures no corner is neglected. This controlled approach maximizes dust extraction and preserves rug quality.
Consider consulting a trusted guide for optimized performance. To reduce guesswork, compare dyson vacuum for hardwood and area rugs for a balance of power and gentleness. The right model can handle multiple surfaces with minimal adjustment.
Clean Hidden Spots And Corners
Corners, under furniture, and behind appliances often harbor accumulated dust. Standard vacuum paths rarely touch these areas, leaving residual grime. Using crevice tools, wands, and small brush heads ensures every inch receives attention.
Sliding attachments along baseboards and under low furniture minimizes trapped dirt. It also reduces allergens and prevents dust from resettling. Paying attention to these hidden spaces increases overall cleanliness noticeably.
Even ceiling fans and vents benefit from light vacuuming with appropriate attachments. Dirt and debris there can fall and affect floor cleanliness if ignored. Using the vacuum strategically protects both air quality and surface hygiene.
Routine inspection of neglected zones, combined with proper attachments, allows a more comprehensive clean without extra machines. The methodical approach prevents repeat trips over the same area and ensures consistent results across rooms.
Maintain The Vacuum For Optimal Performance
Empty the dust cup or bag after each use to prevent suction loss. Clogged filters and overfilled bins reduce effectiveness and strain the motor. Clean, dry filters maintain steady suction and extend appliance life.
Brush rolls frequently collect hair and threads. Removing them prevents tangles and protects moving parts. Simple maintenance contributes to long-term reliability and reduces cleaning interruptions.
Check hoses and attachments for blockages before each session. Even minor clogs can compromise airflow and reduce debris pickup. Regular inspection guarantees maximum efficiency every time you clean.
Consider preventive upgrades, such as replacement filters or genuine batteries. A well-maintained vacuum performs better and minimizes frustration. The combination of care and technique ensures consistent cleaning results.
Follow An Effective Vacuum Pattern
Overlapping strokes prevent missed spots and ensure thorough debris removal. Start from the farthest corner and move backward toward the exit to avoid stepping on cleaned areas. Controlled movement enhances coverage efficiency and visual satisfaction.
Alternate directions on carpets to lift dust trapped in fibers. Quick, straight passes may feel productive but leave hidden dirt behind. Multi-angle passes guarantee deeper cleaning without extra effort.
Edges and tight spaces deserve slow, deliberate movement. Rushing over these zones can push dirt back, requiring repeat vacuuming. Precise handling preserves surface integrity and increases the time between cleans.
For rooms with varied flooring, segment areas and adjust suction accordingly. Transitioning carefully from hardwood to carpet prevents scratches and maintains surface safety.
Use Attachments For Special Tasks
Stairs, upholstery, curtains, and car interiors benefit from specialized attachments. Crevice tools, dusting brushes, and mini turbo heads reach areas standard floor heads cannot. This prevents accumulation of hard-to-reach dirt and pet hair.
Vacuum attachments also reduce strain. Long wands extend reach, while angled tools provide comfort when cleaning below furniture or inside vents. Proper use enhances ergonomics and reduces fatigue.
Remember that some surfaces require gentle treatment. Delicate fabrics, lampshades, and decorative rugs may snag or tear if brushed aggressively. Selecting the right attachment prevents accidental damage and preserves household items.
Keeping a rotation of attachments organized ensures quick access. You spend less time searching and more time cleaning, creating an overall streamlined routine that works.
Incorporate Safety And Efficiency Measures
Unplugging appliances before moving them reduces electrical hazards. Avoid vacuuming liquids unless the unit is designed for wet cleaning. These precautions protect both the user and the machine while maintaining effective cleaning.
Keep cords managed and out of high-traffic paths. Tangled or stretched cords can trip users and cause wear on the vacuum. Controlled cord handling improves safety and saves time.
Vacuuming at off-peak hours reduces disturbances and allows focused cleaning. Less foot traffic means fewer interruptions and better dust capture. A scheduled routine often produces more consistent results.
For those with specific needs, consider specialized tools for pools or terrazzo floors. Check the guide on salt water hot tub conversion kit for related maintenance solutions to minimize debris in shared living spaces.
Final Steps And Routine Optimization
After vacuuming, inspect all surfaces for missed spots and light dust layers. Spot-clean as needed to maintain visual consistency. Tiny adjustments post-cleaning preserve the quality of the entire room.
Clean attachments, wipe down the body, and store the vacuum properly. Prevents dust accumulation inside the machine and keeps performance steady for the next use.
Regularly evaluate patterns and methods. Minor tweaks to sequence, attachment use, or suction settings can yield significant improvements in cleaning efficiency. Consistent optimization ensures high-quality results without extra effort.
Integrating these strategies creates a holistic vacuum routine. Each component from preparation to pattern to maintenance works together to provide a cleaner, healthier environment for longer.


How to Refinish a Fiberglass Pool

How Do You Keep Raccoons Out of Your Pool?

How to Fix Cyanuric Acid in Your Pool

How to Shape a Pool Cue Tip to Stop Miscues

Best Far Infrared Sauna Sauna Heats: Top Picks of 2026

11 Best Far Infrared Sauna Carbon Fiber Heaters of 2026 For Balanced Full-Body Heat

11 Best Carbon Far Infrared Sauna of 2026 For Even Heat

10 Best Bluetooth Speaker For Sauna of 2026 For Heat and Steam


