
How To Use Vacuum Brake Bleeder Kit Easily

Using a vacuum brake bleeder kit can feel daunting at first, but understanding the basics transforms the process into a straightforward task. This tool allows precise control over brake fluid flow, reducing air bubbles and improving system responsiveness. Instead of struggling with traditional manual pumping methods, the vacuum approach offers a cleaner, more controlled alternative that saves time and frustration. Consistent brake performance starts with proper bleeding, and a well-used kit ensures every piston and caliper is optimally purged. The kit's versatility adapts to various vehicle types, making it suitable for multiple maintenance scenarios. With clear tubing, fluid reservoirs, and a reliable vacuum pump, the process is observable and manageable, letting you monitor fluid color and consistency. Safety is paramount; the kit minimizes spills and prevents brake fluid contamination. Its ergonomic design allows a comfortable grip and simple attachment to bleeder valves, making repetitive tasks less tiring. Over time, regular use maintains brake efficiency and extends component lifespan, preventing premature wear. Whether handling stubborn air pockets or routine maintenance, the vacuum brake bleeder kit streamlines the operation, letting even less-experienced hands achieve professional-like results. Understanding how to set up the kit, secure connections, and operate the vacuum pump efficiently is key to avoiding common mistakes. Attention to detail ensures all calipers receive equal attention, keeping the braking system balanced and responsive.
The learning curve is gentle when following systematic steps. Start by connecting the hose to the bleeder valve and ensuring the vacuum reservoir is properly positioned. Gradually opening the valve while activating the pump controls the fluid flow, letting trapped air escape without splashing or backflow. Observing the fluid in the transparent tubing provides immediate feedback, signaling when the system is fully bled. Cleanup is simpler too; the kit's containers capture excess fluid and prevent spills on delicate surfaces. Over time, confidence grows with each brake system serviced, making future maintenance faster and more predictable. The kit promotes precision, minimizes mess, and enhances safety, transforming a traditionally cumbersome chore into an organized, efficient procedure. With consistent use, brake feel improves noticeably, and the risk of air-induced pedal sponginess diminishes. Mastering the vacuum brake bleeder kit empowers you to maintain your vehicle with professionalism and peace of mind.
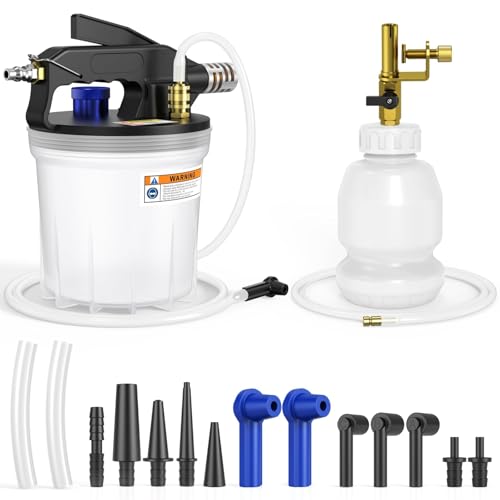
- VC Score9.0
BCP Score is a ranking system developed by bestcleanerproducts.com. BCP Score has no relationship or impact from any manufacturers or sales agent websites. Learn more
- BrandLuney

- VC Score9.0
BCP Score is a ranking system developed by bestcleanerproducts.com. BCP Score has no relationship or impact from any manufacturers or sales agent websites. Learn more
- BrandIMSTMTER
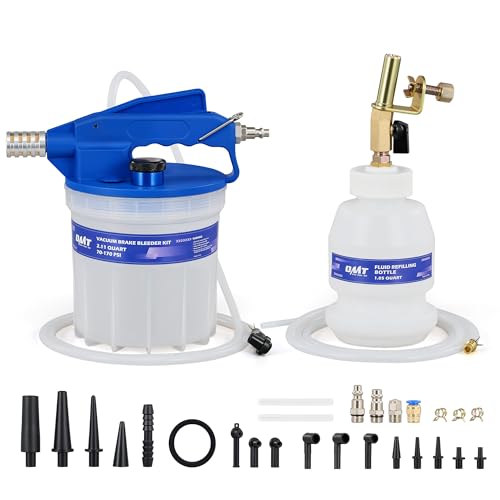
- VC Score8.8
BCP Score is a ranking system developed by bestcleanerproducts.com. BCP Score has no relationship or impact from any manufacturers or sales agent websites. Learn more
- BrandOrion Motor Tech
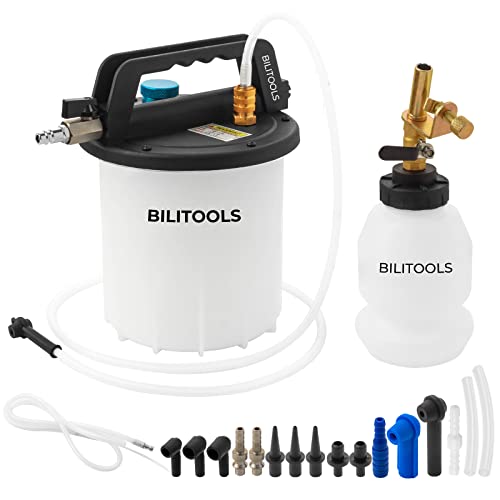
- VC Score8.6
BCP Score is a ranking system developed by bestcleanerproducts.com. BCP Score has no relationship or impact from any manufacturers or sales agent websites. Learn more
- BrandBILITOOLS
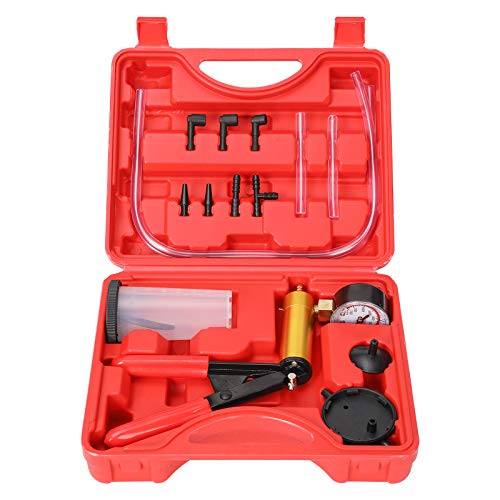
- VC Score8.4
BCP Score is a ranking system developed by bestcleanerproducts.com. BCP Score has no relationship or impact from any manufacturers or sales agent websites. Learn more
- BrandYonligonju
- VC Score8.2
BCP Score is a ranking system developed by bestcleanerproducts.com. BCP Score has no relationship or impact from any manufacturers or sales agent websites. Learn more
- BrandZJERYL GULL

- VC Score8.0
BCP Score is a ranking system developed by bestcleanerproducts.com. BCP Score has no relationship or impact from any manufacturers or sales agent websites. Learn more
- BrandOrion Motor Tech

- VC Score8.0
BCP Score is a ranking system developed by bestcleanerproducts.com. BCP Score has no relationship or impact from any manufacturers or sales agent websites. Learn more
- BrandZEAJSRU

- VC Score7.6
BCP Score is a ranking system developed by bestcleanerproducts.com. BCP Score has no relationship or impact from any manufacturers or sales agent websites. Learn more
- BrandDURATECH

- VC Score7.6
BCP Score is a ranking system developed by bestcleanerproducts.com. BCP Score has no relationship or impact from any manufacturers or sales agent websites. Learn more
- BrandOrion Motor Tech

- VC Score7.4
BCP Score is a ranking system developed by bestcleanerproducts.com. BCP Score has no relationship or impact from any manufacturers or sales agent websites. Learn more
- BrandSMART JERRY
Last update on 2026-06-05 / Affiliate links / Images, Product Titles, and Product Highlights from Amazon Product Advertising API
How To Use Vacuum Brake Bleeder Kit
A soft brake pedal can turn a routine drive into an uncomfortable guessing game. Every extra inch of pedal travel raises questions about trapped air, aging fluid, or a maintenance job that wasn't completed properly. That's exactly why the how to use vacuum brake bleeder kit process matters so much. A vacuum bleeder helps remove air from the brake system with better control, less mess, and more consistent results than many traditional methods.
Getting Familiar With The Vacuum Bleeder
A vacuum brake bleeder kit uses suction to pull old brake fluid and trapped air through the brake system. Instead of relying on another person to pump the brake pedal repeatedly, the vacuum pump creates negative pressure at the bleeder valve. That approach helps produce a steady fluid flow while reducing interruptions. Many vehicle owners appreciate the time savings and simplified process.
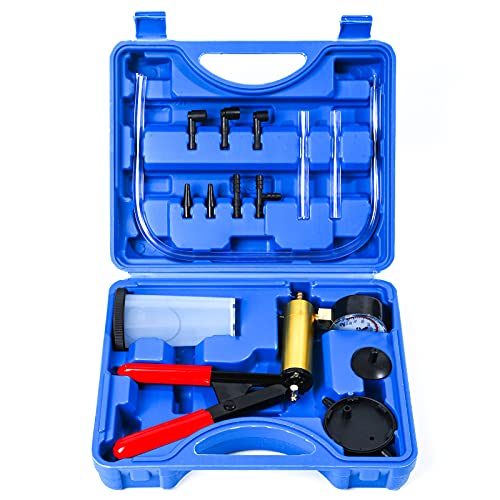
Most kits include a hand-operated vacuum pump, collection reservoir, hoses, and fittings. Some versions also include pressure gauges that show vacuum levels during operation. These components work together to remove air pockets that can cause a spongy brake pedal. A complete kit makes the task more organized and easier to monitor.
Brake fluid absorbs moisture over time. Excess moisture can reduce braking performance and contribute to corrosion inside the hydraulic system. Regular bleeding helps maintain brake responsiveness, fluid cleanliness, and long-term component protection. A vacuum bleeder simply makes that maintenance task more manageable.
The process isn't complicated, but attention to detail matters. Loose hose connections, a nearly empty master cylinder, or contaminated fluid can create unnecessary problems. Spending a few extra minutes on preparation often leads to much smoother results.
Preparing The Vehicle Before Bleeding
Successful brake bleeding starts before the first hose is connected. Park the vehicle on a flat surface and secure it with wheel chocks. Stability reduces risks and allows you to focus entirely on the procedure. A safe work area is always a critical first step.
Locate the brake fluid reservoir and verify the correct fluid specification listed in the owner's manual. DOT 3, DOT 4, and DOT 5.1 fluids may look similar, but they are not always interchangeable. Using the proper fluid protects seal integrity and maintains manufacturer-recommended performance.
Clean the reservoir cap and surrounding area before opening it. Dirt that enters the brake system can create problems later. Brake hydraulic components operate with tight tolerances, so even small contaminants can affect system reliability. A clean workspace helps prevent avoidable issues.
Inspect bleeder screws before starting. Rusted or damaged bleeder valves may require penetrating oil or replacement. Discovering those issues beforehand prevents delays and reduces the chance of damaging components during the bleeding process.
Connecting The Vacuum Brake Bleeder Kit Correctly
Proper connections determine how efficiently the vacuum bleeder works. Attach the hose firmly to the collection reservoir and vacuum pump according to the kit instructions. Tight seals help maintain consistent suction and prevent inaccurate readings. Small leaks can make the process frustrating.
Place the collection container in a stable position. A tipped reservoir creates unnecessary cleanup and may interrupt suction. Keeping the setup organized helps maintain fluid control throughout the job. Little details often have the biggest impact.
Connect the clear hose securely to the bleeder valve. Transparent tubing offers a major advantage because you can see air bubbles moving through the system. Monitoring fluid movement provides immediate feedback and allows you to confirm progress without guesswork.
Before opening the bleeder valve, apply vacuum pressure according to the manufacturer's recommendations. Creating suction first helps establish a controlled flow path. That sequence generally produces cleaner results and minimizes fluid spills.
Following The Correct Bleeding Order
Vehicle manufacturers usually recommend a specific wheel sequence. Many vehicles begin with the wheel farthest from the master cylinder and finish with the closest. Following the proper order helps ensure complete air removal throughout the hydraulic system. Skipping around can leave trapped air behind.
Consult the service manual whenever possible. Some modern braking systems use unique hydraulic layouts that differ from traditional configurations. A few minutes of verification can prevent repeating the entire procedure later.
Open the bleeder valve slowly once vacuum pressure is established. Brake fluid should begin moving through the hose into the collection reservoir. Watch for air bubbles and changes in fluid color. Those visual cues reveal the condition of the system.
Continue until fluid appears clean and bubble-free. Then close the bleeder valve before removing vacuum pressure. This sequence helps prevent air from being drawn back into the system through the bleeder threads.
Managing Brake Fluid During The Process
The master cylinder reservoir requires constant attention during bleeding. Fluid levels drop as old fluid exits through the bleeder valve. Allowing the reservoir to run dry introduces new air into the system, creating more work and reducing bleeding efficiency. Frequent checks are essential.
Many experienced mechanics keep fresh fluid within arm's reach throughout the procedure. Refilling regularly maintains a stable hydraulic supply and protects the braking system from accidental air ingestion. Consistency pays off here.
Brake fluid can damage painted surfaces. Keep clean shop towels nearby and wipe spills immediately. Quick cleanup protects the vehicle's finish and prevents unnecessary cosmetic repairs. Small spills are common, but they shouldn't be ignored.
Fluid color often tells a story. Fresh brake fluid typically appears clear or lightly tinted, while older fluid can become darker from heat exposure and contamination. Observing these changes helps gauge the overall condition of the system.
Identifying Common Bleeding Problems
Air bubbles that never seem to disappear often indicate a leak somewhere in the setup. Hose connections, reservoir fittings, and bleeder screw threads are common culprits. Tracking down these leaks improves vacuum stability and produces more reliable results.
Some users mistake tiny bubbles caused by bleeder screw threads for air trapped inside the brake system. Applying thread sealant around the outer threads, while avoiding the fluid passage itself, can sometimes reduce false bubble indications. This technique helps create a clearer picture of actual system conditions.
A bleeder valve that won't flow fluid may be clogged with debris. Gentle cleaning or replacement may be necessary. Forcing components can create additional problems, so patience is usually the better approach.
Pedal feel remains the ultimate indicator after bleeding. If the pedal still feels soft despite clean fluid and no visible air bubbles, additional troubleshooting may be required. Hidden leaks or component wear can sometimes mimic air-related symptoms.
Benefits Of Using A Vacuum Bleeder Instead Of Traditional Methods
Traditional two-person bleeding methods have worked for decades, but they aren't always convenient. Coordinating pedal pumping and valve operation requires communication and timing. A vacuum bleeder removes much of that complexity and provides greater independence.
The vacuum method also reduces repeated pedal travel. Older master cylinders occasionally experience seal damage when the brake pedal is pushed farther than normal during manual bleeding. Vacuum bleeding avoids that concern and promotes controlled fluid movement.
Visibility improves significantly with clear hoses and collection containers. Watching fluid and air move through the system helps confirm progress. That visual feedback creates more confidence throughout the process.
Maintenance becomes easier to schedule when another helper isn't required. A single person can often complete the task efficiently, making routine fluid changes more practical and less intimidating.
Keeping maintenance tools organized matters too. If you're also dealing with hard-to-reach cleaning areas around the garage, explore best shark vacuum for under beds solutions to simplify dust removal in tight spaces before working on your vehicle.
Step-By-Step Guide For Vacuum Brake Bleeder Kit
Air trapped in brake lines can lead to a spongy pedal and inconsistent stopping power. Performing the how to use vacuum brake bleeder kit procedure correctly ensures cleaner fluid circulation and safer braking. The kit's design streamlines traditional bleeding, reducing strain and providing better precision with minimal mess. Users quickly notice improved pedal feel and consistent pressure after following the correct steps.
Securing The Vehicle And Safety Measures
Start by parking on a level surface and engaging the parking brake. Chock the wheels to prevent any movement while working. These steps provide a stable platform and reduce risks. Ensuring safety allows you to focus on the procedure and avoid accidental damage.
Wear gloves and safety glasses. Brake fluid is corrosive, and splashes can harm skin or painted surfaces. A few precautions protect both you and the vehicle. A controlled work environment enhances process reliability and prevents accidental spills.
Gather all components of the vacuum bleeder kit before opening the bleeder valves. Proper preparation avoids mid-procedure scrambling. Keeping tools organized supports efficient workflow and minimizes frustration. Preparation often determines how smoothly the procedure runs.
Inspect hoses and connectors for wear or cracks. Damaged components reduce vacuum efficiency and can compromise the entire process. Reliable connections are a key factor in achieving complete air removal and maintaining system integrity.
Attaching Hoses And Setting Up The Pump
Connect the hose from the vacuum pump to the reservoir and the bleeder valve. Firm connections ensure consistent suction and smooth fluid flow. Loose fittings create leaks that prolong the bleeding process and introduce error. Proper setup saves both time and effort.
Position the collection container on a stable, level surface. This prevents accidental tipping and ensures fluid is captured cleanly. Clear tubing offers visual feedback, showing air bubbles escaping from the brake system. Observing the fluid in motion improves accuracy and confidence in the results.
Operate the pump gently at first to create steady vacuum pressure. Sudden or excessive suction may draw air back into the system or damage bleeder screws. Maintaining controlled pressure protects system components and improves the overall outcome.
Monitor vacuum gauges if included, making sure pressure levels remain stable throughout the process. Fluctuations indicate potential leaks or blockages that need correction. Consistent pressure is a crucial feature for thorough bleeding and optimal brake performance.
Bleeding Each Wheel In Sequence
Follow the recommended sequence: usually the farthest wheel from the master cylinder first. This ensures trapped air is fully expelled from all lines. Skipping the sequence can leave pockets of air and reduce braking reliability. Proper order simplifies the process and improves safety.
Open the bleeder valve slowly and observe the fluid. Air bubbles should rise and eventually stop. Patience during this step ensures thorough air removal. Clean, bubble-free fluid signifies effective bleeding and readiness for the next wheel.
Keep checking the master cylinder reservoir. Low fluid levels can allow air back into the system, undoing progress. Maintain fluid at the recommended level to preserve hydraulic integrity and prevent complications. Consistency throughout the process is essential.
Close the bleeder valve before releasing vacuum pressure. This prevents new air from entering and maintains the gains achieved. Attention to timing and valve operation is a critical factor for achieving a fully bled system.
Monitoring Fluid Quality And Color
Old brake fluid darkens over time due to heat and moisture absorption. As you bleed, observe the fluid in the collection container. Clean, bright fluid indicates the system is purged and ready. Tracking fluid color helps maintain optimal brake performance and prevents contamination.
Dispose of used fluid properly. Brake fluid is hazardous to the environment, and safe handling practices matter. Collecting fluid in dedicated containers keeps your workspace clean and supports long-term safety. Responsible disposal complements effective bleeding.
If fluid continues to appear dark, multiple cycles may be necessary. Persistent discoloration can signal internal corrosion or debris, highlighting the importance of quality maintenance. Following a systematic approach ensures each brake component receives adequate attention.
Consider replacing the fluid entirely if it's consistently contaminated. Fresh fluid enhances pedal feel, hydraulic efficiency, and component longevity. A vacuum bleeder makes this refresh straightforward and manageable.
Recognizing And Addressing Common Issues
Trapped air may linger if the bleeder valve is partially blocked. Cleaning or gently tapping the valve can help release stubborn pockets. Patience and careful technique are essential. Correcting these small issues prevents incomplete bleeding and uneven pedal feel.
Leaks in hoses or connections reduce suction effectiveness. Inspect and tighten fittings as needed. Identifying leaks early maintains vacuum efficiency and speeds up the procedure. A properly sealed system ensures consistent results every time.
Pedal softness despite visible clean fluid might indicate worn internal components. Master cylinders or calipers may need service, highlighting the system-wide perspective required. Recognizing when additional intervention is necessary avoids repeated frustration.
Following a detailed, step-by-step approach minimizes these issues and supports safe, reliable braking. Proper technique combined with observation ensures consistent outcomes and user confidence.
Cleaning And Storing The Kit
Flush hoses with clean brake fluid or appropriate cleaner to remove residue. Preventing buildup preserves kit longevity and ensures readiness for future maintenance. Clean components also reduce contamination risk for new fluid.
Wipe down the vacuum pump and reservoir to remove any spills. Regular cleaning prevents wear and keeps parts functioning smoothly. Attention to detail supports durable, long-term use and maintains efficiency.
Store all parts in a designated case or container. Organized storage prevents loss and damage. Knowing where each piece belongs improves setup time and makes maintenance tasks less stressful, enhancing usability.
Consider labeling components or hoses for specific vehicles if you maintain multiple cars. This small step reduces confusion and supports repeatable precision. A well-maintained kit is ready to deliver reliable results every time.
Enhancing Your Maintenance Routine
Regular brake system checks paired with vacuum bleeding improve pedal feel and stopping power. Combining this with other cleaning or vacuuming routines keeps the vehicle in top shape. For tight spots under furniture or garages, explore how to use pink soap brush cleaner to simplify cleanup before vehicle work.
Incorporate checks of lines, hoses, and calipers for leaks, wear, or corrosion. Consistent inspection complements bleeding and maintains hydraulic integrity. Routine attention reduces unexpected failures.
Pair the kit with other vacuum or cleaning tools for a holistic maintenance approach. For wooden floors or workshop areas, consider the best dyson vacuum for wooden floor to keep spaces clean and debris-free. Clean surroundings enhance safety and efficiency.
Developing a repeatable routine creates confidence and reduces stress. A vacuum bleeder kit becomes a reliable ally, delivering controlled, consistent fluid management and contributing to safer driving experiences.


How to Refinish a Fiberglass Pool

How Do You Keep Raccoons Out of Your Pool?

How to Fix Cyanuric Acid in Your Pool

How to Shape a Pool Cue Tip to Stop Miscues

Best Far Infrared Sauna Sauna Heats: Top Picks of 2026

11 Best Far Infrared Sauna Carbon Fiber Heaters of 2026 For Balanced Full-Body Heat

11 Best Carbon Far Infrared Sauna of 2026 For Even Heat

10 Best Bluetooth Speaker For Sauna of 2026 For Heat and Steam


