
How to Unlock, Extend, and Use a Vacuum Wand

Press the release latch to pull it free. From there, slide your cleaning tool onto the narrow tip and guide the pipe toward baseboards or high corners. The rigid tube turns a bulky floor cleaner into an extended arm for cobwebs, ceiling vents, and deep gaps under low furniture. Keeping the main machine close prevents the stretched hose from tipping it onto your floors.
The exact way pieces fit together depends on your vacuum design. Some models use push-button click locks, while basic tubes simply twist and pull apart by hand. Upright machines pull against a stiff stretch hose, whereas canister cleaners roll freely across the room. You might also have a metal pipe that slides longer with a quick collar switch, or separate tubes that stack together. Here is how to unlock the pipe, attach your nozzles, and reach awkward spots without breaking any plastic.
The Short Version
- Find the release: Look for a colored button labeled "Wand Release" near the base of your upright handle, or give a push-together friction tube a firm twist to free it from the machine.
- Attach tools directly to the tip: Push your desired cleaning accessory, like a narrow flat nozzle or dusting brush, onto the open end of the pipe until it sits snug.
- Extend for extra reach: Slide the collar on a sliding extension tube to lengthen the metal pipe, or press together stackable plastic tubes to reach high corners.
- Anchor the machine base: Always keep an upright vacuum parked close to your work area so the pulling stretch hose does not topple the heavy motor onto hard flooring.
How to Release the Wand from Your Vacuum
Releasing a vacuum wand can feel confusing because different vacuum styles lock their rigid tubes in distinct ways. Forcing a stuck joint sideways is the fastest way to crack plastic clips or bend metal tubes, so taking a moment to identify how your specific model connects will protect your machine.
Most vacuum cleaners use one of two connection types: a push-button click lock or a push-in tight joint (a friction fit where two tubes slide into each other and stay held by tightness alone). Upright vacuums often store the wand directly inside the handle spine, while canister and stick vacuums place the wand between the flexible suction hose and the floor cleaning head.
- Turn off the vacuum and park it: Switch off the motor and make sure the vacuum is standing upright on a flat floor. Never try to detach or adjust extension tubes while the motor runs, as the sudden suction can yank tools out of your hands or pinch your fingers.
- Locate the release button or latch: On an upright vacuum, look near the bottom of the long handle tube. You will usually find a large plastic button or foot pedal labeled "Wand Release" or "Quick Release." On canister and stick vacuums, look for a small push tab located right where the metal tube enters the curved handle grip.
- Press the button and pull straight out: Press the button firmly with your thumb or foot while holding the curved handle with your other hand. Pull the wand straight up along the line of the tube. Avoid bending the wand back and forth at an angle, as angled pulling jams the locking pin against the inner housing.
- Twist apart push-in tight joints: If your vacuum uses plain push-fit tubes without any buttons, do not pull with brute force alone. Grasp one tube with your left hand and the connecting piece with your right hand. Twist your hands in opposite directions while gently pulling outward. The twisting motion breaks the airtight seal instantly without straining the plastic edges.
If you use a stick vacuum, the wand detaches at two separate points. You can press the top button to remove the entire long pipe and turn the unit into a compact hand vacuum. You can also press the lower button right above the motorized floor head to leave the long tube attached for clearing high cobwebs. If your vacuum feels unwieldy during overhead work, checking what is the lightest cordless vacuum cleaner in 2026 can show you how different body weights affect cleaning balance.
Extending Your Reach with Sliding Tubes and Extra Pipes
Once you detach the wand, you may need extra length to clean ceiling fans, air conditioning vents, or tight spaces behind heavy dressers. Vacuum wands typically extend using one of two designs: a sliding extension tube (a telescopic wand that expands from inside itself) or modular, stackable extension pipes.
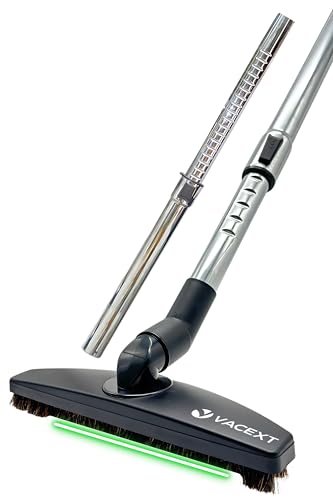
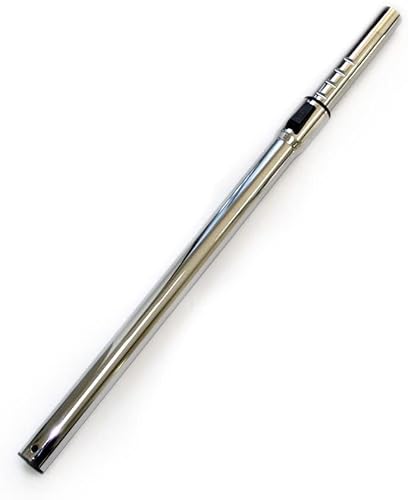
A sliding extension tube uses an internal sleeve that glides smoothly to lengthen the pipe. Look along the body of the metal wand for a grooved plastic collar, a sliding thumb switch, or a spring-loaded ring. Push or slide this collar forward in the direction of the arrow mark, then pull the inner tube out until it clicks into your desired length notch. Once locked, give the tube a slight push back toward yourself to confirm the internal locking pin settled into the ratchet groove. If it is not locked firmly, the wand will collapse closed the moment you press a brush against the ceiling.
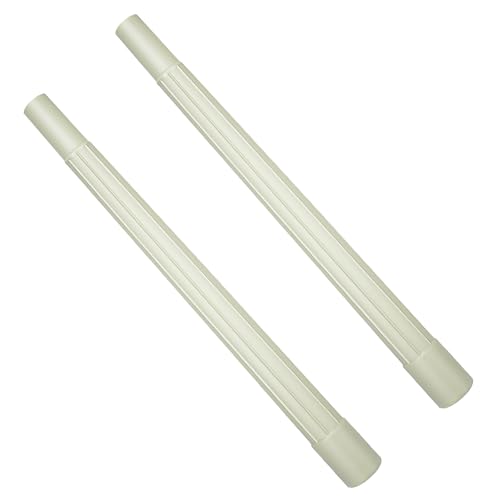
Modular extension pipes do not slide inside each other. Instead, they come as individual plastic or metal tubes, usually around 14 to 19 inches long each. One end of each tube is slightly wider than the other. To connect them, slide the narrow end of one pipe into the wider flared end of the second pipe. Push them together using a gentle quarter-turn twist. This light twist creates a snug push-in tight joint that will not separate during normal sweeping motions.
Avoid tapping or hammering push-fit pipes together against the floor to tighten them. Driving the plastic too deep can cause hairline fractures along the outer collar, which creates air leaks that ruin your suction power. A simple hand push with a firm twist creates plenty of holding force.
Pairing the Right Cleaning Tools with Your Wand Tip
The open end of your vacuum wand accepts a variety of specialized nozzles. Matching the right tool to the surface protects delicate paint and fabric while directing your suction power exactly where dirt hides.
- Narrow flat nozzle (crevice tool): This long, skinny plastic nozzle concentrates suction into a thin line. Slide it onto the wand tip to reach baseboard cracks, window tracks, between sofa cushions, and deep under car seat rails.
- Dusting brush with soft bristles: This attachment features soft, circular or oval bristles surrounding the suction opening. Use this tool for crown molding, delicate picture frames, window blinds, and dusty ceiling fan blades so the hard plastic cannot scratch painted surfaces.
- Upholstery and stair nozzle: A wider, flat tool that often includes small lint-catching felt strips. Connect this directly to the wand to clean fabric furniture, upholstered dining chairs, fabric headboards, and carpeted stair steps.
- Hard floor nozzle: A wide, flat cleaning head with soft edge bristles and no motorized spinning roller. When snapped onto your extended wand, it turns your hose setup into a lightweight floor broom that slides under low beds and coffee tables where a bulky upright machine cannot fit.
Most residential vacuum attachments in the United States use a standard 1-1/4-inch (32mm) fitting size, while some European canister vacuums use a 1-3/8-inch (35mm) connection. Before pushing an accessory onto your wand, make sure the opening matches. If an attachment wobbles loosely or stops halfway down the pipe, you may need a universal step adapter sleeve to bridge the small difference in diameter.
Reaching High and Low Without Tipping the Machine
The biggest frustration when using a vacuum wand is dealing with a machine that tips over. Upright vacuums are tall and top-heavy. Their flexible stretch hoses are designed like tightly coiled springs. When you pull the wand up toward the ceiling, that hose stretches and exerts strong tension right back onto the vacuum body, easily pulling the heavy machine crashing down onto your floor.
To prevent costly damage to your floors and vacuum housing, follow these safe handling habits:
First, always place the vacuum base against an anchor point when stretching the hose toward high spaces. Setting the vacuum wheels against the side of a heavy sofa, a door jamb, or a sturdy wall prevents the base from rolling forward when the hose pulls tight. If you are cleaning in the middle of a room, hold the vacuum handle with one hand to support its weight while directing the wand with your other hand.
Second, check your vacuum controls to shut off the spinning brush roller (the motorized rotating bar with stiff bristles under the floor base). When an upright vacuum is parked standing straight, that motorized roller can continue spinning against your carpet or hardwood. If left running in one spot for several minutes while you clean ceiling vents, the friction can scorch carpet fibers or leave dull burn marks on finished wood. Many uprights have a pedal or button that disengages the brush roll when parked, but older models may require you to switch the dial directly to "Tools" or "Hard Floor" mode.
When cleaning under low furniture like sofas and credenzas, lower the wand angle so the pipe runs parallel to the floor. If your wand has a sliding collar, extend it to its maximum length so the vacuum body stays outside the furniture perimeter. This gives you full reach all the way to the back wall without forcing the thick vacuum body under low wooden frames where it can scratch the finish.
Fixing Weak Suction at the Wand Tip
If you turn on your vacuum and find that the wand barely picks up crumbs or dust, air is either escaping through an opening or a blockage is choking the airflow inside the tube. You can locate and solve the issue with a few simple checks.
- Check the suction valve on the handle: Most vacuum handles feature an adjustable slide opening (a suction valve that bleeds off suction by exposing a small hole to the room). This slide is designed to let you lower suction when cleaning sheer curtains so the fabric does not get sucked into the pipe. If this slide was bumped open, slide it closed completely to restore full pulling power to the wand tip.
- Inspect the hose-to-wand seal: Turn on the motor and run your hand around the joint where the flexible hose meets the rigid wand. If you feel cool air blowing against your skin or hear a sharp hissing sound, the push-button lock is not fully clicked in or the rubber sealing ring inside the joint has shifted. Unclip the wand and snap it firmly back into place.
- Check for clogs inside the rigid pipe: Detach the wand from both the hose and the cleaning tool. Hold the tube up toward a ceiling light and look down through the opening. If you cannot see a clear circle of light, debris is trapped inside. Drop a small coin or heavy marble down the tube. If the item gets stuck, you know a blockage is caught in that section.
- Push out clogs safely: Never use a metal coat hanger or sharp wire to poke through your tubes, as sharp metal can puncture plastic sleeves or gouge sealing surfaces. Instead, take a standard wooden broom handle and gently push it straight through the rigid wand from the narrow end toward the wider end. This pushes clumped hair and dust out the wide exit easily.
- Confirm the main vacuum airflow: If the wand is completely hollow and clear, disconnect the wand and place your bare hand directly over the opening of the flexible hose. If the pull against your hand feels weak right at the hose cuff, the problem is not your wand. Check your vacuum collection bag or dust cup to see if it is overfilled, and verify that the pre-motor foam filters are clean and dry.
Choosing Extension Tubes and Wand Replacements
Over time, plastic connection tabs can snap off, sliding internal rings can wear out, or you may simply find that your factory setup does not give you enough reach for vaulted ceilings and staircases. Adding a replacement wand or an extra extension pipe solves these issues easily without needing to buy an entirely new vacuum.
Before purchasing a replacement wand, measure the outer diameter of your existing hose handle and the inner diameter of your favorite cleaning attachments. Most general-purpose accessories and shop vacuums fit 1-1/4-inch (32mm) connections. If your machine uses non-standard proprietary shapes, you will need a universal adapter cuff that fits securely over your existing hose tip.
Consider the material that best matches your cleaning routine. Chrome-plated steel and stainless steel extension tubes offer exceptional durability. They will not bend, crack, or flex when you press down hard against deep carpets, making them ideal for heavy garage use and deep floor cleaning. Lightweight plastic tubes, on the other hand, are much easier on your arms and shoulders when holding the wand high overhead to clear cobwebs from ceiling corners.
Finally, decide between a sliding extension tube and modular stackable pipes. A sliding tube offers instant convenience because you can adjust your cleaning length from short to long with a quick thumb press. Stackable pipes require you to carry extra pieces in your utility closet, but they allow you to connect three or four sections together to create an extra-long pole for high two-story entryways.

- VC Score9.2
BCP Score is a ranking system developed by bestcleanerproducts.com. BCP Score has no relationship or impact from any manufacturers or sales agent websites. Learn more
- BrandVACEXT
- VC Score9.0
BCP Score is a ranking system developed by bestcleanerproducts.com. BCP Score has no relationship or impact from any manufacturers or sales agent websites. Learn more
- BrandHASMX

- VC Score9.0
BCP Score is a ranking system developed by bestcleanerproducts.com. BCP Score has no relationship or impact from any manufacturers or sales agent websites. Learn more
- BrandCen-Tec Systems

- VC Score8.6
BCP Score is a ranking system developed by bestcleanerproducts.com. BCP Score has no relationship or impact from any manufacturers or sales agent websites. Learn more
- BrandSunSare

- VC Score8.6
BCP Score is a ranking system developed by bestcleanerproducts.com. BCP Score has no relationship or impact from any manufacturers or sales agent websites. Learn more
- BrandGHAMADE

- VC Score8.6
BCP Score is a ranking system developed by bestcleanerproducts.com. BCP Score has no relationship or impact from any manufacturers or sales agent websites. Learn more
- BrandANBOO
- VC Score8.4
BCP Score is a ranking system developed by bestcleanerproducts.com. BCP Score has no relationship or impact from any manufacturers or sales agent websites. Learn more
- BrandVACEXT
- VC Score8.4
BCP Score is a ranking system developed by bestcleanerproducts.com. BCP Score has no relationship or impact from any manufacturers or sales agent websites. Learn more
- BrandIZSOHHOME

- VC Score8.4
BCP Score is a ranking system developed by bestcleanerproducts.com. BCP Score has no relationship or impact from any manufacturers or sales agent websites. Learn more
- BrandSeovmri

- VC Score8.0
BCP Score is a ranking system developed by bestcleanerproducts.com. BCP Score has no relationship or impact from any manufacturers or sales agent websites. Learn more
- BrandHonoson

- VC Score7.6
BCP Score is a ranking system developed by bestcleanerproducts.com. BCP Score has no relationship or impact from any manufacturers or sales agent websites. Learn more
- BrandBaerkian
Last update on 2026-10-01 / Affiliate links / Images, Product Titles, and Product Highlights from Amazon Product Advertising API
FAQs
Which end of the vacuum wand connects to the hose?
The wider, flared end of the wand attaches to the curved hose handle, while the narrower, tapered end holds your cleaning tools. If your vacuum uses click buttons, the end with the alignment hole or locking tab will only fit into the hose cuff in one specific orientation.
How do you separate vacuum wand tubes that are stuck together?
Twist the two pipes in opposite directions while pulling them apart instead of trying to yank them straight out. If your hands slip, put on a pair of rubber kitchen cleaning gloves or wrap rubber jar opener pads around the tubes to get a firm grip without scratching the surface.
Can you connect two extension wands together for extra reach?
Yes, standard push-fit extension tubes are designed to stack into each other so you can build a longer reach. As long as the narrow end of one pipe matches the wide opening of the next, you can connect multiple wands to clean high stairwells or vaulted ceilings safely from the floor.
Why does my vacuum wand make a loud whistling noise?
A high-pitched whistle usually means air is squeezing through an unintended gap or around an obstruction inside the tube. Check that your suction valve slide on the handle is shut tight, confirm the connection joint clicked securely, and look through the tube to make sure clumped pet hair is not partially blocking the airflow.


How to Refinish a Fiberglass Pool

How Do You Keep Raccoons Out of Your Pool?

How to Fix Cyanuric Acid in Your Pool

How to Shape a Pool Cue Tip to Stop Miscues

Best Far Infrared Sauna Sauna Heats: Top Picks of 2026

11 Best Far Infrared Sauna Carbon Fiber Heaters of 2026 For Balanced Full-Body Heat

11 Best Carbon Far Infrared Sauna of 2026 For Even Heat

10 Best Bluetooth Speaker For Sauna of 2026 For Heat and Steam








