
How to Use the Hose on a Vacuum Without Losing Suction

Most people assume using a vacuum hose is as simple as tugging the tube out and flipping the power switch. In reality, getting full cleaning pull requires locking the vacuum upright and unclipping the hose latch to reroute airflow away from the floor head. Pushing your nozzle firmly onto the handle gives you strong, steady suction while stopping the spinning floor roller from scorching your rug.
The exact steps change based on the style of your machine and the job you are tackling. Upright cleaners usually rely on a release latch or a bypass dial, whereas canister vacuums breathe through the hose automatically. Tool fittings also differ, using either snug slide-on friction or small push-button clips. Here is how to release the hose, secure the right attachment, and clean tricky spots without tipping the unit.
Upright vacuums must lock upright to redirect suction
Upright and canister vacuums route airflow differently. On a canister vacuum, the flexible hose is the main path for dirt and air, requiring no extra setup. Upright vacuums use a dual-path system. During floor cleaning, the motor pulls air through the base opening where the spinning brush roller sits. To clean baseboards or furniture, you must redirect that suction into the flexible hose.
Most upright vacuums switch paths automatically when you tilt the body forward until it clicks into the upright parking position. An internal flap swings shut over the floor nozzle and opens the airway to the hose port. If the body leans back even slightly, that internal door stays open to the floor, leaving the hose with little suction. Push the handle fully forward until you hear the mechanical latch snap into place.
Some upright models use a manual airflow selector. Look near the lower base or along the dust bin for a dial or switch labeled "Floors" and "Tools" or "Hose." Rotate this dial by hand to "Tools" to divert suction power into the hose.
Parking an upright vacuum on carpet creates a hazard. While parked upright, the spinning brush roller (the spinning brush bar under the floor head) often keeps spinning. Leaving it running in one spot can scorch synthetic carpet fibers. Turn off the brush roller switch, or raise the floor height adjustment knob to its highest setting so the bristles lift off the carpet pile.
Release the wand latch and push attachments firmly together
Connecting your cleaning tools correctly prevents air leaks and stops attachments from falling off during use. Follow these steps to set up your hose and accessories:
- Turn off the vacuum before unclipping parts. Working on a running machine can snap plastic latches or pinch fingers if suction suddenly pulls a part tight.
- Locate the release button on the vacuum frame. To clean ceilings or high corners, press the "Wand Release" button and pull the wand (a rigid extension tube) straight up out of the machine housing. To clean close areas, press the "Hose Release" tab to disconnect the handle directly from the wand.
- Check the connection style on your tools. Vacuum accessories connect using either a push-on friction fit or a push-button snap lock. Friction-fit tools have a smooth, tapered opening that slides over the tube. Snap-lock tools feature a plastic button that clicks into a matching hole on the hose collar.
- Slide and twist the tool into place. For friction-fit tools, push the accessory firmly onto the tube and give it a quarter-twist to wedge the tapered surfaces together. For snap-lock tools, align the button with the hole and push straight on until it clicks.
- Confirm suction before you start cleaning. Turn the machine on and cover the nozzle opening with your palm for one second. You should feel an immediate, strong pull. If the pull feels weak, push the tool deeper onto the tube to seal the joint.
Match each cleaning attachment to your specific surface
Using the wrong nozzle reduces suction efficiency and can scuff delicate household surfaces. Match your cleaning task to the correct accessory:
- Crevice tool: This narrow flat nozzle for thin spaces forces air through a tight slit, increasing air speed. Use it along baseboards, between sofa cushions, inside window tracks, and along car seat seams. Keep it moving so it does not pull loose fabric tight against the opening.
- Dusting brush: This round or oval nozzle is ringed with soft bristles. It sweeps fine dust loose from hard surfaces so the air stream can catch it without scratching the finish. Use it on window blinds, lamp shades, carved wood, and air vents.
- Upholstery tool: This nozzle has a wider, flatter opening flanked by lint-catching fabric strips. It distributes suction evenly across a broad path without grabbing fabric. Use it on sofas, fabric car seats, mattress tops, and carpeted stairs.
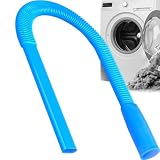
- Flexible vent cleaner hose: This long, bendable tube slips into narrow slots that rigid tools cannot enter. It slides deep into clothes dryer lint traps, reaching past the removable screen into the lower housing where lint collects.
- Rigid extension tubes: Connecting rigid extension tubes between the flexible hose handle and your nozzle lets you reach ceiling corners and fan blades without standing on chairs.
If you are cleaning wet spills or pet messes rather than dry dust, do not use a standard dry vacuum hose. Pulling water into a regular dry vacuum can ruin the motor and create an electrical hazard. For wet messes and deep carpet washing, switch to an extractor built for deep pet stains to protect your main vacuum from water damage.
Anchor the vacuum base so the hose does not tip
A common frustration when using a vacuum hose is having the upright machine tip over. Upright vacuums are top-heavy because the motor, cord, and dust bin sit well above the wheels. Flexible hoses are coiled like springs. As you pull the hose outward, tension builds up until it pulls the upright base off balance.
Position the vacuum correctly to eliminate tipping. Always turn the vacuum so the front face points directly toward you. Upright vacuums roll forward easily on their rear wheels, but they have no sideways stability. When the front faces you, pulling the hose gently rolls the vacuum forward across the floor instead of toppling it on its side.
Never stretch the flexible hose to its limit. Most standard upright hoses reach between six and ten feet when pulled, but they exert heavy resistance past the halfway mark. Treat the hose as a flexible link, not a tow rope. Keep the vacuum body within three to four feet of your work area, moving the wheeled base along with you as you clean.
Cleaning stairs requires extra caution. Never balance an upright vacuum on an intermediate stair step while you climb higher with the hose. The pulling force can yank the machine off the step, sending it tumbling down the staircase.
Place the vacuum base on the flat floor at the bottom of the staircase. Stretch the hose up to clean the first few steps. When you reach the limit of the hose, carry the machine to the top landing and park it on the upper floor, then clean downward. If carrying a heavy upright vacuum up and down the stairs causes back strain, check what is the lightest cordless vacuum cleaner to see how compact stick vacuums simplify multi-level cleaning.
Watch for hose kinks. When you change angles quickly, the ribbed hose can twist into a loop that collapses under suction. A kinked hose stops airflow instantly, causing the motor to emit a high-pitched whine. When you hear that whine, stop pulling, untwist the hose, and let it relax into a smooth curve.
Clear clogs and close air vents to restore full suction
When you attach a tool to the hose and notice that it barely picks up dust, air is escaping or airflow is blocked along the line. Work through these troubleshooting steps to restore full suction power:
- Check the suction relief valve on the handle. The suction relief valve (a small slide cover on the handle to reduce pull) is built into many vacuum handles so users can clean light curtains or rugs without sucking fabric into the nozzle. If your hand bumped this slide open, room air pours into the handle, dropping suction at the nozzle tip to near zero. Slide the valve shut until the opening is completely covered.
- Inspect the hose cuff where it locks into the vacuum body. A hose seated halfway will leak air around the collar. Press the release tab, pull the hose cuff out, inspect the rubber seal for trapped dirt or pet hair, and snap the cuff firmly back into the intake port until the locking tabs click.
- Look for holes or splits in the flexible hose wall. Turn on the vacuum, cup your hand over the open end of the hose, and run your other hand along the ribbed tubing. Listen for hissing sounds and feel for air blowing against your skin. Even a small tear lets air bypass the nozzle. Wrapping the section tightly with vinyl tape can serve as a temporary patch, but replacing the hose assembly is the only permanent solution.
- Check for clogs inside the hose tube. If the motor runs loudly but no suction reaches the handle, a clump of debris is trapped inside. Turn off the vacuum and unplug the cord. Detach the hose completely from the machine. Drop a small coin or marble into one end of the hose and hold the tube vertical. If the coin drops out the other end, the hose is clear. If it stops midway, you have located the clog.
- Push the obstruction out safely. Never use a wire coat hanger to poke a clog loose. Sharp wire ends can puncture the soft plastic ribs or hook into the internal spring, tearing the hose. Instead, feed a smooth wooden broom handle or flexible plastic rod through the hose to push the clump out. Always push from the narrower wand end toward the wider collar end.
- Keep moisture out of the vacuum line. Never rinse a wire-reinforced vacuum hose with water unless the manual explicitly permits it. Many household hoses contain a steel wire coil inside the plastic ribs. Getting water inside can rust this wire, causing it to break and puncture the plastic. If you wash an all-plastic hose, hang it over a shower rod and confirm it is completely dry before reconnecting it.
Specialty flexible attachments help clean deep dryer vents and gaps
When standard factory attachments cannot bend into thin crevices or reach behind large appliances, aftermarket accessories solve the problem. Specialty tools such as flexible crevice nozzles, narrow lint trap hoses, and universal adapters expand what a basic vacuum can reach without requiring a new machine.
Before choosing a specialty attachment or replacement hose, verify the fitting size of your current vacuum. Most household vacuum wands and handles in the United States use standard friction-fit connections with an inside diameter of 1-1/4 inches (32 millimeters) or 1-3/8 inches (35 millimeters). Utility shop vacuums typically use larger 1-7/8-inch or 2-1/2-inch hoses. Measure the outer diameter of your vacuum wand tube or the inner diameter of your existing attachments with a ruler before buying an accessory to confirm that the parts will slide together snugly.
Look for kits that include multi-step universal adapters if your vacuum has an unusual size or a non-round shape. Some modern vacuums feature proprietary oval or clip-locking tubes that reject standard round tools. A universal rubber stepped adapter acts as a bridge, sliding over non-standard handles on one end while providing a standard round connection on the other.
Choose flexible tools built from durable, bendable plastic that can hold their shape under vacuum pressure. For cleaning refrigerator coils, under low sofas, or deep inside clothes dryer lint compartments, look for flat nozzles measuring twenty-four to thirty inches in length that can bend up to 180 degrees. The plastic must be flexible enough to snake through tight turns without collapsing flat under suction.

- VC Score9.0
BCP Score is a ranking system developed by bestcleanerproducts.com. BCP Score has no relationship or impact from any manufacturers or sales agent websites. Learn more
- BrandMarchio figurativo GG

- VC Score9.0
BCP Score is a ranking system developed by bestcleanerproducts.com. BCP Score has no relationship or impact from any manufacturers or sales agent websites. Learn more
- BrandCen-Tec Systems

- VC Score9.0
BCP Score is a ranking system developed by bestcleanerproducts.com. BCP Score has no relationship or impact from any manufacturers or sales agent websites. Learn more
- BrandPetOde

- VC Score8.8
BCP Score is a ranking system developed by bestcleanerproducts.com. BCP Score has no relationship or impact from any manufacturers or sales agent websites. Learn more
- BrandHolikme

- VC Score8.8
BCP Score is a ranking system developed by bestcleanerproducts.com. BCP Score has no relationship or impact from any manufacturers or sales agent websites. Learn more
- BrandSealegend

- VC Score8.8
BCP Score is a ranking system developed by bestcleanerproducts.com. BCP Score has no relationship or impact from any manufacturers or sales agent websites. Learn more
- BrandPmsanzay

- VC Score8.4
BCP Score is a ranking system developed by bestcleanerproducts.com. BCP Score has no relationship or impact from any manufacturers or sales agent websites. Learn more
- BrandSHINLINKDA

- VC Score7.8
BCP Score is a ranking system developed by bestcleanerproducts.com. BCP Score has no relationship or impact from any manufacturers or sales agent websites. Learn more
- BrandGIBTOOL
- VC Score7.6
BCP Score is a ranking system developed by bestcleanerproducts.com. BCP Score has no relationship or impact from any manufacturers or sales agent websites. Learn more
- BrandGROLEOA

- VC Score6.4
BCP Score is a ranking system developed by bestcleanerproducts.com. BCP Score has no relationship or impact from any manufacturers or sales agent websites. Learn more
- BrandSHLYBRZLJ
Last update on 2026-09-30 / Affiliate links / Images, Product Titles, and Product Highlights from Amazon Product Advertising API


How to Refinish a Fiberglass Pool

How Do You Keep Raccoons Out of Your Pool?

How to Fix Cyanuric Acid in Your Pool

How to Shape a Pool Cue Tip to Stop Miscues

Best Far Infrared Sauna Sauna Heats: Top Picks of 2026

11 Best Far Infrared Sauna Carbon Fiber Heaters of 2026 For Balanced Full-Body Heat

11 Best Carbon Far Infrared Sauna of 2026 For Even Heat

10 Best Bluetooth Speaker For Sauna of 2026 For Heat and Steam


