
How to Use the Blackhead Remover Vacuum Safely

How to use the blackhead remover vacuum is a question that pops up after many people bring one home and realize the device isn't quite as simple as it looks. A quick pass across the nose might seem harmless, yet improper pressure or poor technique can leave temporary redness, sensitivity, or disappointing results. Clearer-looking pores often depend more on preparation and patience than on suction strength alone. Small adjustments can make a noticeable difference in both comfort and results.
Clean skin creates a much better starting point. Warm water, gentle cleansing, and a few minutes of steam can help soften debris inside pores, making extraction easier. Strong suction isn't always the answer, and that's where many people get tripped up. Starting with the lowest setting allows the skin to adjust while reducing the chance of irritation.
Proper movement matters just as much as suction level. Keeping the device in constant motion helps prevent concentrated pressure from building in one spot. Leaving the tip parked on the skin for too long can create unwanted marks that may take days to fade. Slow, steady glides usually provide a safer and more comfortable experience.
Different areas of the face react differently. The nose often tolerates stronger suction than delicate areas around the cheeks or under the eyes. Paying attention to skin response during treatment helps avoid overdoing it. Sometimes less really is more, especially when dealing with sensitive or reactive skin.
Consistency tends to outperform aggressive sessions. Chasing immediate results can backfire, while a gradual approach allows pores to appear cleaner over time without excessive stress on the skin. Pairing the device with a balanced skincare routine supports healthier-looking skin between treatments. That combination often leads to a smoother experience and more predictable outcomes.
Post-treatment care shouldn't be overlooked. Gentle hydration and calming products can help the skin recover after suction exposure. Harsh exfoliants immediately afterward may increase sensitivity and discomfort. Giving the skin a little breathing room helps maintain a calmer appearance.
Realistic expectations also play a role. A blackhead remover vacuum may reduce the appearance of congestion, but it won't completely erase every pore or permanently prevent buildup. Skin naturally produces oil, and pores continue collecting debris over time. Understanding that tradeoff helps create a healthier routine without unnecessary frustration.

- VC Score10.0
BCP Score is a ranking system developed by bestcleanerproducts.com. BCP Score has no relationship or impact from any manufacturers or sales agent websites. Learn more
- BrandSKUGF

- VC Score9.6
BCP Score is a ranking system developed by bestcleanerproducts.com. BCP Score has no relationship or impact from any manufacturers or sales agent websites. Learn more
- BrandFLYMOOO
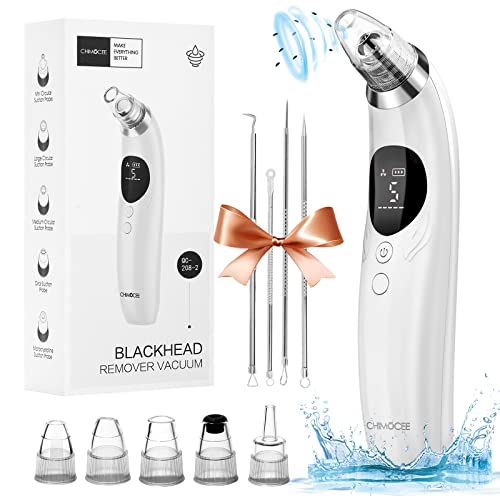
- VC Score8.8
BCP Score is a ranking system developed by bestcleanerproducts.com. BCP Score has no relationship or impact from any manufacturers or sales agent websites. Learn more
- BrandCHIMOCEE

- VC Score8.6
BCP Score is a ranking system developed by bestcleanerproducts.com. BCP Score has no relationship or impact from any manufacturers or sales agent websites. Learn more
- BrandGackoko

- VC Score8.2
BCP Score is a ranking system developed by bestcleanerproducts.com. BCP Score has no relationship or impact from any manufacturers or sales agent websites. Learn more
- BrandOttleba

- VC Score8.0
BCP Score is a ranking system developed by bestcleanerproducts.com. BCP Score has no relationship or impact from any manufacturers or sales agent websites. Learn more
- BrandGackoko

- VC Score7.6
BCP Score is a ranking system developed by bestcleanerproducts.com. BCP Score has no relationship or impact from any manufacturers or sales agent websites. Learn more
- BrandVOYOR

- VC Score7.4
BCP Score is a ranking system developed by bestcleanerproducts.com. BCP Score has no relationship or impact from any manufacturers or sales agent websites. Learn more
- BrandBAIIKO
Last update on 2026-06-14 / Affiliate links / Images, Product Titles, and Product Highlights from Amazon Product Advertising API
How To Use The Blackhead Remover Vacuum
A tiny suction tool can look harmless until it leaves a red ring on your nose and a bruised little reminder on your cheek. That usually happens because how to use the blackhead remover vacuum gets treated like a quick scrub instead of a careful skin step. The device can help lift surface buildup, but skin prep, suction control, and steady movement decide whether the result looks cleaner or irritated. A calmer routine beats a rough, rushed session every single time.
Blackhead Remover Vacuum Basics
Blackhead remover vacuums use suction to help loosen and lift oil, dead skin, and debris sitting inside visible pores. The idea sounds simple, but skin doesn't behave like a clogged sink. Pores can stretch, flush, or react when pressure sits too long in one spot. That’s why gentle suction matters more than chasing the strongest setting right away.
Blackheads form when oil and dead skin collect in a pore and darken at the surface after exposure to air. A vacuum may help with the look of some clogged pores, especially around the nose and chin. It won’t erase pore size, stop oil production, or replace a basic skincare routine. Think of it as a support tool, not a magic wand.
Skin type changes how the device should be used. Oily areas may tolerate light suction better, while dry or sensitive spots can protest fast. Cheeks, jawline, and areas near the eyes need extra caution because the skin is thinner and easier to mark. A smart routine respects those differences instead of treating the whole face the same.
Patience keeps the process safer. People often press harder after seeing only a small amount of debris in the nozzle, but that habit can turn a skincare step into skin stress. A few careful passes are usually better than one aggressive session. Clearer-looking pores take routine, not punishment.
Prep Skin Before Suction
Clean skin gives the vacuum a better shot at doing its job. Wash away sunscreen, makeup, sweat, and surface oil before the device touches your face. A mild cleanser works better than a harsh scrub because scrubbing can make skin more reactive before suction. Starting calm helps the whole process feel less like a wrestling match.
Warm water can soften buildup and make clogged pores easier to work with. A warm washcloth placed over the nose and chin for a few minutes often feels more controlled than heavy steam. Too much heat can trigger redness, especially for sensitive or easily flushed skin. Keep the warmth comfortable, not steamy enough to make your face feel cooked.
Dry the skin lightly before using the device. Slippery skin can make the nozzle drag unevenly, while overly dry skin may feel tight and more sensitive. A slightly softened surface is the sweet spot. That balance helps the vacuum glide instead of tugging.
Skip strong actives right before suction. Retinoids, strong acids, benzoyl peroxide, or gritty exfoliants can leave the skin more vulnerable to irritation. Give your face a calmer setup if you plan to use suction. The goal is pore care, not a full-on skin boot camp.
Choose The Right Suction Setting
Low suction should be the starting point, even if the device has several tempting power levels. Strong settings may look more productive, but they also raise the chance of redness and temporary marks. Skin doesn’t need a tug-of-war to release surface buildup. A lower setting lets you read how your face responds before going further.
Patch testing helps prevent a bad surprise on the center of your face. Try the device on a small area near the jaw or side of the nose for a short pass. Wait and watch for lingering redness, soreness, or a tight feeling. That quick check can save you from turning a simple routine into damage control.
Nozzle choice matters because different tips create different pressure patterns. A smaller round tip can feel stronger on focused areas like the nose. A wider tip spreads suction across more skin, which may feel gentler but still needs careful movement. Start with the least aggressive attachment until you know how your skin behaves.
Comfort is the best signal during use. A mild pulling sensation is expected, but pain, pinching, or a sharp tug means the setting is too high or the movement is too slow. Don’t try to tough it out. Skin care shouldn’t feel like losing a bet.
Use Slow Glides Without Pausing
Movement protects the skin from concentrated suction. Glide the vacuum in short strokes instead of holding it still over one pore. Pausing too long can create a circular red mark that looks worse than the blackhead did. Keep the device moving like a tiny squeegee, not a stamp.
The nose usually needs angled passes because the surface curves and dips around the nostrils. Pull the skin slightly taut with clean fingers so the nozzle can move smoothly. Use short upward or outward motions instead of grinding back and forth. That little bit of control helps reduce tugging around delicate folds.
The chin can collect congestion, but it also has uneven texture that makes dragging tricky. Use shorter passes and avoid pressing hard around creases. If the nozzle skips or catches, lift it and reset instead of forcing the glide. A clean pass is better than a stubborn pass.
Cheeks need a lighter touch because they can flush quickly. Avoid broken capillaries, active breakouts, cuts, sunburn, or areas that already feel irritated. Suction over inflamed spots can make them angrier. Cleaner-looking pores are not worth trading for a blotchy patch that hangs around.
Manage Redness And Skin Marks
Temporary redness can happen after suction, especially around the nose. A little flushing that fades quickly is usually different from bruising, soreness, or dark red rings. The warning sign is redness that lingers, feels tender, or looks sharply shaped like the nozzle. That often means the suction was too strong or the device sat too long.
Short sessions reduce the chance of irritation. A few minutes across congested areas is plenty for most routines. More time doesn’t always mean more debris, and overworking the skin can make pores look more noticeable for the wrong reason. Stop while the skin still feels comfortable.
Frequency should stay moderate. Daily use is usually too much for many faces, especially if exfoliants or acne treatments are already in the routine. Once a week or less may be more realistic for sensitive skin. Oily areas may handle occasional use better, but the skin still needs recovery time.
Cool compresses can calm the face after treatment. Use a clean, cool cloth and press gently without rubbing. Follow with a simple moisturizer that supports the skin barrier. Strong fragrance, alcohol-heavy toners, and rough scrubs can make post-suction redness worse.
Build A Safer Routine Around The Device
A blackhead remover vacuum works better as one step in a routine, not the whole plan. Cleanser, moisturizer, and sunscreen still carry the everyday workload. Pores refill because oil production continues, so maintenance matters more than one dramatic session. The device simply gives extra help with visible congestion.
Chemical exfoliation can support clearer-looking pores, but timing matters. Salicylic acid may help loosen oily buildup over time, though it shouldn’t be stacked aggressively with suction in the same moment if your skin gets reactive. Space stronger products away from vacuum use to reduce irritation. The calmer your skin barrier stays, the better the routine usually looks.
Separate skin tools from household cleanup thinking, even though the word vacuum makes the comparison tempting. A face device needs clean tips, gentle handling, and careful storage. Separately, sore hands can make regular cleaning harder around the house, so compare cordless vacuum arthritic hands options for easier grip and lighter movement. Keeping those tools in their own lanes prevents messy habits from crossing into skincare.
Device hygiene should never be skipped. Wash removable tips after each use and let them dry fully before storage. Old oil and residue inside the nozzle can transfer back onto clean skin. A cleaner device supports better pore care and lowers the chance of post-treatment breakouts.
Avoid Common Mistakes That Irritate Skin
Pressing harder is the mistake that causes the most trouble. The vacuum already creates suction, so extra pressure only increases dragging and stress. Let the device do the work while your hand guides it lightly. A gentle grip gives you more control than a clenched one.
Using suction on active acne can make inflammation worse. Pimples, cystic bumps, open spots, and healing scabs should be left alone. Suction can spread irritation and make the area feel more tender. Treat inflamed skin with a calmer routine instead of trying to pull the problem out.
Mixing harsh steps in one session can overwhelm the skin fast. Scrub, steam, suction, acid toner, and retinoid all piled together is a recipe for a cranky face. Pick a cleaner, simpler approach so the skin has room to recover. Good skincare often comes down to restraint, not doing every trick in the cabinet.
Expecting pore erasure leads to frustration. Pores are normal skin structures, and they won’t vanish because a tool pulled out some debris. The realistic goal is a smoother-looking surface and less visible congestion. That mindset keeps the routine practical and much easier to stick with.
Know When To Skip The Vacuum
Sensitive skin may not tolerate suction well, especially during flare-ups. Redness-prone skin, sunburned skin, and recently exfoliated skin can react quickly. If the face already feels warm, tight, or stingy, skip the device. Waiting a few days is smarter than forcing a session on irritated skin.
Broken capillaries and easily bruised areas need extra care. Suction can worsen visible redness or leave marks on fragile skin. Areas near the eyes should be avoided because the skin is thinner and more delicate. A blackhead tool belongs on congested zones, not every inch of the face.
Skin conditions such as eczema, rosacea, active infections, or open wounds call for caution. A professional opinion may be safer if reactions happen often or if the skin barrier feels compromised. The same goes for recent facial treatments, peels, waxing, or procedures. Give the skin time before adding suction into the mix.
Household chemicals belong far away from skincare tools, storage areas, and bathroom counters where face devices are cleaned. Separately, safe cleanup matters if strong products are sitting around, so use guidance on dispose drain cleaner instead of guessing. Skin tools should stay in a clean, dry space where residue, fumes, and spills won’t become part of the routine. That small habit keeps the process cleaner and less chaotic.
Keep Results Realistic And Consistent
Visible debris in the nozzle can feel satisfying, but it doesn’t tell the whole story. Some of what appears inside may be oil, dead skin, or moisture from prep. The skin’s appearance afterward matters more than the amount collected. If the face looks calmer and smoother, that’s a better win than filling the tip.
Consistent care usually beats aggressive extraction. A gentle session every so often, paired with steady cleansing and moisturizing, tends to be easier on the skin. Jumping from neglect to intense suction can shock the face. Slow progress may not feel flashy, but it’s often more skin-friendly.
Storage and cleaning habits affect results over time. Keep attachments dry, check the filter if your model has one, and avoid tossing the device loose into a damp drawer. A clogged or dirty tip can reduce suction quality and drag old residue across the face. Clean tools make the routine feel more controlled.
Practical expectations keep the device useful instead of disappointing. The vacuum can support pore maintenance, but it won’t replace sunscreen, gentle exfoliation, hydration, or smart product choices. Separately, home cleaning needs a different kind of suction, so compare a cannister vacuum powered brush if floor debris and pet hair are the real mess. For skin, the best result comes from light pressure, short sessions, clean attachments, and patience.
Step-by-Step Guide To Effective Blackhead Vacuum Use
Getting a smoother, less congested face often starts with a proper approach to the tool rather than brute force. Step-by-step guidance on how to use the blackhead remover vacuum helps prevent irritation and makes results consistent. Knowing exactly how to prep, glide, and calm the skin afterward can transform a frustrating tool into a skin-friendly routine. Small tweaks in technique often mean the difference between redness and clear-looking pores.
Prep And Clean Skin Properly
Clean skin sets the stage for better results. Remove makeup, sunscreen, and excess oil before using the device. Applying a warm compress or brief steam softens pore debris, making suction easier without stressing skin. Avoid harsh scrubs immediately before; your skin should feel supple, not raw.
Drying lightly ensures the nozzle moves smoothly. Overly wet or slippery skin can make the vacuum drag, while dry, tight skin can be more sensitive. The right balance supports even suction and prevents accidental marks. Timing and prep are as important as suction level.
Check for inflamed areas or sensitive spots. Avoid active acne, eczema patches, or recently treated skin. Targeting calmer areas first prevents flare-ups and helps monitor how your skin reacts to the suction. A careful start builds confidence in your routine.
Prepping this way also minimizes the risk of transferring bacteria back onto clean skin. Clean, prepped surfaces let the vacuum focus on pore debris, not residual products. That small step supports better hygiene and smoother results over time.
Adjust Suction And Tip Size
Start on the lowest setting to gauge tolerance. Strong suction may seem appealing, but it can easily irritate skin and cause redness or temporary bruising. A lower setting lets the skin acclimate and reduces unwanted marks. Learning what your skin tolerates prevents setbacks.
Choosing the right nozzle tip improves precision. Small round tips focus on tight areas like the nose, while wider tips cover broader zones more gently. Using the appropriate tip ensures balanced suction without overworking the skin.
Patch testing on a small area before a full session helps identify sensitivity. Observe for redness or discomfort before proceeding. That small precaution avoids widespread irritation and makes your routine safer and more predictable.
Comfort signals guide adjustments. Pain, sharp pulling, or pinching means the setting is too high or movement is too slow. Let the device do the work while your hand guides lightly for controlled results. Gentle handling enhances both comfort and effectiveness.
Glide Technique For Safe Suction
Move the nozzle steadily without pausing on one spot. A constant glide prevents concentrated pressure that can leave marks. Short, controlled strokes lift debris while preserving skin integrity. Think of it as sweeping away dirt, not stamping a hole.
Curved areas like the nose need angled, gentle passes. Slightly stretching the skin ensures smoother motion and better suction. Avoid dragging aggressively; soft, steady motion keeps pores cleaner without irritation.
The chin and jawline have uneven textures that require careful glides. Short passes over creases prevent tugging. Reset the nozzle if it skips to maintain a smooth, comfortable routine.
Cheeks should be treated lightly due to thinner skin. Avoid strong suction over redness-prone zones. Less pressure keeps the skin calmer while still lifting surface buildup. Attention to movement equals better outcomes.
Post-Treatment Soothing And Moisturization
After using the vacuum, cool compresses can reduce lingering redness. Gentle hydration calms the skin and supports barrier recovery. Avoid strong toners or scrubs immediately afterward; post-suction care helps maintain comfort and clarity.
Moisturizers with soothing ingredients like aloe, glycerin, or panthenol enhance recovery. Hydration keeps the skin smooth and resilient. Skipping this step increases irritation risk and diminishes the benefit of careful suction.
Separate skincare tools from household products to prevent cross-contamination. Proper cleaning of tips and storage in a dry, clean space supports hygiene. This habit reinforces the device’s effectiveness while lowering infection risk.
Routine spacing is key. Giving the skin time to recover between sessions preserves long-term pore appearance and prevents overuse irritation. Consistency with gentle care usually outweighs aggressive treatments.
Integrate With Skincare Routine
Support vacuum use with cleansers and moisturizers. Pores refill naturally, so the vacuum is a maintenance tool rather than a one-off fix. Regular cleansing, hydration, and sunscreen remain essential for healthy-looking skin. Combining these steps improves overall skin clarity.
Exfoliation helps but should be scheduled separately from vacuum sessions. Acids like salicylic or glycolic should not be used immediately before suction. Spacing treatments prevents compounded irritation and allows skin to tolerate suction better.
Separate guidance can help coordinate with other tools. For example, you might use a bissell steam cleaner guide to handle non-skin cleaning at home without overloading hands or wrist strain. Keeping tasks distinct prevents accidental misuses of skincare devices.
Regular, moderate suction paired with careful preparation and follow-up products delivers the most visible improvement in pore appearance. Overuse or aggressive approaches often undo progress and increase redness. Thoughtful integration with the existing routine maximizes benefit.
Identify Red Flags And Skip Sessions
Skip suction on irritated, sunburned, or inflamed skin. Broken capillaries and easily bruised areas react poorly to vacuum use. Monitoring for signs like persistent redness or tenderness informs when to pause. Skipping sessions is a strategic choice for skin safety.
Active acne, eczema, or healing areas are off-limits. Suction may worsen inflammation or spread bacteria. Prioritize calm, healthy zones for best outcomes and avoid problematic areas entirely. Safety trumps visible debris.
Recent facial treatments like peels, waxing, or laser resurfacing require extra caution. The skin may be more fragile and sensitive. Waiting allows recovery and ensures suction doesn’t disrupt healing. Timing maintains effective results while minimizing irritation.
Safe storage away from chemicals supports device hygiene. For instance, knowing how to best robotic vacuum for hardwood and rugs helps separate household cleaning from skincare tools, keeping everything sanitary and efficient. Proper care preserves both device and skin integrity.
Track Progress And Adjust Routine
Observe skin response after each session. Adjust suction, duration, or nozzle choice based on redness, comfort, and results. A journal or photo comparison can reveal subtle improvements over time. Monitoring ensures smart progression rather than guessing.
Frequency may vary. Some areas tolerate weekly use; others prefer less often. Adjust sessions according to skin’s resilience. Flexibility prevents overuse while maintaining cleaner pores.
Cleaning and maintenance of the vacuum support consistent results. Wash tips, let them dry, and check for debris or clogging. Clean tools provide predictable suction and reduce irritation. Device hygiene is as crucial as technique for long-term effectiveness.
Practical expectations help maintain satisfaction. The vacuum reduces the appearance of congestion but doesn’t permanently shrink pores or stop oil production. Using the device responsibly with gentle pressure, proper technique, and follow-up care yields the best outcome over time.
Maximize Comfort And Safety Tips
Keep hands steady and relaxed during use. A tense grip increases uneven pressure, which can hurt skin. Smooth gliding and mindful motion prevent discomfort and support consistent extraction.
Stay hydrated and maintain a basic skincare routine. Skin that’s too dry or stressed reacts more strongly to suction. Moisturizers and gentle cleansers preserve elasticity and calm. Comfort ensures longer-term adherence to the routine.
Rotate devices if multiple areas need attention. Using a single tip repeatedly can cause wear or mark skin. Alternating attachments reduces pressure on sensitive zones and extends device lifespan. Proper use balances effectiveness and safety.
Prioritize cooling and soothing aftercare. Ice rollers, chilled gel masks, or calming creams can mitigate post-suction irritation. Keeping skin calm supports healthy appearance and allows the device to remain part of a regular, safe routine.


How to Refinish a Fiberglass Pool

How Do You Keep Raccoons Out of Your Pool?

How to Fix Cyanuric Acid in Your Pool

How to Shape a Pool Cue Tip to Stop Miscues

Best Far Infrared Sauna Sauna Heats: Top Picks of 2026

11 Best Far Infrared Sauna Carbon Fiber Heaters of 2026 For Balanced Full-Body Heat

11 Best Carbon Far Infrared Sauna of 2026 For Even Heat

10 Best Bluetooth Speaker For Sauna of 2026 For Heat and Steam


