
How To Use Hose Attachment Vacuum Without Fuss

How to use hose attachment vacuum starts with knowing what the hose is actually good at. A vacuum hose isn’t just a backup tool for weird corners, nope, it’s the part that handles tight spaces, upholstery seams, baseboards, vents, stairs, car mats, and the dusty little spots a main floor head keeps missing. Used the right way, it saves you from dragging the whole machine back and forth like you’re wrestling a stubborn garden hose. Used carelessly, though, it can lose suction, clog fast, or scratch surfaces that needed a lighter touch.
Start by turning the vacuum off, then attach the hose firmly until it feels seated and secure. A loose connection is a sneaky troublemaker because even a small air leak can weaken suction power. Pick the attachment based on the mess, not just the nearest tool sitting in the storage clip. A crevice tool works better along couch cracks and baseboards, while a brush attachment is kinder to blinds, shelves, lampshades, and textured surfaces that hold dust like nobody’s business.
Before cleaning, clear larger debris by hand so the hose doesn’t gulp down coins, hairpins, plant chips, or chunky crumbs that can jam inside the tube. Then keep the hose as straight as possible while you work because tight bends reduce airflow and make the motor work harder. Move slowly over dusty areas instead of stabbing at the mess in quick pokes. That steady pass gives the vacuum enough time to pull dirt through the hose instead of scattering it around.
For fabric surfaces, use short strokes and avoid pressing the nozzle too hard. Too much pressure can seal the opening against the fabric and choke the airflow, which makes the vacuum sound busy without picking up much. On stairs, keep the vacuum body stable below or beside you so it doesn’t tip over mid-clean. For vents and blinds, use a soft brush attachment and let the bristles loosen dust before the hose pulls it away.
After cleaning, check the hose for trapped lint, pet hair, or bits of debris, especially if the suction suddenly drops. Detach the hose and look through it toward a light source if you suspect a clog. Empty the dust bin or replace the bag before it gets packed full because a full container can make even a good hose feel weak. A quick wipe of the attachment tips also helps prevent old grime from smearing onto the next surface.
The biggest trick is matching hose attachment vacuum technique to the job in front of you. Dry crumbs need a different pace than pet hair, and delicate shelves need a different tool than car floor mats. So, keep the hose relaxed, choose the right nozzle, and clean in patient passes. Little by little, those awkward spots stop feeling like chores you keep dodging.

- VC Score9.6
BCP Score is a ranking system developed by bestcleanerproducts.com. BCP Score has no relationship or impact from any manufacturers or sales agent websites. Learn more
- BrandYKEBVPW
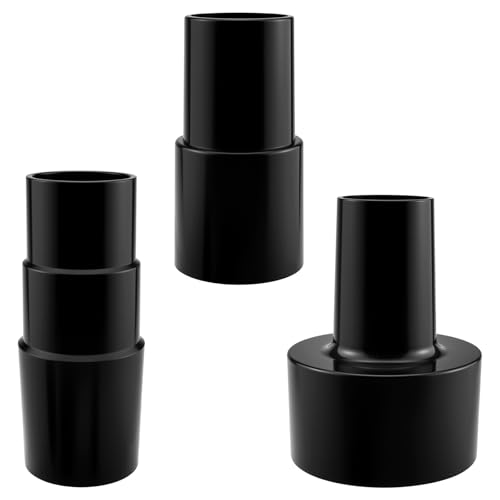
- VC Score9.6
BCP Score is a ranking system developed by bestcleanerproducts.com. BCP Score has no relationship or impact from any manufacturers or sales agent websites. Learn more
- BrandZDRU

- VC Score9.4
BCP Score is a ranking system developed by bestcleanerproducts.com. BCP Score has no relationship or impact from any manufacturers or sales agent websites. Learn more
- BrandCYG&CL

- VC Score8.4
BCP Score is a ranking system developed by bestcleanerproducts.com. BCP Score has no relationship or impact from any manufacturers or sales agent websites. Learn more
- Brandkioguc

- VC Score8.4
BCP Score is a ranking system developed by bestcleanerproducts.com. BCP Score has no relationship or impact from any manufacturers or sales agent websites. Learn more
- Brandpalart

- VC Score8.4
BCP Score is a ranking system developed by bestcleanerproducts.com. BCP Score has no relationship or impact from any manufacturers or sales agent websites. Learn more
- BrandYurMemo
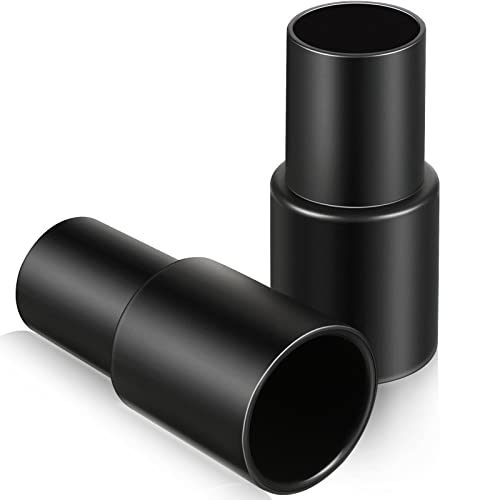
- VC Score8.2
BCP Score is a ranking system developed by bestcleanerproducts.com. BCP Score has no relationship or impact from any manufacturers or sales agent websites. Learn more
- BrandHonoson

- VC Score8.0
BCP Score is a ranking system developed by bestcleanerproducts.com. BCP Score has no relationship or impact from any manufacturers or sales agent websites. Learn more
- BrandEZ SPARES
- VC Score7.8
BCP Score is a ranking system developed by bestcleanerproducts.com. BCP Score has no relationship or impact from any manufacturers or sales agent websites. Learn more
- BrandECOMAID

- VC Score7.6
BCP Score is a ranking system developed by bestcleanerproducts.com. BCP Score has no relationship or impact from any manufacturers or sales agent websites. Learn more
- BrandYurMemo

- VC Score7.0
BCP Score is a ranking system developed by bestcleanerproducts.com. BCP Score has no relationship or impact from any manufacturers or sales agent websites. Learn more
- BrandOntel

- VC Score6.4
BCP Score is a ranking system developed by bestcleanerproducts.com. BCP Score has no relationship or impact from any manufacturers or sales agent websites. Learn more
- BrandSHLYBRZLJ
Last update on 2026-07-11 / Affiliate links / Images, Product Titles, and Product Highlights from Amazon Product Advertising API
How To Use Hose Attachment Vacuum The Smart Way
Crumbs hiding in couch seams, dust packed along baseboards, and soil bits scattered near indoor pots can make a room feel messy even after the main floor is clean. A regular vacuum head handles open space, but it often skips the spots where dirt actually settles and stays. That is where how to use hose attachment vacuum becomes a practical cleaning skill instead of a random add-on clipped to the machine. With the right attachment, steady airflow, and a little patience, tight spaces stop being the places you quietly ignore.
Hose Attachment Vacuum
A hose attachment works best when the vacuum has a clear path for air to move. A kinked hose, packed dust bin, or loose connection can weaken suction power before the nozzle even touches the mess. Start by checking the hose fit, then listen for that steady pull instead of a thin whistling sound. That small check saves a lot of frustration, especially around stairs, shelves, and fabric seams.
The tool you attach to the hose matters more than most people think. A crevice tool belongs in narrow gaps, while a soft brush is better for blinds, lampshades, vents, and delicate surfaces. A wide upholstery tool handles cushions and pet hair with less fuss, though it can struggle in tight corners. Pick the attachment by the surface, not by habit.
Move slower than you would with the main vacuum head. Fast passes make the hose skim over dust instead of pulling it through. For crumb trails, dry soil, and hair, a steady pace gives airflow time to do the work. Pressing harder usually backfires because the nozzle can seal against fabric and choke suction.
Indoor plant corners need a softer touch because loose potting mix, dried leaves, and perlite can clog a hose if they rush in all at once. Pick up large chunks first, then vacuum the fine debris left behind. For laminate nearby, steady cleaning habits pair well with a floor tool that protects the surface, and to reduce scuffs during bigger cleanups, use a setup like upright vacuum laminate flooring for open areas before switching to the hose. That keeps the hose focused on edges, corners, and plant-stand gaps.
Start With The Right Attachment
The crevice tool is the narrow, angled piece that looks simple but earns its keep fast. It reaches between couch cushions, along cabinet toe-kicks, around baseboards, and beside appliance edges. Use it for focused suction where crumbs and dust collect in a line. Don’t jam it into gaps, though, because forcing the tip can scratch trim or wedge debris deeper.
The brush attachment is better for surfaces that need loosening before suction can grab the dust. Bristles lift fine particles from blinds, wicker baskets, bookshelves, vent covers, and plant shelves without scraping them up. For dusty grow-light stands or window ledges near herbs, the brush keeps delicate surfaces from getting roughed up. Keep the strokes light and let the bristles do the nudging.
The upholstery tool handles fabric with a wider mouth. It can pull lint, hair, crumbs, and dry plant bits from cushions, stairs, car seats, and padded benches. Short, overlapping strokes work better than long swipes because fabric tends to hold onto debris. A slow pass also helps keep pet hair from rolling into clumps and staying behind.
Avoid using the wrong attachment just because it is already connected. A brush tool in a deep crack won’t reach the dirt, and a hard crevice tool on a soft lampshade can leave marks. Smart attachment choice makes the job feel less like scrubbing and more like guiding airflow. That is the quiet trick behind cleaner corners and fewer do-overs.
Keep Suction Strong Before You Clean
Suction drops for boring reasons, and yep, those boring reasons matter. A full dust bin, clogged filter, or twisted hose can make a decent vacuum feel tired. Empty the bin before detail work because hose cleaning depends heavily on steady airflow. A half-blocked vacuum may still sound loud, but loud doesn’t always mean effective.
Check the hose for trapped lint or hair if suction feels weak at the nozzle. Detach it, hold one end toward light, and look for anything blocking the tube. A broom handle can help loosen a clog if the hose design allows it, but push gently and avoid sharp tools. The goal is to clear the path without tearing the hose lining.
Filters deserve attention too. A dirty filter restricts airflow and can blow dusty smells back into the room. Wash or replace it based on the vacuum’s instructions, then let washable filters dry fully before reinstalling. Damp filters can cause musty odors and make fine dust stick where it shouldn’t.
For messy bathroom or utility areas, dry vacuuming should stay separate from wet cleaning products. Powdery residue, cleaner dust, and hair can behave differently inside a hose, so sweep or wipe sticky spots first. To handle toilet cleaner residue safely in its own lane, use a separate cleaning routine like use pink stuff toilet cleaner before bringing the vacuum near nearby dry debris. Mixing damp paste with hose suction is asking for a clog.
Use Slow Passes In Tight Spaces
Tight spaces reward patience. Push the crevice tool into a gap, pause for a beat, then draw it back slowly so suction can pull debris toward the opening. That simple rhythm works well along baseboards, couch seams, drawer tracks, sliding-door channels, and the edges of plant shelves. Rushing through these spots leaves fine dust tucked behind the first visible layer.
Angles matter more than pressure. Tilt the nozzle slightly so the opening faces the dirt instead of sealing flat against the surface. On fabric, sealing the nozzle can stop airflow and make the vacuum drag without lifting much. A little space around the nozzle keeps air movement alive.
Use overlapping strokes on stairs and upholstery. Start at the top edge of a stair tread, pull debris toward the center, then work the corners with the crevice tool. For cushions, lift seams with one hand and vacuum with the other so hidden crumbs have somewhere to go. That two-hand method feels fussy at first, but it catches the stuff that quick cleaning misses.
Plant stands and window corners need the same slow approach. Dry soil hides in little ledges, especially around saucers and textured trays. Pick up stones, bark chips, or broken terracotta pieces before vacuuming because hard chunks can rattle through the hose and lodge in bends. A careful pass protects hose durability and keeps the cleanup from turning into a repair job.
Match The Hose To Home Surfaces
Hard floors near walls often collect dust lines that the main vacuum head can’t reach. Use the crevice tool along trim, then switch back to a floor head for the open space. This keeps detail work precise without making the whole room take forever. The combo gives you edge cleaning without overworking the hose.
Laminate, sealed wood, and tile all need different pressure habits. Laminate can show scratches from gritty debris, so vacuum the grit before dragging furniture or plant pots across it. Tile grout can hold fine dust, which may need a brush attachment before suction clears it. Sealed wood prefers a soft touch and clean attachment tips to avoid surface marks.
Budget vacuums can still do solid hose work if the airflow path is clean and the attachments fit tightly. The weak point is often not the motor, but the connection between hose, wand, and nozzle. For a practical setup that balances cost and everyday reach, compare the basics with upright vacuum cleaner under 200 before expecting premium-level detail tools from a bare-bones machine. A lower price can be fine, but flimsy attachments may need gentler handling.
Rugs and upholstery need slower strokes because fibers trap dirt below the surface. A hose won’t replace deep washing, but it can remove loose crumbs, hair, dry soil, and lint before they grind in. Use short passes, empty the bin early, and clean the attachment afterward. That habit keeps fabric cleaning from spreading old dust to the next chair or stair.
How To Use Hose Attachment Vacuum For Tricky Messes
Small messes rarely stay in one neat place. Dry soil slips behind plant stands, pet hair wedges into chair seams, and crumbs settle where the main vacuum head can’t reach without bumping every table leg in sight. How to use hose attachment vacuum becomes a lot easier once you stop treating the hose like a last resort and start using it for detail cleaning. A steady hand, the right nozzle, and a little common sense can save you from chasing dust around the same corner twice.
Clean Around Pets Without Making A Bigger Mess
Pet hair has a sneaky way of wrapping around fabric, baseboards, and the edges of low furniture. A hose attachment can pull loose fur from those spots, but only if the nozzle keeps strong airflow instead of grinding hair deeper into the surface. Use a short back-and-forth motion on fabric, then lift the nozzle and reset the angle. That small pause keeps the tool from smearing hair into a stubborn little rope.
Keep pet areas dry before vacuuming with the hose. Damp hair clings to fabric and can bunch inside the tube, especially if the hose has bends or ridges. For dog beds, stair edges, and couch seams, start with the upholstery tool and finish with the crevice tool. That order handles broad hair first, then clears the tight seams that usually hold the last bit of mess.
Some pet messes need a different cleaner before the vacuum comes anywhere near the area. Ear-care supplies, grooming tools, and pet wipes belong in their own routine, especially for dogs with folded skin or sensitive ears. For pet care outside the vacuuming lane, keep grooming supplies separate and consider a page like ear cleaner bulldogs when the issue is hygiene rather than floor debris. A vacuum hose is for dry pickup, not for handling sticky residue or wet grooming mess.
Noise can also matter around nervous pets. Start the vacuum in another room for a moment, then bring the hose closer once the sound feels less sudden. A lower-power mode can help if your vacuum has one, though suction may drop. The tradeoff is simple: calmer cleaning may take longer, but it can prevent pets from scattering hair and dust right after you start.
Handle Kitchen Crumbs And Dry Food Debris
Kitchen corners collect dry crumbs faster than anyone wants to admit. The hose can clean along cabinet bases, around bar stools, behind small trash cans, and near appliance gaps where a floor head feels clumsy. Use the crevice tool first, then run the main vacuum head across the open floor. That sequence keeps edge debris from getting kicked back into clean areas.
Dry food needs a little sorting before suction takes over. Pick up large chips, shell pieces, twist ties, and anything sharp enough to scrape the hose. Tiny crumbs can go through easily, but chunky debris can lodge in a bend and cause weak suction later. A quick hand check protects hose performance and saves you from fishing out mystery junk after cleaning.
Vacuum-sealed food storage has nothing to do with hose vacuuming, but kitchen cleanup often overlaps with pantry habits. Dry crab shells, seafood packaging, and freezer drips should be handled before they become odor problems near floors or counters. For food storage cleanup outside regular vacuum work, a resource like vacuum sealer crab fits better than trying to use a household hose on anything damp or messy. Keep the vacuum for dry debris, and keep food prep tools in their own lane.
Sticky spills are a hard stop. Sugar, sauce, oil, wet coffee grounds, and damp rice can coat the inside of the hose and turn lint into a clog. Wipe those messes first, let the area dry, then vacuum the leftover crumbs. That habit keeps clog prevention simple and keeps old kitchen smells from riding around inside the machine.
Protect Delicate Surfaces While Cleaning
A hose attachment can be gentle, but only if the tip matches the surface. Use a brush attachment for lampshades, blinds, bookshelves, plant leaves that have dropped onto shelves, and textured baskets. Hard plastic nozzles can scuff softer finishes if you press too aggressively. Let soft bristles loosen dust while suction pulls it away.
Houseplant areas need extra care because potting mix isn’t all the same size. Perlite, bark bits, dry moss, and gravel can bounce into the hose with more force than dust. Pick up large pieces first and vacuum the finer soil in slow passes. This keeps the hose from sounding like it swallowed a handful of pebbles.
Window ledges near plants often collect a mix of dust, soil, pollen, and dried leaves. Use the brush tool first along the corners, then switch to the crevice tool for the track. Don’t shove the nozzle into narrow plastic channels because older tracks can crack. Gentle cleaning gives you cleaner ledges without turning a small chore into a repair job.
Electronics and vents deserve the same lighter touch. Keep the nozzle slightly away from delicate openings and use the brush to lift dust instead of dragging a hard edge across the surface. Avoid vacuuming loose cords, plant labels, curtain strings, or small clips. A careful pace protects small household items from disappearing into the hose.
Fix Weak Suction Without Guessing
Weak suction usually has a cause you can check in a few minutes. Start with the dust bin or bag because a packed container limits airflow before the hose gets a chance to work. Then check the filter, hose connection, and attachment opening. Most hose problems come from blocked airflow, not from the vacuum suddenly giving up.
A whistle near the handle often points to a loose seal. Remove the hose and reconnect it firmly, then check whether the attachment sits straight. Cracks in the hose can also leak air, especially near the ends where it bends most. A small leak can make suction loss feel worse than it looks.
Clogs often hide at elbows and narrow attachment tips. Detach the tool, look inside, and tap out packed lint or hair. For the hose itself, hold it upright and gently shake it to see whether debris moves. Avoid knives, wire hangers, or anything sharp because one torn hose wall can create a bigger problem.
Filter care makes a real difference during detail cleaning. Fine dust from shelves, vents, and dry soil can load a filter quickly, especially after cleaning neglected corners. Wash washable filters only if your vacuum manual allows it, then let them dry fully. A damp filter can cause musty smells and make dust stick inside the machine.
Build A Simple Hose Cleaning Routine
A good hose routine starts before the room looks out of hand. Hit baseboards, couch seams, stair edges, and plant corners once dust begins to show instead of waiting until debris packs down. Small, regular passes are easier than one dramatic cleanup. That rhythm keeps everyday maintenance from eating up your weekend.
Work from high to low. Dust shelves, blinds, window ledges, and plant stands first, then vacuum lower trim and floor edges. Gravity will drop some debris, so cleaning the floor first only makes extra work. This order feels obvious after you do it once, but it’s one of those practical cleaning habits people skip when rushing.
Store attachments where you’ll actually use them. A crevice tool buried in a closet won’t help much during a quick spill cleanup. Keep the main hose tools clipped to the vacuum or in a small bin nearby. Easy access makes spot cleaning more likely, especially after plant watering, snack time, or pet brushing.
Stop before the hose becomes the wrong tool. Wet messes, sticky spills, sharp objects, fireplace ash, and heavy debris need separate cleanup methods. A hose attachment is great for dry detail work, but it has limits. Respecting those limits keeps vacuum care simple and makes the machine last longer without constant unclogging.


How to Refinish a Fiberglass Pool

How Do You Keep Raccoons Out of Your Pool?

How to Fix Cyanuric Acid in Your Pool

How to Shape a Pool Cue Tip to Stop Miscues

Best Far Infrared Sauna Sauna Heats: Top Picks of 2026

11 Best Far Infrared Sauna Carbon Fiber Heaters of 2026 For Balanced Full-Body Heat

11 Best Carbon Far Infrared Sauna of 2026 For Even Heat

10 Best Bluetooth Speaker For Sauna of 2026 For Heat and Steam








