
How to Use Canister Vacuum Without the Hassle

How to use canister vacuum sounds simple at first glance, yet many people end up dragging the machine awkwardly, using the wrong attachment, or missing dirt hidden in corners. A canister vacuum works differently from an upright model, and a few small adjustments can make cleaning feel far less tiring. Proper setup creates better airflow, smoother movement, and more consistent results across different surfaces. A little know-how goes a long way toward getting the most from the machine you already own.
Floor type often changes the way a vacuum should be used. Hardwood, tile, area rugs, and thick carpets all respond differently to brush settings and suction levels. Using the correct attachment helps protect surfaces while improving debris pickup. Many cleaning frustrations come from using one tool for every task rather than matching the attachment to the job.
Proper suction control plays a bigger role than many expect. Cranking the vacuum to maximum power isn't always the smartest move. Delicate rugs, curtains, and upholstery can become difficult to clean if suction is too aggressive. Adjusting airflow creates better maneuverability and helps prevent unnecessary wear on fabrics and surfaces.
Storage and maintenance deserve attention too. Dust containers, filters, and hoses gradually affect performance if neglected. A vacuum that seemed weak yesterday may simply need a filter cleaning or a blockage removed from the hose. Small maintenance habits often restore performance faster than replacing parts.
Another overlooked detail involves movement technique. Pulling the canister at sharp angles can cause tipping and snagging around furniture. Smooth sweeping motions and strategic positioning reduce effort and help maintain steady suction. Before long, cleaning feels less like a chore and more like a quick routine.
How to use canister vacuum effectively also means knowing where each accessory shines. Crevice tools tackle tight spaces, dusting brushes handle shelves and blinds, while upholstery attachments work on furniture and mattresses. Switching tools may seem inconvenient initially, yet it often cuts cleaning time because each attachment is designed for a specific purpose.
Then there's the matter of expectations. A canister vacuum excels at versatility, but it still requires proper technique. Learning a few practical habits can improve cleaning efficiency, reduce strain on your arms and back, and help maintain consistent suction throughout the home. Those little improvements add up surprisingly fast.

- VC Score8.8
BCP Score is a ranking system developed by bestcleanerproducts.com. BCP Score has no relationship or impact from any manufacturers or sales agent websites. Learn more
- BrandMiele

- VC Score8.8
BCP Score is a ranking system developed by bestcleanerproducts.com. BCP Score has no relationship or impact from any manufacturers or sales agent websites. Learn more
- BrandMiele

- VC Score8.6
BCP Score is a ranking system developed by bestcleanerproducts.com. BCP Score has no relationship or impact from any manufacturers or sales agent websites. Learn more
- BrandEureka

- VC Score8.6
BCP Score is a ranking system developed by bestcleanerproducts.com. BCP Score has no relationship or impact from any manufacturers or sales agent websites. Learn more
- BrandEureka

- VC Score8.6
BCP Score is a ranking system developed by bestcleanerproducts.com. BCP Score has no relationship or impact from any manufacturers or sales agent websites. Learn more
- BrandEureka
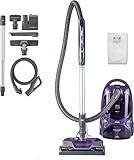
- VC Score8.2
BCP Score is a ranking system developed by bestcleanerproducts.com. BCP Score has no relationship or impact from any manufacturers or sales agent websites. Learn more
- BrandKenmore

- VC Score8.2
BCP Score is a ranking system developed by bestcleanerproducts.com. BCP Score has no relationship or impact from any manufacturers or sales agent websites. Learn more
- BrandKenmore

- VC Score8.2
BCP Score is a ranking system developed by bestcleanerproducts.com. BCP Score has no relationship or impact from any manufacturers or sales agent websites. Learn more
- BrandEureka

- VC Score8.2
BCP Score is a ranking system developed by bestcleanerproducts.com. BCP Score has no relationship or impact from any manufacturers or sales agent websites. Learn more
- BrandKenmore
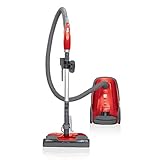
- VC Score8.2
BCP Score is a ranking system developed by bestcleanerproducts.com. BCP Score has no relationship or impact from any manufacturers or sales agent websites. Learn more
- BrandKenmore
Last update on 2026-06-27 / Affiliate links / Images, Product Titles, and Product Highlights from Amazon Product Advertising API
How To Use Canister Vacuum The Smart Way
Dust hides under couches, crumbs slide beside baseboards, and pet hair somehow finds the one corner nobody wants to reach. A canister vacuum can handle those annoying spots without turning cleaning into a wrestling match, but only if the hose, wand, floorhead, and suction settings work together. That is where how to use canister vacuum becomes more than a basic chore tip. Used the right way, it helps you clean faster, protect floors, and stop wasting energy on repeated passes that still leave grit behind.
Canister Vacuum Basics
A canister vacuum separates the motor body from the cleaning wand, which changes the whole rhythm of cleaning. Instead of pushing one heavy unit back and forth, you guide the wand while the canister follows behind. This design gives you better reach under furniture, along stairs, and around tight corners. It also reduces the arm strain that often comes with bulky upright vacuums.
The first smart move is checking the setup before you start. Make sure the hose clicks firmly into the canister, the wand locks into place, and the right floor tool is attached. Loose connections cause weak suction, strange whistling sounds, and debris that refuses to lift. A quick check saves you from blaming the vacuum when the real problem is a poorly seated hose.
Canister vacuums usually come with several attachments, and yep, they actually matter. The floorhead handles wide areas, the crevice tool reaches narrow gaps, and the dusting brush works on shelves, blinds, and vents. Using one attachment for every surface is like using a garden shovel to trim herbs. It might technically work, but it makes the job clumsy and slow.
Start with open floor space before moving into detail work. Clear small objects, lift cords, and move lightweight chairs so the hose does not snag every few seconds. This simple prep step keeps the cleaning path smooth and protects both the vacuum hose and your furniture legs. A cleaner route means fewer interruptions and better focus.
Set Up The Vacuum Before Cleaning
Plug the vacuum into an outlet near the center of the cleaning area, not the farthest corner. That gives you more room to move without yanking the cord or dragging the canister awkwardly. A centered starting point also helps prevent the machine from bumping into walls. Small habit, big difference.
Choose the attachment based on the surface in front of you. A hard floor tool usually has soft bristles that protect wood, tile, or laminate from scratches. A carpet head may include a brush roll or air-driven tool that agitates fibers and lifts trapped dirt. Matching the tool to the surface creates better debris pickup with less effort.
Adjust the wand length before cleaning, especially if you tend to hunch over. The handle should feel comfortable while your back stays mostly upright. Too short, and your shoulders tense up fast. Too long, and the floorhead becomes harder to control around corners.
Check suction control if your model has it. Full suction works well on hard floors and low-pile carpet, but curtains, delicate rugs, and upholstery may need less pull. Strong suction on a lightweight rug can make the tool stick like glue. Lowering the suction gives you more control and prevents fabric from bunching.
Use The Right Tool For Each Surface
Hard floors need a gentle approach. Use a bare-floor brush or hard-floor head with soft bristles, then move in slow, overlapping strokes. Fine dust often sits in grout lines, plank seams, and edges, so rushing can leave a dull film behind. Steady passes help the vacuum collect both visible debris and the sneaky stuff.
Carpet requires a different rhythm. A motorized or turbo brush lifts dirt from the fibers instead of only skimming the surface. Move the head forward slowly, then pull it back even slower to give suction time to grab dust. This technique improves deep cleaning without grinding the brush into the carpet.
Area rugs can be tricky because they shift, curl, or get swallowed by strong suction. Hold the rug edge with your foot or reduce suction before vacuuming. Clean with the grain of the rug first, then make a second pass across traffic lanes if needed. Gentle control protects the backing and keeps fringe from getting tangled.
Tile floors often collect grit near cabinet bases and doorways. A canister vacuum handles this well because the wand can angle into narrow spaces without forcing the whole machine into place. For homes with mixed flooring, To keep daily sweeping from piling up between deeper cleaning sessions, consider robot vacuum ceramic tile as a separate helper for hard-surface maintenance. A canister still shines for edges, stairs, upholstery, and detail cleaning.
Move The Canister Without Fighting It
The canister should trail behind you, not lead the whole cleaning session. Work from the far side of the room back toward the outlet so the cord stays behind your path. This reduces tangles and keeps the hose from crossing over freshly cleaned areas. It also makes the room feel less chaotic while you clean.
Pull the canister gently by the hose only when the design allows it, and avoid sharp jerks. Some models roll smoothly, while others tip if pulled at the wrong angle. Guide the machine around corners instead of whipping it past chair legs. Careful movement protects the hose connection and keeps the vacuum from smacking into baseboards.
Short, planned sections work better than random zigzags. Clean one side of the room, shift the canister, then clean the next area. This method helps you track what has been cleaned and what still needs attention. It also keeps the cord and hose from becoming a knot under the coffee table.
Stairs need extra caution. Place the canister on a stable step below you or keep it at the base while using the hose and wand. Never balance the canister near the edge and hope for the best. A compact attachment, controlled suction, and slow movement make stair cleaning safer and more effective.
Clean Corners, Edges, And Tight Spots
Corners collect more than dust. Crumbs, pet hair, soil from shoes, and tiny debris often settle where the floor meets the wall. The crevice tool is built for this exact job. Run it along baseboards, behind doors, beside appliances, and anywhere the main floorhead feels too wide.
Baseboards need a slower pass because dust clings to edges. Angle the crevice tool slightly instead of pressing it flat against the wall. That little gap helps airflow pull debris into the nozzle. A steady hand gives you cleaner edges without scraping paint or trim.
Furniture gaps are another place where canister vacuums earn their keep. The hose and wand can reach under sofas, beds, media consoles, and dining benches with less strain than many upright vacuums. Use a low-profile floorhead if there is enough clearance. Switch to the crevice tool if the gap is too narrow.
Small craft messes can call for a lighter touch before vacuuming, especially if tiny bits scatter across a table or shelf. For delicate cleanup around handmade décor, To shape flexible details before the floor gets messy, make pipe cleaner rose ideas can stay separate from vacuum work while the crevice tool handles leftover fuzz and scraps afterward. Keep suction low near tiny objects you do not want pulled into the hose.
Handle Upholstery, Curtains, And Soft Surfaces
Upholstery needs patience, not brute force. Use the upholstery tool and reduce suction if the fabric pulls too hard. Work in overlapping strokes across cushions, arms, and seams. Dirt often hides where people sit most, so focus on those pressure points first.
Pet hair can cling stubbornly to fabric. A turbo upholstery tool or brush attachment helps lift hair from woven surfaces without needing endless passes. Move slowly over problem areas, then check the tool for wrapped hair. Clearing the brush keeps airflow steady and prevents performance from dropping halfway through the job.
Curtains and drapes should be cleaned with gentle suction. Start near the top and work downward so loosened dust does not settle onto already cleaned fabric. Hold the fabric lightly with one hand while guiding the brush with the other. This keeps the material stable and prevents the vacuum from grabbing too aggressively.
Mattresses benefit from the same careful approach. Use the upholstery tool and vacuum the surface in straight passes, especially around seams and tufted areas. A canister vacuum will not replace proper mattress care, but it helps remove dust, hair, and surface debris. Regular attention supports a cleaner sleeping area without making the chore feel like a production.
Control Suction Instead Of Forcing It
Strong suction feels satisfying, but it is not always the right answer. Lightweight rugs, curtains, and loose fabrics can become frustrating if the vacuum grabs too hard. Lower suction gives the tool room to glide instead of sticking in place. Better control often beats raw power.
Hard floors usually tolerate higher suction because the surface does not collapse around the nozzle. Carpet and rugs need more judgment. If the floorhead becomes hard to push, the suction may be too strong or the height setting may be too low. Adjusting both creates smoother movement and better cleaning contact.
Airflow matters as much as suction strength. A clogged hose, dirty filter, or full bag can make the vacuum sound busy while doing very little. Before pushing harder, check the simple stuff. Most weak-cleaning complaints come from restricted airflow rather than a dead motor.
Electronics and keyboards need a different cleaning mindset because strong suction can pull loose keys, small covers, or delicate parts. Use low suction and a small attachment, or keep a separate tool nearby for sensitive spaces. For desks, keyboards, and tight device vents, To avoid dragging a full-size hose across fragile gear, a mini vacuum electronics tool can handle small debris while the canister focuses on floors and furniture. Separating those jobs reduces risk and makes cleanup feel less fussy.
How To Use A Canister Vacuum For Better Cleaning Results
Cleaning performance often drops long before the vacuum actually wears out. Filters clog gradually, hoses collect hidden debris, and dust containers become packed tighter than most people realize. A lot of frustration blamed on a vacuum's age is really a maintenance issue. Paying attention to a few performance factors can keep how to use canister vacuum from turning into a battle against weak suction and endless repeat passes.
Keep Airflow Strong With Simple Maintenance
Filters deserve more attention than they usually get. A dirty filter restricts airflow, forcing the motor to work harder while reducing cleaning effectiveness. Check the filter regularly and follow the manufacturer's cleaning instructions. Consistent filter care helps maintain strong suction and extends the life of important components.
Dust bags and collection bins also affect performance. Waiting until they are completely full can reduce airflow and make debris pickup less efficient. Emptying them before they reach maximum capacity keeps the vacuum operating more smoothly. That small habit protects cleaning efficiency and reduces strain on the motor.
Hoses can hide unexpected blockages. Small toys, paper scraps, pet fur clumps, and even socks occasionally find their way inside. If suction suddenly drops, disconnect the hose and inspect it before assuming something expensive has failed. Many suction problems have a surprisingly simple fix.
Brushes and floorheads collect hair over time. Wrapped hair slows moving parts and prevents brushes from contacting surfaces properly. Removing tangled debris every few weeks helps preserve consistent performance and keeps cleaning sessions from taking longer than necessary.
Avoid Common Mistakes That Waste Time
Rushing across the floor often leaves dirt behind. A vacuum needs time to pull debris into the airflow path, especially on carpet. Slowing down slightly can improve pickup without requiring extra passes later. Patience usually beats speed during deep cleaning tasks.
Many people vacuum only the center of a room and ignore edges. Dust naturally migrates toward walls, furniture legs, and corners. Spending a few extra minutes around those areas produces noticeably cleaner results. The difference becomes especially obvious on hard flooring.
Using maximum suction for every surface creates its own problems. Rugs can bunch up, curtains can get pulled into the nozzle, and delicate fabrics may experience unnecessary stress. Adjusting suction levels creates better control and makes the vacuum easier to handle. More power is not always better power.
Dragging the canister aggressively around obstacles increases wear on wheels, hoses, and furniture. Smooth movements reduce accidental impacts and make the entire cleaning process feel less frustrating. Good technique protects both the machine and the surfaces around it.
Get Better Results On Pet Hair And Fine Dust
Pet hair behaves differently from ordinary dirt. It wraps around fibers, clings to upholstery, and settles into carpet backing. A turbo brush or dedicated pet attachment helps loosen embedded hair before suction removes it. That combination improves hair removal without requiring excessive effort.
Fine dust presents another challenge. Tiny particles often settle in cracks, floor seams, and along trim. Slow, overlapping strokes help capture those particles more effectively than quick sweeping motions. Careful technique matters just as much as suction power.
Homes with laminate flooring often benefit from softer floor tools that protect the surface while collecting dust efficiently. Anyone comparing cleaning approaches for hard surfaces may also find useful ideas in best shark vacuum laminate floors discussions, especially when evaluating brush styles and floorhead designs. Different tools can dramatically affect the cleaning experience.
Pet owners often notice fur collecting under furniture long before it becomes visible elsewhere. A canister vacuum's long wand and flexible hose make those hidden areas easier to reach. Regular attention prevents buildup from becoming a larger cleaning headache later.
Use Attachments For More Than Floors
A canister vacuum can tackle much more than carpets and tile. Dusting brushes help clean bookshelves, vents, ceiling fans, blinds, and decorative trim. These surfaces collect surprising amounts of dust that eventually settle back onto floors if ignored. Expanding your cleaning routine creates a more complete result.
Mattresses benefit from periodic vacuuming as well. Surface debris, lint, and dust can accumulate even with regular bedding changes. Using the upholstery tool helps remove loose material without damaging the mattress fabric. Simple maintenance contributes to a cleaner sleeping environment.
Vehicle interiors are another area where canister vacuums excel. The flexible hose reaches between seats, beneath pedals, and into storage compartments. Those narrow spaces often trap debris that standard floor tools cannot access effectively. The right attachment turns a difficult task into a manageable one.
Small workspaces, hobby stations, and utility rooms can also benefit from targeted vacuuming. Dust tends to settle around electronics, shelving, and storage bins. Using specialized attachments provides greater precision while reducing the chance of scattering debris into nearby areas.
Handle Large Cleaning Jobs More Efficiently
Large homes and heavily used spaces benefit from a structured approach. Instead of moving randomly from room to room, work in sections and finish one area completely before moving on. Organized cleaning reduces missed spots and prevents unnecessary backtracking. It also makes progress easier to track.
Start with high surfaces and move downward. Dust shelves, furniture, and ledges before vacuuming floors. That way, falling debris gets collected during the floor-cleaning stage instead of creating extra work. This sequence improves overall efficiency without adding complexity.
Outdoor recreation spaces can inspire useful cleaning habits too. For example, maintaining large surface areas often requires choosing equipment suited to the material being cleaned. People researching solutions for pool maintenance sometimes compare options such as best pool cleaner vinyl pools because matching the tool to the surface matters just as much there as it does indoors.
Taking short breaks during larger cleaning sessions can actually improve results. Fatigue leads to rushed movements and overlooked areas. A brief pause helps maintain attention to detail while reducing physical strain. Consistency beats speed when tackling extensive cleaning tasks.
Store The Vacuum Properly Between Uses
Storage habits affect long-term reliability. Wrapping the cord neatly and storing attachments in their designated locations prevents damage and keeps everything ready for the next use. Hunting for missing accessories every time you clean quickly becomes annoying. Organization saves time.
Keep the vacuum in a dry location whenever possible. Excess moisture can affect filters, hoses, and electrical components over time. A stable environment helps preserve component longevity and reduces the risk of unexpected performance issues.
Inspect the hose occasionally for cracks or wear. Small leaks can reduce suction without being immediately obvious. Catching problems early is often less expensive than replacing major components later. Preventive attention pays off.
Attachments should remain clean and free from tangled hair, thread, or debris. A few minutes of maintenance after each cleaning session can prevent larger problems from developing. Those small habits help maintain reliable performance, smoother operation, and a more enjoyable cleaning experience every time the vacuum comes out of storage.


How to Refinish a Fiberglass Pool

How Do You Keep Raccoons Out of Your Pool?

How to Fix Cyanuric Acid in Your Pool

How to Shape a Pool Cue Tip to Stop Miscues

Best Far Infrared Sauna Sauna Heats: Top Picks of 2026

11 Best Far Infrared Sauna Carbon Fiber Heaters of 2026 For Balanced Full-Body Heat

11 Best Carbon Far Infrared Sauna of 2026 For Even Heat

10 Best Bluetooth Speaker For Sauna of 2026 For Heat and Steam


