
How to Use an Inground Pool Vacuum Without Hassle

How to use an inground pool vacuum sounds simple until the vacuum head starts floating, the hose fills with air, or dirt drifts right back into the water. Plenty of pool owners run into those little headaches, and they can turn a quick cleanup into an afternoon project. A few small adjustments before the vacuum ever reaches the bottom often make the biggest difference. That's why learning the setup process matters just as much as pushing the vacuum across the pool floor.
Clean water isn't only about appearance. Tiny particles left behind can cloud the water, settle into corners, and force the filtration system to work much harder than necessary. Building a routine around proper vacuum technique, careful hose priming, and steady movement helps remove debris instead of stirring it around. Bit by bit, those habits reduce unnecessary cleaning sessions while helping the pool stay inviting between maintenance days.
Oops, rushing is where many problems begin. Fast strokes may seem productive, yet they often kick debris into suspension before the vacuum can capture it. Slow, overlapping passes allow the vacuum head to maintain solid contact with the surface while collecting leaves, sand, and fine dirt more efficiently. That steady rhythm may feel slower, but it usually saves time because fewer areas need to be cleaned twice.
Pool maintenance also becomes easier after understanding how suction changes from one filtration system to another. Some pools require adjusting valves to maximize suction, while others perform better with only moderate flow. Paying attention to how the vacuum behaves instead of forcing it across the floor prevents loss of suction and keeps the cleaning path consistent. Little observations often solve problems that expensive equipment cannot.
Another overlooked detail involves checking the skimmer basket, pump basket, and filter before starting. A partially clogged basket limits water flow, making the vacuum feel weak even though nothing is actually wrong with the equipment. Cleaning those components first creates better circulation and allows the vacuum to pick up stubborn debris more effectively. That tiny maintenance step pays off every single cleaning session.
How to use an inground pool vacuum also includes knowing when to stop and inspect the equipment. Twisted hoses, worn vacuum heads, damaged brushes, or cracked connectors reduce cleaning performance over time. Catching those issues early keeps frustration low and prevents unnecessary strain on the pump. Small maintenance habits often protect expensive pool equipment from premature wear.
Good vacuuming isn't about racing through the task. It's about working with the filtration system instead of against it, keeping movements controlled, and giving debris nowhere to escape. Those practical habits lead to clearer water, cleaner surfaces, and fewer surprise cleaning marathons after windy afternoons or heavy pool use.

- VC Score9.6
BCP Score is a ranking system developed by bestcleanerproducts.com. BCP Score has no relationship or impact from any manufacturers or sales agent websites. Learn more
- BrandWYBOT
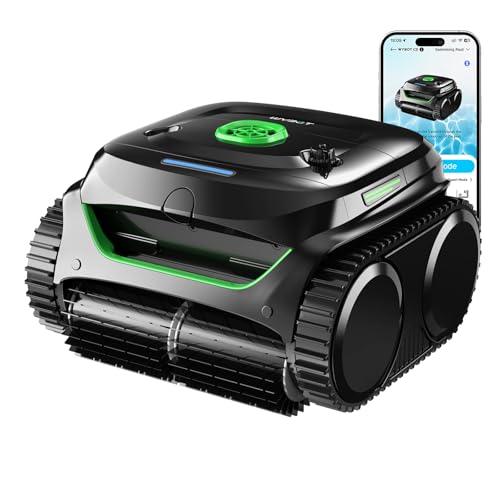
- VC Score9.4
BCP Score is a ranking system developed by bestcleanerproducts.com. BCP Score has no relationship or impact from any manufacturers or sales agent websites. Learn more
- BrandWYBOT

- VC Score9.4
BCP Score is a ranking system developed by bestcleanerproducts.com. BCP Score has no relationship or impact from any manufacturers or sales agent websites. Learn more
- BrandGosvor
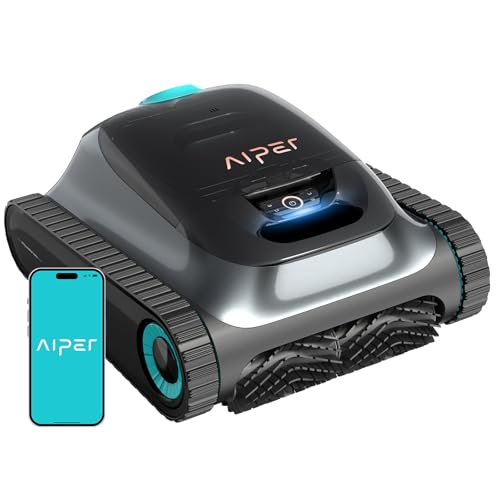
- VC Score8.4
BCP Score is a ranking system developed by bestcleanerproducts.com. BCP Score has no relationship or impact from any manufacturers or sales agent websites. Learn more
- BrandAIPER
- VC Score8.2
BCP Score is a ranking system developed by bestcleanerproducts.com. BCP Score has no relationship or impact from any manufacturers or sales agent websites. Learn more
- BrandDolphin

- VC Score8.0
BCP Score is a ranking system developed by bestcleanerproducts.com. BCP Score has no relationship or impact from any manufacturers or sales agent websites. Learn more
- BrandWYBOT

- VC Score8.0
BCP Score is a ranking system developed by bestcleanerproducts.com. BCP Score has no relationship or impact from any manufacturers or sales agent websites. Learn more
- BrandZodiac

- VC Score7.6
BCP Score is a ranking system developed by bestcleanerproducts.com. BCP Score has no relationship or impact from any manufacturers or sales agent websites. Learn more
- BrandVINGLI
Last update on 2026-07-15 / Affiliate links / Images, Product Titles, and Product Highlights from Amazon Product Advertising API
How To Use An Inground Pool Vacuum
A cloudy pool can make a clean backyard feel weirdly unfinished, even if the water chemistry looks fine on paper. Dirt settles in low spots, leaves hide along the deep-end slope, and the vacuum hose somehow finds a way to burp air right when suction should kick in. That’s where how to use an inground pool vacuum becomes less about muscle and more about steady setup, good suction, and a little patience.
Inground Pool Vacuum Basics
Manual pool vacuuming works best after the big floating debris has already been skimmed off the surface. Skipping that step sounds harmless, but leaves can clog the skimmer basket before the floor gets a fair pass. Start with the pool water at its normal level, the pump running, and the filter system ready to pull water without struggling. A clean skimmer basket and pump basket give the vacuum a better shot at grabbing dirt instead of just dragging it around.
The vacuum head, pole, and hose need to fit together snugly before anything goes underwater. A loose connection can steal suction and make the head lift off the floor every few feet. Push the vacuum head onto the telescoping pole, then attach one end of the hose to the vacuum head. Keep the pole long enough to reach the deepest section without forcing your arms into an awkward stretch.
Priming the hose is the little step that saves the most aggravation. Air trapped inside the hose can make the pump lose prime or cause weak suction right from the start. Lower the vacuum head into the water, then feed the hose straight down into the pool until bubbles stop rising. Those bubbles are the air leaving the hose, and yep, waiting them out matters.
Strong suction depends on where the hose connects. Most inground pools use the skimmer suction port with a vacuum plate, though some setups have a dedicated vacuum line. After the hose is full of water, connect it to the skimmer plate or vacuum port while keeping the hose underwater as much as possible. That small detail helps prevent air from sneaking back into the system.
Set Up The Pool Before Vacuuming
Pool preparation starts with a quick look at the water and floor. Fine dust, sand, and pollen usually need slower vacuum strokes than leaves or acorns. Brush stuck debris from corners, steps, and wall seams before vacuuming so it can settle where the vacuum can reach it. The goal is simple: make the vacuum collect debris instead of chasing it around the pool.
Valve position can change how well the vacuum pulls. Some inground pools need more suction routed through the skimmer, while others work better with a balanced flow between the skimmer and main drain. If suction feels weak, check whether the main drain valve is stealing too much pull from the vacuum hose. Small valve changes can make the head grip the floor instead of floating like a stubborn pool toy.
Filter condition matters more than people expect. A dirty cartridge, overloaded sand filter, or clogged DE grid can make vacuuming feel useless even when the hose and head are attached correctly. Clean or backwash the filter when pressure runs higher than the normal clean reading for that system. A healthy filter gives debris somewhere to go after the vacuum pulls it off the floor.
Sloped pools need extra control because debris usually slides toward the deeper end or collects along the transition line. Slow strokes help keep the vacuum head flat against the floor instead of skipping over the slope. For deeper designs with tricky angles, clean hard-to-reach floor areas with gear suited to incline changes, and compare best pool vacuum for sloped pool options before fighting the same dead spots every weekend. A better match can reduce the tug-of-war between suction, slope, and loose debris.
Prime The Hose Without Losing Suction
Hose priming sounds fussy until the pump gulps air and the vacuum quits halfway across the shallow end. Keep the vacuum head underwater after attaching the hose, then push the hose into the pool section by section. Watch for bubbles rising from the hose end near the surface. Once the bubbles stop, the hose is full and ready to connect.
The return jet method can make priming faster. Hold the free end of the hose over a return jet until water pushes through the entire hose and bubbles stop coming from the vacuum head. This method fills the hose from one end to the other without a lot of guesswork. Just keep the vacuum head submerged so it doesn’t pull air back in.
Air leaks can show up as poor suction, rattling pump sounds, or bubbles returning to the pool jets. Check hose cuffs, cracked hose sections, and the skimmer plate seal before blaming the pump. Even a small split in the hose can weaken the vacuum enough to leave fine dirt behind. Replace worn parts early because patchy suction wastes time and strains the system.
Steady water flow tells you the setup is working. The vacuum head should feel lightly pulled to the pool floor, not glued down so hard it won’t move. If it sticks too aggressively, reduce suction slightly or adjust the valve balance. If it floats or barely picks up debris, look for air in the hose, a clogged basket, or a dirty filter.
Move The Vacuum With Better Control
Slow overlapping passes clean better than fast, random pushing. Move the vacuum head like you’re mowing a lawn, with each pass slightly overlapping the last one. That pattern keeps you from missing strips of dirt, especially in pale plaster pools where fine debris blends into the floor. Rushing kicks particles into the water, and then the filter has to play cleanup duty later.
Floor contact is the whole ballgame. Keep the vacuum head flat, especially around curves, steps, and slope changes. Tilting the head lets debris escape around the sides instead of entering the suction opening. A calm, even pace keeps the brush or wheels working with the surface instead of bouncing across it.
Deep-end cleaning usually takes the longest because that’s where heavier debris collects. Work from the shallow end toward the deep end if loose debris is scattered, or start at the deepest collection point if the pool bottom is visibly dirty there. Either way, avoid whipping the hose across the pool because it can stir up sediment and break your cleaning rhythm. Gentle hose handling keeps the vacuum path predictable.
Automatic cleaner owners still benefit from knowing manual technique because robotic or pressure-side cleaners can miss corners, steps, and tight transitions. A Polaris-style cleaner, for example, may need small adjustments if it climbs too much, circles oddly, or ignores certain areas. Keep pressure cleaners moving correctly with a practical guide on how to adjust a polaris pool cleaner before assuming the unit is worn out. A few tuning changes can make routine cleaning feel a lot less random.
How To Vacuum An Inground Pool Without Stirring Debris
Fine dirt is the sneaky stuff that makes pool cleaning feel unfair. The floor may look clear from the patio, then one slow step into the water sends a dusty cloud across the deep end. After the hose is primed and the vacuum head is moving properly, the real trick is keeping steady suction while stopping debris from floating back into the water. That’s where careful pacing, clean baskets, and smart filter settings start doing the heavy lifting.
Handle Fine Dirt Without Making A Cloud
Small sediment needs a calmer touch than leaves or twigs. Push the vacuum head too quickly and that dust lifts before the suction port can grab it. Slow strokes, slight overlap, and a flat vacuum head keep the dirt moving toward the hose instead of drifting into the water column. It feels almost too slow at first, but that patient rhythm usually saves a second cleanup later.
Filter mode matters if the pool has a heavy layer of fine debris. For normal dirt, vacuuming through the filter is usually fine. For heavy silt, algae dust, or storm wash-in, many pool systems perform better by vacuuming to waste, as long as the water level is watched closely. That setting sends dirty water out instead of loading the filter, but it also lowers the pool water faster than people expect.
Pool sanitation should stay separate from random household cleaning habits. A pool floor needs pool-safe tools and the right water balance, not kitchen cleaners or bathroom sprays. For indoor cleanup concerns that are totally separate from pool care, a guide about household cleaner kill pinworm egg belongs in the home hygiene lane, not the pool equipment lane. Mixing those jobs can damage surfaces, irritate skin, or create chemical problems nobody wants to deal with.
Visibility gives you clues while vacuuming. If the water clouds up quickly, pause for a bit and let the particles settle before continuing. Running the pump after vacuuming helps catch suspended debris, but the vacuum should still do most of the floor work. That balance keeps the filter from becoming the poor guy stuck cleaning up every rushed pass.
Clean Steps, Corners, And Deep-End Trouble Spots
Steps and corners collect dirt because water movement slows down there. A standard vacuum head may skip over tight edges, so brushing those spots first helps pull debris into reach. Use short, controlled movements near steps instead of long sweeping passes. That keeps the hose from tugging the head away right when suction matters most.
Deep-end slopes need a little patience because the vacuum head wants to slide downhill. Keep the pole angle low and guide the head across the slope rather than fighting straight up and down every time. Overlapping passes work especially well along the transition between shallow and deep sections. That line often hides more grit than the flat floor.
Wall seams, drains, and ladder areas deserve a second look. Dirt can tuck itself around fittings and return after the main floor looks clean. Brush those spots toward the open floor, then vacuum them with slow pulls. It’s not fancy, but it beats watching the same dirt reappear after the pump runs for an hour.
Storage habits affect how well the vacuum works next time. Rinse the vacuum head, drain the hose, and store the hose without tight kinks. Outdoor gear gets beat up by sun, heat, and rough handling, so a little care prevents cracked cuffs and weak suction later. For unrelated packing needs away from pool care, best vacuum sealer hikers fits food storage and trail prep, not swimming pool maintenance.
Fix Weak Suction Before Blaming The Vacuum
Weak suction usually starts with airflow, blocked baskets, dirty filters, or loose fittings. Check the simple stuff first before replacing equipment. Empty the skimmer basket, inspect the pump basket, and make sure the hose stayed full of water during connection. A tiny air leak can make a good vacuum act useless.
Pump sound can tell you a lot. A smooth, steady hum usually means the system is pulling water properly. A rattling, surging, or gulping sound often points to air in the line or low water level. Stop and correct that problem before the pump runs dry or loses prime.
Hose condition deserves regular attention because cracks are easy to miss. Flex the hose gently and look for splits near the cuffs, where wear shows up first. A cracked hose can still look usable while quietly ruining suction. Replacing one damaged section is usually less annoying than dragging a weak vacuum across the same dirty floor twice.
Valve adjustment should be small and deliberate. Closing the main drain too much may make the vacuum stick hard to the floor, while leaving it too open can leave the hose with weak pull. Aim for enough suction to pick up debris without making the head difficult to move. That sweet spot makes the job smoother and protects the system from unnecessary strain.
Keep The Pool Cleaner Between Vacuum Sessions
Regular skimming makes vacuuming easier because fewer leaves sink to the floor. A few minutes with a net after windy weather can prevent a messy deep-end cleanup later. Brushing walls and steps once debris starts clinging also helps the filter do its job. Small habits stack up, and pool care gets less dramatic.
Water balance changes how clean the pool looks after vacuuming. Poor circulation, low sanitizer, or unbalanced water can leave surfaces feeling slick even after visible debris is gone. Vacuuming removes physical dirt, but it doesn’t replace proper chemical care. Clean water needs both mechanical cleaning and balanced treatment.
Filter maintenance should match how often the pool gets used. Heavy swimming, storms, nearby trees, and dusty patios all add more debris to the system. Clean or backwash the filter based on pressure and performance, not just a random calendar habit. A filter that breathes well helps the vacuum pull better during every session.
Realistic expectations make the routine easier to stick with. A manual vacuum won’t erase every issue caused by poor circulation, clogged equipment, or neglected chemistry. It will, though, remove settled debris, improve water clarity, and keep the pool from sliding into that “ugh, where do I even start?” stage. Keep the strokes slow, the hose full, the baskets clean, and the process stays much less frustrating.


How to Refinish a Fiberglass Pool

How Do You Keep Raccoons Out of Your Pool?

How to Fix Cyanuric Acid in Your Pool

How to Shape a Pool Cue Tip to Stop Miscues

Best Far Infrared Sauna Sauna Heats: Top Picks of 2026

11 Best Far Infrared Sauna Carbon Fiber Heaters of 2026 For Balanced Full-Body Heat

11 Best Carbon Far Infrared Sauna of 2026 For Even Heat

10 Best Bluetooth Speaker For Sauna of 2026 For Heat and Steam








