
How to Use an Aquarium Gravel Vacuum Right

How to use an aquarium gravel vacuum often looks simple until cloudy water, floating debris, or frightened fish turn a routine cleaning session into a frustrating chore. A little preparation changes everything. Knowing where to place the siphon, how deeply to clean the gravel, and when to stop can make regular maintenance feel far less stressful while helping your aquarium stay cleaner between water changes. Small adjustments in technique usually matter much more than cleaning harder.
Fresh-looking gravel isn't just about appearance. It helps reduce trapped waste that can slowly affect water quality and leave unpleasant odors behind. Plenty of people make the mistake of vacuuming every inch of the substrate during every cleaning session, but that's rarely necessary. Cleaning different sections over time keeps beneficial bacteria in place while still removing leftover food, fish waste, and decaying organic material that settles between the stones.
Every aquarium develops its own rhythm. A lightly stocked tank may only need occasional deep gravel cleaning, while a busy community aquarium collects debris much faster. Paying attention to how quickly waste builds up makes maintenance more predictable instead of relying on a rigid schedule. Before long, spotting areas that need attention becomes second nature.
Using the siphon correctly also prevents several common headaches. Starting the water flow smoothly, lowering the vacuum tube carefully, and lifting it before removing it from the gravel all help avoid stirring unnecessary clouds of debris. Those little habits protect visibility and reduce stress inside the aquarium. Even better, they save extra cleanup afterward.
Gravel cleaning isn't about making every pebble spotless. Healthy aquariums contain beneficial microorganisms that support biological filtration, so aggressive cleaning can do more harm than good. Gentle, consistent maintenance creates a better balance than trying to leave the substrate looking brand new every time. That's one reason experienced aquarium keepers usually favor steady routines over occasional intensive cleaning sessions.
Equipment also plays a role. Choosing the correct vacuum size for the aquarium makes cleaning easier because oversized tubes may remove water too quickly, while smaller siphons can take much longer than necessary on larger tanks. Matching the tool to the aquarium keeps maintenance comfortable instead of feeling like an endless project.
Little details add up over time. Turning off heaters and filters before beginning, replacing water with temperature-matched conditioned water, and watching fish behavior throughout the process all contribute to a smoother routine. Those practical habits help build confidence while reducing avoidable mistakes that often happen during early maintenance sessions. Eventually, how to use an aquarium gravel vacuum becomes less of a chore and more of a simple habit that supports a healthier, cleaner aquarium.
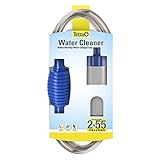
- VC Score9.0
BCP Score is a ranking system developed by bestcleanerproducts.com. BCP Score has no relationship or impact from any manufacturers or sales agent websites. Learn more
- BrandTetra

- VC Score8.8
BCP Score is a ranking system developed by bestcleanerproducts.com. BCP Score has no relationship or impact from any manufacturers or sales agent websites. Learn more
- BrandLaifoo

- VC Score8.6
BCP Score is a ranking system developed by bestcleanerproducts.com. BCP Score has no relationship or impact from any manufacturers or sales agent websites. Learn more
- Brandenomol

- VC Score8.6
BCP Score is a ranking system developed by bestcleanerproducts.com. BCP Score has no relationship or impact from any manufacturers or sales agent websites. Learn more
- BrandFluval
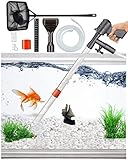
- VC Score8.0
BCP Score is a ranking system developed by bestcleanerproducts.com. BCP Score has no relationship or impact from any manufacturers or sales agent websites. Learn more
- BrandQZQ
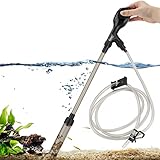
- VC Score8.0
BCP Score is a ranking system developed by bestcleanerproducts.com. BCP Score has no relationship or impact from any manufacturers or sales agent websites. Learn more
- Brandhygger

- VC Score7.8
BCP Score is a ranking system developed by bestcleanerproducts.com. BCP Score has no relationship or impact from any manufacturers or sales agent websites. Learn more
- BrandUPETTOOLS

- VC Score7.6
BCP Score is a ranking system developed by bestcleanerproducts.com. BCP Score has no relationship or impact from any manufacturers or sales agent websites. Learn more
- BrandEheim

- VC Score7.2
BCP Score is a ranking system developed by bestcleanerproducts.com. BCP Score has no relationship or impact from any manufacturers or sales agent websites. Learn more
- BrandAQQA
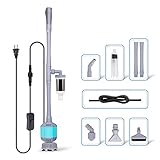
- VC Score6.8
BCP Score is a ranking system developed by bestcleanerproducts.com. BCP Score has no relationship or impact from any manufacturers or sales agent websites. Learn more
- Brandhygger
Last update on 2026-07-15 / Affiliate links / Images, Product Titles, and Product Highlights from Amazon Product Advertising API
How To Use An Aquarium Gravel Vacuum Without The Mess
Murky water, hidden fish waste, and that dusty-looking gravel can make a clean tank feel dirty again by dinner. The fix isn’t scrubbing harder or tearing the tank apart, because how to use an aquarium gravel vacuum is mostly about control, patience, and knowing what not to disturb. A good siphon routine removes trapped debris while protecting the living balance that keeps the aquarium steady. Done calmly, it turns a messy chore into a simple habit that keeps the tank clearer and the fish less jumpy.
Aquarium Gravel Vacuum Basics
A gravel vacuum works by using suction to lift dirty water and loose waste from the substrate while heavier gravel tumbles inside the tube and falls back down. That tumbling action is useful because it separates fish waste, leftover food, and decaying plant bits without forcing you to remove the gravel itself. The trick is keeping the tube low enough to pull debris, but not so rough that the tank turns into a snow globe. Easy does it.
Start by placing a bucket lower than the aquarium, because gravity helps the siphon keep moving. Push the vacuum tube into the gravel, let the stones rise slightly, then lift the tube just enough so the gravel drops back while the dirty water keeps flowing. This small motion gives you cleaner gravel without stripping the tank bare. A common aquarium saying fits here: Clean the waste, not the whole ecosystem.
Before cleaning, turn off heaters, filters, and air-driven equipment that could run dry or stir the tank while the water level drops. Keep the heater submerged until it cools, then move carefully so glass doesn’t crack from sudden exposure. The bucket should be stable, nearby, and easy to watch because siphons don’t politely pause when your attention wanders. One distracted minute can put more water on the floor than in the bucket.
Tank size changes the whole feel of the job. A small aquarium can lose water quickly, so a narrow siphon gives better control, while a larger tank usually benefits from a wider tube that doesn’t make cleaning drag on forever. Matching the tool to the tank keeps water removal reasonable and helps prevent rushed decisions. For cleaning tight household areas away from the tank, compare a practical shark vacuum under beds if dust likes to hide where regular tools can’t reach.
Prep The Tank Before The Siphon Starts
Preparation saves headaches, especially if the aquarium has plants, caves, driftwood, or shy fish that dart at every shadow. Move decorations only when needed, because yanking everything out can stir settled waste and stress fish for no real gain. A better move is to clean around hardscape first, then lift small pieces only if debris is packed beneath them. Slow hands win here.
Use a clean bucket that has never held soap, chemicals, or floor cleaner. Aquarium water is sensitive, and even tiny chemical residues can cause trouble fast. Labeling one bucket for fish tank maintenance removes the guesswork and keeps cleaning safer. It’s a boring detail, sure, but boring details often prevent expensive problems.
Check the replacement water before you begin. Condition tap water, match the temperature closely, and keep it ready so fish aren’t left waiting in a partially drained tank. A sudden temperature swing can stress fish more than the vacuum itself. Stable replacement water supports healthy water changes and makes the whole routine smoother.
Plan the cleaning zones before the siphon touches gravel. Pick one section, work it steadily, then move to the next area instead of poking randomly around the bottom. This keeps the process organized and helps protect beneficial bacteria living in the substrate. For glass smudges outside the aquarium, keep the tank area tidy with how to use sprayway glass cleaner, but never spray cleaner near open water or aquarium equipment.
Start The Siphon Without Making A Mess
Starting the siphon cleanly is half the battle. Some gravel vacuums use a squeeze bulb, while basic models need a few quick up-and-down motions in the water to start flow. Keep the hose end inside the bucket before water moves, because dirty aquarium water has a talent for finding floors, rugs, and socks. Yep, it happens fast.
Once the flow begins, keep one hand on the tube and one eye on the bucket. The tube should sit upright enough to pull debris from below, but not so deeply that it buries itself and clogs. If the flow slows, lift the tube, let the gravel fall, and try again with a lighter touch. Good siphoning feels like controlled lifting, not digging.
Gravel size affects the rhythm. Fine gravel or sand needs gentler movement because lighter substrate can travel up the tube more easily. Larger gravel allows a deeper plunge, but it can hide more waste between gaps. Adjusting the angle helps remove hidden debris without stealing half the substrate.
Watch the water leaving the hose. Dark water at first is normal, especially near feeding spots or under decorations, but the goal isn’t to chase perfectly clear water forever. Stop after the worst waste lifts out and move to another area. Overworking one patch can remove too much water and disturb tank stability.
Clean Gravel In Sections, Not All At Once
A smart routine avoids attacking the entire substrate every single time. Gravel holds helpful bacteria that support the nitrogen cycle, so aggressive cleaning can set the aquarium back. Cleaning one portion during each water change removes waste while leaving plenty of biological balance in place. That balance matters more than a spotless-looking bottom.
Focus first on areas where debris naturally gathers. The front corners, behind plants, under feeding zones, and around rocks often collect the most waste. Fish activity pushes particles into little pockets, and those pockets can sour if ignored for too long. Targeting those areas gives the biggest payoff for cleaner aquarium water.
Don’t panic if some debris remains after one session. Aquariums aren’t sterile display boxes, and trying to make them act like one can create more problems than it solves. A little organic material is normal, while heavy buildup is the real concern. The goal is steady maintenance, not perfection.
Use the bucket as your timer. Once you’ve removed the planned amount of water, stop cleaning even if one corner still looks tempting. Pulling extra water just to chase a few specks can make the replacement process harder. Controlled stopping is part of how to use an aquarium gravel vacuum without turning maintenance into a bigger job.
Avoid Mistakes That Stress Fish
Fish react to sudden movement, vibration, and cloudy water, so the vacuum should move like it belongs there. Lower the tube slowly, avoid tapping the glass, and give fish a path to move away. Fast jabs into the gravel can spook them and stir waste at the same time. Calm movement protects fish comfort and keeps the water easier to see.
Never chase fish with the siphon. That sounds obvious, but curious fish sometimes swim near the tube, especially in community tanks with bold feeders. Pause, lift the vacuum slightly, and let the fish move off before continuing. A small delay is better than risking injury or panic around aquarium equipment.
Cloudiness during cleaning usually means the gravel was disturbed too aggressively. Slow down, work smaller sections, and let the siphon pull debris instead of stirring it into the water column. If the tank clouds badly every time, the substrate may need more frequent light cleaning rather than rare heavy sessions. That shift often improves water clarity without extra effort.
Filters need attention after vacuuming too. Once the water level is restored, restart equipment and check that flow returns normally. A filter that sputters, pulls air, or runs dry can cause avoidable trouble. Keeping equipment steady supports oxygen movement and helps the tank settle after maintenance.
Handle Water Changes With A Steady Routine
A gravel vacuum usually removes water while cleaning, so the process doubles as a partial water change. That’s useful because old water carries dissolved waste that the gravel alone can’t show. Many aquarium keepers prefer partial changes because they refresh the system without shocking it. The sweet spot is consistent care, not draining the tank like a bathtub.
Replacement water should be treated before it goes back in. Use conditioner for tap water, match the temperature closely, and pour gently so the substrate doesn’t scatter. A plate, bowl, or slow pour near the glass can soften the flow. This keeps clean water from turning the freshly vacuumed gravel into a mess again.
Smaller, regular sessions often beat occasional marathon cleanings. Waste gets removed before it breaks down heavily, fish deal with less disruption, and the tank looks better between maintenance days. That rhythm also makes problems easier to spot because the aquarium’s normal look becomes familiar. Consistency is a quiet kind of aquarium care.
Cleaning gear should be rinsed after use and stored dry. Leftover dirty water inside the hose can smell rough and may leave residue that makes the next session unpleasant. Keep the vacuum tube, hose, and bucket together so setup doesn’t become an excuse to delay the job. For larger cleanup chores around the home, rely on a backpack vacuum home use guide when floor messes need a separate tool from aquarium care.
How To Use An Aquarium Gravel Vacuum For Cleaner Water
Cloudy water after cleaning usually means the gravel got stirred faster than the siphon could pull debris away. A calmer routine helps how to use an aquarium gravel vacuum feel less like damage control and more like normal tank care. The goal is steady debris removal, not chasing every speck until the aquarium looks stripped bare. That balance keeps the bottom cleaner while giving fish a less stressful cleaning day.
Read The Gravel Before You Start Cleaning
Gravel tells on the tank if you look closely. Dark patches, trapped food near feeding spots, and dusty buildup around plants usually point to areas that need extra siphon attention. Don’t treat every inch the same, because some spots stay fairly clean while others collect waste fast. Working from the dirtiest areas first helps you use the removed water wisely.
Push the vacuum tube into one small section, pause for a second, then lift it slowly. The gravel should tumble inside the tube while lighter waste travels up and out through the hose. If gravel keeps climbing too high, pinch the hose lightly or raise the tube a bit. That tiny adjustment can save a lot of frustration.
Planted tanks need a softer hand. Roots can loosen if the tube digs too deeply, so clean around plants instead of jamming the vacuum straight into the root zone. Waste still comes out, but the plant stays settled. That approach protects root stability while keeping the substrate from turning sour.
Decor-heavy aquariums hide debris in quiet pockets. Lift only small decorations when needed, and avoid tearing apart the whole layout during every cleaning. Fish depend on familiar hiding spots, so keeping the layout mostly stable helps reduce stress. A thoughtful routine supports clean gravel without making the tank feel brand new every time.
Control The Flow So Water Does Not Vanish Too Fast
Siphon speed can sneak up on you. A wide hose may empty a small tank quickly, leaving you rushing before the gravel is actually clean. Slower flow gives better control and helps prevent accidental over-draining. That matters most in smaller aquariums where a few extra minutes can remove more water than planned.
Pinching the hose is the easiest way to slow the vacuum without stopping completely. You can also lift the tube higher in the water column to reduce suction for a moment. Those simple moves help you handle delicate areas without sending gravel into the bucket. Good flow control turns aquarium maintenance into a calm routine instead of a race.
Keep the bucket in sight the whole time. It sounds basic, but a siphon doesn’t care if you’re adjusting a plant, checking the fish, or wiping the rim. Once the bucket reaches your planned water-change amount, stop the siphon and refill the tank. Controlled stopping protects water stability and keeps cleanup from spilling onto the floor.
Tank tools should stay separate from household cleaners. If you maintain metal fixtures near the aquarium stand, handle that chore away from tank water and rely on a separate guide like best copper cleaner so chemical residue never gets near fish equipment. Aquarium buckets, hoses, and towels should remain aquarium-only. That simple boundary prevents messy cross-contamination.
Refill The Tank Without Stirring Everything Back Up
Fresh water can undo a clean gravel job if it pours in too hard. Add conditioned water slowly, aiming the stream against the glass, a clean plate, or a stable decoration. Gentle refilling prevents substrate clouds from rising right after you removed the debris. It also keeps fish from darting around in panic.
Temperature matters more than many people expect. Water that feels “close enough” to your hand may still be uncomfortable for fish, especially in smaller tanks. Match the refill water as closely as possible to the aquarium temperature before adding it back. Stable temperature supports fish comfort during and after cleaning.
Restart the filter after the water level returns to normal. Listen for odd noises, check the flow, and make sure the intake is fully submerged. A filter pulling air can run poorly and may not clear fine particles as well. Strong, steady filtration helps polish the water after gravel vacuuming.
Give the tank time to settle before judging the result. A little haze can appear even with careful cleaning, especially if the gravel had a lot of fine debris trapped inside. The water often clears as the filter catches small particles. Patience keeps you from over-cleaning a tank that only needs a short settling period.
Match The Cleaning Schedule To The Tank
A crowded tank usually needs gravel cleaning more often than a lightly stocked one. More fish means more waste, more leftover food, and more debris settling between stones. A low-stock aquarium may stay cleaner longer, especially with careful feeding. Watch the gravel and fish behavior instead of forcing a rigid schedule.
Overfeeding creates extra work fast. Food that sinks into the gravel can break down before you even notice it, making the substrate smell unpleasant and feeding algae problems. Feed only what fish can eat promptly, then adjust if leftovers keep appearing. Better feeding habits reduce gravel waste before the vacuum ever comes out.
New tanks need extra care because the biological balance is still settling. Heavy gravel cleaning too soon can disturb developing bacteria and make water quality harder to manage. Light cleaning in small sections is usually safer than deep-cleaning the whole bottom. That restraint helps protect beneficial bacteria.
Supplies around the tank should stay dry and organized. Fish food, test strips, and powders can clump when stored near damp buckets or hoses, so sealed storage helps prevent waste. For non-aquarium storage habits, a guide on a vacuum sealer powder setup can be useful for keeping dry materials protected elsewhere in the home. Aquarium chemicals still need their original labels and safe storage away from children, pets, and tank water.
Fix Common Gravel Vacuum Problems
If suction keeps stopping, check for kinks in the hose first. A bend near the bucket or tank rim can slow the flow enough to make the siphon frustrating. Straighten the hose, keep the bucket lower than the tank, and restart the flow patiently. Strong gravity placement supports consistent suction.
If fish waste floats around instead of leaving the tank, the tube may be moving too quickly. Let the vacuum sit in one spot long enough for debris to rise before lifting it. Rushing from patch to patch stirs more than it removes. Slow placement gives dirty water a clear path out.
If gravel gets sucked into the hose, reduce the flow or raise the tube sooner. Smaller gravel needs a lighter touch, while heavier gravel can handle deeper siphoning. You don’t need to force the vacuum down to the glass unless waste is packed tightly. Controlled depth protects substrate placement.
If the aquarium smells bad even after cleaning, look beyond the gravel. Check the filter, old decorations, dead plant matter, and hidden food pockets behind hardscape. Gravel vacuuming helps a lot, but it can’t fix every maintenance issue by itself. A clean tank depends on balanced feeding, filtration, and regular water changes working together.


How to Refinish a Fiberglass Pool

How Do You Keep Raccoons Out of Your Pool?

How to Fix Cyanuric Acid in Your Pool

How to Shape a Pool Cue Tip to Stop Miscues

Best Far Infrared Sauna Sauna Heats: Top Picks of 2026

11 Best Far Infrared Sauna Carbon Fiber Heaters of 2026 For Balanced Full-Body Heat

11 Best Carbon Far Infrared Sauna of 2026 For Even Heat

10 Best Bluetooth Speaker For Sauna of 2026 For Heat and Steam


