
How to Use a Vacuum to Inflate an Air Mattress Right

How to use a vacuum to inflate an air mattress sounds simple at first glance, yet plenty of people end up scratching their heads once the vacuum comes out of the closet. Air mattresses often need quick inflation during unexpected overnight stays, camping trips, apartment moves, or temporary sleeping arrangements. A standard pump isn't always nearby, so making use of equipment already on hand becomes an appealing workaround. Done correctly, a vacuum can move a surprising amount of air and help create a comfortable sleeping surface without much hassle.
Frustration usually starts when airflow doesn't seem strong enough or the mattress barely expands after several minutes. A common issue comes from using the wrong vacuum port, especially on machines that support both suction and blowing functions. Another stumbling block appears when connectors don't fit snugly, allowing valuable air to escape around the valve. Small adjustments often make a huge difference, turning a slow and annoying task into a smooth process.
Proper airflow plays a bigger role than many people expect. Vacuums designed with a blower outlet generally perform much better than relying on improvised methods that fight against the machine's natural airflow direction. While the setup may look unconventional, it can be surprisingly effective when the nozzle aligns closely with the mattress valve. Even a partial seal can generate enough pressure to fill large air chambers faster than expected.
Space constraints also influence the approach. Carrying a dedicated pump isn't always practical, especially in smaller apartments, RVs, guest rooms, or travel situations where every inch counts. That's why many people search for alternative solutions using equipment they already own. A vacuum capable of blowing air can help bridge the gap without requiring another purchase or extra storage space.
Air mattress comfort depends heavily on reaching the right firmness level. Overinflation can create a stiff sleeping surface and place stress on seams, while underinflation leaves sleepers sagging toward the floor. Watching the mattress expand gradually helps maintain control throughout the process. A few moments of attention can prevent an uncomfortable night and extend the mattress's lifespan.
Then there's the practical side of setup speed. Nobody wants guests waiting around while equipment gets assembled or adjusted repeatedly. A straightforward vacuum inflation method can reduce preparation time and eliminate unnecessary stress. With the right connection and airflow direction, the mattress often reaches usable firmness much faster than many people assume.

- VC Score10.0
BCP Score is a ranking system developed by bestcleanerproducts.com. BCP Score has no relationship or impact from any manufacturers or sales agent websites. Learn more
- BrandHUANTER

- VC Score10.0
BCP Score is a ranking system developed by bestcleanerproducts.com. BCP Score has no relationship or impact from any manufacturers or sales agent websites. Learn more
- BrandBANDQ

- VC Score9.0
BCP Score is a ranking system developed by bestcleanerproducts.com. BCP Score has no relationship or impact from any manufacturers or sales agent websites. Learn more
- BrandETENWOLF

- VC Score9.0
BCP Score is a ranking system developed by bestcleanerproducts.com. BCP Score has no relationship or impact from any manufacturers or sales agent websites. Learn more
- BrandVOLLYC

- VC Score9.0
BCP Score is a ranking system developed by bestcleanerproducts.com. BCP Score has no relationship or impact from any manufacturers or sales agent websites. Learn more
- BrandMAXEVER
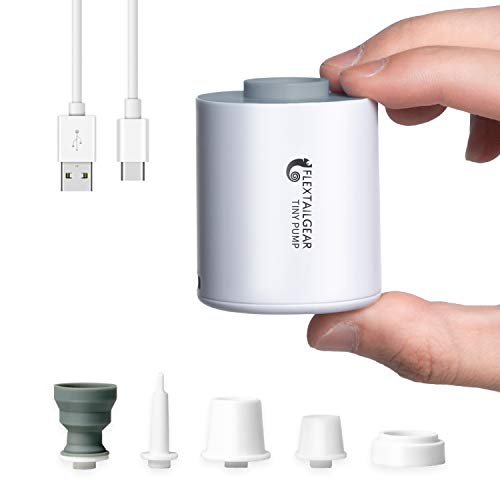
- VC Score8.8
BCP Score is a ranking system developed by bestcleanerproducts.com. BCP Score has no relationship or impact from any manufacturers or sales agent websites. Learn more
- BrandFLEXTAILGEAR
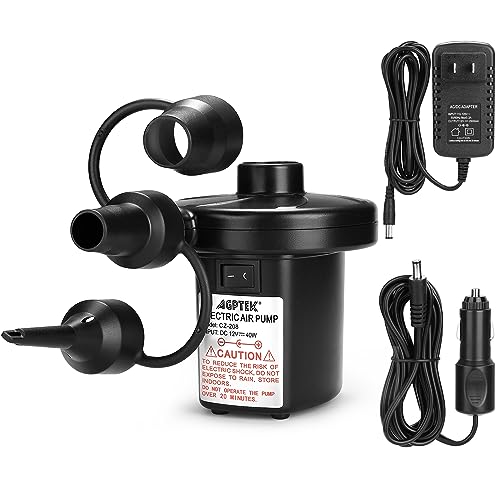
- VC Score8.8
BCP Score is a ranking system developed by bestcleanerproducts.com. BCP Score has no relationship or impact from any manufacturers or sales agent websites. Learn more
- BrandAGPTEK

- VC Score8.8
BCP Score is a ranking system developed by bestcleanerproducts.com. BCP Score has no relationship or impact from any manufacturers or sales agent websites. Learn more
- BrandNIBBaNACAL

- VC Score8.8
BCP Score is a ranking system developed by bestcleanerproducts.com. BCP Score has no relationship or impact from any manufacturers or sales agent websites. Learn more
- BrandHYVOHEX

- VC Score8.2
BCP Score is a ranking system developed by bestcleanerproducts.com. BCP Score has no relationship or impact from any manufacturers or sales agent websites. Learn more
- BrandShop-Vac

- VC Score8.0
BCP Score is a ranking system developed by bestcleanerproducts.com. BCP Score has no relationship or impact from any manufacturers or sales agent websites. Learn more
- BrandHYVOHEX
Last update on 2026-06-05 / Affiliate links / Images, Product Titles, and Product Highlights from Amazon Product Advertising API
How To Use A Vacuum To Inflate An Air Mattress
Guests show up, the pump is missing, and the air mattress is folded in the closet like it has all the patience in the world. That little panic is exactly why how to use a vacuum to inflate an air mattress matters more than it sounds. A vacuum can help, but only if it has the right airflow setup and you avoid forcing air through the wrong side. The goal is simple: create steady airflow, protect the valve, and get the mattress firm enough without stressing the seams.
Vacuum Inflation Basics
A vacuum only helps with inflation if it can push air out, not just pull debris in. Many shop vacs, wet dry vacs, and some canister vacuums have a blower port on the back or side of the machine. Standard upright vacuums often lack that feature, so they may not be useful for this job. Before doing anything else, check the machine body for an exhaust outlet or blower setting.
The mattress valve also matters because air loss can ruin the whole setup. Wide-mouth valves usually work better with vacuum hoses because they allow more airflow into the mattress chamber. Smaller valves may need a nozzle, adapter, or a clean plastic funnel to guide the air. A loose connection can still work, but the process becomes slower and noisier.
Air mattresses are not built like tires, so controlled pressure is the name of the game. A vacuum blower moves volume quickly, but it may not create the same neat finish as a dedicated air pump. That means you should watch the mattress surface as it fills instead of walking away. Firm is good, but drum-tight is asking for seam trouble.
Cleanliness deserves a quick nod too. A dusty hose can blow grit, hair, or stale odors into the mattress if it hasn't been cleaned first. Wipe the nozzle, shake loose debris from the hose, and avoid using a vacuum that recently handled wet messes. Nobody wants a guest bed that smells like the garage.
Vacuum To Air Mattress Setup
Start by placing the mattress on a flat surface with enough room for full expansion. Sharp corners, rug tacks, pet nails, and rough flooring can all create puncture risks before the mattress even gets filled. Spread it out fully so the internal chambers don't fold against themselves. A wrinkled mattress inflates unevenly and may feel lumpy later.
Move the vacuum close enough so the hose reaches the valve without pulling sideways. That small detail helps keep the connection stable while the mattress fills. A stretched hose can slip out, break the seal, or yank the valve at an awkward angle. Keep the vacuum on a stable floor position so airflow stays consistent.
Attach the hose to the blower outlet rather than the suction inlet. This step is easy to mess up because vacuum ports can look similar, especially on older machines. If air pulls inward, stop immediately and switch ports. The correct side should send a clear stream of air out through the hose.
For a tighter fit, hold the hose opening directly against the valve or use a nozzle that narrows the airflow. A clean towel wrapped lightly around the gap can reduce escaping air, though it shouldn't block the valve opening. Some people use painter's tape for a temporary seal, but hands-on control is usually safer. The best connection is snug, simple, and easy to remove fast.
Airflow And Valve Control
Turn the vacuum on only after the hose is lined up with the mattress valve. That prevents the hose from whipping around and blowing dust across the room. Once airflow begins, keep one hand near the valve and the other stabilizing the hose. This gives you better control if the mattress starts filling faster than expected.
The first stage often looks slow because the mattress fabric is still unfolding. Then, suddenly, the chambers take shape and the bed rises quickly. Don't assume nothing is happening just because the first few moments feel sluggish. Watch the corners and top surface for even expansion.
A small hiss around the valve isn't always a disaster. Some air escape is normal with an improvised setup, especially if the hose doesn't match the valve perfectly. The problem appears when more air escapes than enters, leaving the mattress limp. Adjust the angle, cup your hand around the connection, or use a cleaner adapter shape to improve the seal.
Crab storage, seafood prep, and freezer organization live in a separate lane from mattress setup, but airtight packing has the same practical mindset: reduce waste and keep air where it belongs. For food storage projects outside the bedroom, compare a vacuum sealer for crab that handles moisture and tight sealing better than loose bags.
Firmness Without Damaging Seams
Stop inflating before the mattress feels rock hard. Air mattresses need a little give because body weight spreads pressure through the chambers overnight. Overfilling can strain seams, valve edges, and internal baffles, especially on older mattresses. A slightly springy surface usually feels better than a stiff one anyway.
Press your palm into the center of the mattress after it takes shape. The surface should resist your hand but still compress slightly. If it caves in too much, add short bursts of air instead of running the vacuum nonstop. This slow finish gives you better firmness control.
Temperature can change the feel after inflation. Cool rooms may make the air inside contract a bit, leaving the mattress softer later. Warm rooms can make the surface feel tighter. Leaving a small margin helps the mattress adjust without feeling unstable or overfilled.
Once the mattress feels close, remove the hose and close the valve quickly. Many valves have a flap or one-way design, but older models may leak air during that handoff. Keep the cap ready before removing the hose. A quick seal preserves firmness and keeps the setup from turning into a comedy routine.
Common Mistakes That Slow Everything Down
The biggest mistake is using the suction side and hoping it somehow reverses the process. Suction won't inflate the mattress, and it can pull the valve flap in the wrong direction. Some vacuums need the hose physically moved to a separate blower port. That one switch often solves the whole headache.
A dirty hose creates another problem that people don't notice until too late. Dust, pet hair, and old debris can blow straight into the mattress chamber. That doesn't always ruin the mattress, but it's gross and avoidable. Clean the hose first so airflow quality doesn't become the hidden downside.
Poor valve matching can also drag out the job. A huge hose pressed against a tiny valve wastes air and creates awkward handling. A funnel, tapered nozzle, or clean adapter can narrow the flow and improve contact. Better fit means less leakage and fewer stops.
Chemical storage and cleanup need a totally different safety mindset from air mattresses, especially if bottles are old, leaking, or unlabeled. For household cleanup decisions that shouldn't be guessed, review dispose of drain cleaner guidance before putting anything near trash, sinks, or storage shelves.
Safety Checks Before Someone Sleeps On It
After inflation, let the mattress sit for a few minutes before dressing it with sheets. This pause helps reveal slow leaks, weak valve closure, or uneven chambers. A mattress that sags immediately needs more air or a better valve seal. Catching that early beats waking up on the floor at 3 a.m.
Listen near the valve and seams for faint hissing. Quiet rooms make this easier, so turn off the vacuum and any fans nearby. If the leak comes from the valve, reseat the cap and press around the opening. Seam leaks are trickier and may need a patch kit instead of more air.
Place bedding only after the mattress feels stable. Heavy blankets and body weight can reveal soft spots that weren't obvious during inflation. A fitted sheet also helps reduce that sticky vinyl feel, which makes the bed more comfortable. Small comfort details matter when temporary sleep is already a compromise.
Sewing rooms, craft tables, and tiny lint-filled corners call for a different kind of suction tool than air mattress inflation. To keep thread bits and fabric dust from building up near machines, use a dedicated mini vacuum for sewing machine instead of dragging out a full-size cleaner.
Best Vacuum Types For This Job
A wet dry vacuum with a blower port is usually the easiest choice. These machines are built to move a lot of air, and the hose often fits larger mattress valves fairly well. They can be loud, though, so late-night setup may not be subtle. Still, the strong airflow makes them practical for larger mattresses.
Canister vacuums with exhaust ports can also work, especially if the hose attaches securely. Their airflow may be gentler than a shop vac, which can actually help with control. The tradeoff is speed, since larger mattresses may take longer. Patience pays off when valve fit is decent.
Upright vacuums are hit or miss. Some have detachable hoses but no true blower function, which limits their usefulness. Others may vent air from areas not designed for hose attachment. Forcing a workaround can create mess, heat, or weak inflation, so don't push the machine beyond its design.
Handheld vacuums usually struggle unless they include a blower attachment. Their small motors and limited airflow make them better for spot cleaning than mattress inflation. A twin mattress might partially fill with enough improvising, but a queen-size mattress can test your patience fast. The better move is using a machine with real outward airflow.
Step-By-Step Techniques For Inflating Air Mattresses With A Vacuum
Messy late-night setups and missing pumps don’t have to ruin sleep plans. How to use a vacuum to inflate an air mattress effectively involves strategic placement, airflow management, and careful attention to mattress valves. Starting with the right technique prevents uneven filling and protects the seams from stress. Simple adjustments can save minutes and eliminate frustration, making the process smoother for anyone handling temporary bedding.
Preparing Your Mattress And Area
Lay the mattress flat on a clean, open surface, removing any obstructions. Sharp edges, pet nails, or rough flooring can create puncture risks, so check carefully before inflating. Ensure that the valve is clean and fully functional to avoid air leaks that could compromise firmness. Clear space also allows you to see how the mattress expands and prevents accidental bumps during inflation.
Remove sheets, pillows, or other items before beginning. Even a slight obstruction can affect the way air fills the chambers, creating uneven surfaces and lumps. Check the valve orientation so the vacuum hose aligns easily. Having everything ready helps maintain steady airflow and reduces wasted time.
Consider the surrounding room environment. Too cold or hot conditions can affect the internal air pressure, leaving a mattress softer or firmer than expected. Planning for a few minutes of adjustment gives a realistic final firmness. Prepping the area properly is a small step that ensures optimized comfort.
It’s also wise to clean the floor underneath. Dust or debris can stick to the mattress bottom during inflation, especially if the vacuum produces air gusts. A simple sweep or mat provides better hygiene and reduces the chance of introducing dirt into the mattress chambers.
Connecting The Vacuum Properly
Identify the correct blower port on your vacuum. Using the wrong port can slow the process and frustrate even experienced users. Align the hose to the valve with a snug fit to maintain consistent airflow. A temporary seal using a towel or adapter can improve air delivery without damaging the valve.
Never force the hose if it doesn’t fit; improvising poorly can tear the valve. A proper connection ensures that maximal air volume reaches the mattress in a controlled manner. Keeping one hand on the hose and the other stabilizing the mattress helps maintain efficient expansion as the air flows.
For tighter fittings, a small funnel or custom nozzle helps guide air directly into the chamber. This avoids air leakage that slows filling and reduces the need for repeated vacuum bursts. Precision in connecting the hose is a key factor in saving time and ensuring even inflation.
Some vacuums come with built-in nozzle attachments designed for blowing air. These can be used effectively for larger mattresses without resorting to tape or improvised adapters. Simple design tweaks on the hose often produce faster, more controlled results.
Maintaining Steady Inflation
Once airflow begins, monitor the mattress as it rises. Even expansion is critical to prevent stress on seams and internal baffles. A mattress that inflates unevenly can create pressure points or sagging areas, so maintain visual control and adjust the hose position as needed.
Adjusting the vacuum speed or using intermittent bursts helps prevent overinflation. Sudden surges may force seams or valve flaps beyond their designed tolerance. Maintaining gradual, controlled airflow is safer and produces a mattress that holds its shape better overnight.
Check corners and edges to ensure they fill evenly. Stubborn areas sometimes need slight hand guidance to help air reach the last pockets. Balancing pressure across the mattress is a key factor in long-term mattress durability.
Patience pays off when using a vacuum for inflation. Unlike specialized pumps, airflow may vary slightly based on hose fit, vacuum power, and valve type. Observing these subtle cues ensures a firm, comfortable sleeping surface without damaging the mattress.
Dealing With Leaks And Adjustments
Listen for hissing around valves and seams. Minor leaks are normal with improvised vacuum inflation, but significant air loss indicates a poor fit or valve issue. Adjust the hose or cap promptly to maintain optimal firmness. Quick corrections prevent frustrations and ensure the mattress is ready on time.
Small gaps around the valve can be sealed temporarily with a towel or hands while the air is flowing. Avoid permanent adhesives that can damage the valve. Proper management of minor leaks is crucial for efficient inflation.
Sometimes chambers appear lopsided even after full inflation. Gentle massaging or shifting of air can equalize pressure and prevent sagging. Focus on consistent internal pressure for maximum comfort and durability.
For older or worn mattresses, leaks may persist and require patching. A few minutes of preventative maintenance saves longer-term frustration and extends mattress life. Addressing weak points before use maintains performance for repeated applications.
Practical Tips For Multiple Uses
Vacuum inflation isn’t just for one-night setups. Keeping a process in mind allows repeated use for camping, sleepovers, or temporary guest arrangements. Each mattress may behave differently, so adjusting technique is part of the practical learning curve. Experience improves speed and efficiency.
Label valves or hose adapters for each mattress to avoid confusion. Quick recognition saves time in fast-paced situations. Clear markings help maintain smooth workflow and reduce accidental misfits.
Storing vacuums and adapters together with the mattress ensures everything is ready when needed. This setup reduces stress during unexpected visits. Preparing for repeated usage reinforces consistent performance.
Keep track of mattress wear and tear. Not all mattresses respond the same to vacuum inflation, so noting issues can inform future adjustments. Awareness of durability and pressure tolerance helps prevent unnecessary damage.
Cleaning And Maintenance After Inflation
After the mattress is fully inflated and used, it’s important to clean the valve and surrounding area. Dust or sticky residues can affect the seal for future use. Regular upkeep maintains air-tight integrity and ensures reliable inflation every time.
Rolling or folding the mattress correctly avoids unnecessary stress on seams and valves. A compact fold keeps material integrity intact and simplifies storage. Improper folding can lead to cracks or weak points over time.
Keep a microfiber cloth or small vacuum handy to remove dust from the mattress surface. Clean surfaces prevent abrasions and wear that accumulate unnoticed. Simple routines make the difference for longevity and comfort.
Finally, store the vacuum separately from the mattress if possible to avoid accidental knocks or scratches. This protects both the tool and the mattress, preserving long-term usability and performance for future needs.
Recommended Vacuum Options
For consistent results, vacuums with a true blower port are preferable. Wet dry vacs or shop vacs often provide sufficient airflow and volume for rapid inflation. Canister vacuums with a dedicated exhaust outlet can also do the trick for smaller mattresses or tighter spaces.
Handheld vacuums usually struggle to generate enough pressure for full-sized air mattresses. They’re better for cleaning and light tasks. For repeated inflation, investing in a vacuum with blow function is worthwhile to save time and reduce frustration.
Some users combine vacuum techniques with a small manual pump to fine-tune firmness. This hybrid approach balances speed and control and protects mattress seams. Quick adjustments after initial vacuum inflation ensure the surface is perfectly comfortable.
For ongoing home projects, pairing the vacuum with other household tools can extend usability. For example, using a dedicated dupray neat steam cleaner helps sanitize or freshen the mattress surface quickly before guests arrive, enhancing comfort and hygiene.
Alternative Tools For Smaller Spaces
If space or noise is an issue, compact vacuums with blower attachments work well. Smaller, portable vacs provide adequate airflow for twin or single mattresses without taking over the room. The tradeoff is slower inflation for larger models, but controlled results often outweigh speed concerns.
These mini vacs also come in handy for other household tasks like litter cleanup or minor spills. A small vacuum for cat litter doubles as a multi-use tool that can handle quick jobs while still helping inflate a mattress. Efficiency is key for small living areas.
Maintaining portable vacs is simple. Empty dustbins, clean filters, and keep blower nozzles ready to go. Reliable performance and convenience depend on routine care.
They’re also quieter, which matters for late-night or shared apartment settings. With a properly set up hose and airflow, these small vacuums can achieve consistent mattress inflation without waking neighbors or family members.


How to Refinish a Fiberglass Pool

How Do You Keep Raccoons Out of Your Pool?

How to Fix Cyanuric Acid in Your Pool

How to Shape a Pool Cue Tip to Stop Miscues

Best Far Infrared Sauna Sauna Heats: Top Picks of 2026

11 Best Far Infrared Sauna Carbon Fiber Heaters of 2026 For Balanced Full-Body Heat

11 Best Carbon Far Infrared Sauna of 2026 For Even Heat

10 Best Bluetooth Speaker For Sauna of 2026 For Heat and Steam


