
How to Use a Vacuum Cleaner for the First Time Right

How to Use a Vacuum Cleaner for the First Time sounds simple on the surface, yet plenty of people end up pushing dust around, missing hidden debris, or struggling with attachments that seem confusing at first glance. A vacuum cleaner can make routine cleaning far easier, but only if it's used correctly from the start. Small details such as selecting the right floor setting, adjusting height levels, and understanding suction controls often have a bigger impact than many expect.
Freshly unboxed equipment can feel a little intimidating. Buttons, hoses, brushes, filters, and attachments all seem to demand attention at once. Fortunately, most of the confusion disappears after learning a few practical basics. Once those pieces click into place, cleaning becomes smoother, faster, and much less of a chore.
Proper suction management plays a major role in cleaning performance. Too much suction on delicate rugs can make movement difficult, while weak settings may leave dirt trapped deep within carpet fibers. Getting familiar with these adjustments helps create better cleaning results without unnecessary effort. A few moments spent understanding controls can save plenty of frustration later.
Floor surfaces often require different approaches. Hardwood, tile, laminate, area rugs, and thick carpets each respond differently to vacuum settings and brush rolls. Switching modes appropriately protects flooring while improving dirt pickup. That balance between effectiveness and care is one of the most overlooked parts of vacuum ownership.
Dust containers and filters deserve attention as well. A vacuum packed with debris loses efficiency surprisingly quickly. Emptying bins before they become overloaded and checking filters regularly helps maintain strong airflow. Consistent maintenance keeps the machine running smoothly instead of turning simple cleaning into an uphill battle.
Attachments frequently sit unused despite being incredibly helpful. Crevice tools reach narrow spaces beside appliances and furniture. Upholstery brushes handle couches, cushions, and fabric surfaces with greater precision. Learning where each accessory shines can dramatically improve cleaning coverage throughout the home.
How to Use a Vacuum Cleaner for the First Time also involves developing good habits. Slow, steady passes usually collect more debris than rushing across a room. Overlapping cleaning paths reduce missed spots and improve overall results. Those simple techniques often matter more than expensive features.
Even small cleaning sessions become more satisfying when the machine works as intended. Floors look cleaner, dust levels stay lower, and maintenance becomes easier to manage. Rather than guessing through trial and error, understanding the fundamentals helps create a cleaner living space with less effort and fewer headaches.
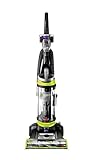
- VC Score9.0
BCP Score is a ranking system developed by bestcleanerproducts.com. BCP Score has no relationship or impact from any manufacturers or sales agent websites. Learn more
- BrandBissell

- VC Score8.8
BCP Score is a ranking system developed by bestcleanerproducts.com. BCP Score has no relationship or impact from any manufacturers or sales agent websites. Learn more
- BrandBissell
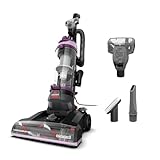
- VC Score8.8
BCP Score is a ranking system developed by bestcleanerproducts.com. BCP Score has no relationship or impact from any manufacturers or sales agent websites. Learn more
- BrandBissell
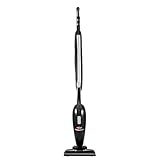
- VC Score8.8
BCP Score is a ranking system developed by bestcleanerproducts.com. BCP Score has no relationship or impact from any manufacturers or sales agent websites. Learn more
- BrandBissell

- VC Score8.8
BCP Score is a ranking system developed by bestcleanerproducts.com. BCP Score has no relationship or impact from any manufacturers or sales agent websites. Learn more
- BrandShark

- VC Score8.8
BCP Score is a ranking system developed by bestcleanerproducts.com. BCP Score has no relationship or impact from any manufacturers or sales agent websites. Learn more
- BrandEureka

- VC Score8.6
BCP Score is a ranking system developed by bestcleanerproducts.com. BCP Score has no relationship or impact from any manufacturers or sales agent websites. Learn more
- BrandBissell

- VC Score8.6
BCP Score is a ranking system developed by bestcleanerproducts.com. BCP Score has no relationship or impact from any manufacturers or sales agent websites. Learn more
- BrandKARDV

- VC Score8.6
BCP Score is a ranking system developed by bestcleanerproducts.com. BCP Score has no relationship or impact from any manufacturers or sales agent websites. Learn more
- BrandDirt Devil
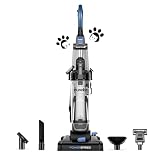
- VC Score8.4
BCP Score is a ranking system developed by bestcleanerproducts.com. BCP Score has no relationship or impact from any manufacturers or sales agent websites. Learn more
- BrandEureka
Last update on 2026-06-01 / Affiliate links / Images, Product Titles, and Product Highlights from Amazon Product Advertising API
How To Use A Vacuum Cleaner For The First Time
Dust has a sneaky way of making a clean room feel unfinished, especially after crumbs, pet hair, and tracked-in grit settle into corners. A vacuum cleaner should make that mess easier to handle, not turn the first cleaning session into a button-pressing guessing game. How to use a vacuum cleaner for the first time starts with getting familiar with the machine before rushing across the floor. A little patience at the start helps protect floor surfaces, improve suction performance, and prevent the kind of rookie mistakes that make cleaning feel harder than it needs to be.
First Vacuum Setup
Start by placing the vacuum on a flat surface and checking every visible part before plugging it in. The handle, hose, dust bin, filter cover, power cord, and cleaning head should all feel secure. Loose parts can reduce suction, rattle during use, or make the vacuum harder to control. That first quick inspection gives you a better feel for the machine and keeps small problems from turning into annoying interruptions.
Read the labels on the vacuum body instead of guessing what each button does. Most models include simple icons for power, brush roll, floor mode, or suction control. Those tiny symbols matter because hardwood, carpet, rugs, and tile don’t all need the same setup. A few seconds spent matching the setting to the surface can save your floor from scratches and your rugs from getting pulled around.
Check the dust bin or bag before cleaning, even if the vacuum is brand new. Packaging dust, plastic bits, or factory inserts can sometimes sit inside compartments. A clean, properly seated bin helps the vacuum maintain strong airflow from the first pass. If the filter isn’t clicked into place, suction may feel weak even though the motor sounds loud.
Unwind the power cord fully if the vacuum uses one. A tightly coiled cord can tug at the machine and make movement awkward. Keep the cord behind you as you clean so it doesn’t get caught under the wheels or brush head. That simple habit protects the cord and keeps your cleaning path smoother.
Choose The Right Floor Setting
Floor settings exist for a reason, and skipping them is one of the fastest ways to get poor results. Hard floors usually need a gentler mode, while carpets often need the brush roll to lift debris from the fibers. Correct floor adjustment helps the vacuum pick up more dirt without fighting against the surface. It also reduces the chance of scattering crumbs across tile or pulling threads from delicate rugs.
Carpet height matters more than beginners expect. A cleaning head set too low can feel stuck, while a setting that sits too high may glide easily but miss dirt below the surface. The sweet spot lets the vacuum move with slight resistance while still pulling debris upward. Balanced height makes the machine easier to push and helps the motor work without unnecessary strain.
Hardwood and laminate need a little extra care. A spinning brush roll may kick debris backward or leave faint marks on softer finishes, depending on the vacuum design. Switch to a hard-floor mode or turn off the brush roll if your model allows it. Surface protection matters just as much as visible cleanliness.
Area rugs can be tricky because lightweight rugs tend to bunch, lift, or slide. Lower suction or use a gentler attachment if the rug keeps getting pulled into the cleaning head. Slow passes work better than forcing the vacuum forward. For outdoor messes around patios or pool areas, uneven ground creates its own headache, so compare practical cleaning setups through pool vacuum uneven surfaces before dealing with rougher surfaces beyond indoor floors.
Use Slow Passes Instead Of Rushing
Speed is the silent enemy of good vacuuming. Racing across the room may look productive, but the vacuum needs time to pull dirt, dust, hair, and grit into the airflow path. Slow forward passes allow the brush and suction to loosen debris properly. Then a steady backward pass helps collect what the first movement lifted.
Overlap each pass slightly instead of cleaning in random lines. This method keeps narrow strips of dust from being left behind between paths. Think of mowing a lawn, just indoors and without the gasoline smell. Overlapping strokes create a cleaner finish and reduce the need to redo the same area later.
Pay extra attention to high-traffic lanes. Entryways, hallway centers, bedroom walkways, and spaces near the couch usually collect more dirt than quiet corners. Those areas often need a second pass from a different direction. Cross-pattern cleaning helps loosen debris trapped deeper in carpet fibers.
Don’t press down hard on the handle. Heavy pressure can reduce airflow around the cleaning head and make the vacuum harder to move. Let the machine do the work while you guide it steadily. Light control gives better results than wrestling with the vacuum like it owes you money.
Handle Attachments Without Guesswork
Attachments can look like random plastic extras until you match each one to a specific cleaning problem. The crevice tool handles narrow gaps beside appliances, baseboards, couch cushions, and car seats. The dusting brush is better for blinds, shelves, vents, and delicate surfaces. Using the right attachment keeps dirt from hiding in places the main floor head can’t reach.
The upholstery tool deserves more attention than it usually gets. Sofas, fabric chairs, mattresses, and pet beds collect hair and fine dust that the main vacuum head may not handle well. Short, firm strokes work better than quick swipes. Fabric cleaning takes a little patience because lint and hair cling tightly to textured surfaces.
Hoses need gentle handling during the first use. Pulling too hard can tip the vacuum or loosen a connection, especially with upright models. Keep one hand near the vacuum body if the hose feels stiff. Stable handling prevents the machine from bumping furniture or tipping over mid-clean.
Small cleaning tools are also easy to misplace. Store them on the vacuum body if clips are provided, or keep them in a labeled basket near your cleaning supplies. That sounds fussy, sure, but hunting for a crevice tool every time crumbs fall beside the fridge gets old fast. Easy access makes deep cleaning feel less like a whole production.
Empty The Bin Before It Gets Packed
A full dust bin weakens suction long before it looks completely stuffed. Dirt, hair, and lint can block airflow inside the container, making the motor work harder. Airflow maintenance is one of the simplest ways to keep a vacuum performing well. Emptying the bin early beats waiting until dust puffs out like a tiny indoor storm cloud.
Bagged vacuums need the same kind of attention. A bag that’s too full can reduce pickup and leave fine dust behind. Check the fill line if the bag has one, and replace it before performance drops badly. Fresh bags help maintain steady suction and reduce unpleasant odors.
Bagless models should be emptied over a trash can slowly. Tap the bin gently instead of shaking it aggressively, especially if fine dust has collected inside. People with dust sensitivity may want to empty the bin outdoors or wear a simple mask. Cleaner disposal habits keep the task from sending debris right back into the room.
Filters need routine checks, not constant panic. Some are washable, while others must stay dry and be replaced on schedule. Always confirm the filter type before rinsing anything. Proper filter care protects suction, motor life, and indoor air quality.
Avoid Common First-Time Mistakes
Vacuuming over large debris is a bad habit from day one. Coins, paper clips, small toys, plant stones, and broken bits of plastic can clog hoses or damage the brush area. Pick up visible objects before turning the vacuum on. Pre-cleaning the floor takes less time than clearing a jammed hose later.
Wet messes are another hard no for standard dry vacuums. Water, spilled drinks, damp soil, and soggy food can damage internal parts or create odors inside the machine. Use a wet-dry vacuum only if the model is built for liquids. Dry debris only is the safe rule for most household vacuums.
Power cords need a clear path. Running over the cord may nick the insulation or tangle it in the brush roll. Keep the plug behind your cleaning direction and switch outlets instead of stretching the cord across the whole room. Cord safety protects both the vacuum and the person using it.
Small machines can still handle big jobs, but expectations need to stay realistic. Budget robot vacuums, for example, can help with daily crumbs and pet hair, though they may struggle with thick rugs, cords, and cluttered floors. Compare practical floor-care expectations through robot vacuum cleaner under 200 if hands-off cleaning sounds useful for lighter maintenance. Realistic use keeps disappointment out of the picture and makes each tool fit the job better.
Clean Smarter Around Furniture
Furniture legs create little dust traps that beginners often miss. Chairs, coffee tables, nightstands, and plant stands collect debris around their bases. Use the main head for open areas, then switch to a crevice tool near tight edges. Detail cleaning makes the room look truly clean instead of just cleaner in the middle.
Move lightweight furniture when it makes sense, but don’t turn every vacuum session into a full-room reset. Dining chairs, floor baskets, and small ottomans are worth shifting for a better pass. Heavy furniture can stay put for routine cleaning and get handled during deeper sessions. Practical effort matters because a routine you can keep beats a perfect plan you’ll avoid.
Baseboards deserve a quick pass because dust loves to settle along edges. A brush attachment can loosen fine debris without scraping painted trim. Work from the far side of the room toward the exit so you don’t walk over freshly cleaned paths. Edge cleaning gives floors a sharper, more finished look.
Houseplants add another layer of mess, especially with dry potting mix, fallen leaves, and spilled perlite. Pick up larger soil chunks by hand before vacuuming, since gritty particles can be rough on some floor finishes. Use suction carefully around plant stands so lightweight leaves don’t clog the nozzle. Plant-area cleanup works best with a gentle touch and a little common sense.
Keep The Vacuum Running Smoothly
Brush rolls collect hair faster than most people expect. Long hair, pet fur, thread, and carpet fibers wrap around the roller and reduce its ability to lift dirt. Turn the vacuum off and unplug it before checking the brush area. Brush roll maintenance keeps cleaning performance steady and helps prevent strain on the motor.
Hose clogs usually show up as weak suction or strange whistling sounds. Detach the hose if your model allows it, then look for trapped lint, paper, or clumps of hair. A broom handle can help gently push out soft blockages, but avoid sharp tools that could puncture the hose. Clear airflow is the backbone of good vacuuming.
Odors can build up if dust, pet hair, or damp debris sits too long inside the vacuum. Empty the bin regularly, check filters, and let washable parts dry fully before reinstalling them. Moisture trapped inside a vacuum can create a stale smell that spreads during cleaning. Dry components help keep the machine fresher between uses.
Some household cleaning tools use timed cycles, especially devices made for jewelry, small parts, or hardware. That timing mindset can help with maintenance routines too, because machines perform better when they aren’t ignored until something fails. For a separate cleaning setup, compare cycle expectations through run ultrasonic cleaner before using one for small-item cleaning. Consistent care keeps tools useful instead of turning them into clutter.
How To Vacuum Your Home Correctly For The First Time
Once the first few passes feel less awkward, the next challenge is building a cleaning rhythm that actually fits real life. Crumbs near the kitchen, grit by the door, pet hair on fabric, and dust under furniture all need slightly different handling. How to use a vacuum cleaner for the first time becomes easier once the job stops feeling like one big chore and starts feeling like a simple sequence. Clean the open areas first, slow down near edges, then use attachments where the main floor head can’t do the job cleanly.
Build A Simple Cleaning Route
A good route keeps you from wandering around the room and missing obvious spots. Start at the farthest corner, then work toward the doorway so you’re not stepping over freshly cleaned flooring. Clean paths make the room feel more organized while reducing repeated work. It’s a small habit, but it saves time once vacuuming becomes routine.
Rooms with mixed flooring need a little more attention. Move from hard floors to rugs, or handle rugs separately if they slide around too much. Surface changes can affect suction, brush roll behavior, and how smoothly the vacuum moves. Switching settings at the right moment keeps the machine from dragging, scattering crumbs, or leaving grit behind.
Kitchen edges deserve slower passes because dry rice, coffee grounds, cereal pieces, and tiny crumbs love to hide near cabinets. A standard floor head may collect most of it, but a crevice tool usually does better along toe-kicks and corners. Edge cleanup matters because leftover crumbs can make the whole room feel unfinished. For sticky residue on counters or tile nearby, learn what a separate cleaner is made for through cif cleaner before mixing surface cleaners with floor-care tools.
Bedrooms often need attention around bed frames, nightstands, and laundry baskets. Dust collects quietly there, especially if windows stay open or bedding sheds lint. Slow passes along baseboards and under reachable furniture help remove debris before it builds up. Keep the vacuum steady instead of jamming the head into tight spots.
Match Suction To The Mess
Strong suction sounds impressive, but it isn’t always the right answer. Lightweight rugs, curtains, thin mats, and loose fabric can get pulled too hard if the setting is too aggressive. Suction control helps the vacuum clean without turning the job into a tug-of-war. Lower power can sometimes give better control and a cleaner finish.
Carpeted rooms usually benefit from a more deliberate pace. Dirt settles between fibers, and rushing over the surface only grabs what’s sitting on top. Deep debris removal needs slower movement, overlapping strokes, and the right height adjustment. The vacuum should feel steady, not stuck.
Pet hair adds another layer of frustration. It clings to rugs, gathers near furniture legs, and rolls into little clumps along baseboards. Brush roll cleaning becomes more important in homes with shedding pets because wrapped hair can weaken pickup fast. Check the roller often if the vacuum starts leaving fur trails behind.
Large carpeted areas may need a stronger machine than a small household vacuum can offer. That doesn’t mean every home needs heavy equipment, but offices, rental properties, and busy carpeted spaces can wear out lighter machines quickly. Compare practical durability needs through commercial vacuum carpet if thick carpet and frequent cleaning are part of the routine. Machine fit matters because the wrong vacuum makes a simple job feel like a workout.
Protect Floors While Cleaning
Clean floors shouldn’t come with scratches, rug damage, or scuffed trim. Check the underside of the vacuum head before the first serious cleaning session. Trapped grit, small stones, or hardened debris can drag across hard floors and leave marks. A quick wipe around the wheels and base plate can prevent a lot of avoidable damage.
Hardwood floors need a softer touch than carpet. Turn off the brush roll if the vacuum allows it, especially on older finishes or softer wood. Gentle floor care keeps dust removal effective without roughing up the surface. The goal is clean, not polished into regret.
Tile and laminate can handle more movement, but debris may scatter if the vacuum head sits wrong. Start with lower suction or hard-floor mode, then adjust if crumbs keep kicking forward. Proper head contact helps the vacuum pull debris in instead of chasing it across the room. Slow down near grout lines because grit likes to settle there.
Rugs with fringe need extra caution. Avoid running the brush roll directly over tassels because they can tangle fast. Use suction near the edges and lift the fringe out of the way when possible. Fringe protection keeps decorative rugs from looking chewed up after one careless pass.
Make Attachments Part Of The Routine
Attachments work best when they’re used before the room looks visibly dusty again. A quick pass over vents, shelves, and couch seams keeps buildup from spreading back onto the floor. Dust control starts above ground level, not just where shoes land. That’s why a brush tool can be just as useful as the main cleaning head.
The crevice tool is the quiet hero of first-time vacuuming. It reaches between seat cushions, beside appliances, along stair edges, and around sliding door tracks. Narrow-space cleaning removes the debris that usually survives a basic floor pass. Use short pulls instead of long awkward stretches for better control.
Upholstery tools need firm but careful movement. Fabric can hold crumbs, hair, and dust even when it looks clean from a distance. Fabric care improves when you use steady strokes and avoid grinding the tool into the material. Sofas, dining chairs, and pet beds usually benefit from this slower approach.
Stairs can feel clumsy with a full-size vacuum. Use a hose, compact attachment, or handheld mode if available. Stable footing matters more than speed, especially on narrow steps. Keep the cord behind you and never balance the vacuum where it can tip.
Set A Maintenance Habit Early
A vacuum cleaner stays useful longer when maintenance starts before problems show up. Empty the bin, check the filter, and look at the brush roll after the first few cleaning sessions. Early maintenance helps you learn how fast your home fills the machine with dust and hair. That pattern tells you how often to clean each part.
Filters affect suction more than many beginners realize. A dirty filter blocks airflow, makes the motor sound strained, and leaves debris behind. Clean filtration supports better pickup and helps reduce dusty exhaust. Let washable filters dry fully before reinstalling them because damp filters can create odor and airflow issues.
The brush roll should spin freely without hair wrapped around it. Cut away tangled strands carefully with scissors if the manual allows it. Roller care keeps carpet cleaning more consistent and prevents the machine from dragging. Ignore it too long and the vacuum may still run, but it won’t clean with the same bite.
Store the vacuum where it’s easy to grab, not buried behind boxes or laundry piles. A machine that’s simple to access gets used more often for small messes. Convenient storage makes cleaning less dramatic and more like a normal household habit. Keep attachments nearby so quick cleanups don’t turn into a scavenger hunt.
Know What The Vacuum Should Not Do
A regular vacuum cleaner is not built for every mess. Wet spills, damp soil, fireplace ash, glass shards, and construction dust can damage parts or create safety issues. Dry household debris is the safer lane for most standard models. Use the right tool instead of forcing one machine to handle everything.
Fine powders can be especially tricky. Baking soda, drywall dust, and powdery debris may clog filters quickly and reduce suction. Filter strain happens fast with tiny particles because they pack tightly inside the airflow path. Clean or replace filters sooner after handling dusty messes.
Noisy operation can signal a problem if the sound suddenly changes. A high-pitched whistle may point to a hose clog, while rattling could mean debris is trapped near the brush area. Sound changes are worth checking before continuing. Turning the machine off early can prevent a small issue from becoming a repair bill.
Smells should not be ignored either. Burnt odors, sour dust smells, or pet hair buildup can point to clogged filters, full bins, or tangled rollers. Odor control starts with emptying the bin and cleaning the parts that collect debris. A vacuum should leave the room fresher, not announce itself after the job is done.


How to Refinish a Fiberglass Pool

How Do You Keep Raccoons Out of Your Pool?

How to Fix Cyanuric Acid in Your Pool

How to Shape a Pool Cue Tip to Stop Miscues

Best Far Infrared Sauna Sauna Heats: Top Picks of 2026

11 Best Far Infrared Sauna Carbon Fiber Heaters of 2026 For Balanced Full-Body Heat

11 Best Carbon Far Infrared Sauna of 2026 For Even Heat

10 Best Bluetooth Speaker For Sauna of 2026 For Heat and Steam


