
How to Use 2 in 1 Vacuum Sealer Without the Guesswork

How to use 2 in 1 vacuum sealer sounds simple at first glance, yet plenty of kitchen mishaps begin with one small mistake. A bag that's overfilled, a moist food item placed too close to the sealing strip, or the wrong mode selected can turn a quick food-storage task into a frustrating cleanup. Knowing the right process helps create a stronger seal, reduces food waste, and keeps ingredients fresher for much longer.
Many households buy a sealer expecting instant results, only to realize there are two different functions working together. The vacuum mode removes air from bags, while the accessory or container mode handles jars, canisters, and specialty storage containers. That dual-purpose design is exactly why a 2 in 1 vacuum sealer offers more flexibility than a basic machine. Used correctly, it becomes a practical tool rather than another appliance collecting dust.
Fresh produce, meat, seafood, leftovers, coffee beans, and even snacks benefit from proper vacuum sealing. Air is often the culprit behind freezer burn, stale flavors, and shortened shelf life. By learning how to use 2 in 1 vacuum sealer correctly, food stays protected from excess oxygen and moisture fluctuations. The result is cleaner organization and fewer trips to the grocery store.
Small details make a surprising difference. Leaving enough space at the top of the bag allows the machine to create a complete seal. Selecting the correct setting for dry or moist foods prevents liquids from interfering with the process. Also, keeping the sealing strip clean improves consistency and helps avoid weak seals that fail later.
Storage efficiency becomes another major advantage. Vacuum-sealed foods take up less room in refrigerators and freezers, making crowded shelves easier to manage. Bulk purchases suddenly become more practical because portions can be separated and preserved with confidence. A little preparation upfront often saves money and reduces unnecessary waste over time.
Maintenance matters, too. Regular cleaning of the drip tray, sealing gasket, and vacuum channel keeps the machine performing smoothly. Neglecting these areas can reduce suction power and create sealing problems that seem mysterious at first. Fortunately, routine upkeep takes only a few minutes and pays off with more reliable performance.
Proper technique turns a simple appliance into a dependable kitchen companion. Once the process becomes familiar, sealing food feels quick and effortless. More importantly, the benefits of longer-lasting freshness, better food organization, and reduced waste become part of everyday life rather than occasional conveniences.

- VC Score9.8
BCP Score is a ranking system developed by bestcleanerproducts.com. BCP Score has no relationship or impact from any manufacturers or sales agent websites. Learn more
- BrandBeelicious Pro

- VC Score9.6
BCP Score is a ranking system developed by bestcleanerproducts.com. BCP Score has no relationship or impact from any manufacturers or sales agent websites. Learn more
- BrandZACHVO
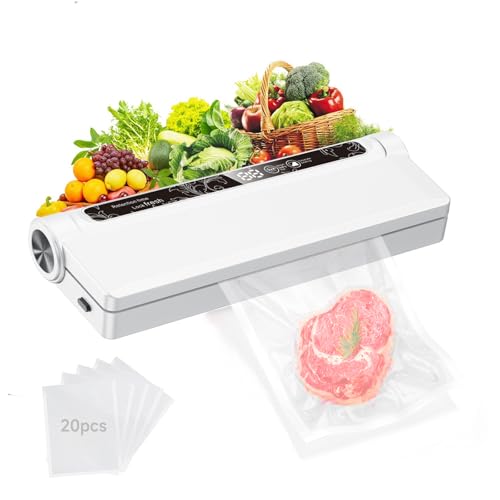
- VC Score9.4
BCP Score is a ranking system developed by bestcleanerproducts.com. BCP Score has no relationship or impact from any manufacturers or sales agent websites. Learn more
- BrandKe Moxiey

- VC Score9.4
BCP Score is a ranking system developed by bestcleanerproducts.com. BCP Score has no relationship or impact from any manufacturers or sales agent websites. Learn more
- BrandROUUO

- VC Score9.0
BCP Score is a ranking system developed by bestcleanerproducts.com. BCP Score has no relationship or impact from any manufacturers or sales agent websites. Learn more
- BrandFRESKO

- VC Score8.8
BCP Score is a ranking system developed by bestcleanerproducts.com. BCP Score has no relationship or impact from any manufacturers or sales agent websites. Learn more
- BrandBBDYOY

- VC Score8.6
BCP Score is a ranking system developed by bestcleanerproducts.com. BCP Score has no relationship or impact from any manufacturers or sales agent websites. Learn more
- BrandMEGAWISE

- VC Score8.2
BCP Score is a ranking system developed by bestcleanerproducts.com. BCP Score has no relationship or impact from any manufacturers or sales agent websites. Learn more
- BrandWOODSPROUT
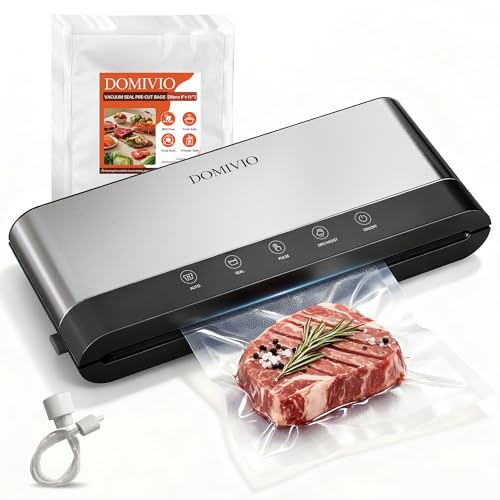
- VC Score8.0
BCP Score is a ranking system developed by bestcleanerproducts.com. BCP Score has no relationship or impact from any manufacturers or sales agent websites. Learn more
- BrandDOMIVIO
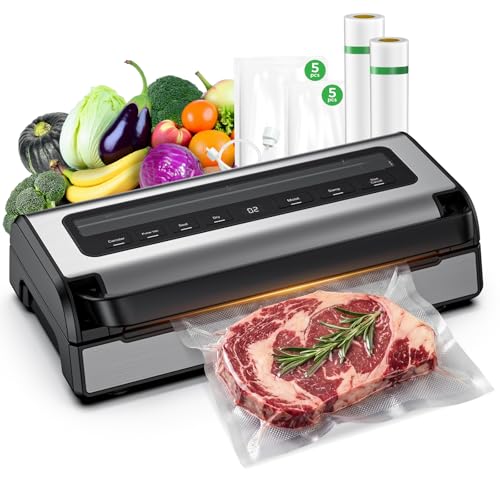
- VC Score8.0
BCP Score is a ranking system developed by bestcleanerproducts.com. BCP Score has no relationship or impact from any manufacturers or sales agent websites. Learn more
- BrandROUUO
Last update on 2026-06-27 / Affiliate links / Images, Product Titles, and Product Highlights from Amazon Product Advertising API
How To Use 2 In 1 Vacuum Sealer
A freezer drawer can turn messy fast, especially after one grocery run with family-size chicken packs, half-used vegetables, and leftovers that need a second chance. Bags puff up, containers hog space, and food gets forgotten in the back until it looks suspicious. That is where how to use 2 in 1 vacuum sealer becomes more than a kitchen trick. It gives food a tighter seal, a cleaner storage routine, and a better shot at staying useful instead of landing in the trash.
2 In 1 Vacuum Sealer Basics
A 2 in 1 vacuum sealer usually handles two jobs: sealing vacuum bags and working with accessory containers or canisters. That second function matters because not every food belongs in a flat bag. Chips, berries, coffee beans, and delicate leftovers can get crushed if the suction pulls too hard. Containers give those items breathing room while still reducing air exposure.
The bag function suits meats, fish, chopped vegetables, freezer meals, and dry pantry goods. The accessory function helps with jars, marinating containers, and reusable vacuum boxes. So, the real skill is not just pressing a button. The smart move is matching the food to the right sealing method.
Most sealing problems start before the machine even turns on. Wet edges, wrinkled bags, overfilled portions, and food crumbs near the seal line can all weaken the final seal. A clean, flat bag mouth gives the heating strip a fair chance. That small habit saves a surprising amount of frustration.
Kitchen appliances also share one annoying truth: they behave better when they are not rushed. Let the machine finish its cycle before lifting the lid or pulling the bag away. A rushed seal may look fine at first, then slowly leak air overnight. Patience keeps the vacuum seal tight and dependable.
Set Up The Machine Before Sealing
Start with a dry counter, a clean machine, and enough space to lay the bag flat. A cramped setup makes the bag twist, and twisted plastic often leads to uneven sealing. Plug in the sealer, open the lid, and check that the gasket sits properly in its groove. A loose gasket can reduce suction power before the real work begins.
Cut the bag a little longer than the food seems to need. That extra space is not wasteful; it helps the machine pull air without dragging food into the vacuum channel. For most foods, leaving several inches between the food and the open edge works better than packing everything to the top. Tight bags may save plastic, but they often create weak seals.
Dry foods are forgiving, so rice, nuts, crackers, and coffee usually seal without drama. Moist foods need more care because liquid can creep toward the sealing strip. Freeze saucy foods slightly before sealing, or fold a paper towel near the top inside the bag to catch moisture. That one trick helps protect the heat seal from getting wet.
Accessory hoses need a snug connection. Push the hose firmly into the machine and the container port before starting the accessory mode. A loose hose can make the motor run while almost nothing happens. The sound may fool you, but the container will not hold a proper vacuum.
Small cleaning routines matter here, too. If your floors collect crumbs while you prep bulk food, a home cleaning routine can pair naturally with storage days, especially with a robot vacuum for slate floors handling grit underfoot. A cleaner prep zone means fewer crumbs sneaking into bag edges. That helps the sealer do its job without fighting little bits of food.
Use Vacuum Bags The Right Way
Place food in the bag in a single, even layer whenever possible. Stacked pieces create air pockets, and air pockets make the machine work harder. Flat portions freeze faster and thaw more evenly later. That is especially useful for meat, seafood, and meal prep.
Slide the open end of the bag into the vacuum channel, not just onto the sealing strip. This is where many first-time mistakes happen. The machine needs access to the bag opening so it can pull air out before sealing. If the bag sits too shallow, it may seal without removing enough air.
Close the lid until it locks, then choose the correct mode. Use normal or dry mode for pantry items and firmer foods. Use moist or gentle mode for juicy foods, soft bread, or anything that may collapse under strong suction. The right setting protects texture as much as freshness.
Watch the bag as the air leaves. The plastic should tighten around the food without pulling liquid into the channel. If liquid starts climbing too fast, cancel the cycle, clean the edge, and try again with a colder or more controlled setup. Better to pause once than ruin the seal and clean the machine twice.
After sealing, inspect the sealed strip. A strong seal looks smooth, even, and complete from one side to the other. Wrinkles, gaps, or cloudy wet spots can mean trouble. For freezer storage, a second seal above the first one adds extra protection against leaks.
Use Containers Without Crushing Food
Containers are the calmer side of a 2 in 1 vacuum sealer. They protect foods that would suffer inside a tight plastic bag. Strawberries, muffins, salad greens, and chips need reduced air exposure, not a plastic squeeze. A vacuum container gives those foods a cleaner balance.
Fill the container without packing it to the lid. Air needs space to move out through the valve. Overfilled containers can block the valve or press food into the lid seal. That can weaken the vacuum and make the lid pop loose later.
Attach the accessory hose, select the container mode, and let the machine stop on its own. Do not pull the hose early just because the lid looks tight. The final seconds often help build the seal. That steady finish supports longer freshness and better storage consistency.
Marinating containers deserve special mention. Vacuum pressure can help marinade reach the food surface more efficiently than a loose bowl in the fridge. Still, it will not magically turn a tough cut tender in a few minutes. Salt, acid, time, and cut thickness still matter.
Pool owners know adjustment makes equipment behave better, and the same mindset applies in the kitchen. A small tweak can change the whole result, much like learning adjust a polaris pool cleaner for steadier movement. With containers, the tweak is usually simple: less filling, cleaner lid edges, and a tighter hose connection.
Prevent Common Sealing Mistakes
Overfilling is the sneaky villain. It feels efficient, but it causes wrinkles, food smears, and trapped air. A bag needs room at the top so the machine can grip, vacuum, and seal cleanly. Give the seal area space, and the finished package will look neater.
Wet foods cause another headache. Raw meat, fish, soups, and cooked vegetables can release moisture as suction starts. Pat them dry first, chill them well, or freeze them until firm around the edges. That extra prep protects the machine and improves the final seal.
Powdery foods need a lighter touch. Flour, sugar, spices, and protein powder can get sucked toward the vacuum channel. Put them in a paper bag or original inner pouch before placing them inside the vacuum bag. This keeps fine particles away from the gasket and sealing strip.
Sharp foods can puncture bags after sealing. Bones, pasta edges, and hard frozen corners may poke tiny holes that let air back in. Wrap those sharp spots with parchment or a small food-safe cushion before vacuuming. A neat package is useless if the bag gets pierced in the freezer.
Cleaning after mistakes keeps the sealer from becoming unreliable. Wipe the vacuum channel, dry the drip tray, and remove crumbs from the gasket. A dirty strip can create partial seals even when everything else looks right. Think of it like carpet care: deep fibers need the right tool, just as thick storage routines need the right appliance, and a bissell vacuum for high pile carpet fits that kind of targeted household job.
Store Sealed Food With Better Habits
Vacuum sealing slows exposure to air, but it does not replace safe food storage. Refrigerated foods still need proper cold temperatures. Frozen foods still need steady freezer conditions. The sealer helps, yet food safety still depends on temperature and clean handling.
Label every bag before storing it. Add the food name and packing date with a marker. This sounds boring, sure, but future-you will be grateful. A frozen mystery pouch rarely inspires dinner confidence.
Stack bags flat until frozen, then stand them upright like files. This saves freezer space and makes portions easier to find. Flat packs also thaw faster than bulky lumps. That one storage habit can make meal prep feel less chaotic.
Keep similar foods together. Meat in one area, vegetables in another, snacks in a separate bin, and ready-to-heat meals within easy reach. A vacuum sealer works best as part of a system, not as a random bagging tool. Clean categories reduce waste because food stays visible.
Leave delicate foods in containers if crushing is a risk. Lettuce, pastries, and soft fruit may not bounce back after tight suction. The container function exists for exactly those cases. Using it wisely makes the 2 in 1 design feel practical instead of gimmicky.
Keep The Sealer Working Smoothly
A vacuum sealer does not ask for much, but it does need basic care. Let the heating strip cool between heavy batches so the seals stay clean. Constant back-to-back sealing can make some machines struggle. A short pause helps protect seal consistency.
Clean the drip tray after moist foods. Even a small amount of liquid can create odors or interfere with suction later. Remove it, wash it if the design allows, and dry it before putting it back. Dry parts make the next sealing job easier.
Check the gasket for crumbs, dents, or food residue. The gasket helps create the vacuum chamber seal, so damage there affects suction. If the machine suddenly loses power, the gasket is one of the first places to inspect. A simple reseat may fix the issue.
Store the machine with the lid unlatched if the manual allows it. Constant pressure on the gasket can flatten it over time. A relaxed gasket usually lasts longer and seals better. That little storage habit supports long-term performance without buying extra parts too soon.
How To Vacuum Seal Different Foods Correctly
Food type changes everything. A bag of coffee beans behaves very differently from a tray of marinated chicken or a container full of strawberries. Learning these differences helps turn how to use 2 in 1 vacuum sealer from a basic storage method into a reliable routine that protects both flavor and texture.
Fresh meat usually seals well because its shape stays stable under suction. Moisture creates the biggest challenge. Patting the surface dry before sealing often leads to a stronger vacuum, a cleaner seal line, and less mess inside the machine.
Vegetables deserve a little extra attention. Some produce benefits from blanching before freezing, while others can be sealed fresh. The goal is preserving quality instead of simply trapping food inside plastic. A thoughtful approach prevents disappointing results later.
Dry pantry items are often the easiest foods to store. Rice, pasta, beans, cereal, and nuts respond well to vacuum sealing because there is little moisture to interfere with the process. These foods gain the benefit of longer freshness and better organization without much effort.
Handle Delicate Foods Without Damage
Soft foods can become frustrating if strong suction pulls too aggressively. Bread may flatten, berries can split, and pastries sometimes lose their shape before the seal finishes. The container mode on a 2 in 1 vacuum sealer solves many of these problems because it protects fragile foods from pressure.
Cheese often surprises people. Hard cheeses usually vacuum seal nicely, but soft varieties may compress if too much air is removed. Using a gentle setting or a vacuum container helps maintain texture while still reducing air exposure.
Leafy greens need realistic expectations. Vacuum sealing may help reduce air contact, but delicate leaves can still bruise if packed carelessly. A container usually delivers a better balance between protection and storage efficiency.
Crackers and chips create another common challenge. Crushing them into crumbs defeats the purpose of preserving freshness. Container mode allows the food to keep its shape while still benefiting from a reduced-oxygen environment.
Use Vacuum Sealing For Meal Preparation
Meal prep becomes easier when portions are separated before storage. Instead of freezing a large package of food, divide ingredients into practical serving sizes. Smaller portions thaw faster and create less waste. That simple habit supports better planning and easier weeknight cooking.
Cooked meals often benefit from vacuum sealing because they take up less freezer space. Soups, casseroles, and cooked proteins can be organized neatly instead of stacking bulky containers. Flat storage creates room for other ingredients without overcrowding shelves.
Labeling matters more than many people realize. A freezer filled with anonymous packages quickly becomes confusing. Names, dates, and portion details make it easier to rotate inventory and avoid forgotten food.
Bulk shopping can feel expensive at checkout, yet portioning and sealing food immediately often stretches value much further. The combination of portion control, food preservation, and organized storage helps reduce unnecessary purchases later.
Home organization habits often overlap. People focused on cleaner storage systems may also appreciate practical housekeeping solutions such as a best shark vacuum corners curtains guide for keeping difficult areas free from dust while maintaining an orderly kitchen environment.
Common Signs A Vacuum Seal Has Failed
A bag that suddenly looks loose is often the first warning sign. Air creeping back into the package usually means the seal was incomplete or the bag developed a tiny puncture. Catching these problems early helps prevent food quality from declining.
Sharp bones and frozen edges frequently create small holes that are hard to see. The package may appear sealed initially, then slowly lose vacuum over several days. Protective wrapping around sharp points helps reduce this risk.
Moisture near the seal line can weaken the bond between layers of plastic. That weakness may not appear immediately. Several days later, the seal can separate and allow air inside. Keeping the sealing area dry remains one of the most effective habits for success.
Routine inspections help maintain confidence in stored food. A quick glance for loose packaging, trapped air pockets, or damaged edges protects the quality, freshness, and reliability of your storage system.
Extend Appliance Life With Better Maintenance
Vacuum sealers are fairly simple machines, but simple machines still benefit from care. Wiping the sealing area after each use prevents residue from building up. Small cleaning habits often prevent larger performance issues later.
Gaskets deserve occasional attention because they help create the vacuum chamber. Food particles or moisture trapped around the gasket can reduce suction strength. Cleaning these areas helps maintain consistent results over time.
Storage conditions matter, too. A machine stored in a damp location may experience premature wear. Dry, clean storage supports long-term durability and helps components remain dependable.
Replacement parts occasionally become necessary. Gaskets, drip trays, and sealing strips can wear after repeated use. Replacing worn components promptly usually costs less than dealing with unreliable sealing performance.
Build A Practical Food Storage Routine
Consistency often matters more than perfection. A vacuum sealer delivers the greatest value when it becomes part of a repeatable routine rather than an occasional project. Small weekly sessions are usually easier to manage than waiting until food starts approaching its expiration date.
Many people benefit from creating dedicated storage zones. Fresh ingredients, frozen proteins, prepared meals, and snacks each perform better when organized separately. Clear categories reduce confusion and make meal planning easier.
Seasonal habits can influence storage needs as well. Large harvests, holiday leftovers, and warehouse-club purchases create moments where vacuum sealing becomes especially useful. Preparing for those periods prevents storage problems before they start.
Heat management also matters around the home. Households that regularly evaluate appliance efficiency sometimes compare utility equipment and fuel systems, which makes information about burn cleaner propane natural gas relevant when considering overall household maintenance and energy decisions.
A thoughtful system built around vacuum bags, storage containers, food rotation, and routine maintenance helps maximize the benefits of learning how to use 2 in 1 vacuum sealer. Better organization, reduced waste, and more reliable food quality are often the direct result of those steady habits rather than any single sealing session.


How to Refinish a Fiberglass Pool

How Do You Keep Raccoons Out of Your Pool?

How to Fix Cyanuric Acid in Your Pool

How to Shape a Pool Cue Tip to Stop Miscues

Best Far Infrared Sauna Sauna Heats: Top Picks of 2026

11 Best Far Infrared Sauna Carbon Fiber Heaters of 2026 For Balanced Full-Body Heat

11 Best Carbon Far Infrared Sauna of 2026 For Even Heat

10 Best Bluetooth Speaker For Sauna of 2026 For Heat and Steam


