
How to Take Apart a Ball Vacuum Head Without Breaking It

Unclip the head and turn the side dials. Detaching the cleaner head from the ball joint gives you room to work safely. Use a coin to twist the side locking dial a quarter-turn, and the roller brush slides straight out. That quick move clears most wrapped hair. For deep clogs around the belt, removing the bottom plate gives you clear access without forcing or snapping fragile plastic parts.
Your process depends on how deep the debris sits. A routine cleanout takes two minutes with a coin, but reaching the drive belt requires a star-shaped screwdriver (a small tool with a six-point star tip). Different model generations also alternate between simple snap tabs and small screws along the base. Having the right tool ready prevents rounded screws and snapped clips before you begin. Here is how to open each section smoothly.
The Short Version
- Unplug the vacuum: Disconnect the power cord from the wall outlet before touching any release latches or roller parts.
- Release the floor nozzle: Press the red release collar or pivot clip at the base of the ball to separate the cleaner head from the main vacuum body.
- Remove the spinning brush roller: Insert a coin into the side locking dial, turn it a quarter-turn counterclockwise, and slide the brush assembly straight out.
- Take off the bottom plate: Remove the star-shaped screws along the underside casing, then pivot the plate forward to unhook the front plastic tabs without snapping them.
Tools and Preparation: What to Grab Before You Start
Working on a vacuum cleaner head requires only a few basic household items. You do not need an entire garage tool set, but having the exact right size tools on hand prevents broken plastic tabs and stripped screw heads. Grab these items before you begin:
- A standard coin or flat metal washer: A coin like a US quarter fits perfectly into the wide slot on the side locking dial. Avoid using narrow butter knives or thin flathead screwdrivers, which chew up the soft plastic edges of the slot.
- A star-shaped screwdriver (size T15): Many ball upright vacuums hold their bottom plates together with star-shaped screws (often called Torx screws) instead of standard cross-head screws. A T15 size bit has six small points and grips the screw head firmly.
- A small pair of scissors or seam ripper: You need these to slice through wound carpet fibers, thread, and long hair tangled along the spinning brush roller.
- A dry microfiber cloth and an old toothbrush: Perfect for wiping away caked dirt, fine drywall dust, and pet dander from the internal roller channels without needing running water.
- A small bowl or magnetic tray: Use this to hold the small screws so they do not roll under furniture while your hands are busy.
Before you loosen a single screw, unplug the power cord from the wall outlet. Never rely on the power switch alone. Vacuum cleaner heads contain high-speed electric motors that spin the brush roller, and an accidental start can cause hand injuries. Carry the machine to a clear, well-lit table or a hard floor. Cold plastic becomes stiff and brittle, so if your vacuum was stored in a chilly garage or unheated basement, let it sit at room temperature for an hour. Warm plastic flexes slightly, which helps prevent thin tabs from snapping under pressure.
Detaching the Floor Nozzle from the Ball Base
Taking the floor nozzle (the wide cleaner head resting on the floor) off the ball assembly makes the entire teardown much easier to manage. You do not want the heavy vacuum handle tipping over while you try to unscrew small fasteners underneath.
- Recline the vacuum handle: Stand behind the machine, place your foot gently on the outer edge of the wheel, and pull the handle back as if you were preparing to vacuum. Lay the machine flat on its back so the red neck pivot is clearly visible.
- Locate the red release collar: Look directly behind the cleaner head where the swivel neck meets the large central ball. On most ball upright models, you will find a bright red release collar, a wide latch, or a plastic retaining clamp that locks the neck to the motor housing.
- Disengage the neck connection: Press firmly down on the red release button or pull the collar outward. While holding the release open, wiggle the cleaner head gently from side to side and pull it straight away from the ball. It should slide off its mounting track with moderate pressure.
- Free the internal air duct: As the neck separates from the ball base, check the flexible suction duct. On some models, a short plastic hose or rubber elbow slides out from the main air intake channel. Ease this duct out smoothly so you do not tear the soft rubber seal.
If the head feels stuck, do not yank or kick it. Check around the pivot arms for secondary plastic clips or small retaining rings. Some ball models use an outer plastic C-clip near the pivot hinge to keep the swivel joint aligned. Forcing the neck apart without loosening these catches can crack the swivel housing, which ruins the steering mechanism.
Removing the Roller Brush Without Snapping Clips
Long hair, string, and carpet threads wrap tightly around the roller brush over time. As this debris packs into the ends, it creates friction that slows down the motor and creates a burning rubber smell. Taking the roller brush out lets you clear that tangle completely.
- Position the cleaner head on its side: Set the detached floor nozzle sideways on your work surface so the side locking dial faces straight up at you.
- Unlock the side locking dial: Place your coin into the wide groove on the side locking dial (often referred to as an end cap). Turn the coin counterclockwise by roughly 90 degrees (a quarter-turn). You will feel a slight mechanical click as the internal locking teeth disengage from the outer housing.
- Slide out the locking dial: Pull the dial straight out from the side of the housing. If it sticks, gently work the edge with your fingernails. Never pry behind the dial with a metal screwdriver, because thin retaining ears snap easily if twisted sideways.
- Pull the spinning brush roller free: Grip the exposed end of the roller brush and slide it straight out of the long nozzle tunnel. On models featuring two separate roller sections, slide the primary brush roller out first, then reach inside to unhook the smaller secondary roller from the center drive cog.
- Clear wound hair and fibers: Run the blade of a pair of scissors or a seam ripper down the built-in guide groove on the roller body. Snip through the wound hair from end to end, then peel the strands off in clumps. Pull away any hair wrapped around the end bearings, taking care not to pull the metal bearing rings out of their rubber seats.
Spin the metal bearing on each end of the roller brush with your fingers. It should rotate freely and silently. If an end feels gritty, stiff, or hot to the touch, hair has worked its way inside the bearing raceway, creating drag that will continue to strain the drive belt.
Opening the Bottom Plate for Deep Cleaning and Belt Access
If your vacuum head makes a loud whining noise or the roller refuses to turn even after cutting away hair, debris has likely clogged the drive belt or wrapped around the motor drive spindle. To reach these internal parts, you must remove the bottom plate (the flat underside plate that rides along the carpet).
- Turn the cleaner head upside down: Lay the floor nozzle flat with the bottom plate facing upward toward the ceiling.
- Locate the star-shaped fasteners: Inspect the underside of the housing. You will see several recessed screw holes, typically holding between two and four star-shaped screws. Look closely into deep recesses near the back edge where fine dust tends to hide fastener heads.
- Unscrew the fasteners: Insert your size T15 star-shaped screwdriver straight down into each hole. Push downward with firm, steady pressure before turning counterclockwise. The star shape provides excellent grip, but leaning your body weight over the driver ensures the bit stays fully seated in the head so the metal does not strip. Drop the removed screws into your small parts bowl.
- Disengage the rear edge of the bottom plate: Lift the rear edge of the bottom plate (the edge closest to where the ball used to connect) upward by about one inch. It should swing open like a shallow hinge.
- Unhook the front plastic tabs: Do not pull the bottom plate straight up off the cleaner head. The front lip of the plate uses several small molded plastic hooks that slide into matching slots under the front bumper. Once the back of the plate is raised, gently push the plate forward and slide it away from the front bumper. The hooks will slide out freely without bending or snapping.
- Expose the drive belt and motor cog: With the bottom plate set aside, you can see the rubber drive belt, the ribbed motor spindle, and the internal suction channels. Check the belt for cracks, missing teeth, or heavy stretching.
Use your dry cloth and toothbrush to clear packed lint and hair out of the cog teeth on the drive belt. When dust packs tightly between these teeth, the belt slips under load, which causes the brush to stop spinning the moment the vacuum touches deep carpet.
Cleaning and Maintenance Rules: What Can Get Wet vs. Dry
Water cleans plastic quickly, but using water on the wrong vacuum components will cause permanent damage. Keep these wet and dry rules in mind as you clean your disassembled parts:
- Plastic bottom plate and outer bumper (Washable): The hard plastic bottom plate and unpowered plastic bumper pieces can be washed under warm tap water. Use a few drops of mild dish soap to wash off sticky residue. Rinse thoroughly and set them on a dry towel.
- Hard plastic roller bodies without metal parts (Washable with caution): If your roller brush is solid plastic with synthetic bristles and contains no internal metal bearings or magnets, it can be rinsed. However, water easily seeps past bearing shields and gets trapped inside the roller core.
- Roller brush metal end bearings (Keep dry): The metal bearings on the ends of the spinning brush roller must never be soaked in water. Moisture washes away the internal grease packing and rusts the steel balls, which leads to squealing and seized rollers within a few weeks.
- The internal motor and wiring harness (Keep dry): The central motor housing inside the floor nozzle contains electrical coils, wiring contacts, and sensor switches. Never spray water, glass cleaner, or liquid degreaser into this housing. Wipe it down using only a dry microfiber rag.
- The rubber drive belt (Keep dry): Wipe the belt with a dry cloth only. Soapy water or chemical sprays can cause the rubber compound to soften, stretch out, or crack prematurely.
If you wash any plastic component, leave it to air dry completely for at least 24 hours in a warm, dry room. Never reinstall a damp part into the floor nozzle. Suction will pull fine carpet dust directly into damp corners, creating a thick mud that clogs internal air passages and shorts out electrical components.
Putting It Back Together in the Right Order
Reassembling the vacuum cleaner head is simple if you follow the reverse order carefully. Rushing through reassembly is the most common reason plastic tabs break or drive belts get pinched.
- Seat the drive belt: Loop the rubber drive belt around the small motor spindle first, then stretch it over the larger cog on the brush roller drive socket. Make sure the ribbed side of the belt matches the grooves on the drive teeth perfectly, without any twist in the loop.
- Reinstall the bottom plate: Hold the bottom plate at a 30-degree angle. Slide the front plastic hooks into their corresponding slots under the front bumper first. Once those front hooks engage, lower the back edge down until the plate rests completely flush against the main housing. If you notice a gap or springy resistance, stop. Lift the plate and check whether the drive belt or internal wire is caught between the plastic edges.
- Fasten the star-shaped screws: Place each star-shaped screw into its hole. Turn the screws clockwise with your T15 screwdriver until they sit snug. Turn them by hand until you feel firm resistance, then stop. Do not overtighten, because driving steel screws too hard into plastic threads will strip the casing holes completely.
- Slide the roller brush back in: Slide the spinning brush roller through the side opening. Rotate the brush gently with your fingers as you push it inward until the internal drive socket locks into the motor gear. The roller will slide deep into the housing once the shapes align.
- Lock the side dial: Push the side locking dial into place over the roller end. Insert your coin into the slot, press gently inward, and rotate the dial a quarter-turn clockwise until the indicator arrow lines up with the locked padlock symbol on the casing.
- Reattach the cleaner head to the ball: Line up the swivel neck of the cleaner head with the ball base. Push the two sections firmly together until the red collar or retaining clip snaps home with a distinct, audible click. Give the head a gentle forward tug to confirm it is fully locked before plugging the vacuum in.
When to Replace the Head Assembly
Taking your cleaner head apart will resolve most hair tangles, belt slips, and simple suction blockages. But regular teardowns sometimes reveal deeper internal wear that a home cleaning cannot fix.
If you open the housing and find that the teeth on the internal drive cog are rounded off or melted flat, the brush roller will no longer grip under load. Similarly, if the internal motor smells strongly of scorched wiring, sparks visibly through its vent holes, or cuts out after running for thirty seconds, the motor winding has failed. You may also notice broken pivot arms or cracked plastic screw sockets where fasteners simply spin without tightening. When the structural plastic cracks or the internal drive motor fails, patching individual pieces rarely lasts.
In those situations, replacing the entire floor nozzle assembly is the most practical choice. A complete replacement head comes with a brand-new internal motor, fresh drive belt, new spinning brush roller, and intact pivot joints. Installing a replacement unit requires zero internal teardown: you simply press the red release clip on your vacuum, slide the old broken head off the ball pivot, click the new assembly into place, and return to cleaning immediately.
Before purchasing a replacement cleaner head, always verify your vacuum model number. Upright ball vacuums share similar shapes across generations, but their electrical connections, neck widths, and clip placements differ between model series (such as DC41, DC65, UP13, or Ball Animal series). Locate the silver or white serial sticker on your vacuum body, usually found directly behind the clear dust bin or underneath the ball base, to confirm the exact model code. If keeping up with the weight and maintenance of a heavy ball upright has become tiring over the years, learning about what is the lightest cordless vacuum cleaner can also help you decide whether repairing your upright or shifting to a lighter format makes more sense for your routine.

- VC Score9.6
BCP Score is a ranking system developed by bestcleanerproducts.com. BCP Score has no relationship or impact from any manufacturers or sales agent websites. Learn more
- BrandLHG

- VC Score9.4
BCP Score is a ranking system developed by bestcleanerproducts.com. BCP Score has no relationship or impact from any manufacturers or sales agent websites. Learn more
- BrandTondiamo

- VC Score9.2
BCP Score is a ranking system developed by bestcleanerproducts.com. BCP Score has no relationship or impact from any manufacturers or sales agent websites. Learn more
- BrandRosyOcean
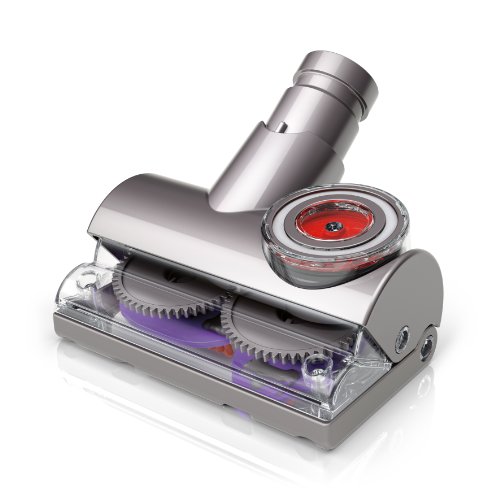
- VC Score9.0
BCP Score is a ranking system developed by bestcleanerproducts.com. BCP Score has no relationship or impact from any manufacturers or sales agent websites. Learn more
- BrandDyson
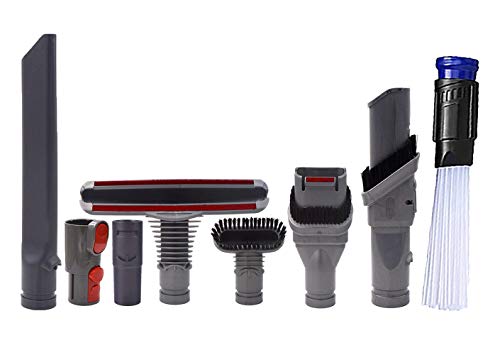
- VC Score8.8
BCP Score is a ranking system developed by bestcleanerproducts.com. BCP Score has no relationship or impact from any manufacturers or sales agent websites. Learn more
- BrandHeodim

- VC Score8.8
BCP Score is a ranking system developed by bestcleanerproducts.com. BCP Score has no relationship or impact from any manufacturers or sales agent websites. Learn more
- BrandVACEXT

- VC Score8.6
BCP Score is a ranking system developed by bestcleanerproducts.com. BCP Score has no relationship or impact from any manufacturers or sales agent websites. Learn more
- BrandVACEXT

- VC Score8.6
BCP Score is a ranking system developed by bestcleanerproducts.com. BCP Score has no relationship or impact from any manufacturers or sales agent websites. Learn more
- BrandOTTWL

- VC Score8.4
BCP Score is a ranking system developed by bestcleanerproducts.com. BCP Score has no relationship or impact from any manufacturers or sales agent websites. Learn more
- BrandTweruna
Last update on 2026-10-01 / Affiliate links / Images, Product Titles, and Product Highlights from Amazon Product Advertising API
FAQs
Why is my roller brush still not spinning after clearing all the hair?
Many ball vacuums feature an independent brush roll switch on the handle that may be turned off, or an internal brush bar reset switch that trips when a blockage occurs. If the reset button tripped, switch the vacuum off, unplug it for ten minutes to allow the thermal protector to cool down, then restart the machine while reclining the handle flat. If the brush still fails to move, the internal drive belt has snapped or slipped off its drive spindle.
Can I use a regular flathead or Phillips screwdriver on the bottom plate?
You should not use a flathead or cross-head Phillips driver on star-shaped screws. A standard driver only contacts two small points inside the screw head, which will quickly round out the six-pointed star shape and permanently trap the screw inside the housing. If you do not own a T15 star screwdriver, inexpensive bit sets are widely available at local hardware and home improvement stores.
How often should I take apart the vacuum head for maintenance?
For homes with long hair or shedding pets, take the roller brush out for a quick clearout every four to six weeks. A full disassembly of the bottom plate to inspect the belt and suction duct is typically only needed once a year, or whenever you notice a decline in pick-up performance, unusual whining noises, or burning rubber odors.
Why does the cleaner head make a loud clicking noise on deep carpet?
A loud ratcheting or clicking noise usually means the internal safety clutch is slipping. When a deep plush rug or jammed object puts too much resistance on the spinning brush roller, the clutch slips on purpose to prevent the drive belt from snapping and protect the electric motor from burning out. Try lifting the suction release vent or raising the cleaner head height setting to lower resistance on thick carpeting.


How to Refinish a Fiberglass Pool

How Do You Keep Raccoons Out of Your Pool?

How to Fix Cyanuric Acid in Your Pool

How to Shape a Pool Cue Tip to Stop Miscues

Best Far Infrared Sauna Sauna Heats: Top Picks of 2026

11 Best Far Infrared Sauna Carbon Fiber Heaters of 2026 For Balanced Full-Body Heat

11 Best Carbon Far Infrared Sauna of 2026 For Even Heat

10 Best Bluetooth Speaker For Sauna of 2026 For Heat and Steam








