
How to Take Apart a Ball Vacuum Canister Safely

Most people assume that taking apart a jammed canister requires undoing screws or wrestling with stiff plastic joints. In reality, sliding the clear dirt bin off the inner cone separator takes nothing more than pressing a small secondary release catch hidden along the back runner after opening the base. The outer plastic cylinder drops free in seconds, leaving the central cone assembly ready to wipe down without any tools at all.
How far you take this depends on what needs cleaning and the style of machine resting on your floor. An upright model uses a slightly different latch position than a pull-behind barrel, and brittle older latches will snap if pulled at an awkward angle. A simple rinse works for the outer plastic shell, but the inner cone separator must stay completely dry unless you plan on removing tiny security screws for a factory-level rebuild. Here is how to free every section safely without cracking a single tab.
Press the main release catch to remove the bin
Before you touch any latches, unplug your vacuum from the wall outlet. Ball vacuums pull high electrical wattage from wall sockets, so removing power protects both you and the internal wiring. Place the machine on a flat, bare floor in an upright position where it will not tip over while you work.
Ball vacuums come in two main layouts: upright models that balance directly over a large rolling ball, and pull-behind canister models that sit on a rounded chassis that trails behind you on a hose. Both styles hold the dirt collection unit on the front or top of the body using a spring-loaded clip. You do not need any screwdrivers, pry bars, or knives to release the bin from the machine frame.
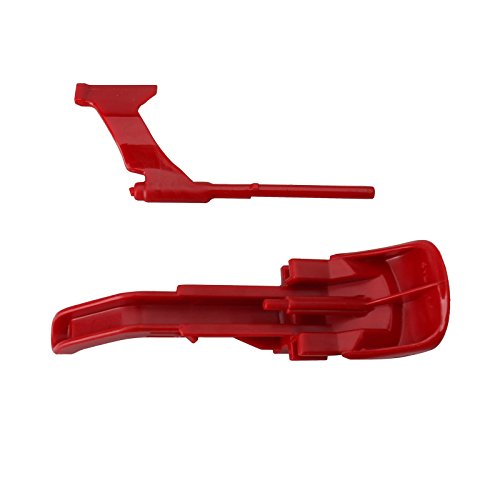
- Find the red canister release catch (a red plastic button or lever) located on the upper section of the carry handle.
- Support the base of the vacuum with one hand so the upright spine does not rock backward.
- Press the red release catch firmly downward with your thumb until you feel the latch release from the frame spine with a light pop.
- Tilt the entire dust collection assembly forward and away from the body of the vacuum.
- Lift the assembly straight upward to slide it off the lower support bracket.
A common mistake is pulling upward on the carry handle before the red latch is fully pressed down. The handle connects directly to the cyclone housing, but the latch hook grips a plastic lip on the vacuum spine. Pulling against that latch bends the hook backward. Over time, that plastic turns pale white, bends out of shape, and eventually snaps clean off.
If your release catch feels stuck or refuses to move, fine grit has likely worked its way underneath the button edges. Do not pry the plastic with a metal butter knife or screwdriver. Instead, place both hands flat against the sides of the clear dirt bin and wiggle it gently side to side while pressing down on the red button with moderate thumb pressure. The small wiggling motion usually shifts the trapped dust particles and allows the spring to compress naturally.
Slide the clear bin off the inner cyclone runner
Separating the clear dirt bin from the inner cone-shaped dirt separator (the cyclone unit) is where most broken parts happen. Homeowners often mistake the bottom bin empty button for a disassembly tool and force parts that are designed to slide apart smoothly along molded tracks.
Ball vacuums use a two-stage action to separate these parts. The first push of the button opens the hinged flap at the bottom of the bin to dump dirt. The second action releases the clear cylinder so it can slide off the central spine. Here is how to complete this separation cleanly:
- Hold the entire assembly over a deep trash bag to catch any stray debris that escapes.
- Press the red canister release catch down once to drop the trapdoor flap at the bottom of the cylinder, allowing the loose dirt to empty.
- Look along the back spine of the bin assembly, directly along the plastic runner track that connects the clear shell to the inner cone unit. You will see a secondary release catch, which appears as a smaller red plastic tab or lever tucked into the runner seam.
- Press and hold that secondary red tab firmly inward or downward toward the plastic runner.
- Keep that tab depressed while using your other hand to slide the clear dirt bin downward along its guide rails until it pulls completely free from the inner cone housing.
Plastic gets brittle when it is cold. If your vacuum was stored in a chilly garage, basement, or utility shed during winter, bring the machine into a warm room for an hour before attempting this step. Cold plastic clips lose their flexibility and can crack under light thumb pressure.
If the clear cylinder jams halfway down the track, stop immediately. Never force the plastic downward with a hard yank. Hair, carpet threads, or sticky gunk can pack into the tight space between the outer plastic wall and the inner metal shroud. Look closely through the clear plastic to see what is binding the cylinder. You can use your fingers to reach in through the open bottom door and pluck away the caught wad of hair, which frees up the tracks so the bin slides down without snapping.
Wash only the clear bin and keep cyclones dry
Once you have the clear bin separated from the cone unit, it is tempting to rinse everything under a utility sink faucet. Never put water into the cone-shaped dirt separator. Water trapped inside the cyclone cones is one of the quickest ways to ruin a vacuum cleaner permanently.
The cyclone section contains a maze of narrow funnels, fine mesh screens, and tiny air pathways designed to spin high-speed vortices of air. When water enters those narrow funnels, it cannot escape easily. The water combines with fine drywall powder, talcum dust, and pet dander left behind, turning into a thick paste that dries like concrete. That paste permanently chokes off suction. Even worse, trapped moisture grows foul-smelling mold inside the cones and pulls damp air directly into the electric motor when you turn the machine back on, which burns out the motor windings.
Use this simple checklist to keep your parts safe during cleaning:
- Clear dirt bin: Washable. Rinse the empty clear plastic cylinder under cool or lukewarm tap water. You can wash off grime using a soft microfiber towel and a few drops of mild dishwashing liquid. Never use scalding hot water, which warps the round shape, and never run the bin through a dishwasher, which melts the plastic and ruins the latch alignment.
- Rubber sealing ring (gasket): Wipe clean only. The soft rubber sealing ring around the base of the bin provides an airtight seal. Wipe it with a slightly damp rag to remove grit. Do not pull, stretch, or peel the gasket out of its molded channel unless you are replacing a torn piece, as stretched rubber will not seat flat again.
- Cone-shaped dirt separator: Keep completely dry. Clean the shroud and cones using a soft dry paintbrush, a stiff nylon detailing brush, or a dry rag. If you have an outdoor air compressor or a can of compressed electronics duster, take the unit outdoors and blow dry air through the mesh holes to blast out hidden chalky dust.
- Top handle assembly: Keep completely dry. The top handle contains metal springs and release rods that can rust, squeak, or jam if soaked with water.
If you wash the clear dirt bin, leave it to dry in an open, well-ventilated area for a full 24 hours. The bin must be completely dry before you put it back together. Even a tiny pocket of moisture hidden inside the lower hinge mechanism will grab dry dust the moment you run the vacuum, creating sticky sludge inside the latch springs.
If maintaining a full-sized upright vacuum feels too heavy for quick household cleanups, you can also consider how a compact stick vacuum fits your routine. To see how lighter machines compare for daily floor sweeping, take a look at the lightest cordless vacuum cleaner in 2026 to compare weights and dirt bin capacities.
Unfasten inner screws only when debris completely blocks airflow
For standard maintenance and seasonal cleaning, you never need to take screws out of your vacuum. Sliding the clear bin off the cyclone provides all the access you need to wipe down parts and clear clogs. But there are rare moments when a deeper teardown is necessary, such as when fine plaster dust, spilled liquids, or pet accidents are pulled into the upper chambers and completely block suction.
Before you remove any screws, be aware of what you are getting into. The interior chambers use molded plastic tabs and fitted rubber gaskets that seal air tightly. Taking these parts apart requires patience, gentle handling, and the right hand tools. If your machine is still covered under a manufacturer warranty, opening factory-screwed housings can void your coverage.
If you must access the inner cones, inspect the screw heads first. Ball vacuums do not use standard Phillips or flathead screws. They use Torx screws (star-shaped screw heads), typically in sizes T8, T10, or T15 depending on the specific model. Trying to turn a star-shaped screw with a flathead screwdriver will strip the soft metal head instantly, leaving you with a screw that cannot be removed or tightened.
Follow these guidelines if you decide to open the cyclone casing:
- Use a dedicated magnetic Torx driver with a long, narrow shaft. Wide-shank multi-bit screwdrivers are often too thick to reach down the narrow, deep screw tunnels molded into the cyclone body.
- Count every screw you remove and place them into a small dish. The screws that hold the cyclone shroud are often different lengths than the screws holding the carry handle bracket. Putting a long screw into a short hole can crack right through the outer cosmetic plastic.
- Once the Torx screws are out, gently separate the upper cone manifold from the lower shroud. Look for small plastic clips hidden around the perimeter. Use your fingernails or a dull plastic trim tool to lift the clips. Never use a metal screwdriver to pry these seams, as metal gouges soft plastic and creates permanent air leaks.
- Note the direction of the internal rubber gasket between the cone layers. Take a quick photo on your phone before you separate the pieces so you know exactly which way the rubber lip points during reassembly.
When driving screws back into plastic, turn the screw backward (counter-clockwise) with light downward pressure until you feel a soft click. That click means the screw threads have dropped into the original factory-cut grooves in the plastic. Once you feel that click, gently screw it clockwise until it feels snug. Never overtighten screws into plastic bosses, or you will strip the plastic hole and the screw will spin uselessly.
Seat rubber gaskets squarely before clicking the bin shut
Putting the vacuum canister back together is straightforward once you know how the alignment points interact. If pieces are forced together out of line, the vacuum will suffer severe suction loss or the bottom trapdoor will randomly drop open while you are cleaning your rugs.
- Inspect the round rubber sealing ring (gasket) at the base of the cone-shaped separator. Verify that it sits flat inside its perimeter channel without any twisted corners or bunched-up sections.
- Check the small square rubber seal around the side air intake port. If this small square pad is missing or cocked sideways, air will whistle loudly and suction at the floor head will drop noticeably.
- Align the guide grooves on the clear dirt bin with the matching plastic runner tracks on the cyclone housing.
- Slide the clear cylinder smoothly upward along the tracks. As it reaches the top, push firmly until you hear the secondary red release catch snap into place. Pull downward gently on the clear bin with your hand to confirm it is locked and will not slide off on its own.
- Swing the bottom hinged flap upward toward the base of the bin. Press the flap firmly against the bottom rim until you hear a sharp, solid click. Give the flap a gentle tug downward to ensure the latch hook has fully grabbed the catch.
- Position the lower notch of the completed canister onto the bottom cradle bracket on the vacuum ball frame.
- Pivot the top carry handle backward toward the upright machine spine until the main release latch snaps shut.
If the bottom door refuses to stay closed, do not force it or tape it shut. A door that pops open almost always points to one of three simple causes. First, check whether the clear cylinder was pushed all the way up its track; if it sits even an eighth of an inch too low, the door latch cannot reach high enough to lock. Second, check the rubber gasket along the base of the door flap to make sure it has not rolled out of its groove. Third, check the small square latch opening for packed hair or lint that is blocking the plastic hook from sliding home.
Once everything clicks securely into place, switch the vacuum on and place your palm briefly over the hose inlet to check suction. If the motor sounds smooth and you feel strong, instant pull against your skin, your canister is properly sealed and ready for regular home cleaning.
Choose matching replacement clips and soft brushes for maintenance
Keeping your vacuum running like new often comes down to having the right replacement pieces and maintenance accessories on hand. If a red latch snaps or an old seal wears out, you do not need to replace the entire vacuum cleaner. Individual components can be swapped out quickly at your workbench.
When selecting replacement parts, always verify your exact model number. Look at the rating sticker located on the underside of your vacuum base or behind the canister spine. Models like the DC41, DC65, and modern Ball Animal lines use release clips that look nearly identical at first glance, but their hinge pins, pivot arms, and catch lengths differ by millimeters. Choosing a clip molded for your specific machine series guarantees that the latch snaps securely onto the frame spine without rattling loose.
For routine canister cleaning, pick up a narrow, long-bristled dusting brush with soft nylon hairs. Standard household dust rags cannot reach into the tight valleys between cyclone cones, while stiff wire brushes can scratch the plastic walls and snag on delicate inner mesh screens. A soft, flexible detailing brush or a dedicated vacuum crevice tool lets you dislodge clingy pet hair and static-charged dust from deep within the air channels without needing to loosen a single internal screw.

- VC Score10.0
BCP Score is a ranking system developed by bestcleanerproducts.com. BCP Score has no relationship or impact from any manufacturers or sales agent websites. Learn more
- BrandN/A

- VC Score9.6
BCP Score is a ranking system developed by bestcleanerproducts.com. BCP Score has no relationship or impact from any manufacturers or sales agent websites. Learn more
- BrandDyson

- VC Score9.6
BCP Score is a ranking system developed by bestcleanerproducts.com. BCP Score has no relationship or impact from any manufacturers or sales agent websites. Learn more
- BrandLemige

- VC Score9.4
BCP Score is a ranking system developed by bestcleanerproducts.com. BCP Score has no relationship or impact from any manufacturers or sales agent websites. Learn more
- BrandTondiamo

- VC Score8.8
BCP Score is a ranking system developed by bestcleanerproducts.com. BCP Score has no relationship or impact from any manufacturers or sales agent websites. Learn more
- BrandWYWY.Wide

- VC Score8.8
BCP Score is a ranking system developed by bestcleanerproducts.com. BCP Score has no relationship or impact from any manufacturers or sales agent websites. Learn more
- BrandVACEXT

- VC Score8.6
BCP Score is a ranking system developed by bestcleanerproducts.com. BCP Score has no relationship or impact from any manufacturers or sales agent websites. Learn more
- BrandSuperDi
- VC Score8.4
BCP Score is a ranking system developed by bestcleanerproducts.com. BCP Score has no relationship or impact from any manufacturers or sales agent websites. Learn more
- BrandSuperDi

- VC Score8.4
BCP Score is a ranking system developed by bestcleanerproducts.com. BCP Score has no relationship or impact from any manufacturers or sales agent websites. Learn more
- BrandDyson

- VC Score8.2
BCP Score is a ranking system developed by bestcleanerproducts.com. BCP Score has no relationship or impact from any manufacturers or sales agent websites. Learn more
- Brandsuperbobi

- VC Score8.0
BCP Score is a ranking system developed by bestcleanerproducts.com. BCP Score has no relationship or impact from any manufacturers or sales agent websites. Learn more
- BrandGeneric
Last update on 2026-10-01 / Affiliate links / Images, Product Titles, and Product Highlights from Amazon Product Advertising API


How to Refinish a Fiberglass Pool

How Do You Keep Raccoons Out of Your Pool?

How to Fix Cyanuric Acid in Your Pool

How to Shape a Pool Cue Tip to Stop Miscues

Best Far Infrared Sauna Sauna Heats: Top Picks of 2026

11 Best Far Infrared Sauna Carbon Fiber Heaters of 2026 For Balanced Full-Body Heat

11 Best Carbon Far Infrared Sauna of 2026 For Even Heat

10 Best Bluetooth Speaker For Sauna of 2026 For Heat and Steam








