
How to Remove a Vacuum Cleaner Filter Without Breaking It

Most people assume taking out a vacuum filter requires heavy pulling or prying with a tool. Forcing it usually cracks fragile plastic parts, because filters are actually built to slide free with minimal effort once you find the latch. After unplugging the machine, press the thumb tab or give the housing a quarter-turn to slip the filter out safely.
The exact steps shift depending on your vacuum style and where the parts sit. Upright and cordless stick machines often hide a washable foam sponge inside the dirt container, plus a pleated paper filter behind a rear exhaust vent. Some snap in with plastic clips, while others rest in a rubber gasket. Here is how to find each filter on your machine and ease it out without damaging the clips.
Filters hide inside the dirt cup and exhaust vents
Most modern vacuums carry at least two separate filters to keep dust from escaping back into the room. The first is an inner dust cup sponge or screen, which guards the motor against stray pet hair, grit, and carpet fluff. The second is a rear exhaust vent filter, often a thick pleated paper filter, which catches micro-dust right before clean air blows out into the room. Knowing where these two parts sit prevents you from pulling on the wrong housing.
Upright vacuums place the main dirt cup front and center. You will almost always find the inner dust cup sponge resting in the lid of that clear plastic bin, or sitting in a slide-out tray directly underneath it. The rear exhaust vent filter on an upright usually hides behind a slotted door down near the floor nozzle or right above the lower wheels.
Cordless stick vacuums bunch their parts around the grip handle. The dirt cup clicks onto the motor body, and the inner sponge or foam cone sits inside the central plastic tube or under a flip-top lid. The exhaust filter usually forms the circular rear cap at the back of the motor dome. When a cordless stick cuts out after a minute of run time, owners sometimes wonder how much is a new battery for a cordless vacuum, but a suffocated rear exhaust filter is often the real reason the machine shuts down.
Canister vacuums roll behind you across the floor and store filters along their airflow path. Open the main body lid, and you will see the inner sponge sitting in a small plastic slide-cage right in front of the motor fan intake. The exhaust filter sits under a flat cover on the top deck or rear wall near the power cord outlet.
Handheld vacuums keep parts small. The clear front nose unsnaps with a single push tab, revealing a small pleated paper cup nested right inside the dust bin opening.
Take out the inner dust cup sponge in four steps
Removing the inner dust cup sponge or screen requires minimal force once you know how the parts interlock. Follow these steps to remove it cleanly:
- Cut all electrical power: Unplug the power cord from the wall outlet completely. If you are working on a cordless vacuum, shut the power switch off and slide the battery pack off the handle so the motor cannot start by accident.
- Detach the dirt container over a trash can: Press the main push tab or snap clip on the vacuum body to release the dust bin. Carry the whole plastic container directly over a trash can before opening it, because fine dust will drop as soon as the seals separate.
- Open the filter chamber lid: Look for a small plastic latch or a twist-lock arrow along the top edge of the dirt cup. Press the release latch inward with your thumb, or turn the lid a quarter-turn counterclockwise to pop the lid free from the clear bin.
- Lift the sponge out by its edges: Grasp the small cloth pull-tab or the rigid plastic outer ring of the inner dust cup sponge. Pull it straight out of the housing without pinching the soft foam, which keeps the sponge from tearing along its edges.
Unlatch the rear exhaust vent to reach pleated paper filters
The rear exhaust vent filter sits downstream from the motor, keeping fine particles from blowing across clean baseboards. Follow these steps to reach it safely:
- Locate the exhaust grill on the outer shell: Scan the back, side, or bottom of your vacuum body for a plastic panel with air slots. This grill sits opposite the main dirt intake, right where warm air vents during normal use.
- Press the outer release clip: Place your thumb on the push tab or snap clip at the edge of the grill. Push firmly inward or downward to disengage the plastic catch from the vacuum shell.
- Swing the grill door outward: Pull the grill toward you like a cabinet door instead of yanking it straight back. The opposite side of the panel uses small plastic hinge teeth that slide out of matching slots only after the panel swings open at an angle.
- Grip the hard frame of the pleated paper filter: Take hold of the plastic border surrounding the pleated paper filter. Pull firmly to slide the frame out of its cavity, keeping your fingers off the delicate paper folds to avoid tearing the media or crushing the pleats.
Free stubborn stuck filters without snapping brittle plastic parts
Vacuum plastics become brittle from heat and dry air, while fine drywall dust or pet dander can lock slide tracks tight. If a filter or cover will not budge, run through this quick checklist before applying extra muscle:
- Look for hidden secondary latches: Check the sides and bottom of the filter cage for tiny slide tabs, rotating lock rings, or push-down buttons that secure the frame in place.
- Tap the housing to break dust seals: Tap the outside of the plastic canister lightly with your knuckles to shake loose fine grit packed around the edges of the filter frame.
- Wiggle the frame from side to side: Press the release tab down fully with one hand, then use your other hand to rock the filter frame gently from left to right instead of pulling straight back.
- Warm cold plastic with your hands: If the vacuum was stored in a cold garage or utility closet, let it sit in a heated room or cup your warm palms around the plastic clips for a minute so the tabs flex without snapping.
- Put away all metal tools: Never shove a flathead screwdriver, kitchen butter knife, or pair of pliers into plastic seams, because metal will crack thin retaining tabs instantly.
- Check the rubber sealing ring: Run your finger along the rubber gasket around the filter rim to ensure the rubber has not rolled over or jammed inside the housing track.
Wash reusable foam pads but always replace paper filters
Once the filters are in your hands, the cleaning process depends on what material you are holding. Foam pads and pleated paper filters require completely different care.
Inner dust cup sponges, made of dense foam or felt, are almost always washable. Hold the foam pad under cool running tap water and squeeze it gently with your palms until the runoff water turns completely clear. Avoid hot water, strong detergents, or dish soaps, which break down the cellular structure of the sponge. Never twist or wring the foam like a washcloth, as twisting will split the material down the middle.
Drying is the most critical step for washable foam. Shake off excess moisture, lay the sponge flat on a clean towel, and let it air dry completely for at least 24 to 48 hours. Never set it near an open flame, on top of a hot radiator, or inside a clothes dryer, because artificial heat shrinks the foam and ruins its airtight fit. Installing a damp filter back into your vacuum will pull water directly into the high-speed electric motor, causing rust, electrical failure, and foul mildew smells throughout your home.
Pleated paper filters, on the other hand, usually cannot tolerate water. Liquid causes the paper fibers to swell, bind together, and permanently choke all airflow. Hold the pleated paper filter over an outside trash can and tap the plastic frame gently against the rim to dislodge loose grit, or brush the folds lightly with a soft, dry bristle brush.
Replace any filter immediately if you notice rips in the foam, crumbling edges, warped plastic frames, or deep gray discoloration that will not tap clean. If your vacuum continues to blow dusty smells into the room even after a thorough dry cleaning, the filter fibers are clogged beyond recovery and need a fresh replacement.
Pick the right replacement filter style for your vacuum
When an old filter wears thin or tears along the seam, installing a fresh replacement restores suction power and stops motor strain. You will generally choose between two main styles when shopping for replacements.
Molded cartridge replacements match your specific vacuum housing exactly. These come built with hard plastic borders, snap-fit tabs, and rubber sealing gaskets pre-installed. Before ordering a molded cartridge, look at the white product sticker on the back or bottom of your vacuum body. Check the exact model number printed on that label, because different production years of the same vacuum line often use slightly different tab shapes.
Cut-to-fit universal foam and felt sheets provide an affordable alternative for simple pre-motor trays and canister filter cages. These come as flat, broad sheets of dense foam or woven felt that you trim to size with ordinary household scissors. Measure the length, width, and thickness of your original filter tray before cutting. Use your worn foam pad as a physical stencil by laying it over the replacement sheet and tracing its outer boundary with a pen.
Keeping a spare filter set in your supply closet is also a practical habit. Because washable foam pads require up to two full days to dry safely, having a clean spare ready allows you to run your vacuum immediately without waiting for damp parts to dry on the counter.
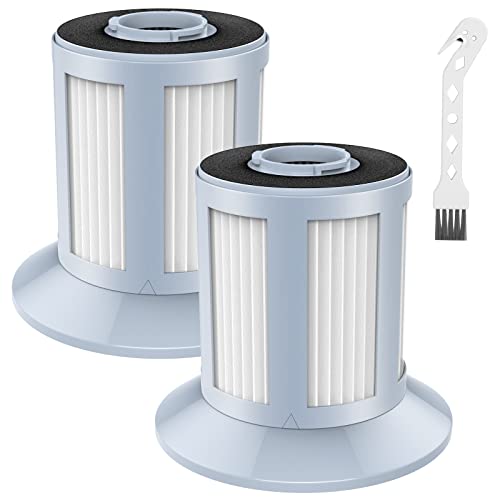
- VC Score9.6
BCP Score is a ranking system developed by bestcleanerproducts.com. BCP Score has no relationship or impact from any manufacturers or sales agent websites. Learn more
- BrandJORAIR

- VC Score9.4
BCP Score is a ranking system developed by bestcleanerproducts.com. BCP Score has no relationship or impact from any manufacturers or sales agent websites. Learn more
- BrandTyhocent
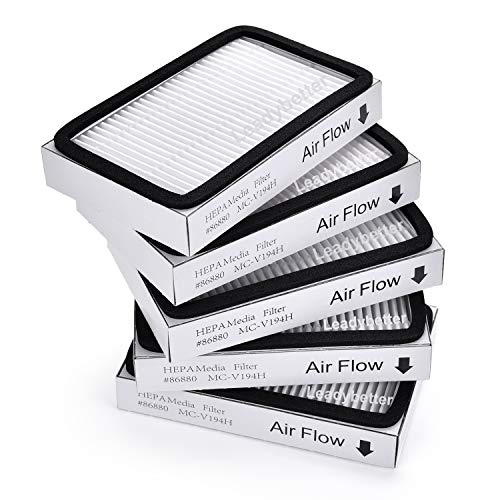
- VC Score9.4
BCP Score is a ranking system developed by bestcleanerproducts.com. BCP Score has no relationship or impact from any manufacturers or sales agent websites. Learn more
- BrandLeadaybetter

- VC Score9.0
BCP Score is a ranking system developed by bestcleanerproducts.com. BCP Score has no relationship or impact from any manufacturers or sales agent websites. Learn more
- BrandGeneric
- VC Score9.0
BCP Score is a ranking system developed by bestcleanerproducts.com. BCP Score has no relationship or impact from any manufacturers or sales agent websites. Learn more
- BrandIYOFINE

- VC Score9.0
BCP Score is a ranking system developed by bestcleanerproducts.com. BCP Score has no relationship or impact from any manufacturers or sales agent websites. Learn more
- BrandOUKENS

- VC Score8.8
BCP Score is a ranking system developed by bestcleanerproducts.com. BCP Score has no relationship or impact from any manufacturers or sales agent websites. Learn more
- BrandAmazon Basics

2-Pack Vacuum Cleaner Filter Replacement Compatible with SMOTURE VAC01/VAC02/VC70 Cordless
View on Amazon- VC Score8.4
BCP Score is a ranking system developed by bestcleanerproducts.com. BCP Score has no relationship or impact from any manufacturers or sales agent websites. Learn more
- BrandJexobox

- VC Score7.6
BCP Score is a ranking system developed by bestcleanerproducts.com. BCP Score has no relationship or impact from any manufacturers or sales agent websites. Learn more
- BrandGeneric
Last update on 2026-10-02 / Affiliate links / Images, Product Titles, and Product Highlights from Amazon Product Advertising API


How to Refinish a Fiberglass Pool

How Do You Keep Raccoons Out of Your Pool?

How to Fix Cyanuric Acid in Your Pool

How to Shape a Pool Cue Tip to Stop Miscues

Best Far Infrared Sauna Sauna Heats: Top Picks of 2026

11 Best Far Infrared Sauna Carbon Fiber Heaters of 2026 For Balanced Full-Body Heat

11 Best Carbon Far Infrared Sauna of 2026 For Even Heat

10 Best Bluetooth Speaker For Sauna of 2026 For Heat and Steam


