
How to Remove a Stuck Vacuum Top Without Snapping Plastic

Disconnecting a stubborn vacuum top starts with unplugging the power and finding the hidden release catch rather than tugging on the plastic housing. The exact release method changes depending on whether the assembly is held by a push latch, a coin screw, or an airtight vacuum seal. Pulling against a locked catch snaps thin plastic tabs instantly, turning a quick cleaning chore into an expensive repair.
Stick vacuum handles and clear dirt cups usually release with a thumb button, while the upper plate over a motorized brush head often needs a coin or flat tool for quarter-turn lock screws. Thick pet hair and fine dust can also jam inside the seam, gluing parts together even after the fasteners disengage. Recognizing what holds your specific model together makes it easy to separate the parts safely.
Identifying What Holds the Top Down
Before pulling on any plastic housing, you need to understand which part of the vacuum you are separating and how the factory secured it. Most modern vacuums use three distinct assemblies where people encounter a stuck top section. The first is the upper lid or cyclone assembly on a clear dirt cup. The second is the upper motor housing on a cylinder canister. The third is the upper hood on a motorized floor nozzle that covers the spinning brush roller. Each assembly uses a specific locking method, and pulling before that lock is free will crack the brittle plastic.
Modern vacuums rarely hold parts together with pure friction alone. Manufacturers rely on spring-loaded snap clips, sliding lock collars, recessed quarter-turn screws, or a stubborn suction lock caused by airtight rubber gaskets. A spring-loaded snap clip uses an internal plastic tooth that drops into a molded notch. When you press an external release button, the button levers that tooth out of the notch. If dust, hair, or dried grime fills the gap behind that tooth, pressing the button will not move the clip far enough to clear the plastic rim.
Fasteners also hide in plain sight. Many upright and stick vacuums use quarter-turn plastic screws that look like flathead screw heads or wide coin slots. These fasteners do not thread all the way out like metal wood screws. Instead, they turn ninety degrees to line up an internal tab with an exit slot. If your vacuum top feels solidly anchored at two specific corners while the rest of the seam flexes, stop pulling immediately and inspect those anchor points for recessed twist latches.
Finally, consider the suction lock. When a vacuum runs, the motor pulls an airtight seal across rubber O-rings and perimeter gaskets. Even after turning off the motor, fine plaster dust, pet dander, or sticky spills can cement the silicone seal to the mating plastic face. The clips may be completely open, but the suction seal acts like a physical latch. Recognizing whether you are fighting a mechanical hook, a screw fastener, or a glued rubber gasket determines your next move.
Step-by-Step Guide to Removing a Stuck Vacuum Top
- Disconnect the power source completely. Unplug the cord from the wall outlet, or remove the rechargeable battery pack from a cordless stick vacuum. This protects you from accidental motor starts, prevents electrical shorts near internal wiring harness plugs, and removes power from any motorized spinning brush roller. If you are servicing a cordless stick unit and plan to swap out an aging power cell while the body is open, check how much is a new battery for a cordless vacuum before reassembling the unit.
- Empty the clear dirt cup and release remaining pressure. Open the bottom trap door of the clear dirt cup over a trash bin to dump loose debris. Opening this trap door immediately equalizes internal pressure and breaks any lingering suction lock that pulls the upper cyclone lid tightly against the lower bin walls.
- Inspect the perimeter seam for hidden fasteners and dirt. Wipe a clean rag around the seam line separating the stuck top piece from the lower housing. Look for small indicator icons, such as padlock symbols, directional arrows, or recessed slots. Clearing away external grime lets you see whether the seam incorporates sliding lock toggles or coin-turn plastic locks.
- Press and hold the primary release latch firmly. Place your thumb squarely on the center of the release button or latch. Depress the button completely while keeping your fingers clear of the seam line. If the button feels stiff, press down on the top cover slightly with your other hand. Relieving upward tension on the internal spring-loaded snap clip allows the latch mechanism to slide backward without catching on the rim.
- Unlock quarter-turn fasteners or side slide clips. If your model uses flat coin slots on the upper cover, insert a coin, a wide flathead driver, or a stiff washer into the slot. Turn the fastener ninety degrees counterclockwise until the slot aligns with the unlock icon molded into the plastic. Do not force the fastener past ninety degrees, or you will shear off the retaining tabs underneath.
- Apply gentle wiggling pressure along the natural track. Grip the top handle or side ridges with one hand while holding the lower body firm with your other hand. Rock the top piece back and forth with light side-to-side movements rather than an abrupt vertical jerk. The top should separate along its molded guide tracks smoothly once the seal breaks.
Accessing the Top Cover on Floor Heads
Removing the top canopy of a floor nozzle to clear a jammed spinning brush roller requires a different approach than opening a clear dirt cup. Floor heads endure heavy impacts and house high-speed belts, so manufacturers lock them down with multiple perimeter catches to prevent accidental opening during cleaning. If the top hood over the roller refuses to pop off, run through this checklist before applying pressure.
- Check whether the bottom cover plate must come off first: On many upright and stick models, the top clear window cannot lift off until you remove the bottom cover plate. Flip the floor nozzle over and confirm whether bottom screws or locking cams anchor through the entire nozzle body into the top lid.
- Inspect the roller end caps for bound thread and pet hair: Tangled hair wraps tightly around the outer bearing caps and wedges into the seam between the roller and the upper casing. This hair acts like heavy twine, physically tying the top plastic shell to the rotating metal shaft underneath.
- Look for hidden foot pedal releases and neck pivot locks: Some floor nozzles require you to lower the vacuum handle into the reclined cleaning position before the top cover catches disengage. If the neck is locked upright, the internal pivot hinge blocks the release track of the top plate.
- Examine the front bumper strip for snap tabs: Many brush roll covers secure at the front edge with three or four flexible plastic tabs that slip under the front bumper. You must lift the rear edge of the top hood first, then slide the entire piece forward to clear those front tabs.
Unsticking Suction Seals and Jammed Debris
When you have disengaged every visible latch and turned every locking fastener, plastic assemblies can still stay firmly stuck. In most homes, the culprit is a combination of rubber gasket adhesion and fine particulate buildup. Vacuum seals use soft rubber or silicone strips designed to flatten under suction to prevent air leaks. Over months of use, microscopic drywall dust, spilled sugary drinks, or fine carpet powders work their way into the microscopic pores of that rubber. The gasket effectively glues itself to the opposing smooth plastic lip.
Never shove a sharp metal screwdriver into the seam to pop a stuck gasket. Metal creates concentrated pressure points that will chip the plastic rim, creating permanent air leaks that ruin your suction power. Instead, use your palm to deliver firm, rhythmic taps around the perimeter of the seam. These light shock waves flex the outer plastic shell just enough to break the surface adhesion of the rubber gasket without cracking the material.
If tapping does not free the bond, introduce moderate warmth. Wet a clean washcloth with warm tap water, wring it out so it is not dripping, and drape it along the stubborn seam line for two minutes. The mild heat softens hardened sticky residue and expands the outer plastic casing slightly faster than the inner seal. Once the warmth penetrates the joint, insert the edge of an expired plastic credit card or a smooth plastic shim into the seam line. Slide the card horizontally along the seam to slice through sticky dirt deposits and release the seal safely.
Suction lock can also trap a top lid if an internal filter has collapsed or become clogged while the vacuum was running. When airflow stops abruptly, the negative pressure inside the sealed chamber holds the components together like a suction cup. To equalize this pressure, look for an air relief slider or secondary exhaust valve on the body. Pushing a small blunt tool against an internal rubber flap will allow air to rush in, producing an audible hiss as the vacuum equalizes and the top lid loosens.
Mistakes That Snap Plastic Tabs and Crack Housings
Vacuum housings are primarily molded from ABS plastic. ABS is rigid, lightweight, and durable against everyday bumps, but it has poor shear tolerance when subjected to twisting or prying forces. Understanding how brittle plastic fails prevents expensive repairs.
The most common mistake is using a metal flathead screwdriver as a pry bar. When you slip a steel blade between two plastic panels and twist your wrist, all the leverage focuses onto a two-millimeter edge. The steel will always win, slicing through the retaining lip or snapping off the internal spring-loaded snap clip completely. Once that clip breaks, the top cover will never sit flush again, and the vacuum will hiss and lose suction whenever the motor runs.
Another frequent error is pulling parts at an angle rather than along their designated sliding plane. Many vacuum top covers do not lift straight up like a cooking pot lid. Instead, they sit on molded rails that require you to slide the cover forward or backward by half an inch before lifting. Pulling upward against a sliding track bends the guide pins until they shear off. Always look at the seam profile. If you see horizontal alignment tracks, move the part parallel to those tracks first.
Working in a cold environment also leads to broken tabs. Plastic becomes significantly more brittle when cold. If your vacuum was stored in an unheated garage, porch, or car trunk during winter, bringing it inside and immediately wrenching on stiff latches will snap tabs that would normally flex safely. Allow the vacuum to reach normal indoor room temperature before attempting to disassemble tight plastic covers.
Finally, avoid ignoring resistance. If a latch moves halfway and stops dead, do not force it with your full body weight. A hard stop almost always indicates a missed screw hidden under a brand sticker, beneath a rubber roller wheel, or behind a secondary slide button. Back off, check the casing from every angle under good lighting, and make sure no mechanical fastener remains engaged.
Helpful Tools for Freeing Stuck Vacuum Parts
While you should never pry vacuum housings with heavy metal tools, keeping a dedicated maintenance kit nearby makes opening stubborn assemblies much easier. Simple cleaning accessories designed specifically for vacuums help you clear out the debris that causes latches and floor covers to seize up in the first place.
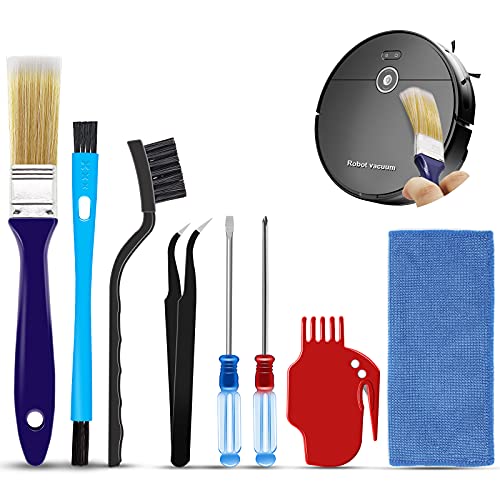
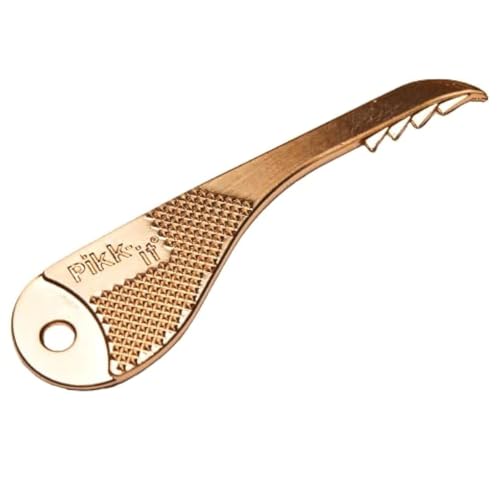
Look for compact clearing tools that feature soft nylon bristles on one end and a slender plastic pick or curved hook on the other. These tools allow you to scrape compacted pet hair and carpet threads out of narrow joints around the floor nozzle without scratching the plastic. A tool with an integrated small cutting blade is especially helpful for slicing tangled hair away from spinning brush roller axles, which removes tension holding the upper canopy closed.
When selecting maintenance accessories, verify that the handle is constructed from sturdy, non-marring ABS plastic. Smooth plastic tools can depress stiff internal snap clips and separate glued rubber gaskets safely without gouging the mating surfaces. A small detailing brush with narrow bristles also lets you sweep fine dust out of latch cavities so spring mechanisms can slide freely again.

- VC Score10.0
BCP Score is a ranking system developed by bestcleanerproducts.com. BCP Score has no relationship or impact from any manufacturers or sales agent websites. Learn more
- BrandEiodoni

- VC Score9.6
BCP Score is a ranking system developed by bestcleanerproducts.com. BCP Score has no relationship or impact from any manufacturers or sales agent websites. Learn more
- BrandLXUEJIE

- VC Score9.6
BCP Score is a ranking system developed by bestcleanerproducts.com. BCP Score has no relationship or impact from any manufacturers or sales agent websites. Learn more
- BrandEESC2Y

- VC Score9.0
BCP Score is a ranking system developed by bestcleanerproducts.com. BCP Score has no relationship or impact from any manufacturers or sales agent websites. Learn more
- BrandTweruna
- VC Score9.0
BCP Score is a ranking system developed by bestcleanerproducts.com. BCP Score has no relationship or impact from any manufacturers or sales agent websites. Learn more
- BrandMidukit

- VC Score9.0
BCP Score is a ranking system developed by bestcleanerproducts.com. BCP Score has no relationship or impact from any manufacturers or sales agent websites. Learn more
- BrandWAONIQ
- VC Score8.6
BCP Score is a ranking system developed by bestcleanerproducts.com. BCP Score has no relationship or impact from any manufacturers or sales agent websites. Learn more
- BrandPikk-it

- VC Score8.6
BCP Score is a ranking system developed by bestcleanerproducts.com. BCP Score has no relationship or impact from any manufacturers or sales agent websites. Learn more
- BrandVataim

- VC Score8.4
BCP Score is a ranking system developed by bestcleanerproducts.com. BCP Score has no relationship or impact from any manufacturers or sales agent websites. Learn more
- BrandTweruna

- VC Score7.0
BCP Score is a ranking system developed by bestcleanerproducts.com. BCP Score has no relationship or impact from any manufacturers or sales agent websites. Learn more
- BrandOntel
Last update on 2026-10-03 / Affiliate links / Images, Product Titles, and Product Highlights from Amazon Product Advertising API
FAQs
Why will the top of my vacuum not budge even when I press the release button?
A latch button can press down fully without actually disengaging the internal hook if dirt or pet hair is jammed behind the spring mechanism. Alternatively, the internal plastic catch may be under heavy friction load from an unemptied dirt chamber or an airtight suction lock. Press downward gently on the top lid while pushing the release button to take weight off the catch, then try lifting again.
Do I need tools or a coin to unlock the top plate?
It depends on which part of the vacuum you are opening. Clear dirt cup lids and canister motor hoods almost always use tool-free push buttons or sliding latches so you can empty them quickly. In contrast, the top covers on motorized floor nozzles frequently use recessed quarter-turn plastic cams that require a coin or a wide flat blade to rotate ninety degrees into the unlocked position.
How can I separate a stubborn rubber gasket without tearing it?
Never use sharp metal blades or knives to pry against rubber seals. Instead, warm the joint with a damp, warm cloth to soften any dried dirt or sticky residue, then slide the edge of a flexible plastic card smoothly through the seam line. Once air enters the gap, the seal releases naturally without ripping the delicate rubber.
What parts should I clean once the top assembly comes off?
Wipe down the rubber O-rings and perimeter sealing grooves with a dry or slightly damp microfiber cloth to remove abrasive grit. Clear all wound hair and thread from the ends of the spinning brush roller and its drive belt channel. Finally, blow out any loose dust packed inside the latch buttons and spring cavities so the components snap securely back into place when you reassemble the unit.


How to Refinish a Fiberglass Pool

How Do You Keep Raccoons Out of Your Pool?

How to Fix Cyanuric Acid in Your Pool

How to Shape a Pool Cue Tip to Stop Miscues

Best Far Infrared Sauna Sauna Heats: Top Picks of 2026

11 Best Far Infrared Sauna Carbon Fiber Heaters of 2026 For Balanced Full-Body Heat

11 Best Carbon Far Infrared Sauna of 2026 For Even Heat

10 Best Bluetooth Speaker For Sauna of 2026 For Heat and Steam


