
How to Remove a Stick Vacuum Filter Without Breaking It

Struggling with a stubborn vacuum filter is completely normal and nothing to worry about. After turning the machine off, press the canister release button to detach the clear dirt cup, then pull or twist the inner filter straight out of its socket. These pieces are designed to slide apart smoothly once you hit the right latch, so there is never a need to force stiff plastic.
The exact way the parts unlock depends on how your cleaner is built. Some models secure the filter inside the dust cup with a rubber pull tab, while others place a cartridge behind a twist-off cap near the motor. Many stick vacuums also feature a second exhaust air filter near the handle that pops off with a light pinch. Taking a brief look at how your pieces connect will keep the plastic latches safe while you work.
Setting Up Your Workspace to Avoid Dust Spills
Taking apart a stick vacuum can quickly turn into a messy chore if you are not prepared. Because stick vacuums pack dirt into a compact chamber right next to the motor, fine dust settles into every crevice around the filtration system. The moment you pull a dirty filter free, loose particles of pet dander, pollen, and fine silt tend to billow out into the air or drop onto your clean floors. Preparing your space takes less than a minute and prevents you from having to clean your room all over again.
Always turn off the vacuum completely before touching any release latches. If you have a corded stick vacuum, unplug the power cord from the wall outlet so the motor cannot start by mistake. For a cordless vacuum, make sure your fingers stay away from the power trigger. Some cordless designs feature slide-on batteries that you can unlatch and slide off entirely, which is the safest way to ensure the machine never spins up while your hands are inside the dirt chamber.
Set yourself up near a deep trash can, or head out to a garage or covered porch if the weather is clear. If you must work over an indoor wastebasket, hold the dust cup deep inside the rim so rising dust stays contained. Spreading an old towel or a section of newspaper across a flat table gives you a soft, clean surface to place delicate plastic components as you take them apart.
- Disconnect all power: Unplug the wall cord or detach the removable battery pack from the handle.
- Work over a waste bin: Position the vacuum body directly over a deep trash can or inside an open plastic grocery bag.
- Clear a clean surface: Lay down a soft cloth or paper towel to hold fragile plastic parts and rubber seals.
- Keep a small soft brush handy: Have a nylon brush or dry toothbrush nearby to knock away loose grit before unseating tight parts.
Step-by-Step Guide to Detaching the Dust Cup and Primary Filter
Stick vacuum filters live inside tight plastic housings held together by friction, rubber gaskets, and small spring-loaded latches. Forcing these pieces can crack the brittle plastic clips, which destroys the airtight seal your vacuum needs to create suction. Follow these steps in order to safely take apart the main canister and separate the primary filter without bending or snapping any parts.
- Remove the long wand and floor nozzle: Press the release button where the long extension tube connects to the handheld motor body. Pull the tube straight out with a smooth, firm tug. Setting the floor nozzle (the wide cleaning head with the spinning brush roller) and extension tube aside leaves you with just the handheld motor unit, making the machine much lighter and easier to control.
- Release the dust cup: Locate the dust cup release button or clip. On most stick vacuums, this is a brightly colored lever or push-button located near the base of the handle or along the top edge of the canister. Support the bottom of the clear dirt cup with one hand while pressing the release button with the other. If your vacuum uses a twist-lock style rather than a button, grip the canister firmly and turn it roughly a quarter-turn counterclockwise until the molded alignment dots line up, then slide the cup downward.
- Empty the loose debris: Hold the detached canister over your waste bin and press the bottom flap release. Let all the heavy dirt, hair, and dust fall straight down into the trash. Lightly tap the outside of the plastic canister with your knuckles to knock free any clumped debris clinging to the inner walls.
- Lift out the primary filter: Look inside the top of the open dust cup or directly into the base of the motor housing. You will see the pre-motor filter, which usually consists of a dust cup sponge or pleated insert seated in a plastic frame. Most models feature a small fabric pull tab, a raised plastic center peg, or a notched rim. Pinch this tab or rim with your fingertips and lift straight up. Pull gently and evenly; rocking it violently from side to side can tear the soft foam or stretch the rubber sealing ring out of shape.
- Remove the plastic dirt cone: Beneath or inside the sponge filter, you will find a perforated plastic dirt cone (the cyclone assembly that spins heavy dirt away from the motor). If your model allows this part to separate for cleaning, twist it a quarter-turn counterclockwise to release it from its locking track, then lift it clear of the canister.
Locating Hidden Exhaust Filters and Freeing Jammed Parts
Many people clean out the dust cup sponge and wonder why their stick vacuum still whines, overheats, or leaves dirt on the rug. The reason is usually a second, hidden exhaust air filter (often called a post-motor filter) that traps fine carbon dust and microscopic particles before the air vents back into your room. If you only clean the main cup, this second filter slowly chokes the motor from behind.
To find the exhaust air filter, examine the rear dome or the side ventilation grilles on the motor body behind the handle. Look for a circular back cap, a slotted vent cover, or a small release button marked with a filter symbol. On many popular designs, you grip the rear exhaust cap with your palm and rotate it a short distance counterclockwise (from a locked padlock icon to an unlocked padlock icon) to pop the cap free. Inside, you will find a small pleated circular cartridge or a flat felt disc. Press the locking tab inward to release this cartridge from the motor housing.
Sometimes, dust cups and filter frames refuse to budge. Fine construction dust, pet hair, and dried sticky residues can pack into the narrow seams between plastic parts, acting like glue. When a latch or filter feels frozen solid, never use a metal flathead screwdriver or kitchen knife to pry it apart. Vacuum housings are made from thin, rigid plastic that will permanently crack, gouge, or snap under metal lever pressure.
Instead, use the heel of your open hand to give several firm, sharp taps against the outer rim of the plastic housing. These vibrations help shatter the crust of packed dust sitting inside the locking tracks. Next, wrap your fingers around the filter housing and wiggle it with micro-movements, turning slightly left and right while applying steady upward pressure. If a push-button release feels stiff, inspect the crevice around the button for trapped sand or pet hair. Brushing out the seam with a dry, stiff nylon brush often frees the spring mechanism so the clip can depress all the way.
Washing, Drying, and Knowing When to Replace
Once you have all the filters removed and laid out on your work surface, you need to verify which components can safely touch water. Getting this wrong can ruin a filter in seconds. Washable filters are typically made of dense black or blue sponge foam, felt, or washable synthetic fabric housed in hard plastic frames. Non-washable filters are made of delicate pleated paper that breaks down, separates, and loses its structural integrity the moment it gets wet.
Check the plastic frame of each filter for molded icons or text. Manufacturers frequently stamp a small faucet icon or the word "washable" directly onto parts that can be rinsed. If you see no markings, consult your user manual before bringing the part near a sink. If your filter is non-washable, clean it by gently tapping the plastic frame against the inside wall of your trash can to knock the dust out of the pleats, or use a soft dry brush to sweep between the folds.
For washable foam sponges and plastic dirt cones, hold them under a steady stream of cold or lukewarm tap water. Never use dish soap, laundry detergent, or hot water, as chemical residues attract fresh dust and hot water can warp plastic frames. Squeeze the foam gently between your palms until the runoff water transitions from murky gray to completely clear. Avoid twisting or wringing foam filters like a washcloth, which tears the cell structure and creates thin spots where dirt can bypass the filter.
Drying is the single most critical step of vacuum maintenance. A filter that feels slightly dry on the outside can remain soggy deep in its center. Putting a damp filter back into a stick vacuum pulls moisture directly into the high-speed electric motor, causing rapid corrosion, foul mildew odors, and motor burnout that ruins the machine. Lay the cleaned parts flat on a clean dry towel in a warm, well-ventilated room for a full 24 to 48 hours. Keep them away from high heat sources like clothes dryers, ovens, or direct heat registers, which will shrink and melt the plastic frames.
Even with careful washing, filters do not last forever. Replace your filter immediately if you spot tears in the foam, crushed or split paper pleats, or a cracked rubber gasket around the outer rim. An unsealed filter allows fine grit to enter the motor chamber, where it grinds down internal bearings and ruins suction. If your vacuum still lacks power after thoroughly clearing and drying the airflow path, the issue might lie in the power system rather than the filters. In that situation, checking how much a new battery for a cordless vacuum costs can help you determine whether an aging power cell is failing to supply the energy your motor needs.
What to Look for in Replacement Filters and Maintenance Accessories
When washing no longer clears away deep odors or when the filter material starts to fray, picking up a fresh replacement set restores the vacuum to its original suction levels. Because stick vacuum designs change frequently across model years, matching the replacement part to your exact machine requires attention to small physical details.
Start by locating the rating sticker on your vacuum, which is usually tucked underneath the handheld handle or on the underside of the motor body. Write down the complete model series number printed there. Many stick vacuums look identical on the outside but feature slightly different canister tabs, latch offsets, or filter heights that prevent generic parts from snapping into place securely. Look for replacement filter sets that clearly list your specific model number on the packaging.
Check the construction of the replacement filter frame. The outer edge must feature a pliable rubber, silicone, or dense foam gasket that creates a tight press-fit against the inside of the dust canister. If this gasket is too thin or rigid, air will slip around the outside of the filter rather than traveling through the pleated material, starving the machine of suction and sending dust back into the motor.
Buying filters in multi-packs is practical because it completely eliminates cleaning downtime. While one clean set of filters sits on your counter drying for two days, you can drop a dry backup filter straight into the vacuum and keep cleaning your home. Small cleaning tools with stiff nylon bristles and a hooked pick are also worth keeping in your utility closet. These let you clear hair wraps from the floor nozzle and sweep fine dander out from between filter pleats every week, stretching the lifespan of your filters significantly between washings.

- VC Score10.0
BCP Score is a ranking system developed by bestcleanerproducts.com. BCP Score has no relationship or impact from any manufacturers or sales agent websites. Learn more
- BrandTC-JUNESUN

- VC Score9.8
BCP Score is a ranking system developed by bestcleanerproducts.com. BCP Score has no relationship or impact from any manufacturers or sales agent websites. Learn more
- BrandSCREENTRONICS

- VC Score9.4
BCP Score is a ranking system developed by bestcleanerproducts.com. BCP Score has no relationship or impact from any manufacturers or sales agent websites. Learn more
- Brandisinlive

- VC Score9.4
BCP Score is a ranking system developed by bestcleanerproducts.com. BCP Score has no relationship or impact from any manufacturers or sales agent websites. Learn more
- BrandKaulolado
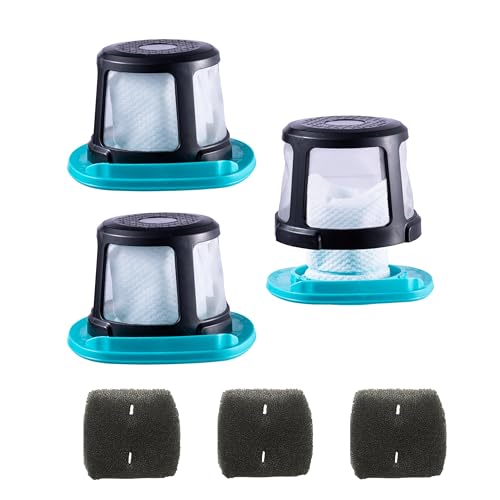
- VC Score9.4
BCP Score is a ranking system developed by bestcleanerproducts.com. BCP Score has no relationship or impact from any manufacturers or sales agent websites. Learn more
- BrandNicever

- VC Score9.2
BCP Score is a ranking system developed by bestcleanerproducts.com. BCP Score has no relationship or impact from any manufacturers or sales agent websites. Learn more
- BrandBissell

- VC Score9.0
BCP Score is a ranking system developed by bestcleanerproducts.com. BCP Score has no relationship or impact from any manufacturers or sales agent websites. Learn more
- BrandTweruna

- VC Score8.8
BCP Score is a ranking system developed by bestcleanerproducts.com. BCP Score has no relationship or impact from any manufacturers or sales agent websites. Learn more
- BrandYurMemo

- VC Score8.6
BCP Score is a ranking system developed by bestcleanerproducts.com. BCP Score has no relationship or impact from any manufacturers or sales agent websites. Learn more
- BrandAmazon Basics

- VC Score8.4
BCP Score is a ranking system developed by bestcleanerproducts.com. BCP Score has no relationship or impact from any manufacturers or sales agent websites. Learn more
- Brandpower Pic REACH

- VC Score8.2
BCP Score is a ranking system developed by bestcleanerproducts.com. BCP Score has no relationship or impact from any manufacturers or sales agent websites. Learn more
- BrandLINNIW
Last update on 2026-10-03 / Affiliate links / Images, Product Titles, and Product Highlights from Amazon Product Advertising API
FAQs
How often should I take out and clean my stick vacuum filter?
For regular household cleaning, take out and tap the loose dust from your primary filter every two to three uses. Give washable foam and mesh filters a thorough water rinse once every month, or every two weeks if you have multiple shedding pets. Exhaust filters capture much finer air particles and generally only need a rinse or replacement every six months.
What happens if I turn on a stick vacuum without a filter installed?
Running a stick vacuum without its filter pulls heavy dirt, hair, and fine silt directly through the high-speed electric motor. This debris can clog the spinning motor fan, overheat the electrical wiring, and cause permanent mechanical failure within minutes. It also voids your warranty and blows unfiltered dust straight back into your room air.
Why does my stick vacuum filter still smell bad after I washed it?
Lingering bad odors usually mean bacteria or mold grew inside the material because the filter was reinstalled before it dried completely. Soak the washable foam in cool water, rinse it until the water runs crystal clear, and let it dry flat in a bright, breezy location for at least 48 hours. If a sour or dusty smell persists after a full dry cycle, the fibers are saturated and the filter must be replaced.


How to Refinish a Fiberglass Pool

How Do You Keep Raccoons Out of Your Pool?

How to Fix Cyanuric Acid in Your Pool

How to Shape a Pool Cue Tip to Stop Miscues

Best Far Infrared Sauna Sauna Heats: Top Picks of 2026

11 Best Far Infrared Sauna Carbon Fiber Heaters of 2026 For Balanced Full-Body Heat

11 Best Carbon Far Infrared Sauna of 2026 For Even Heat

10 Best Bluetooth Speaker For Sauna of 2026 For Heat and Steam


