
How to Safely Remove a V8 Vacuum Battery

Replacing a failing power pack on a cordless stick vacuum sounds intimidating, but the job is completely painless and safe to do at home. All it takes is sliding off the clear dirt canister and taking out three small cross-head screws to drop the unit free. There is no quick-release latch to force, so pulling hard on the delicate plastic housing is never necessary.
Getting everything apart cleanly depends on removing that clear bin first so the two lower screws are exposed. Matching the screws to a small cross-head screwdriver also protects the soft metal heads from stripping. The steps can shift slightly if the machine uses a battery converter bracket instead of a factory case. Follow along below to locate every hidden fastener and slide the old unit off smoothly.
Preparing Your Work Area and Tools
When a cordless vacuum cuts out after thirty seconds or pulses repeatedly during normal suction, the battery pack has usually reached the end of its working life. Many owners look at the handle, assume the power pack snaps off with a quick-release clip like a power drill, and end up tugging on the plastic until something cracks. The power unit on this machine is actually anchored directly to the motor housing with three small fasteners. Taking it off is simple, but you need a calm workspace and the right hand tool before you touch the machine.
Start by carrying the vacuum over to a clean, flat table or countertop. Working over deep carpet or a cluttered floor is a bad idea because the mounting screws are tiny and bounce out of sight if you drop them. Spread out a clean kitchen towel or a rubber mat. This gives the motor body a soft surface to rest on, keeps the plastic finish from scratching, and prevents loose hardware from rolling onto the floor.
Safety comes first with any battery-powered appliance. Disconnect the vacuum completely from its charging cord or wall dock before you begin. Never attempt to take apart the handle while the unit is plugged into electrical power. You should also make sure the vacuum has cooled down if you were just trying to run it. Lithium power packs generate internal warmth under heavy draw, and handling a warm pack increases the risk of damage. Once the machine is unplugged and cool, set your tools within reach.
You do not need a full garage toolkit for this repair. In fact, using bulky tools or electric drills will ruin the vacuum. Here is the short checklist of everything you need on your table:
- A small cross-head screwdriver (size PH1): Make sure the screwdriver has a narrow, straight shaft so it fits deep into recessed screw holes without scraping the plastic rim.
- A small tray or shallow cup: Keep a clean bowl, dish, or magnetic parts tray handy so the three tiny screws stay in one spot.
- A soft work cloth: Lay down a hand towel to support the curved handle and catch any stray dust that shakes loose during the process.
- A dry microfiber cloth: Having a dry wipe nearby lets you clean dust out of the mounting tracks before you slide a new power pack into place.
Choosing the correct screwdriver is the most critical part of preparation. The factory screws are cut with small cross-head slots and are made from relatively soft metal. If you grab an oversized household driver or try to force a flat blade into the opening, the tip will slip, chew through the metal cross, and permanently strip the head. A standard PH1 precision driver fits snugly into the slots, giving you clean torque without any slipping.
Removing the Clear Dirt Canister to Reach the Hidden Screws
The single biggest reason people get stuck when taking off the battery is that two of the mounting screws are completely hidden. You can stare at the handle for ten minutes and never see them because they sit tucked behind the lower wall of the clear dirt canister. You must remove this canister completely from the main body before you can touch the lower screws.
Hold the vacuum upright by the handle with one hand. Take the machine over a trash can if there is any lingering dust inside. Locate the bright red release lever on top of the central cyclone assembly. Pull that red lever firmly straight up toward the ceiling. As the cyclone pulls upward, the bottom flap of the clear dirt canister will drop open to release loose dirt. This is the normal motion you use for everyday emptying, but you are only halfway through the process.
To take the canister off the machine entirely, you need to trigger the second release catch. Look closely along the red runner track on the side or base of the cyclone assembly while the red lever is pulled up. You will see a small red plastic release tab positioned along the lower runner. Press this tab firmly inward while gently pulling the clear dirt canister downward and away from the handle body.
The clear plastic canister will slide smoothly down off its guide rails. Set the canister aside on your towel. With the canister out of the way, you can look directly at the front lower portion of the handle assembly. You will immediately notice the flat plastic base where the battery connects to the suction intake, revealing the recessed screw pockets that were impossible to see a moment ago.
Locating and Removing the Three Screws
With the clear dirt canister set aside, you can now locate all three fasteners holding the battery to the main vacuum body. Take a moment to spot each one before you start turning your screwdriver. Rushing this step often leads to pulling on the plastic while a screw is still half-threaded, which snaps the delicate retaining brackets.
- Remove the rear handle screw: Turn the vacuum so the back of the handle faces you. Right below the curved grip where your palm rests, directly above the small round charging socket, you will see a single small cross-head screw. Insert your PH1 screwdriver straight into the hole. Press inward with steady, moderate thumb pressure so the bit stays seated, then turn counter-clockwise. Back the screw out completely and drop it into your parts tray.
- Locate the two front base screws: Turn the vacuum around so the underside of the motor housing faces up toward you. Look at the flat plastic shelf right where the clear dirt canister used to sit. You will see two small cross-head screws sitting side by side in deep circular recesses. These two screws point directly into the front mounting tabs of the battery block.
- Unthread the two front base screws: Place your screwdriver into the first base recess. Keep the shaft straight and level with the hole. Turn counter-clockwise until the screw spins freely, then tilt the vacuum gently to let the screw slide out into your hand. Repeat the exact same movement for the second base screw. Put both fasteners in your tray alongside the rear screw.
- Slide the battery off the handle: Grasp the handle grip firmly with your non-dominant hand. Take hold of the rectangular battery block with your other hand. Slide the battery straight down and slightly forward along the line of the handle spine. The unit will glide off its internal tracks without requiring heavy force.
Pay close attention as the pack slides free. The top of the battery features a long vertical post that runs up through the center of the vacuum grip. At the very top of this post, two metal power pins slide into matching female connectors inside the trigger housing. Sliding the battery straight along its natural angle protects these metal power pins from bending.
Avoid common mistakes during this stage. Never use an electric drill or cordless driver to remove these screws. Power tools spin too fast, generating instant friction that strips soft screw heads in a fraction of a second. Also, avoid prying between the battery seam and the handle with a flathead screwdriver or butter knife. The plastic housing uses thin alignment lips that will warp or snap under prying pressure. If the battery does not move after backing out three screws, stop and check that the front screws actually came completely out of their recessed holes rather than just loosening inside the plastic wells.
Choosing a Replacement and Securing the New Battery
Once the old power pack is off the machine, you need to decide what kind of power source to install in its place. Cordless stick vacuum owners usually pick between two practical options: a standard direct-fit replacement battery or a battery converter bracket that accepts workshop power tool packs.
A direct-fit replacement battery looks and functions just like the factory original. It comes with the complete plastic handle spine, the internal lithium cells, and the integrated charging socket. This is the right choice if you want to keep using your existing wall-mounted dock and prefer a simple drop-in fix. Before ordering a direct-fit pack, check the product label on the underside of your old battery. Verify the exact series number, such as SV10, and confirm the mounting shape matches your machine. Checking these numbers ensures that the screw holes and metal power pins line up perfectly with your handle.
A battery converter bracket is an alternative solution for owners who already have a collection of compatible 18-volt or 20-volt cordless tool batteries in their garage. This bracket screws permanently onto the vacuum handle in place of the factory battery, but it features an open slide mount on the bottom instead of sealed cells. You simply click your existing tool battery into the bracket to vacuum, then slide it off to charge on your standard tool charger. If you choose this path, verify that the converter matches both your vacuum model series and your specific power tool battery brand, because locking tabs vary widely between tool manufacturers. Learning how much a new cordless vacuum battery costs can help you decide whether a standard replacement or a tool converter makes more financial sense for your home.
Installing your new power unit takes less than two minutes once you have the correct part. Follow these simple steps to put the machine back together safely:
- Align the mounting post: Hold the vacuum handle upright. Line up the tall post of the new battery pack or converter bracket with the hollow channel inside the vacuum grip.
- Slide the unit home: Push the battery straight upward into the handle until the base sits flush against the motor casing. You should feel the metal power pins seat firmly inside the handle without crunching.
- Start the rear handle screw: Drop the rear screw into the hole below the grip. Turn your screwdriver clockwise until the screw catches the plastic threads. Snug it down until it stops, but do not overtighten it.
- Fasten the two base screws: Set the two remaining screws into the front recessed holes on the underside. Tighten each one down with gentle wrist pressure. Stop turning the moment you feel firm resistance to keep from cracking the plastic screw mounts.
- Reattach the clear dirt canister: Line up the canister tracks with the runners on the central cyclone body. Slide the canister upward until the red catch clicks into place. Push the bottom flap shut until it clicks securely.
Give the trigger a quick squeeze to test your work. The motor should spin up instantly with a smooth, steady tone. If you installed a standard replacement battery, plug the vacuum into the charger and let it reach a full charge before tackling a full cleaning session.

- VC Score10.0
BCP Score is a ranking system developed by bestcleanerproducts.com. BCP Score has no relationship or impact from any manufacturers or sales agent websites. Learn more
- BrandKQAHA

- VC Score8.8
BCP Score is a ranking system developed by bestcleanerproducts.com. BCP Score has no relationship or impact from any manufacturers or sales agent websites. Learn more
- BrandSwidan

- VC Score8.8
BCP Score is a ranking system developed by bestcleanerproducts.com. BCP Score has no relationship or impact from any manufacturers or sales agent websites. Learn more
- BrandFLYLINKTECH

- VC Score8.6
BCP Score is a ranking system developed by bestcleanerproducts.com. BCP Score has no relationship or impact from any manufacturers or sales agent websites. Learn more
- BrandMorpilot

- VC Score8.6
BCP Score is a ranking system developed by bestcleanerproducts.com. BCP Score has no relationship or impact from any manufacturers or sales agent websites. Learn more
- BrandJJXNDO

- VC Score8.6
BCP Score is a ranking system developed by bestcleanerproducts.com. BCP Score has no relationship or impact from any manufacturers or sales agent websites. Learn more
- BrandTPDL
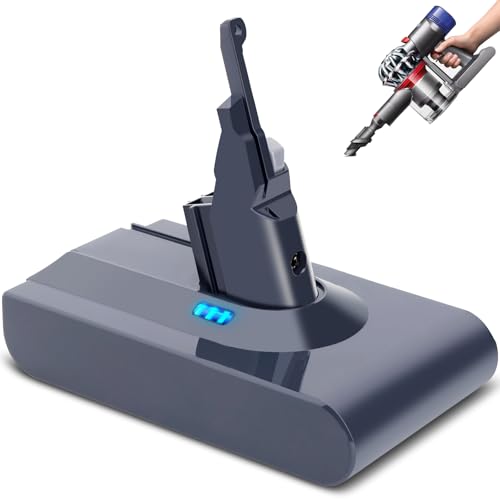
- VC Score8.6
BCP Score is a ranking system developed by bestcleanerproducts.com. BCP Score has no relationship or impact from any manufacturers or sales agent websites. Learn more
- BrandTacerny

- VC Score8.4
BCP Score is a ranking system developed by bestcleanerproducts.com. BCP Score has no relationship or impact from any manufacturers or sales agent websites. Learn more
- BrandTPDL

- VC Score8.4
BCP Score is a ranking system developed by bestcleanerproducts.com. BCP Score has no relationship or impact from any manufacturers or sales agent websites. Learn more
- BrandDyson

- VC Score8.4
BCP Score is a ranking system developed by bestcleanerproducts.com. BCP Score has no relationship or impact from any manufacturers or sales agent websites. Learn more
- BrandURUN

- VC Score8.0
BCP Score is a ranking system developed by bestcleanerproducts.com. BCP Score has no relationship or impact from any manufacturers or sales agent websites. Learn more
- BrandSwidan
Last update on 2026-10-03 / Affiliate links / Images, Product Titles, and Product Highlights from Amazon Product Advertising API
FAQs
Why will my V8 battery not come off after removing the handle screw?
The screw behind the handle is only one of three fasteners holding the pack to the machine. Two additional screws are hidden on the underside of the vacuum body behind the clear dirt canister. You must pull the red release lever to remove the canister completely, then take out both lower screws before the battery will slide free.
What should I do if one of the battery screws is stripped?
If the cross-head slots are worn smooth, place a wide rubber band flat across the tip of your screwdriver and press firmly into the screw head. The rubber fills the stripped gaps and gives the metal bit enough grip to back the screw out. If that fails, carefully grasp the outer rim of the screw head with small locking pliers to turn it counter-clockwise.
How do I know if my vacuum problem is a dead battery or a dirty filter?
A failing battery typically causes the vacuum to shut off after a few seconds of use, often showing a blinking red light on the side of the battery pack. A clogged filter or blocked airway causes the motor to pulse rapidly on and off like a heartbeat while the indicator lights remain solid blue. Wash and dry your filters completely before replacing the power unit.


How to Refinish a Fiberglass Pool

How Do You Keep Raccoons Out of Your Pool?

How to Fix Cyanuric Acid in Your Pool

How to Shape a Pool Cue Tip to Stop Miscues

Best Far Infrared Sauna Sauna Heats: Top Picks of 2026

11 Best Far Infrared Sauna Carbon Fiber Heaters of 2026 For Balanced Full-Body Heat

11 Best Carbon Far Infrared Sauna of 2026 For Even Heat

10 Best Bluetooth Speaker For Sauna of 2026 For Heat and Steam


