
How to Safely Remove a V8 Stick Vacuum Battery

The vacuum motor sputters out after barely thirty seconds of cleaning, and the red charging light starts blinking on the wall mount. Swapping out the worn power pack takes only a few minutes once you remove three small cross-head screws and slide the battery straight down away from the handle.
Getting that pack free depends on sliding off the clear dirt cup first, because two hidden fasteners sit tucked right under the bin area. Success also relies on using a small screwdriver that fits snugly, since these tiny factory screws have soft heads that strip easily under heavy pressure. A quick look will also confirm whether the machine has the standard three-screw layout or an aftermarket adapter setup. Here is how to guide the old battery out cleanly without cracking the plastic casing.
Preparing Your Vacuum and Releasing the Clear Dirt Cup
Before you touch a single screw, make sure your vacuum is disconnected from the wall charger or docking station. Working on any appliance while it connects to a live power cable creates an unnecessary electrical hazard, and accidentally bumping the red trigger while your fingers are near the inner wiring can damage the motor. Set the machine flat on a clean kitchen counter, workbench, or table where small parts will not roll onto the floor and disappear.
Take a minute to gather the few simple items you need before opening the casing:
- A small cross-head screwdriver with a clean, sharp tip (size PH1 or PH0).
- A shallow dish, small cup, or magnetic tray to keep your screws safe.
- A dry cloth or soft brush to clear away loose grit from the screw pockets.
Many people pick up their stick vacuum, take out the obvious screw on the back of the handle, and wonder why the battery feels locked in place. The reason is that two additional mounting screws sit directly under the front of the handle, hidden beneath the clear dirt cup. If you attempt to force, pry, or wiggle the battery loose while those front fasteners are still holding on, you will crack the plastic housing or snap the internal mounting tabs.
Taking off the clear dirt cup is quick and requires no tools. Hold the main vacuum body by the top carry handle over a trash bin. Pull the red bin release lever on top of the machine firmly upward. The central red cyclone unit will slide straight up along its runners, and the bottom flap of the cup will drop open to release any trapped dust.
Once the trapdoor drops open, look along the red plastic guide rail located on the bottom or inner track of the cyclone. You will find a small secondary red release catch. Press this red tab with your thumb while sliding the entire clear dirt cup downward off the metal guide tracks. Place the dirt cup aside on your table. With that plastic barrel out of the way, the front base of the vacuum handle and its two hidden screw holes are clearly visible.
Removing the Three Screws and Freeing the Old Battery Pack
With the clear dirt cup set aside, you can see all three factory mounting points that secure the battery to the vacuum body. The stick vacuum relies on a triangular mounting pattern. One screw sits high on the back of the handle, directly beneath the charging port and your hand grip. The other two screws sit side by side on the underside of the front battery flange, right in the channel where the clear dirt cup was seated.
Follow these steps to take out the three screws and free the battery safely:
- Lay the vacuum flat on its side on a clean towel or non-slip mat with the handle pointing toward you.
- Set the tip of your small cross-head screwdriver into the single screw at the back of the handle. Press the driver straight into the screw head with steady inward pressure and turn counterclockwise until the screw comes free, then drop it into your dish.
- Roll the vacuum over so the bottom base faces up toward the ceiling. Locate the two matching cross-head screws tucked into the front lip of the battery housing.
- Back out both front screws by turning your screwdriver counterclockwise. Keep your hand perpendicular to the surface so the tip stays centered in the screw head without slipping.
- Grip the vacuum handle firmly with one hand and grasp the rectangular battery pack with your other hand.
- Pull the battery straight down and away from the base of the handle. It will slide out along molded internal rails.
The direction of your pull matters. Always pull the old pack straight down along the path of the handle. Never twist the battery, pry it sideways, or try to lever it out from the rear hook. The handle houses delicate metal contact pins (the small electrical prongs that transfer energy from the battery cells into the motor and down through the extension wand to the motorized floor nozzle). Bending or snapping those metal contact pins will break the electrical pathway, which means even a brand-new battery will fail to turn the vacuum or spinning brush roller on.
If a screw refuses to turn or seems stripped, stop immediately before the slot rounds out completely. Factory screws use soft metal that strips quickly under an ill-fitting driver. If the driver slips, lay a flat rubber band across the screw head, then press the screwdriver tip firmly into the rubber band before turning. The rubber fills the gaps to grip the metal walls. If a screw spins endlessly without backing out, the brass threaded insert inside the plastic may have broken loose. Slide the flat edge of a butter knife under the screw head to apply gentle upward leverage while slowly turning the screwdriver counterclockwise.
Installing Your New Battery Pack or Tool Adapter Securely
Before you fit your replacement power pack or tool adapter, take a dry cloth and brush away any stray pet hair or fine drywall dust that settled inside the empty handle cavity. Never spray cleaning liquids, water, or aerosol cleaners into the handle opening, because liquid near the metal contact pins can short-circuit the electronics when you reapply power.
Installing the replacement pack follows a straightforward path, but taking care with the plastic threads will keep the housing solid for years:
- Inspect the top of the replacement battery or adapter to confirm that its guide ribs and internal contact slots match the grooves inside your vacuum handle.
- Slide the battery straight upward into the handle column until it seats firmly against the upper housing stops. Check the seams around the base to ensure there is no tilt or uneven gap.
- Place the rear handle screw into its hole first. Turn it clockwise with your fingers or a very gentle touch with the screwdriver until the threads catch, but do not tighten it down yet.
- Insert the two front screws into the underside flange and turn each clockwise until they begin to thread cleanly into the handle.
- Tighten all three screws snugly in an alternating pattern. Stop turning the moment you feel firm resistance. Driving screws too hard into plastic will crack the thin mounting loops on the battery or strip the internal threads inside the vacuum handle.
- Reattach the clear dirt cup by sliding it back up along the red cyclone runners until the lower red catch clicks. Then push the cyclone assembly down until the bottom flap clicks shut.
Once everything sits flush and the screws are secure, give the red trigger a quick two-second squeeze. You should hear the motor spin up smoothly with full power. If the status light blinks or the motor cuts out, release the trigger and make sure the battery is pushed all the way into the cavity. Most replacement packs arrive with a partial storage charge, so place the vacuum on your charger to let the cells charge fully before tackling a full room.
What to Look for in a Replacement Battery or Battery Adapter
When your stick vacuum starts cutting out after only a minute or two of cleaning, you do not need to replace the entire vacuum. You have two reliable paths to restore full cleaning runtime: buying a direct-fit replacement battery pack or installing a power-tool battery adapter. If you are comparing your repair choices, you can check how much a new battery for a cordless vacuum costs in 2026 to see what fits your household budget.
If you choose a direct-fit battery, look for a replacement pack shaped specifically for your vacuum series. Check the model code printed on your original dead battery label, along with the physical layout of the three screw tabs, to confirm that the new pack will slide straight into your handle. Packs with higher capacity ratings provide longer uninterrupted runtime, which is especially helpful when pushing a heavy floor nozzle with a spinning brush roller across deep living room carpets. Verify that the pack includes internal safety controls to protect against overcharging, deep discharge, and overheating during continuous use.
If you already own a collection of cordless power tools in your garage, a battery adapter is another practical option. These molded plastic adapters screw onto the bottom of your vacuum handle in place of the factory battery and allow you to click in standard 18-volt or 20-volt tool batteries. When selecting an adapter, confirm that it matches both your specific vacuum model series and the exact brand and style of tool battery you own. Look for an adapter made from durable plastic that holds the power tool pack securely without rattling, ensuring steady electrical contact while you push the machine around furniture legs and across door thresholds.

- VC Score9.8
BCP Score is a ranking system developed by bestcleanerproducts.com. BCP Score has no relationship or impact from any manufacturers or sales agent websites. Learn more
- BrandApexilyfe

- VC Score9.2
BCP Score is a ranking system developed by bestcleanerproducts.com. BCP Score has no relationship or impact from any manufacturers or sales agent websites. Learn more
- BrandBoetpcr

- VC Score9.0
BCP Score is a ranking system developed by bestcleanerproducts.com. BCP Score has no relationship or impact from any manufacturers or sales agent websites. Learn more
- BrandMAKBOS

- VC Score8.8
BCP Score is a ranking system developed by bestcleanerproducts.com. BCP Score has no relationship or impact from any manufacturers or sales agent websites. Learn more
- BrandSwidan
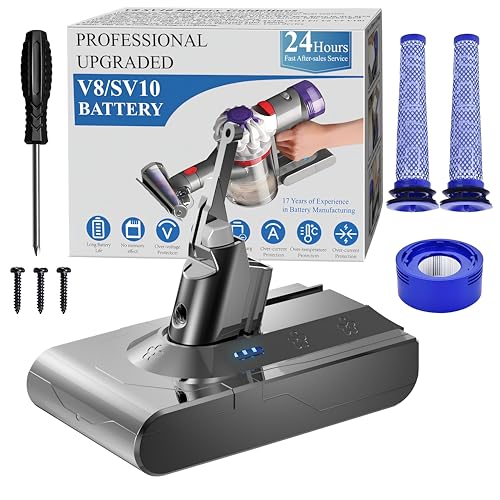
- VC Score8.8
BCP Score is a ranking system developed by bestcleanerproducts.com. BCP Score has no relationship or impact from any manufacturers or sales agent websites. Learn more
- BrandBOTKK
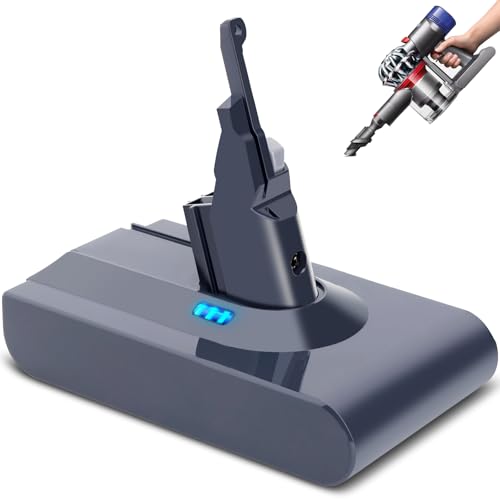
- VC Score8.6
BCP Score is a ranking system developed by bestcleanerproducts.com. BCP Score has no relationship or impact from any manufacturers or sales agent websites. Learn more
- BrandTacerny

- VC Score8.6
BCP Score is a ranking system developed by bestcleanerproducts.com. BCP Score has no relationship or impact from any manufacturers or sales agent websites. Learn more
- BrandLasica

- VC Score8.6
BCP Score is a ranking system developed by bestcleanerproducts.com. BCP Score has no relationship or impact from any manufacturers or sales agent websites. Learn more
- BrandMorpilot

- VC Score8.6
BCP Score is a ranking system developed by bestcleanerproducts.com. BCP Score has no relationship or impact from any manufacturers or sales agent websites. Learn more
- BrandEGR

- VC Score8.6
BCP Score is a ranking system developed by bestcleanerproducts.com. BCP Score has no relationship or impact from any manufacturers or sales agent websites. Learn more
- BrandJJXNDO

- VC Score8.4
BCP Score is a ranking system developed by bestcleanerproducts.com. BCP Score has no relationship or impact from any manufacturers or sales agent websites. Learn more
- BrandTPDL
Last update on 2026-10-03 / Affiliate links / Images, Product Titles, and Product Highlights from Amazon Product Advertising API
FAQs
Can I remove the battery without taking off the clear dirt cup?
No, you must take off the clear dirt cup to reach the front screws. The vacuum frame conceals two of its three mounting fasteners directly under the front of the handle behind that clear plastic bin. If you try to pull or pry the battery free while those two hidden screws are still fastened, you will permanently crack the plastic mounting ears on your vacuum handle.
What size screwdriver do I need to remove the battery screws?
You need a small cross-head screwdriver in size PH1 or PH0. A standard household screwdriver has a tip that is too large to seat deep inside the narrow recess of the screw heads. Using the wrong size causes the driver to cam out and slip, which quickly strips the soft factory metal and makes the screws nearly impossible to back out.
Why will the new battery not turn on after I tightened the screws?
The battery may not be seated deeply enough against the internal electrical contact pins inside the handle. Back the three screws off by two turns, push the battery firmly upward into the handle until the seam closes completely, and tighten the screws back down. Also, keep in mind that most replacement batteries arrive in a low-power shipping mode and must sit on the charger for a short period before the motor responds.


How to Refinish a Fiberglass Pool

How Do You Keep Raccoons Out of Your Pool?

How to Fix Cyanuric Acid in Your Pool

How to Shape a Pool Cue Tip to Stop Miscues

Best Far Infrared Sauna Sauna Heats: Top Picks of 2026

11 Best Far Infrared Sauna Carbon Fiber Heaters of 2026 For Balanced Full-Body Heat

11 Best Carbon Far Infrared Sauna of 2026 For Even Heat

10 Best Bluetooth Speaker For Sauna of 2026 For Heat and Steam


