
How to Remove the Battery from a Dyson V7 Vacuum

Taking apart a cordless cleaner might seem intimidating, but swapping out the power pack is a simple project that takes only a few minutes. To detach the unit safely, remove three small cross-head screws after sliding off the clear dirt cup, then pull the battery downward away from the handle. There are no delicate clips to pry open and no hidden glue holding anything together.
Getting this right comes down to three basic precautions. The machine must stay disconnected from the wall charger before starting. Sliding off the dirt bin first is essential, because it exposes the front screw hidden right behind the latch. Matching the screwdriver tip closely to the soft screw heads also prevents them from stripping and damaging the plastic body. Here is how to locate every fastener and slide the pack free without hassle.
What tools do you need before getting started?
Preparing your workspace keeps the job quick and prevents lost parts. You only need one basic hand tool, but using the correct size makes all the difference between a simple swap and a stripped screw head.
- A small cross-head screwdriver: Use a number 1 cross-head screwdriver (marked PH1). The three screws securing the pack are small and soft. A standard number 2 household screwdriver is too wide to seat into the cross slots, which can slip and round off the edges. An eyeglass screwdriver is too narrow and lacks the grip needed to break the factory seal.
- A small parts tray: You will remove three tiny screws. A magnetic dish, a small ramekin, or an upside-down jar lid keeps them from rolling off the table and disappearing onto the floor.
- A clean, soft work surface: Place a hand towel or rubber mat over your table. The plastic handle body scratches easily if rubbed against bare stone or wood while you apply downward pressure.
- An unplugged power supply: Disconnect the charging cable from the vacuum handle. Never work on the unit while connected to an outlet or dock. Cutting all power eliminates any risk of shorting the metal contact prongs while handling tools.
Why must you remove the clear dirt bin first?
Looking at the vacuum, the battery seems to hang freely beneath the handle grip. It is tempting to start backing out screws right away, but you must remove the clear dirt bin first. Dyson designed the front mounting tab of the battery to sit directly behind the lower tracks of the clear dirt bin. If you leave the bin attached, you cannot reach this front screw, and pulling the pack will snap the plastic tab.
Taking off the clear dirt bin takes only a few seconds once you know how the release catches work:
- Empty the dirt chamber: Hold the vacuum body over a trash can. Pull up firmly on the red cyclone release latch on top of the machine until the cyclone slides up and the bottom flap drops open. Tap the frame gently so loose dust falls out and does not get into open screw holes later.
- Locate the lower release catch: Look along the bottom track where the clear dirt bin mounts to the main body, near the base hinge. You will see a small red release catch marked with an arrow pointing forward.
- Slide the bin off: Press and hold that red release catch inward with your thumb. Pull the clear dirt bin straight down along its guide tracks until it slides completely free from the handle body.
- Set the bin aside: Place the clear plastic container in a safe spot on your towel. With the bin removed, the front of the motor assembly and the front battery mounting tab are fully accessible.
Where are the three hidden screws located?
The battery is held in place by exactly three small cross-head screws. If the battery refuses to move later on, you have left one in place. The factory uses soft metal for these fasteners, so always apply firm inward pressure while turning to prevent stripping the heads.
- The rear handle screw: Hold the vacuum upright and look at the back of the handle grip. Just below the charging port socket, you will see a deep, narrow hole. Look inside with good lighting to spot the first cross-head screw. Insert your PH1 screwdriver straight into the recess, push firmly, and turn counter-clockwise until the screw backs out.
- The front base screw: Look at the front face of the vacuum where you removed the clear dirt bin. At the lower edge of the motor casing, there is a protruding plastic tab from the battery. A single screw passes through this tab into the vacuum frame. Turn this screw counter-clockwise and set it into your tray.
- The underside base screw: Flip the vacuum upside down to look at the bottom flat surface of the battery pack. Near the rear foot pad, you will find the final screw sitting flush in its own recess. Loosen and remove this third screw using steady downward pressure.
Check each removed screw before moving forward. If a screw is loose but remains in its deep hole, turn the vacuum over and tap the plastic handle body gently against your palm so it drops out. Do not leave a loose screw in the recess where it could fall into the motor housing.
How do you safely slide out the old battery?
With all three screws removed, the battery is mechanically free from the vacuum frame. But it will not simply drop away by itself. The battery connection uses tight metal contact prongs that slide directly into internal electrical sockets inside the handle. These prongs create friction to prevent power cutouts during regular vacuuming.
- Position your hands correctly: Grip the upper handle firmly with one hand. Keep your fingers completely off the red power trigger to avoid accidental activation.
- Grasp the battery pack: Wrap your other hand around the wide, rectangular base of the battery pack. Do not grab the thin front mounting tab, which is made of rigid plastic that can bend or break under uneven force.
- Pull straight downward: Pull the battery pack firmly downward away from the handle in a straight line. Do not twist the pack or rock it aggressively from side to side. Twisting can warp the plastic guide rails molded into the handle or bend the internal metal contact prongs.
If the battery feels jammed and refuses to budge, stop pulling immediately. Shine a flashlight into all three screw locations to confirm every screw is out. A screw that is unthreaded but still caught halfway in the plastic hole will stop the pack from sliding. Never wedge a flat-head screwdriver or metal knife between the battery and the plastic handle body to pry them apart. Prying easily gouges the soft casing, snaps the alignment tabs, or risks damaging the internal battery cells.
How do you install and secure the new battery?
Installing the replacement battery pack is a straightforward process, but you must align the parts correctly so you do not bend connection pins or strip plastic threads.
- Check the connector alignment: Hold the new battery pack below the handle. Look at the top surface of the pack to locate the two plastic guide rails and the internal electrical contacts. Align these rails with the matching slots inside the bottom of the vacuum handle body.
- Slide the pack into place: Push the new battery smoothly upward into the handle until the base sits completely flush. You should feel a firm click as the metal contact prongs seat into their sockets. Confirm that the screw holes on the rear handle and front mounting tab line up with the frame.
- Start with the rear handle screw: Place the rear handle screw onto your screwdriver and guide it into the deep hole under the charging port. Turn clockwise until the screw catches the internal threads. Tighten until snug against the casing, but do not overtighten. Over-torquing will strip the plastic threads inside the handle, leaving the battery loose.
- Install the front and underside screws: Thread the front base screw through the battery tab on the front of the unit, then tighten it gently. Next, install the third screw into the underside of the battery base. Both screws should sit flush without forcing.
- Reattach the clear dirt bin: Line up the runners of the clear dirt bin with the guide grooves on the vacuum body. Slide the bin upward until the red bottom catch snaps shut with a crisp click. Push the bottom flap up until the latch catches.
- Confirm proper operation: Squeeze the red power trigger for two to three seconds. Listen for a clean motor response, and confirm that the indicator light glows a steady blue rather than blinking.
What should you look for in a replacement battery?
Before picking a new power pack, make sure the replacement matches your machine's exact mechanical layout. Cordless vacuum lines share similar styling, but packs are not interchangeable between generations. A battery built for an older V6 or a newer V8 will not fit the V7 handle, as the screw tabs and connector shapes differ.
Check the rating sticker on your current vacuum to confirm compatibility. Dyson V7 models typically carry an SV11 model designation. Whether your vacuum is an Animal, Motorhead, Absolute, Fluffy, or Trigger variant, they all share this identical battery mounting footprint. If you are comparing your options and want to know how much a new battery for a cordless vacuum costs, checking capacity ratings is a great place to start.
Consider the milliamp-hour capacity of the pack. Standard batteries provide solid everyday run times, while higher capacity versions hold more energy to extend runtime during tough cleaning jobs. Extra capacity is particularly useful when you regularly use motorized tools like a spinning brush roller or a motorized floor nozzle on heavy carpet, which pull far more current than bare wands.
Finally, inspect the post-filter style on the rear of your vacuum. Some models use a twist-on rear filter cap, while others use a simple push-on design. If you purchase a replacement battery kit that includes fresh filters, ensure the included filter matches the connection style on your machine.

- VC Score10.0
BCP Score is a ranking system developed by bestcleanerproducts.com. BCP Score has no relationship or impact from any manufacturers or sales agent websites. Learn more
- Brandkaejil

- VC Score10.0
BCP Score is a ranking system developed by bestcleanerproducts.com. BCP Score has no relationship or impact from any manufacturers or sales agent websites. Learn more
- BrandIbanti

- VC Score9.4
BCP Score is a ranking system developed by bestcleanerproducts.com. BCP Score has no relationship or impact from any manufacturers or sales agent websites. Learn more
- BrandBoetpcr

- VC Score9.0
BCP Score is a ranking system developed by bestcleanerproducts.com. BCP Score has no relationship or impact from any manufacturers or sales agent websites. Learn more
- BrandBTRUI

- VC Score8.8
BCP Score is a ranking system developed by bestcleanerproducts.com. BCP Score has no relationship or impact from any manufacturers or sales agent websites. Learn more
- BrandBOTKK
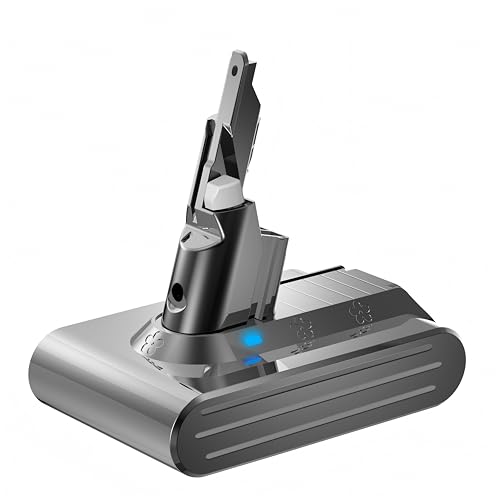
- VC Score8.8
BCP Score is a ranking system developed by bestcleanerproducts.com. BCP Score has no relationship or impact from any manufacturers or sales agent websites. Learn more
- BrandBOTKK

- VC Score8.6
BCP Score is a ranking system developed by bestcleanerproducts.com. BCP Score has no relationship or impact from any manufacturers or sales agent websites. Learn more
- BrandJJXNDO

- VC Score8.6
BCP Score is a ranking system developed by bestcleanerproducts.com. BCP Score has no relationship or impact from any manufacturers or sales agent websites. Learn more
- BrandMorpilot

- VC Score8.4
BCP Score is a ranking system developed by bestcleanerproducts.com. BCP Score has no relationship or impact from any manufacturers or sales agent websites. Learn more
- BrandFieety

- VC Score8.2
BCP Score is a ranking system developed by bestcleanerproducts.com. BCP Score has no relationship or impact from any manufacturers or sales agent websites. Learn more
- BrandBonadget
Last update on 2026-10-03 / Affiliate links / Images, Product Titles, and Product Highlights from Amazon Product Advertising API
FAQs
What should you do if a battery screw gets stripped?
If your screwdriver slips and rounds out the cross shape on the screw head, stop turning immediately. Place a wide, flat rubber band across the tip of your screwdriver, press down firmly into the stripped recess, and turn slowly. The rubber fills the stripped gap and provides enough traction to back the screw out without damaging the surrounding plastic handle body.
Does installing a new battery reset the red flashing light?
Yes, if your old battery was flashing red because its internal cells degraded or failed, installing a fresh pack completely replaces that circuitry. The battery management system is housed inside the battery pack itself rather than the vacuum motor. Once the new pack is properly installed and charged, the indicator light should glow solid blue during use instead of blinking red.
Can you use the vacuum right away after installing the new pack?
Replacement packs usually arrive with a partial charge for safe transit, so the motor will turn on immediately after installation. However, it is best practice to dock the vacuum on its charger and let it reach a full charge before doing heavy cleaning. Giving the pack a complete initial charge helps the internal electronics calibrate runtime accurately.
Why does the vacuum pulse or cut out after replacing the battery?
If your vacuum pulses or shuts off after a few seconds with a new pack, check the clear dirt bin, cyclone airways, and filters for blockages. The vacuum has an automatic shutoff feature that cuts power when airflow is restricted to protect the motor from overheating. Ensure the center pre-filter and rear post-filter are completely clean and dry before running the machine again.


How to Refinish a Fiberglass Pool

How Do You Keep Raccoons Out of Your Pool?

How to Fix Cyanuric Acid in Your Pool

How to Shape a Pool Cue Tip to Stop Miscues

Best Far Infrared Sauna Sauna Heats: Top Picks of 2026

11 Best Far Infrared Sauna Carbon Fiber Heaters of 2026 For Balanced Full-Body Heat

11 Best Carbon Far Infrared Sauna of 2026 For Even Heat

10 Best Bluetooth Speaker For Sauna of 2026 For Heat and Steam


