
How to Safely Remove and Clean a Vacuum Head

A vacuum roller suddenly stalls on the carpet, or a faint smell of warm rubber drifts up while pet hair scatters across the floor. Getting it running again is straightforward: unplug the power, press the neck latch to detach the head, and slide out the roller brush to cut away trapped threads.
The exact steps vary with the style of your machine. Lightweight stick cleaners often use simple push buttons or coin-turn latches to release the bottom cover plate, while larger uprights might use small screws. Motorized heads with internal electrical wires must always stay dry, whereas hollow plastic tools without electronics can safely soak in warm water. Following the right order lets you clear deep clogs and tangled hair without snapping fragile plastic clips.
How do you safely detach the floor head?
Taking the floor head off your vacuum takes only a few seconds, but rushing can snap the small plastic locking tabs that hold the machine together. Before touching any latches, cut the electrical power completely. If you use an upright or canister vacuum, unplug the cord from the wall outlet. If you have a cordless stick vacuum, turn the unit off and remove the battery pack if your model allows it. When you work on a cordless unit that cannot hold power, looking up the cost of a new cordless vacuum battery can help you plan your next repair, but safety comes first right now.
Lay the vacuum flat on a soft surface, like a clean bath towel, rug, or carpet runner. Hard tile and bare concrete easily scratch the clear plastic windows on modern vacuum heads. Once the unit rests flat, locate the connection point where the floor nozzle (the wide intake head that rolls along the floor) connects to the wand (the long metal extension tube) or the lower motor body.
- Find the release button: Look for a large push button or lever near the flexible neck joint. This button usually sits on top of the neck or just behind the swivel joint. On many stick vacuums, this is a brightly colored plastic clip.
- Press straight down: Push the release button firmly with your thumb. You should feel the latch compress against its internal spring. Do not pry at the edge of the latch with keys, screwdrivers, or butter knives, because thin plastic tabs shear off under metal pressure.
- Pull the joint straight apart: While holding the release button down, grip the wand with one hand and the neck of the floor head with the other. Pull them straight apart in opposite directions.
- Avoid twisting: Never twist or wrench the head from side to side while pulling. Most motorized floor nozzles have electrical prongs hidden inside the neck to send power down to the spinning roller brush. Twisting the neck sideways bends or snaps these brass pins, ruining the electrical connection.
How do you open the bottom cover plate?
Once you separate the floor head from the vacuum, turn it upside down on your work towel so the brush mechanism faces up toward you. To pull out the spinning brush roller, you need to open the bottom cover plate (often called the soleplate by vacuum makers). Vacuum brands secure this bottom plate in three common ways: sliding latches, coin-turn locks, or small recessed screws.
- Inspect the locking style: Check the edges and corners of the bottom plate under bright room light. If you see two sliding levers marked with padlock icons, you have slide latches. If you see wide plastic screw heads with a deep center groove, you have coin-turn locks. If you see small metal screw heads set into deep holes, you have standard screws.
- Unlock sliding latches: Push each slider in the direction of the open padlock symbol. These sliders often feel stiff because fine carpet dust packs behind the plastic ridges. Push steadily with your thumb pad until you hear or feel a soft click.
- Turn coin-turn locks: Place a thick coin, such as a quarter, into the slot. Turn the coin a quarter-turn counterclockwise. Stop turning as soon as the slot aligns with the unlock arrow. Turning past the stop point strips the soft plastic tabs underneath.
- Remove standard screws: If your bottom plate uses screws, select a screwdriver that fits the head snugly. Turn counterclockwise and set each screw inside a small bowl or cup so it does not roll off your table.
- Lift the plate away: Lift the bottom cover plate up from the rear edge first, then pull it forward out of the front hinge hooks. Set the plate aside on your towel.
What is the best way to cut tangled hair?
Long hair, thread, pet fur, and rug fringe love to wrap around spinning parts. As the roller spins at thousands of revolutions per minute, strands pull tighter and tighter against the center bar until they form a dense, rock-hard sleeve. This choked cylinder slows the motor down, creates a burning rubber smell from the slipping belt, and keeps the bristles from sweeping up dirt.
- Lift the roller brush free: Grasp the spinning roller brush near the side opposite the rubber drive belt. Lift that end up and tilt it toward you. Once the free end clears the housing, slide the other end out of the looped drive belt. If your vacuum uses two rollers, lift the soft front roller out first by popping its release lever.
- Find the cutting guide groove: Most modern roller brushes have a shallow groove molded directly into the plastic cylinder, running straight from one end to the other between the bristle strips. This groove gives you a safe path to slide your tool beneath the hair mat without dulling your blade against the hard roller core.
- Slice across the hair wrap: Slip the tip of a pair of small sewing scissors, a seam ripper, or a letter opener into the cutting groove. Cut along the groove in a straight line from one side of the roller to the other. Keep the flat edge of your cutting tool pointed away from the brush bristles so you do not accidentally snip the bristle tufts short.
- Peel away the hair blanket: Use your fingers to pull the cut hair away from the bar. It usually peels off in one thick sheet. Check the bristle tufts individually to pull away loose threads and lint balls caught between the hair knots.
- Clear the roller bearings: Look at both ends of the roller cylinder. You will find metal spinning caps at roller ends (often called bearings), which allow the roller to spin freely on its axle. Hair works its way behind these caps, forming tight, hidden rings that create intense heat. Pop the plastic end caps off if your model allows it, or use a wooden toothpick to hook and pull out the hidden hair rings.
- Clear the intake throat: Look down into the airway tunnel inside the plastic floor nozzle where the brush housing meets the swivel neck. Shine a small flashlight down the channel to spot hidden socks, paper scraps, or dense clumps of pet hair. Gently dislodge any packed blockage using your fingers or the blunt end of a wooden spoon handle.
Can you wash the vacuum head with water?
You must keep water away from any vacuum head that has a motor or electrical wiring. Most modern floor nozzles carry internal electric motors, circuit boards, headlight wiring, and brass connection pins. Running tap water through these motorized heads ruins the electrical components, causes internal rust, and creates an electrical shock risk when you turn the vacuum back on.
If you are trying to clean up deep liquid spills, food messes, or muddy dog tracks from carpet fibers, a standard dry vacuum floor head is the wrong tool for the job. Using a dedicated carpet machine like a carpet cleaner for deep stain removal handles wet moisture extraction safely because its fluid channels remain completely separated from its internal electronics.
Follow these rules to wash the safe parts of your vacuum head without creating water hazards:
- Wash the bottom cover plate: If your bottom plate is solid plastic with no wiring, rubber squeegee strips, or light lenses, rinse it under warm running water in the sink. Scrub stuck mud and sticky residue using an old dish brush and mild dish soap.
- Check your roller brush type before washing: Pure plastic roller brushes without internal motors can usually be washed under cool tap water. Soft velvet roller bars from stick vacuums can also be rinsed gently to remove fine gray dust. But never submerge a roller that contains an internal direct-drive motor inside the roller tube.
- Dry everything for 24 full hours: Never put a damp roller brush or wet bottom plate back into the floor head. Trapped moisture inside the dark housing breeds mildew, rots the bristles, and can short out electrical terminals. Place washed parts on a clean, dry cloth in an open room with good airflow for a minimum of 24 hours until bone dry.
- Wipe motorized housings with a damp cloth: To clean the outer plastic shell and the clear window of the motorized head, use a microfiber cloth dampened with water and thoroughly wrung out. The cloth should feel barely damp, never dripping wet. Wipe away dust tracks, then wipe the surface dry immediately with a clean kitchen towel.
How do you put the floor head back together?
Putting the floor head back together correctly keeps the drive belt from slipping and prevents the roller from rattling out of its mounting brackets. Take your time reseating each piece in reverse order.
Start by lining up the rubber drive belt. Slip the drive belt loop over the metal motor spindle inside the head, then thread the opposite loop over the toothed gear end of the spinning roller brush. Pull the roller outward against the tension of the rubber belt to line up the roller ends with the housing slots.
Pay close attention to the shape of the end caps on your roller brush. Many vacuums use distinct shapes on each side, such as a square block on the belt side and a rounded cap on the opposite side. Other models use tabs with flat alignment notches that must slide into matching cutouts in the frame. Press both ends down firmly until they sit flush. If the roller sits crooked, the bottom cover plate will not latch and the roller will bind.
Once the roller sits in its slots, turn it several times with your fingers. The roller should rotate smoothly. You will feel slight resistance from the rubber belt and the motor spindle, but the roller should turn evenly without scraping against the inner plastic housing walls. If it feels stuck or rubs loudly against the frame, lift the roller out and reseat the end caps.
Next, install the bottom cover plate. Hook the front tabs of the plate into the matching slots on the front bumper of the head first. Swing the rear edge of the plate downward until it lays completely flat against the base. Re-engage your fasteners: slide the tabs into the locked position, turn the coin slots a quarter-turn clockwise until they point to the locked icon, or tighten the screws until they are snug. Do not overtighten screws into plastic housings, as the threads strip easily.
Finally, line up the neck of the floor nozzle with the wand or lower vacuum body. Push the parts straight together until the release button snaps outward with a distinct, audible click. Give the head a gentle tug away from the tube to confirm the locking latch holds firm.
What tools make cleaning your roller brush easier?
Cleaning out tangled hair and impacted dirt from a floor head is much simpler when you use dedicated maintenance tools instead of awkward kitchen scissors. Basic household scissors often have thick, blunt tips that struggle to slip under tight strands without snipping off valuable bristle clumps. A good maintenance tool protects your vacuum parts while speeding up routine cleaning.
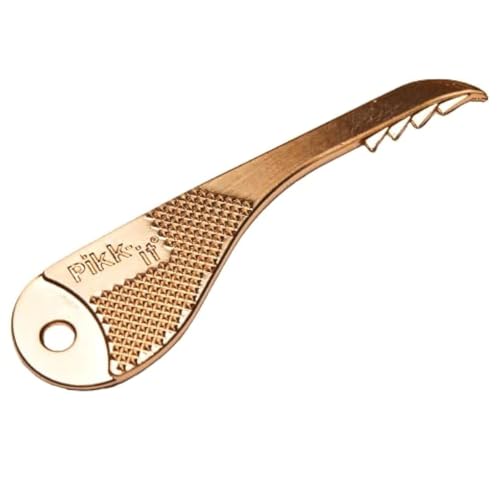
Look for small multi-function cleaning tools designed with a hooked guide and a recessed razor edge. The smooth plastic hook glides safely along the roller groove under dense hair, while the protected blade slices through threads without touching the nylon bristles. Tools that combine this cutter with a stiff nylon comb let you rake out deep lint mats from bristle clusters in a single motion.
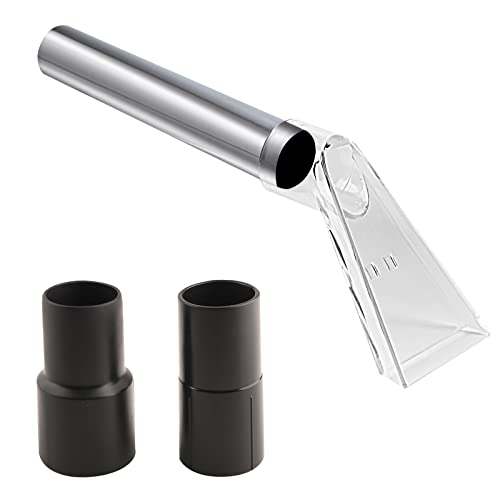
For narrow floor heads or carpet cleaner nozzles, long, flexible cleaning wands with small bristle tips help pull out stubborn fuzz clogs from the internal suction throat. When shopping for these accessories, verify that the tool profile is slender enough to slip into the specific intake channel of your vacuum head. Sturdy ABS plastic handles and rust-resistant steel cutters hold up best against dense pet hair and repeated sink cleanings.

- VC Score9.4
BCP Score is a ranking system developed by bestcleanerproducts.com. BCP Score has no relationship or impact from any manufacturers or sales agent websites. Learn more
- BrandDetetap

- VC Score9.4
BCP Score is a ranking system developed by bestcleanerproducts.com. BCP Score has no relationship or impact from any manufacturers or sales agent websites. Learn more
- BrandKEEPOW

- VC Score9.0
BCP Score is a ranking system developed by bestcleanerproducts.com. BCP Score has no relationship or impact from any manufacturers or sales agent websites. Learn more
- BrandTweruna

- VC Score9.0
BCP Score is a ranking system developed by bestcleanerproducts.com. BCP Score has no relationship or impact from any manufacturers or sales agent websites. Learn more
- BrandSealegend

- VC Score8.8
BCP Score is a ranking system developed by bestcleanerproducts.com. BCP Score has no relationship or impact from any manufacturers or sales agent websites. Learn more
- BrandHolikme
- VC Score8.6
BCP Score is a ranking system developed by bestcleanerproducts.com. BCP Score has no relationship or impact from any manufacturers or sales agent websites. Learn more
- BrandPikk-it

- VC Score8.6
BCP Score is a ranking system developed by bestcleanerproducts.com. BCP Score has no relationship or impact from any manufacturers or sales agent websites. Learn more
- BrandVataim
- VC Score8.6
BCP Score is a ranking system developed by bestcleanerproducts.com. BCP Score has no relationship or impact from any manufacturers or sales agent websites. Learn more
- BrandYSJWAER

- VC Score8.2
BCP Score is a ranking system developed by bestcleanerproducts.com. BCP Score has no relationship or impact from any manufacturers or sales agent websites. Learn more
- BrandVACEXT

- VC Score8.0
BCP Score is a ranking system developed by bestcleanerproducts.com. BCP Score has no relationship or impact from any manufacturers or sales agent websites. Learn more
- BrandSplinova

- VC Score7.2
BCP Score is a ranking system developed by bestcleanerproducts.com. BCP Score has no relationship or impact from any manufacturers or sales agent websites. Learn more
- BrandEZ Vac Brush
Last update on 2026-10-02 / Affiliate links / Images, Product Titles, and Product Highlights from Amazon Product Advertising API
FAQs
Why is my roller brush not spinning after cleaning?
A roller brush usually refuses to spin because the end caps are not seated completely into their frame notches, which physically wedges the cylinder against the outer housing. Another common cause is a slipped, broken, or stretched rubber drive belt that cannot grip the roller gear under motor load. Many vacuums also feature a safety reset switch that trips when hair wraps jam the motor, so check your manual for a reset button or turn the vacuum off for several minutes to allow the thermal protector to cool down.
How often should you clean your vacuum floor head?
You should inspect the underside of your vacuum floor head every couple of weeks, especially if you share your home with long-haired pets or people. A quick monthly cleaning to cut away stray fibers and wipe down the bottom cover plate keeps suction airflow strong and prevents hair from working deep into the spinning axle bearings. If you notice a faint burning rubber odor, hear a high-pitched belt squeal, or see the roller push debris forward instead of lifting it, clean the head immediately.
Can tangled hair damage a vacuum motor permanently?
Yes, ignoring tangled hair can destroy both the drive belt and the vacuum motor over time. As wrapped strands build up around the roller ends, friction generates high heat that can melt the plastic roller core and lock the metal spinning caps in place. When the roller jams, the electric motor continues pulling power while unable to turn, which causes internal motor coils to overheat, trip thermal fuses, or burn out entirely.
How do you remove bad smells from the floor head?
Bad vacuum odors come from pet dander, damp dirt, and bacteria trapped in fine dust layers inside the floor nozzle. Remove the bottom cover plate and roller brush, clean off all hair, and wash the plastic-only pieces in warm water with a few drops of dish soap. Wipe down the inner airway of the motorized housing using a cloth lightly dampened with a mixture of equal parts water and white vinegar, then let every single component air-dry completely for 24 hours before putting the unit back together.


How to Refinish a Fiberglass Pool

How Do You Keep Raccoons Out of Your Pool?

How to Fix Cyanuric Acid in Your Pool

How to Shape a Pool Cue Tip to Stop Miscues

Best Far Infrared Sauna Sauna Heats: Top Picks of 2026

11 Best Far Infrared Sauna Carbon Fiber Heaters of 2026 For Balanced Full-Body Heat

11 Best Carbon Far Infrared Sauna of 2026 For Even Heat

10 Best Bluetooth Speaker For Sauna of 2026 For Heat and Steam


