
How to Put a Vacuum Cleaner Back Together Easily

How to put a vacuum cleaner back together often feels much harder than taking it apart. Everything may have looked simple during cleaning or maintenance, yet a handful of screws, filters, tubes, and plastic clips can suddenly seem confusing once it's time to reassemble the machine. A calm approach, paired with careful attention to each component, makes the process far less stressful. Small details, like lining up locking tabs or checking that every seal sits flat, usually make the difference between a vacuum that runs smoothly and one that rattles, leaks, or loses suction.
Many assembly problems happen because one part gets installed before another. Oops, that's an easy trap to fall into. Looking over every piece before attaching anything helps create a natural order instead of forcing components into place. Proper alignment, clean connections, and gentle pressure protect delicate clips from snapping while reducing the chance of taking everything apart again a few minutes later.
Dust left behind during maintenance can also create trouble. A filter that's slightly crooked, a hose that's not fully seated, or a brush roll resting outside its guides may prevent the vacuum from performing as expected. That's why checking each connection before tightening screws saves frustration later. Slow and steady usually wins the race here, and rushing rarely pays off.
Another helpful habit involves comparing both sides of the vacuum while reassembling it. Many brush heads, wheels, and covers are designed symmetrically, making visual checks surprisingly effective. If something appears uneven or refuses to click into place, stopping for another look is smarter than applying extra force. Plastic locking tabs aren't forgiving once they've broken.
How to put a vacuum cleaner back together also becomes easier by testing moving parts before restoring power. Spin the brush roll with your hand, move adjustable joints through their full range, and confirm hoses twist or lock correctly. Those quick inspections often reveal hidden problems before they become noisy surprises after switching the vacuum on.
Finally, realistic expectations matter. Not every vacuum model shares the same layout, but the basic principles stay remarkably consistent. Keep components clean, assemble them in a logical sequence, avoid overtightening screws, and verify each attachment before finishing the job. That practical mindset turns what first looked like a puzzle into a manageable task while helping preserve strong suction, smooth operation, and reliable cleaning performance.

- VC Score10.0
BCP Score is a ranking system developed by bestcleanerproducts.com. BCP Score has no relationship or impact from any manufacturers or sales agent websites. Learn more
- BrandEiodoni

- VC Score9.2
BCP Score is a ranking system developed by bestcleanerproducts.com. BCP Score has no relationship or impact from any manufacturers or sales agent websites. Learn more
- BrandHOMLOVE

- VC Score9.0
BCP Score is a ranking system developed by bestcleanerproducts.com. BCP Score has no relationship or impact from any manufacturers or sales agent websites. Learn more
- BrandTweruna

- VC Score9.0
BCP Score is a ranking system developed by bestcleanerproducts.com. BCP Score has no relationship or impact from any manufacturers or sales agent websites. Learn more
- BrandEave
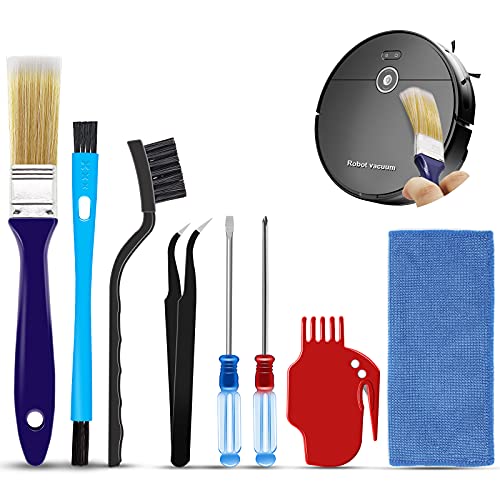
- VC Score9.0
BCP Score is a ranking system developed by bestcleanerproducts.com. BCP Score has no relationship or impact from any manufacturers or sales agent websites. Learn more
- BrandMidukit

- VC Score8.8
BCP Score is a ranking system developed by bestcleanerproducts.com. BCP Score has no relationship or impact from any manufacturers or sales agent websites. Learn more
- BrandHolikme

- VC Score8.6
BCP Score is a ranking system developed by bestcleanerproducts.com. BCP Score has no relationship or impact from any manufacturers or sales agent websites. Learn more
- BrandKiato

- VC Score8.6
BCP Score is a ranking system developed by bestcleanerproducts.com. BCP Score has no relationship or impact from any manufacturers or sales agent websites. Learn more
- BrandGiraffe Tools

- VC Score8.6
BCP Score is a ranking system developed by bestcleanerproducts.com. BCP Score has no relationship or impact from any manufacturers or sales agent websites. Learn more
- BrandVataim

- VC Score8.4
BCP Score is a ranking system developed by bestcleanerproducts.com. BCP Score has no relationship or impact from any manufacturers or sales agent websites. Learn more
- BrandTweruna

- VC Score8.4
BCP Score is a ranking system developed by bestcleanerproducts.com. BCP Score has no relationship or impact from any manufacturers or sales agent websites. Learn more
- BrandANBOO
Last update on 2026-07-19 / Affiliate links / Images, Product Titles, and Product Highlights from Amazon Product Advertising API
How To Put A Vacuum Cleaner Back Together
A clean vacuum can turn into a small floor puzzle fast, especially after the dust cup, hose, brush roll, filters, and screws are sitting in separate little piles. The trick with how to put a vacuum cleaner back together is slowing down just enough to avoid forcing parts that should simply line up and click. Most assembly headaches come from misaligned seals, crooked filters, or a brush roll seated slightly outside its track. Get those details right, and the machine usually feels normal again without drama.
Vacuum Reassembly Basics
Start by laying every loose part on a flat surface where you can actually see what you’re doing. A towel on the floor works nicely because it keeps small screws, plastic clips, and rubber seals from rolling away. Group parts by area, such as dust bin pieces, hose parts, brush head parts, and filter pieces. That simple sorting step keeps the job from turning into a guessing game.
The biggest mistake is rushing straight to the screws. Most vacuums need filters, gaskets, and internal covers seated before the outer shell goes back on. If a part feels stubborn, stop right there and check its direction instead of pushing harder. Plastic tabs can snap quickly, and once they’re gone, the vacuum may never close tightly again.
Photos help, even after the vacuum is already apart. Look for wear marks, dust outlines, screw holes, and molded arrows on the housing. Those little clues often show where locking tabs and airflow channels belong. For floor-specific cleaning concerns after reassembly, keep surface care in mind and compare tools built for stick vacuum for terazzo floors if hard flooring is part of your regular routine.
Before snapping anything shut, wipe the edges where parts meet. Dust caught between two panels can stop a cover from sitting flush and make the vacuum sound loose. Clean edges support a tighter fit, better airflow, and fewer weird rattles. That’s a small move, but it pays off once the motor starts pulling air again.
Put Filters And Seals Back First
Filters should go back before most outer parts because they control airflow and protect the motor from fine debris. A filter installed backward may still fit, which is the sneaky part, but it can choke suction or push dust into places it shouldn’t go. Check arrows, tabs, flat sides, and rounded edges before pressing it in. A snug filter should sit evenly without bending or bulging.
Foam filters need to be fully dry before reassembly. Damp foam can create musty smells, reduce airflow, and cause dust to clump inside the vacuum. If the filter still feels cool or spongy from washing, give it more drying time. That extra patience beats opening the whole thing again later.
Rubber seals deserve the same attention. A twisted or pinched seal can cause suction leaks, which makes the vacuum feel weak even though the motor sounds fine. Run a finger around the rim of the dust bin, filter lid, and hose connector. Everything should feel flat, even, and properly seated.
Don’t grease seals unless the manual specifically says so. Household oils can attract dust and damage certain rubber parts over time. A clean, dry seal usually does the job better. If a seal looks cracked, stretched, or flattened, reassembly may work for the moment, but suction may still suffer.
Reattach The Dust Bin And Hose
The dust bin usually goes back together in layers. Start with the internal cone, mesh screen, or separator if your model has one, then attach the lid and latch. These pieces guide dirt separation, so a loose internal part can make debris swirl badly or clog the filter too fast. Listen for a clean click, not a strained snap.
Hoses need a careful twist-and-seat motion. Many vacuum hoses look attached before they’re fully locked, especially on uprights and canister models. Push the hose into its port, turn it gently if the design allows, and check for wobble around the connector. A small gap can steal suction and make the vacuum feel tired.
Watch for hidden clogs before reconnecting the hose. A sock, hairball, dried dirt plug, or broken plastic piece can sit inside the bend where it’s hard to spot. Shine a flashlight through the tube and flex it gently. If airflow is blocked, putting the vacuum back together won’t fix the real problem.
Older cleaners can have parts that are hard to identify, especially if brand names or replacement lines have changed over time. For odd cleaner references, discontinued products, or confusing labels, separate your research path from the repair and read about what happened to big wally cleaner before assuming every part is still easy to replace. That keeps the reassembly process practical instead of turning it into a parts chase.
Reset The Brush Roll And Bottom Plate
The brush roll is one of the most common places where reassembly goes sideways. Hair, string, carpet fibers, and pet fur often hide around the end caps and stop the roller from sitting evenly. Clean both ends before dropping it back into the head. A properly seated brush roll should spin by hand without scraping the housing.
Check the belt before closing the bottom plate. A belt that sits halfway off the motor shaft can smell hot, squeal, or stop the brush from turning. Stretch it into place with steady pressure, not a sharp yank. The belt should feel tight but not twisted.
End caps need to match their slots. Some rollers have square ends, rounded ends, or one side shaped differently from the other. Forcing the wrong side down can crack the brush housing or throw the roller off balance. Take the extra glance because roller alignment matters more than muscle here.
Pet hair creates a different kind of headache because it wraps tightly and hides near bearings. After the vacuum is back together, a smaller cleanup tool can handle quick fur piles before they reach the main brush again, so use a practical option like mini vacuum for dog hair for sofas, stairs, and tight corners. That reduces strain on the larger machine and keeps the main roller from becoming a furry little log.
Close Covers Without Forcing Clips
Outer covers should fit with light pressure once the inner parts are in the right place. If a cover rocks, lifts at one corner, or refuses to sit flat, something underneath is probably out of position. Don’t force it. A cracked clip can turn a simple vacuum reassembly into a repair that needs tape, replacement parts, or both.
Line up tabs before screws. Screws are meant to hold parts together, not drag crooked panels into place. Press panels together by hand first and make sure the seams look even. Then tighten screws slowly in a balanced pattern.
Overtightening causes trouble too. Many vacuum bodies use plastic screw posts, and those posts can strip if you crank them down like metal hardware. Stop once the screw feels seated and the panel doesn’t move. Firm is good, but gorilla strength is asking for trouble.
After every cover is attached, give the vacuum a gentle shake. Nothing should rattle inside except normal moving parts like wheels or height adjusters. If you hear a loose screw or plastic piece bouncing around, open the nearest cover before powering on. That quick check protects the motor, fan, and brush assembly from avoidable damage.
How To Put A Vacuum Cleaner Back Together After Cleaning
Small mistakes show up fast after reassembly, usually as weak suction, odd noise, or a brush roll that refuses to spin. That’s why how to put a vacuum cleaner back together should finish with careful checks, not just snapped covers and tightened screws. A vacuum can look fully assembled while still having a loose hose, crooked filter lid, or misplaced bottom plate. Slow down here, because this last stretch saves the headache of taking the whole thing apart again.
Check Airflow Before Powering On
Airflow tells you whether the main pieces are seated correctly. Hold the hose connection, dust bin, and filter cover firmly, then look for gaps around the edges. A tiny opening can weaken suction strength and make the motor sound louder than normal. If the vacuum has a removable wand, lock it into place and tug gently to confirm it won’t slip loose during cleaning.
Pay close attention to the dust bin latch. Many bins seem closed at first glance, but one side may sit slightly higher than the other. That uneven fit can break the sealed airflow path the vacuum needs to pull dirt properly. Press the latch until it clicks cleanly, then check that the bin doesn’t wobble.
The filter area deserves one more look before the machine gets power. A filter that’s not fully seated can block air or let fine dust travel where it shouldn’t. Clean hands help here, because grit on the filter rim can stop a lid from closing flat. Treat this as a quick insurance step for motor protection and steady suction.
Hard water stains, rust marks, and bathroom grime sometimes get cleaned during the same maintenance session, but those jobs need different products than vacuum care. For a separate bathroom cleanup task, remove rust stains with toilet bowl cleaner rust instead of using harsh bathroom chemicals near vacuum seals, hoses, or plastic housings. That separation keeps cleaning chemicals away from parts that rely on flexible rubber and dry airflow.
Test The Brush Roll By Hand
The brush roll should spin smoothly before the vacuum touches the floor again. Turn it with your fingers and listen for scraping, clicking, or tight spots. A little resistance from the belt is normal, but grinding usually means the roller isn’t seated correctly. Fix that before switching on the vacuum, because a jammed brush can strain the belt and motor drive.
Look at both brush roll ends. End caps often collect hair, thread, and carpet fibers, which can push the roller out of alignment. Remove anything wrapped around the ends before closing the bottom plate. A clean roller seat helps the brush move evenly across carpet and hard floors.
The bottom plate should sit flush without bending. If one corner lifts, check for a belt that slipped out of place or a brush end cap sitting above its groove. Screws should go in straight and feel snug, not forced. Over-tightening can crack plastic screw posts, and that’s a frustrating problem nobody needs.
Roll the vacuum forward and backward while it’s still unplugged. The wheels should move freely, and the brush area shouldn’t drag against the floor. This quick movement test catches alignment issues before the motor adds noise and vibration. If something feels off, open the plate again instead of hoping it will settle by itself.
Run A Short Function Test
After everything looks seated, plug in the vacuum and run it briefly on a clear floor area. Listen for a steady motor sound, not a harsh rattle or sudden whine. Strong suction at the hose or floor head usually means the air path is sealed well. Strange smells, hot rubber, or sharp clicking mean the machine needs another check right away.
Use a small amount of dry debris for the first test. A few crumbs or a light dust trail can show whether the vacuum is pulling properly without overloading anything. Watch the dust bin to confirm debris moves into the correct chamber. If dirt swirls oddly or bounces back out, the separator or bin seal may not be installed correctly.
Brush roll movement matters too. On many models, the roller turns only after the handle reclines or a brush button is pressed. Don’t assume it’s broken until you’ve checked the normal operating position. If the roller still won’t move, inspect the belt, end caps, and bottom plate again.
Noise can point directly to the problem area. A rattling dust bin suggests a loose latch, while a thumping floor head often points to a brush roll that isn’t centered. A high-pitched whistle usually signals an air leak around the hose, filter cover, or bin seal. Those sounds are annoying, sure, but they’re useful clues.
Fix Common Reassembly Problems
Weak suction after reassembly usually comes from one of three places: the hose, the filter, or the dust bin seal. Start with those before blaming the motor. Remove and reseat each part, then check whether the vacuum feels stronger. Simple reseating often solves air leakage without replacement parts.
A vacuum that shuts off quickly may have a blocked airflow path or an overheated motor. Let it cool, then check the hose, wand, brush head, and filter area for clogs. Fine dust can pack tightly inside bends, especially after cleaning construction debris or powdery messes. Keeping the pathway open protects motor cooling and helps the machine run normally.
If the vacuum smells dusty right after cleaning, the filter may still be dirty, damp, or installed incorrectly. Remove it and check for trapped grime along the edges. A dry, properly seated filter should not create a musty smell during a short test. Replace filters that look warped, torn, or permanently clogged.
For homes or cleaning routines with heavier daily messes, equipment choice matters after repairs too. Handle larger jobs with commercial vacuum maid service if frequent deep cleaning is wearing down a lighter household model. That kind of match matters because workload, floor type, and maintenance frequency all affect how long a vacuum stays reliable.
Keep Parts Easier To Reassemble Next Time
Good habits make the next cleaning session much easier. Take photos before removing covers, belts, filters, or hoses. Place screws in a small cup or tape them near the part they belong to. Those tiny habits prevent the classic extra screw problem after everything is back together.
Labeling parts may sound fussy, but it helps with vacuums that have several filters or similar-looking covers. A small piece of painter’s tape can mark front, back, left, or right without leaving sticky residue. That’s especially handy for brush housings and dust bin inserts. Simple labels reduce second-guessing and protect plastic clips from repeated trial and error.
Clean parts in the order they come off, then reassemble in reverse order. That rhythm feels natural once you’ve done it a couple of times. Keep wet-washed parts away from dry electrical sections until they’re fully dry. Moisture and vacuum motors are a bad mix, plain and simple.
Store the manual or a quick photo folder where you can actually find it. A model number photo also helps if you need belts, filters, or replacement latches later. Reassembly becomes less stressful when the right part names are easy to confirm. A little prep turns how to put a vacuum cleaner back together into a repeatable routine instead of a guessing contest.


How to Raise CYA in Your Pool Safely

How to Refinish a Fiberglass Pool

How Do You Keep Raccoons Out of Your Pool?

How to Fix Cyanuric Acid in Your Pool

How to Shape a Pool Cue Tip to Stop Miscues

Best Far Infrared Sauna Sauna Heats: Top Picks of 2026

11 Best Far Infrared Sauna Carbon Fiber Heaters of 2026 For Balanced Full-Body Heat

11 Best Carbon Far Infrared Sauna of 2026 For Even Heat


