
How to Open a Dyson V8 Vacuum Without Breaking It?

To dump out dust, pull firmly straight up on the red lever sitting on top of the center cylinder until the bottom flap swings open over the trash. That single upward pull clears ordinary dirt, but taking the clear cup completely off to wash it requires pressing a separate latch underneath. Forcing any of these parts in the wrong direction can bend or crack the delicate plastic hinges.
The exact steps shift depending on whether the goal is an everyday dump, sliding the clear bin off to rinse it, or unlocking the floor head to cut tangled hair off the roller. Trapped dust along the runners can also make the top handle feel completely stuck, which tempts people to yank harder than they should. Here is how to free each section safely so everything clicks back together tight.
Dumping the Dirt: How to Pull the Red Lever Safely
Standing over a trash can with a full vacuum can be frustrating if the handle resists. The Dyson V8 uses a two-motion system that lifts the central metal mesh center cylinder (the cyclone), scrapes dust off the shroud, and opens the bottom door. Forcing it crooked can snap the inner plastic runner track.
Empty the canister cleanly by following these steps:
- Disconnect the wand and attachments from the main body.
Reason: A long wand adds awkward leverage that twists the plastic chassis in your hands while you pull upward. - Lower the clear plastic dirt cup deep into your trash can.
Reason: Keeping the bin base below the rim prevents clouds of fine dust and dander from billowing into room air. - Hold the red carry handle firmly with one hand.
Reason: Securing the main grip keeps the vacuum steady so you do not drop the unit when the latch lets go. - Pull the red top release lever straight up in one smooth pull.
Reason: The upward motion draws the metal mesh center cylinder up to scrape clinging debris down the canister walls before releasing the bottom catch. - Allow the bottom flap to swing completely open.
Reason: Gravity lets clumped hair and dust drop straight out without requiring you to reach inside the dirty bin.
If dust clings to the shroud, gently tap the side over the trash. Never scrape inside with metal tools, which scratch clear plastic and ruin rubber seals.
Removing the Bin: How to Slide the Clear Cup Free
Emptying the trapdoor removes bulk debris, but static dust and grime eventually coat the inside of the canister. To wipe down the clear plastic dirt cup or wash out stuck dirt, the canister must slide off the handle assembly. Trying to pull the bin free while the vacuum is closed will snap the locking tabs.
Follow these steps to remove the clear cup safely:
- Pull the top red lever up to open the bottom trapdoor first.
Reason: The lower release tab is physically blocked and unreachable while the bottom door stays closed. - Find the small red catch tab on the lower runner track.
Reason: This secondary clip sits on the underside of the vacuum right beside the bottom door hinge. - Press the small red tab inward toward the central spine.
Reason: Pressing this catch disengages the internal plastic locking teeth holding the cup on its guide rails. - Slide the clear canister straight down along the tracks.
Reason: Sliding straight down prevents twisting or snapping the delicate plastic ridges that guide the bin. - Place the clear canister on a flat, safe surface.
Reason: The bare plastic cup has small hinge tabs on the bottom rim that crack easily if dropped on hard flooring.
Once removed, wipe the clear canister with a dry cloth or rinse it with cold water. Keep moisture away from the metal mesh center cylinder and handle, which contain electrical contacts.
Freeing a Jammed Bin Slider Without Snapping Brittle Plastic
A common issue with the V8 happens when you pull up on the red lever and the assembly freezes halfway up. This jamming occurs when fine particles like drywall dust, fireplace ash, spilled flour, or sandbox grit get trapped between the plastic slider tracks and the rubber gasket.
When plastic pieces bind, your first instinct might be to yank the handle harder. Forcing a stuck lever is the fastest way to break the internal linkage arms. The top red handle connects to thin plastic tabs that trip the bottom catch. If you snap those tabs, the vacuum cannot empty normally.
To loosen a stuck slider safely, use controlled micro-movements:
Hold the vacuum handle in one hand and support the clear plastic dirt cup against a solid surface. Grip the red top lever and apply gentle, pulsing upward and downward wiggles of just a few millimeters. This small vibrating action helps crush and dislodge packed sand along the internal tracks without stressing the plastic.
If the tracks stay jammed, use a can of compressed air or a soft-bristled utility brush. Blow short bursts of air directly into the seam where the metal mesh center cylinder enters the clear canister. Brush away loose powder as it falls out.
Never spray liquid lubricants like WD-40, silicone spray, or cooking oil into the tracks. Wet lubricants combine with household dust to make a sticky paste that permanently jams the tracks and destroys the rubber gaskets needed for suction.
Opening the Cleaner Head: How to Slide Out the Roller Bar
Opening your vacuum also means clearing the floor nozzle. Hair, threads, and carpet fibers wrap tightly around the rotating roller (brush bar) during every cleaning session. When hair builds up near the end bearings, friction builds rapidly, which can melt the plastic end cap, scorch the drive belt, or burn out the head motor.
Whether your machine uses the direct-drive motorhead for carpets or the soft roller head for hard floors, removing the roller bar requires only a coin:
- Disconnect the floor nozzle from the extension wand.
Reason: Removing the head prevents accidental trigger pulls that could spin the roller while your hands are inside. - Turn the floor nozzle upside down on a flat table.
Reason: Working on a flat surface keeps the housing stable and gives you a clear view of the side locking plug (end cap). - Insert a coin or flat washer into the end cap slot.
Reason: A narrow screwdriver chews up soft plastic, while a coin fits the entire slot to distribute turning pressure evenly. - Turn the coin a quarter-turn counterclockwise to the unlock mark.
Reason: A ninety-degree turn releases the internal bayonet tabs holding the roller inside the nozzle frame. - Slide the side locking plug off and pull the rotating roller outward.
Reason: Sliding the roller out horizontally gives you direct access to the spindle where hair wraps tightest. - Snip away wrapped hair and pull lint from the bearing cup.
Reason: Removing tangled hair restores smooth rotation, reduces motor heat, and stops burning odors.
Slide the clean roller back onto its drive spindle, press the side locking plug in flush, and turn your coin a quarter-turn clockwise to lock it securely before vacuuming again.
Snapping the Vacuum Back Together: The Correct Reassembly Checklist
Reassembling the vacuum requires a strict order. Many owners snap their bottom trapdoor by trying to slam it shut while the top cyclone is still raised. That mistake forces the door catch into the bottom of the metal shroud, snapping the plastic hook off instantly.
Follow this checklist whenever you put the canister back together:
- Slide the clear canister onto its tracks first: Line up the ridges on the back of the clear plastic dirt cup with the grooves on the handle, then slide it up until the red catch clicks into place.
- Push the central cyclone down completely: Place your hand on the top cyclone assembly and push straight down until it seats flush against the handle with a firm click.
- Check the red rubber sealing ring: Verify that the rubber seal around the cyclone rim sits smoothly without pinching or folding outside the clear plastic wall.
- Swing the bottom door upward firmly: Push the trapdoor shut until the front red latch clicks over the lip of the canister with a sharp snap.
- Tug the bottom door lightly to confirm: Gently pull down on the bottom rim with your fingertips to confirm the catch holds firm before turning the power on.
What to Check Before Buying Replacement Parts and Attachments
Even with gentle handling, vacuum plastics turn brittle after years of dry indoor heat, sun exposure, and normal drops. When a latch snaps, a runner cracks, or the bottom lid will not stay shut, replacing individual parts is far cheaper than replacing the entire vacuum.
Always verify your specific model number. The Dyson V8 shares many dimensions with the V7 series (often listed under chassis codes SV10 and SV11), but these components will not fit larger vacuums like the V10, V11, or V15, which use a horizontal canister layout. Check the silver data label on the underside of your battery pack to verify your chassis code before ordering.
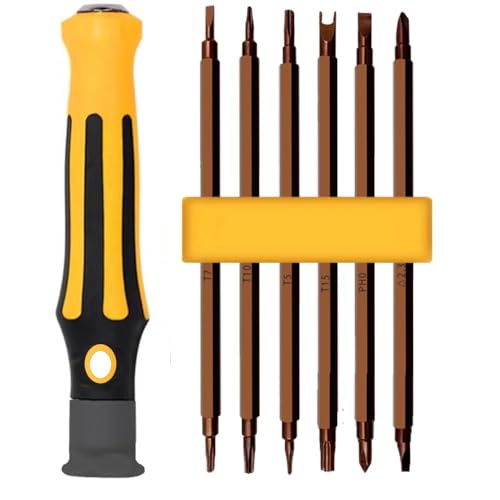
Make sure any replacement dirt cup or bottom door includes a pliable silicone or rubber sealing ring. A bin without an airtight seal causes air leaks, leading to whistling sounds, lost suction, and motor pulsing. If maintenance requires opening internal housings, choose a dedicated vacuum repair tool kit with extended driver bits to protect soft internal screw heads. If your vacuum cuts out quickly on a full charge, weigh the cost of replacement parts against how much a new battery for a cordless vacuum costs, or consider the lightest cordless vacuum cleaner models to see if upgrading makes better sense.

- VC Score9.6
BCP Score is a ranking system developed by bestcleanerproducts.com. BCP Score has no relationship or impact from any manufacturers or sales agent websites. Learn more
- BrandLemige

- VC Score9.4
BCP Score is a ranking system developed by bestcleanerproducts.com. BCP Score has no relationship or impact from any manufacturers or sales agent websites. Learn more
- BrandQWYTLROX

- VC Score9.2
BCP Score is a ranking system developed by bestcleanerproducts.com. BCP Score has no relationship or impact from any manufacturers or sales agent websites. Learn more
- Brandhedonlee

- VC Score9.2
BCP Score is a ranking system developed by bestcleanerproducts.com. BCP Score has no relationship or impact from any manufacturers or sales agent websites. Learn more
- BrandWYWY.Wide

- VC Score9.2
BCP Score is a ranking system developed by bestcleanerproducts.com. BCP Score has no relationship or impact from any manufacturers or sales agent websites. Learn more
- Brandilovelife

- VC Score9.2
BCP Score is a ranking system developed by bestcleanerproducts.com. BCP Score has no relationship or impact from any manufacturers or sales agent websites. Learn more
- BrandFullclean

- VC Score9.2
BCP Score is a ranking system developed by bestcleanerproducts.com. BCP Score has no relationship or impact from any manufacturers or sales agent websites. Learn more
- BrandDyson

- VC Score9.0
BCP Score is a ranking system developed by bestcleanerproducts.com. BCP Score has no relationship or impact from any manufacturers or sales agent websites. Learn more
- BrandHather

- VC Score9.0
BCP Score is a ranking system developed by bestcleanerproducts.com. BCP Score has no relationship or impact from any manufacturers or sales agent websites. Learn more
- BrandWYWY.Wide
- VC Score8.6
BCP Score is a ranking system developed by bestcleanerproducts.com. BCP Score has no relationship or impact from any manufacturers or sales agent websites. Learn more
- BrandSKZIRI

- VC Score8.4
BCP Score is a ranking system developed by bestcleanerproducts.com. BCP Score has no relationship or impact from any manufacturers or sales agent websites. Learn more
- BrandKuflant

- VC Score8.0
BCP Score is a ranking system developed by bestcleanerproducts.com. BCP Score has no relationship or impact from any manufacturers or sales agent websites. Learn more
- BrandRUKHOOL
Last update on 2026-10-27 / Affiliate links / Images, Product Titles, and Product Highlights from Amazon Product Advertising API
FAQs
Can I wash the clear bin with water once it is opened and removed?
Yes, you can rinse the detached clear plastic dirt cup under cool tap water, but never place it in a dishwasher. Avoid washing the metal mesh center cylinder with water, as moisture trapped inside the internal cyclones turns fine dust into mud and causes persistent sour smells. Let the clear canister air-dry completely for at least 24 hours before reattaching it.
Why will the bottom lid not stay closed on my Dyson V8?
The bottom lid usually fails to stay closed because the top cyclone assembly has not been pushed down completely into place. If the cyclone sits even slightly high, the door latch cannot reach its catch. Make sure no trapped debris blocks the bottom hinge, push the cyclone down firmly until it clicks, and then close the trapdoor.
Do I need tools to open the vacuum for everyday cleaning?
No tools are needed to open the bottom door or slide the clear canister off for routine cleaning. You only need a household coin or flat washer to turn the side locking plug on the floor nozzle when removing the roller bar to clear hair. Specialty screwdrivers are only needed if you are taking apart the internal motor housing or replacing the trigger switch.
What should I do if the vacuum smells bad after I open and clean the dirt cup?
Bad odors usually come from a dirty filter or damp dust trapped inside the internal air paths. Wash both the center stick pre-filter and the rear post-filter under cold water, then allow them to air-dry completely in a warm room for 24 hours. Wipe the interior of the clear canister with a dry cloth and check the floor nozzle neck for stuck debris.


How to Refinish a Fiberglass Pool

How Do You Keep Raccoons Out of Your Pool?

How to Fix Cyanuric Acid in Your Pool

How to Shape a Pool Cue Tip to Stop Miscues

Best Far Infrared Sauna Sauna Heats: Top Picks of 2026

11 Best Far Infrared Sauna Carbon Fiber Heaters of 2026 For Balanced Full-Body Heat

11 Best Carbon Far Infrared Sauna of 2026 For Even Heat

10 Best Bluetooth Speaker For Sauna of 2026 For Heat and Steam


